
Overview
You will learn
- How to create a calculation view with a Dimension data type
- How to perform the basic modelling operations, such as projections and joins
- This tutorial is also available as a video


Prerequisites
Prerequisites
- This tutorial is designed for SAP HANA on premise and SAP HANA, express edition. It is not designed for SAP HANA Cloud.
- Tutorials: Import SHINE tables and data
Steps
Create a new file called models/.hdinamespace under /db/src.

Although there is no need to use namespaces in general, calculation views are consumed from external reporting tools best with namespaces
Use the following code in the file
{
    "name":    "db.models",
    "subfolder": "ignore"
}
Save and close the file.
If you do not see the file, go to View-> Show hidden files.
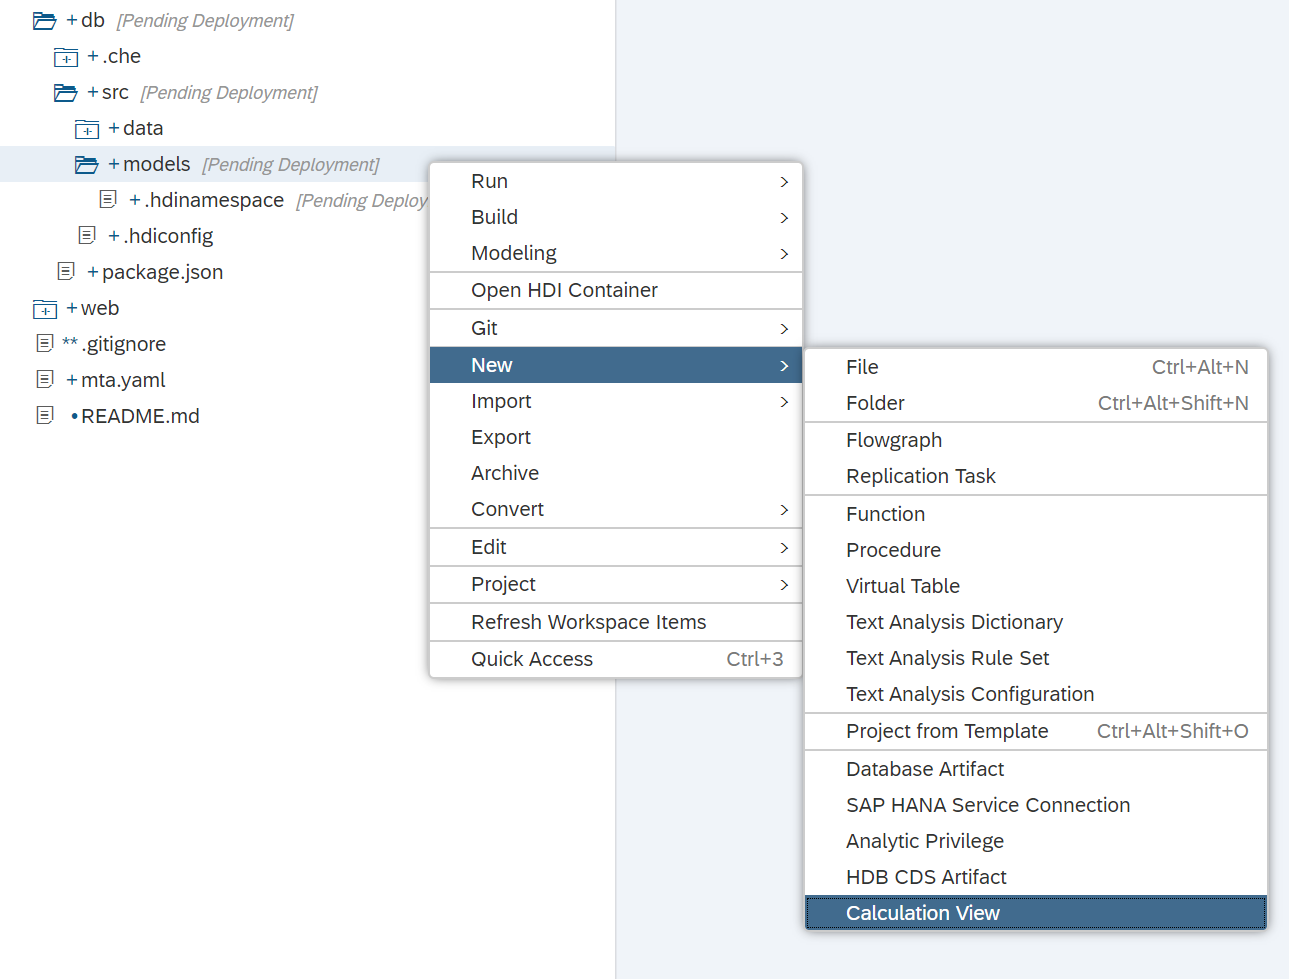
Right-click on the models folder and create a new calculation view
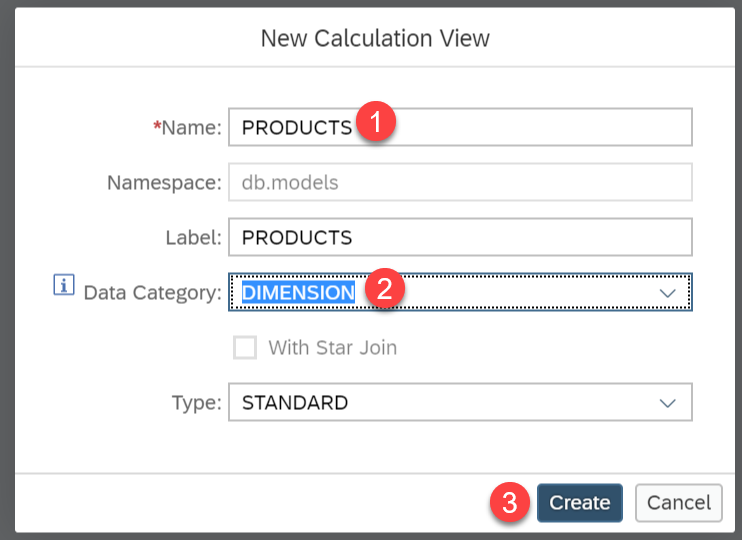
Call it PRODUCTS and choose type DIMENSION and click Create
Click the Create join button and drop the node at the bottom of the design window
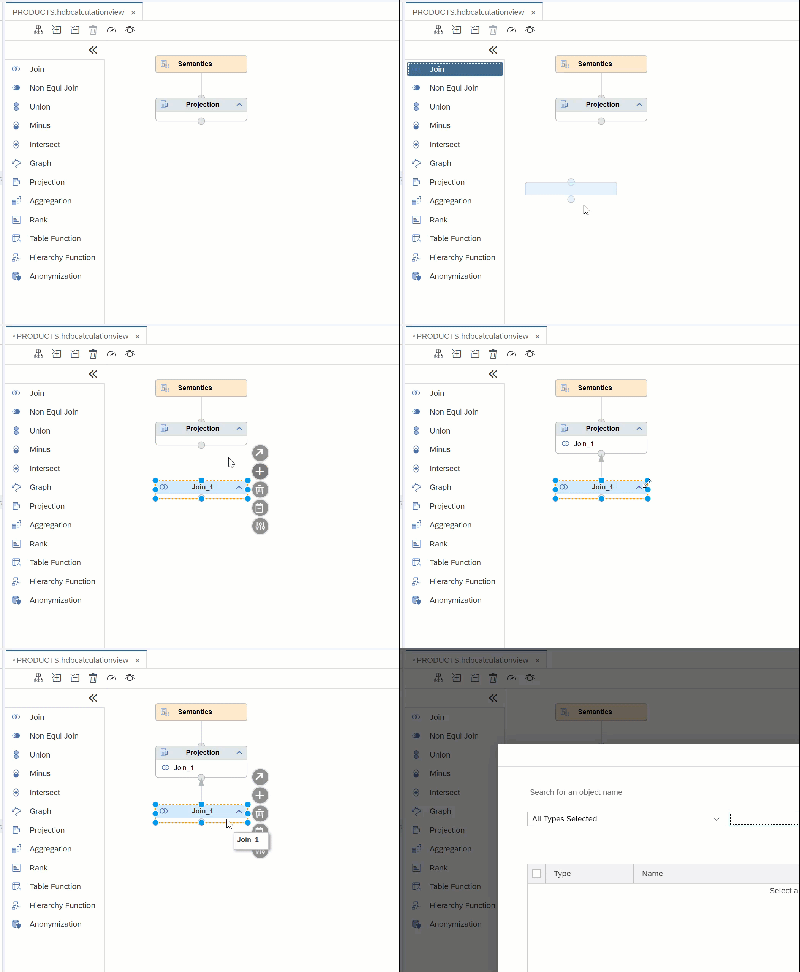
Right-click on the node and call it Product_BP

Press enter and select the node again, choose the + sign to add data sources
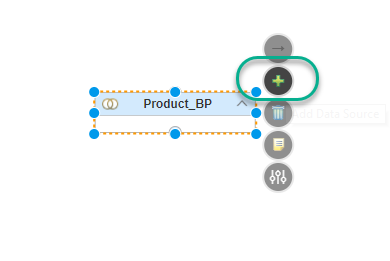
Add MD.Products and MD.BusinessPartners to the node. Use the + sign to search for the entities.

Double-click on the name of the node to open the join definition. Drag and drop SUPPLIER.PARTNERID to PARTNERID to connect the two tables.
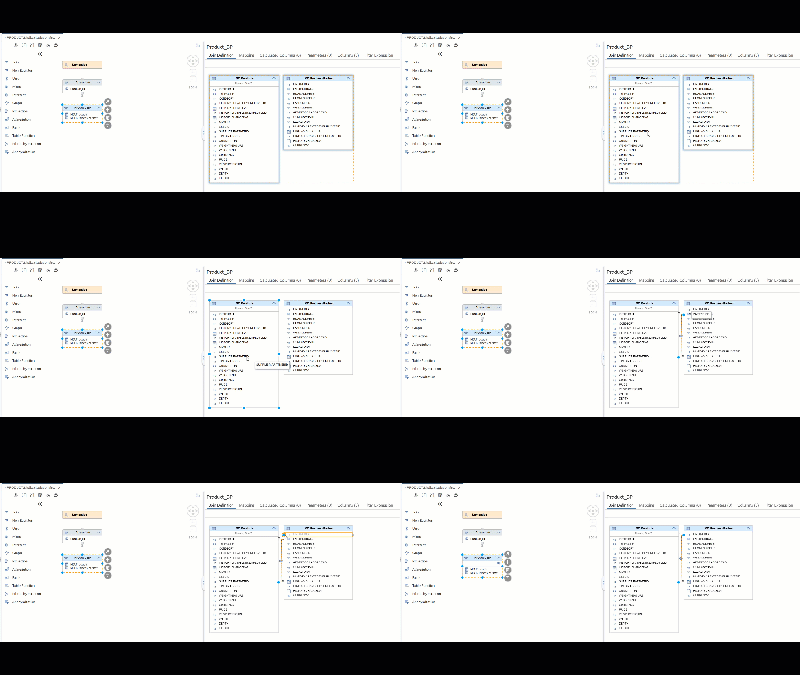
Click on the mapping tab and select PRODUCTID, TYPECODE, CATEGORY, NAMEID, CURRENCY, PRICE, DESCID, PARTNERID, COMPANYNAME and ADDRESES.ADDRESSID and then choose Add To Output.
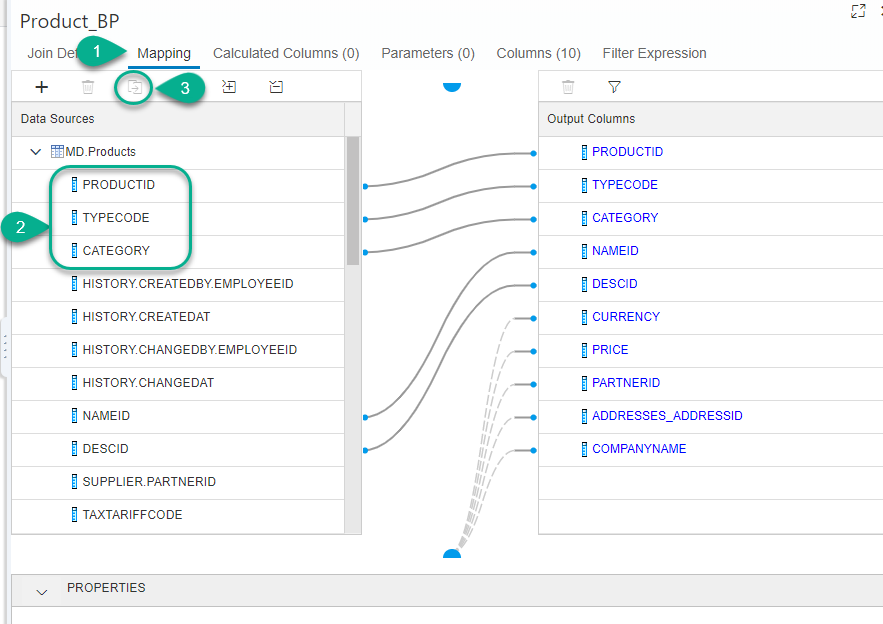
Change the name of the column Category to ProductCategory
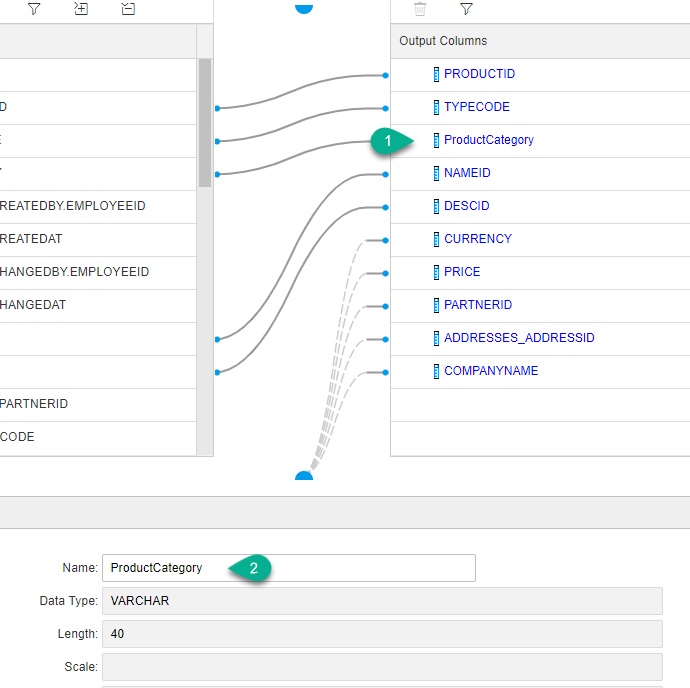
Create a new join node, and drag the existing node as input
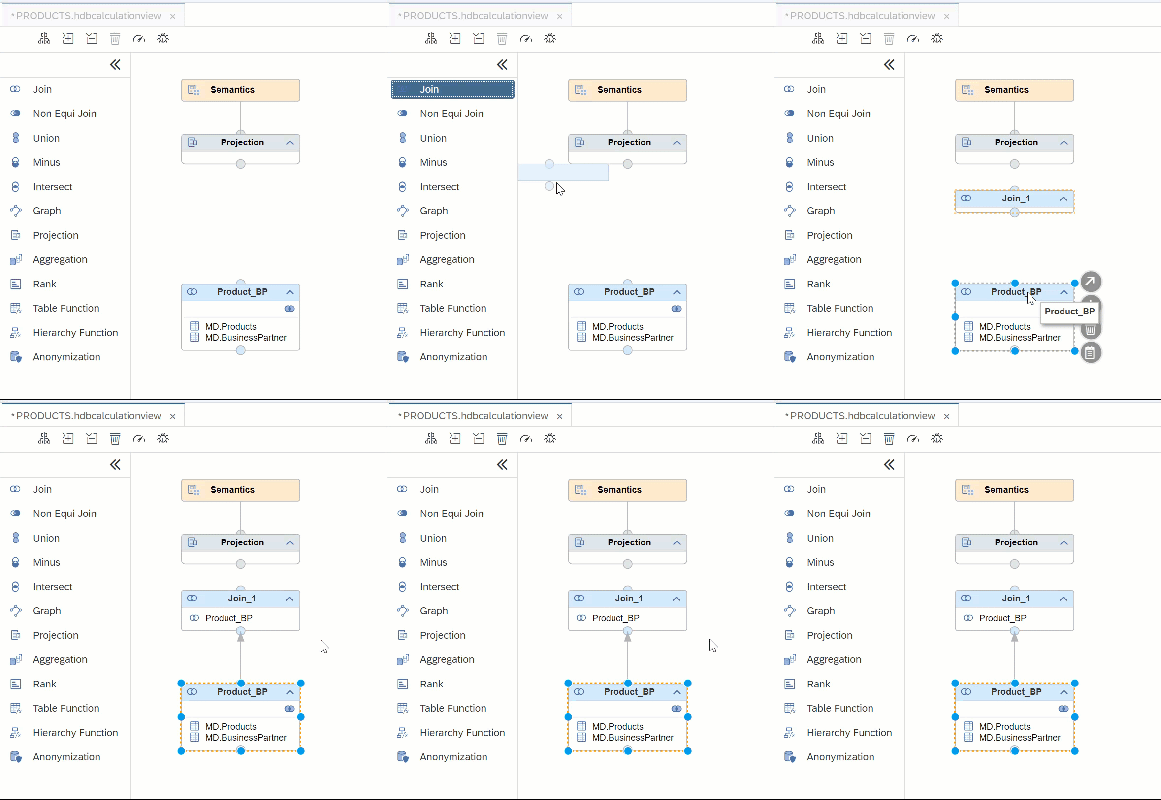
Use the + sign to add MD.Addresses to this join node.
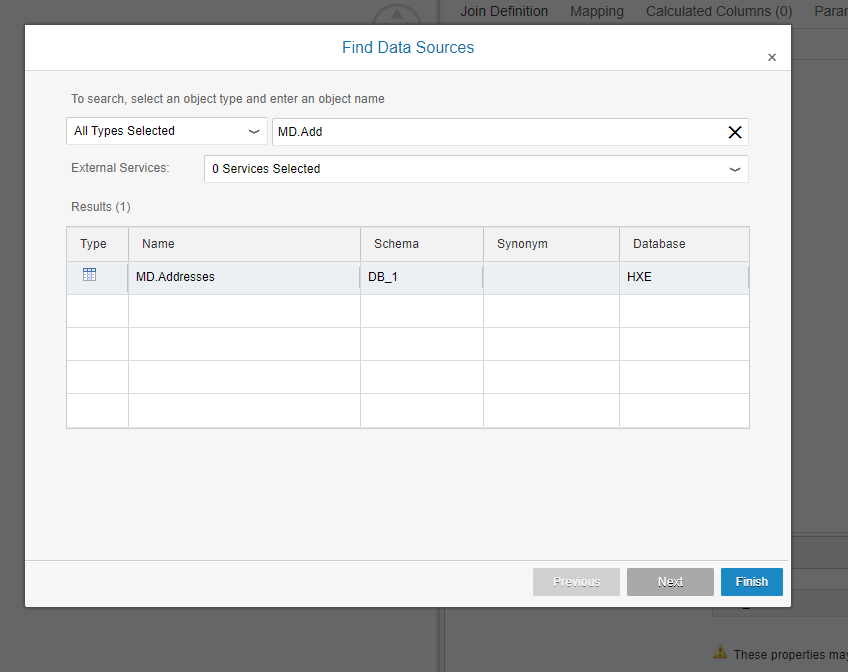
Join the two tables by ADDRESSES_ADDRESSID and ADDRESSID.
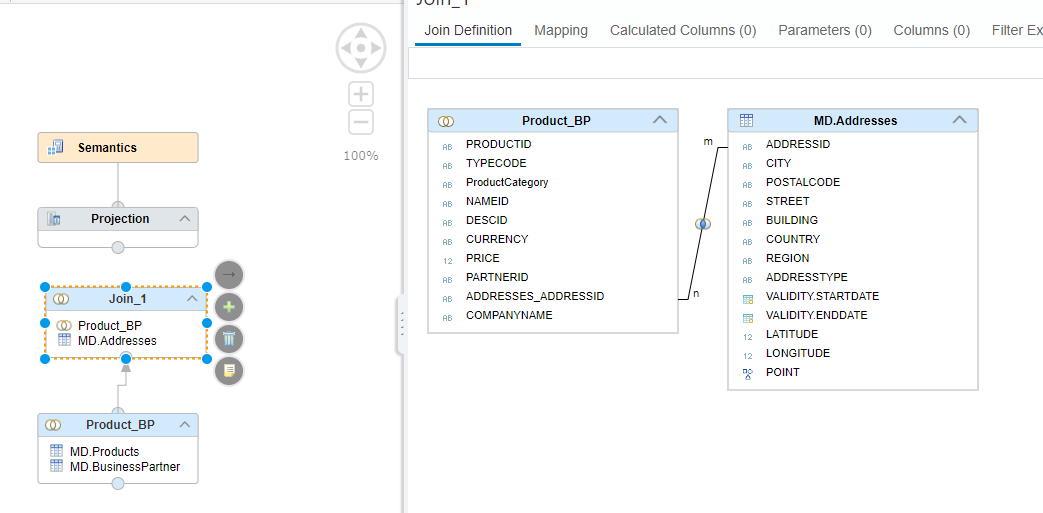
Go to the mapping tab to add columns to the output. Select all columns from the Product_BP node except ADDRESSES_ADDRESSID. From MD.Addresses table select CITY, POSTALCODE, STREET, BUILDING, COUNTRY and REGION.
You can double-click on
Product_BPto add all of the columns to the output and then right-click onADDRESSES_ADDRESSIDto remove that output column

Rename the current join node to Address
Add a new join node and use the Address node as input. Add Util.Texts as a data source.

Join NAMEID to TEXTID. Set the join to Text join and the language column to LANGUAGE.

In the mapping tab, select all columns from the Address node except NAMEID and add them to the output. From the Util.Texts table select TEXT.
Change the name of the TEXT column in the output to ProductName.

Rename the join node to ProductName.
Add a new join node and use ProductName as an input. Add Util.Texts again as a source.
Use a text join between DESCID and TEXTID.

Repeat the process of adding columns to the output via the mapping tab. Select all columns from the ProductName node except DESCID. From the Util.Texts table select TEXT but change the name of to ProductDesc.

Rename the join node to ProductDesc.
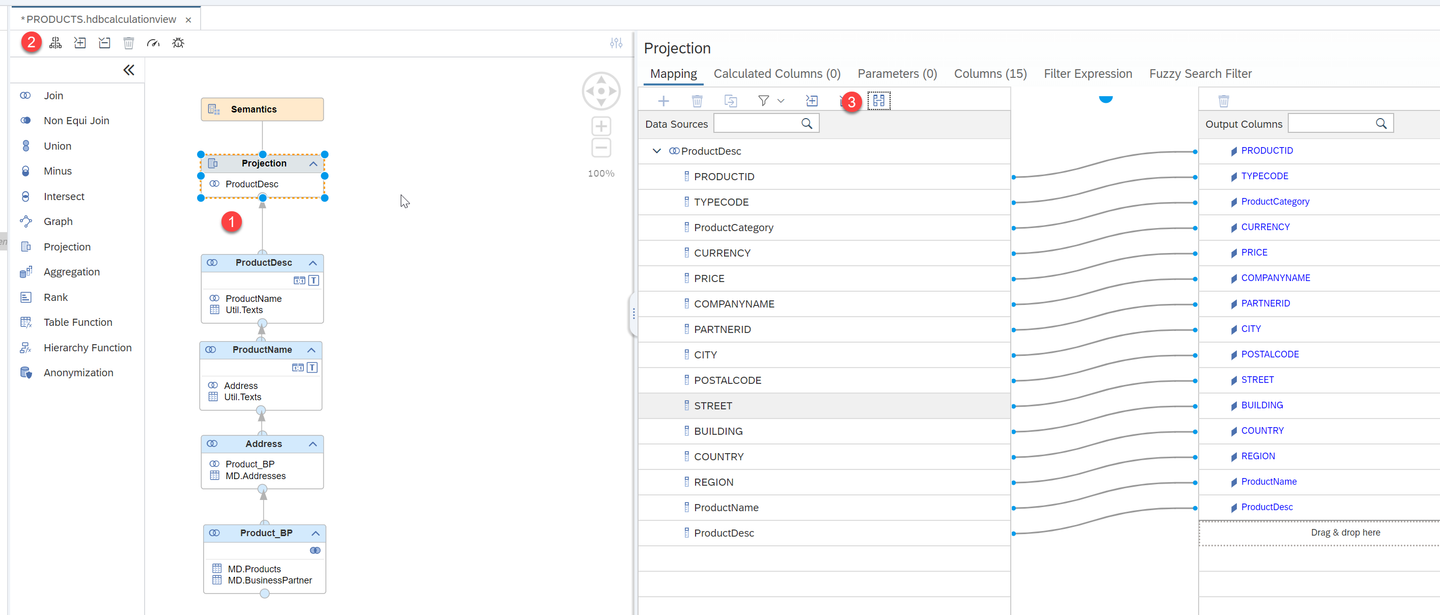
Connect the node ProductDesc to the projection node. Use the AutoLayout feature to align the nodes and the Auto Map by name button to create the output. Save the Calculation View.
Build the view then right-click on it and choose Data Preview.

The output should be similar to the following. Copy the SQL statement produced by the SQL button into the validation below to complete it

Resources
Discussion
Share feedback on this tutorial or join the conversation in SAP Community.