
Overview
You will learn
- How to create an instance of the User Authentication and Authorization service
- How to incorporate security into the routing endpoint of your application


Prerequisites
Prerequisites
- This tutorial is designed for SAP HANA on premise and SAP HANA, express edition. It is not designed for SAP HANA Cloud.
- You have created a user interface.
- You have administration access to the XS Advanced cockpit in SAP HANA (e.g., like user
XSA_ADMINin SAP HANA, express edition).
Steps
Intro
This tutorial can be completed in SAP HANA, express edition SPS04 or higher.
You will first define the different roles a user could have when using your application. As the developer of the application, you will define the roles. Then, an administrator would create the roles and assign them to the different users. In this tutorial, it is assumed you are the administrator of your instance so you will be performing this task, too.
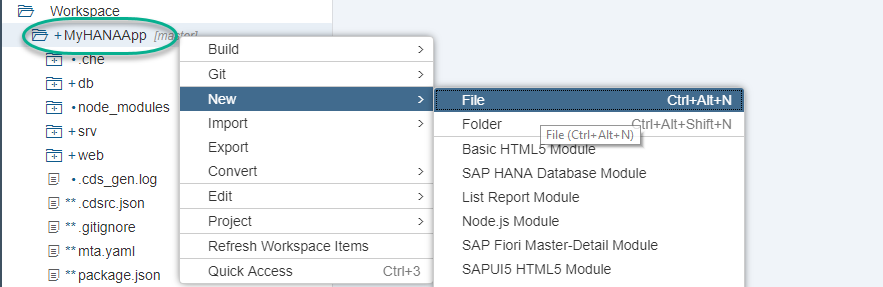
Create a file called xs-security.json in the root folder of your application.
Paste the following content into the file and save it
{
	"xsappname": "myHanaApp",
  "tenant-mode": "dedicated",
	"scopes": [{
		"name": "$XSAPPNAME.Display",
		"description": "display"
	}, {
		"name": "$XSAPPNAME.Create",
		"description": "create"
	}, {
		"name": "$XSAPPNAME.Edit",
		"description": "edit"
	}, {
		"name": "$XSAPPNAME.Delete",
		"description": "delete"
	}, {
		"name": "xs_authorization.read",
		"description": "Read authorization information from UAA"
	}, {
		"name": "xs_authorization.write",
		"description": "Write authorization information to UAA"
	}],
	"attributes": [{
		"name": "country",
		"description": "country",
		"valueType": "s"
	}],
	"role-templates": [{
      "name": "Token_Exchange",
      "description": "UAA",
      "scope-references": [
        "uaa.user"
      ]
    },{
		"name": "Viewer",
		"description": "View all records",
		"scope-references": [
			"$XSAPPNAME.Display"
		],
		"attribute-references": [
			"country"
		]
	}, {
		"name": "Editor",
		"description": "Edit and Delete records",
		"scope-references": [
			"$XSAPPNAME.Create",
			"$XSAPPNAME.Edit",
			"$XSAPPNAME.Delete",
			"$XSAPPNAME.Display"
		]
	}]
}Save the file.
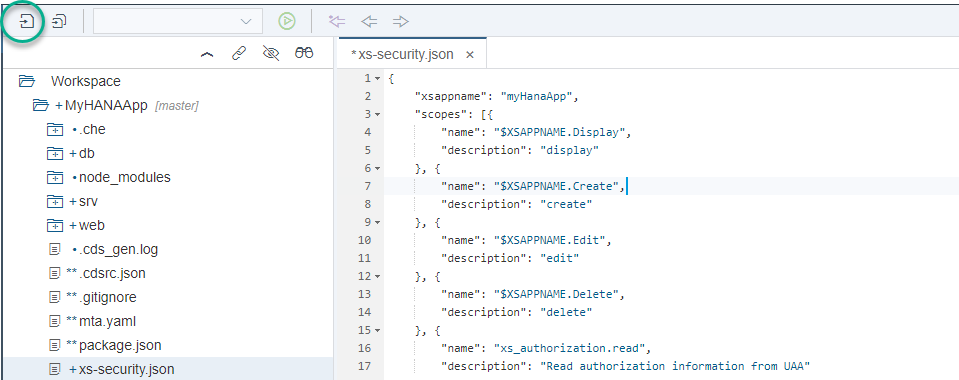
The User Authentication and Authorization service is a backing service. You will create an instance of it and attach it to your application so that a user needs to authenticate before accessing it through your web module.
Navigate to the Resource Manager in the Web IDE and delete the resource instance for the uaa_MyHANAApp. This will cause the UAA instance to be recreated with the new xs-security.json settings upon next run of your modules.

What is going on?
You are creating an instance of the UAA service so that users authenticate and have different access restricted depending on the roles that are assigned to them.
You now need to declare the instance of the UAA service as a dependency in the deployment descriptor. During the deployment process, this will tell the platform that the instance is needed for some of the micro-services to run. It will also bind the service to the application.
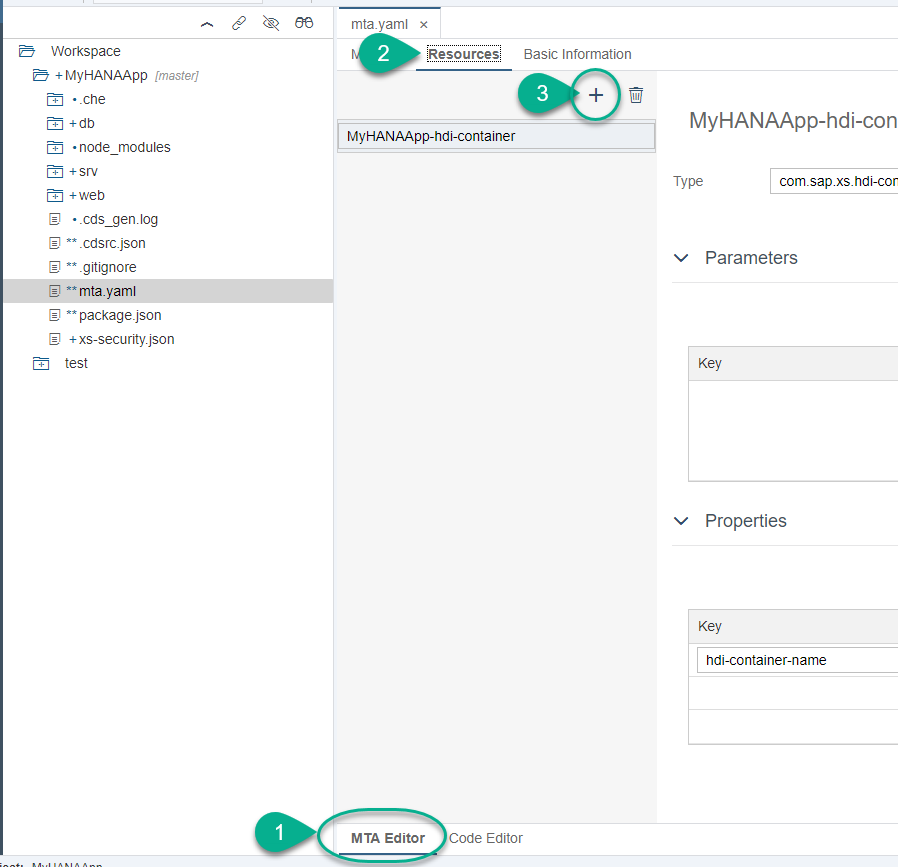
Open the MTA editor in graphical mode and click Resources. Use the + button to create a new resource.
Call the resource app-uaa and choose type com.sap.xs.uaa-space.
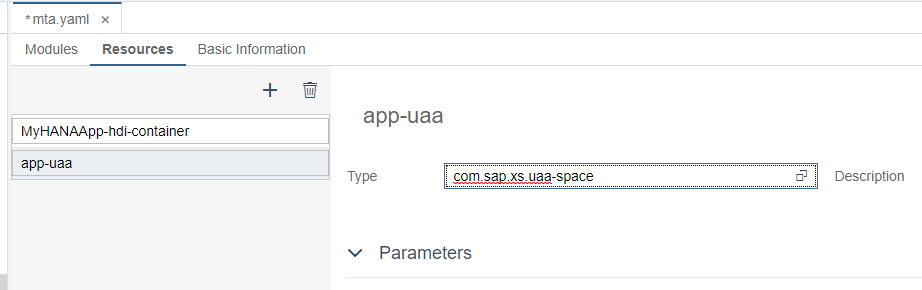
Under Parameters, use the following key-value pair:
- Key:
path - Value:
xs-security.json
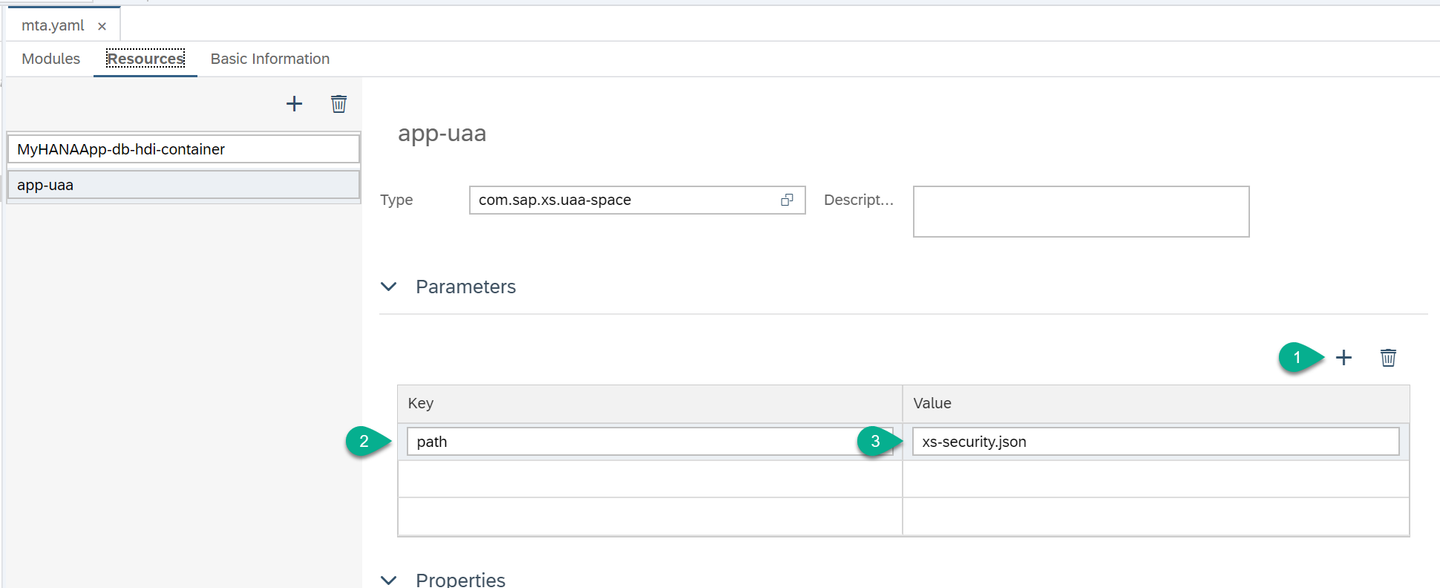
Save the changes.
Add the service instance as a dependency to the web application.
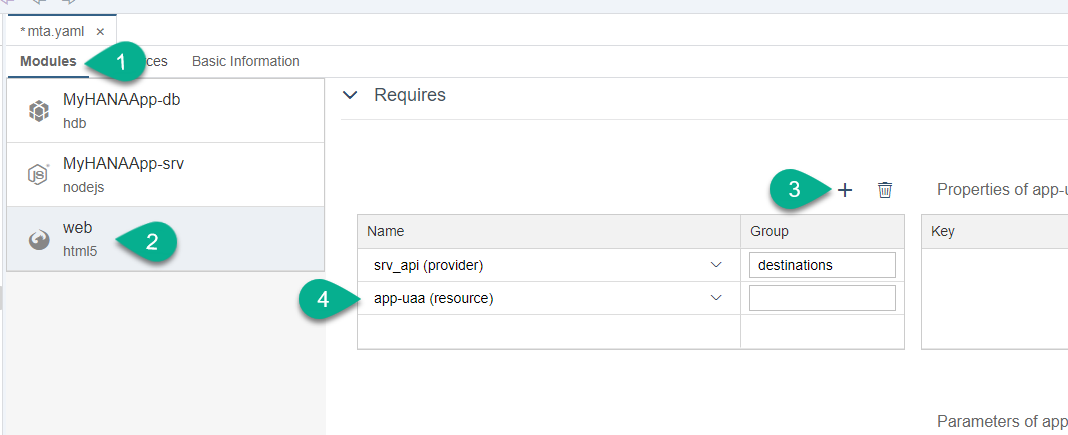
Add the dependency to the srv application, too.
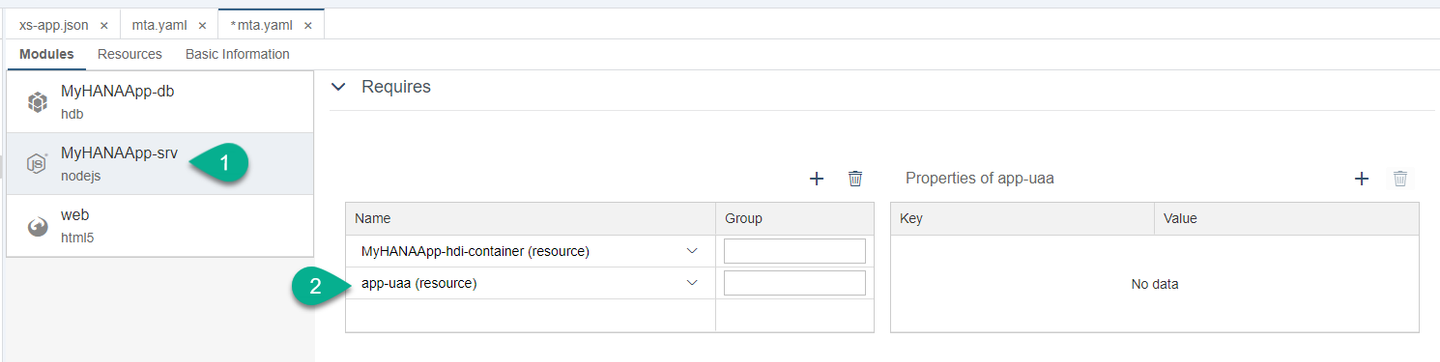
Remember to Save.
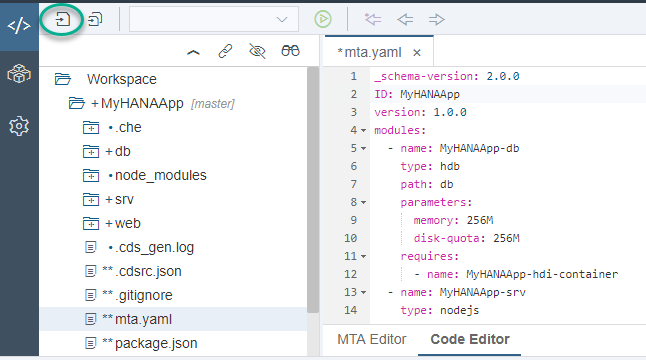
For further reference, here is an example of what the
MTA.yamlfile looks lie:YAML_schema-version: 2.0.0 ID: MyHANAApp version: 1.0.0 modules: - name: MyHANAApp-db type: hdb path: db parameters: memory: 256M disk-quota: 256M requires: - name: MyHANAApp-hdi-container - name: MyHANAApp-srv type: nodejs path: srv parameters: memory: 512M disk-quota: 256M provides: - name: srv_api properties: url: '${default-url}' requires: - name: MyHANAApp-hdi-container - name: app-uaa - name: web type: html5 path: web requires: - name: srv_api group: destinations properties: name: srv_api url: '~{url}' forwardAuthToken: true - name: app-uaa resources: - name: MyHANAApp-hdi-container type: com.sap.xs.hdi-container properties: hdi-container-name: '${service-name}' - name: app-uaa type: com.sap.xs.uaa-space parameters: path: xs-security.json
The web module will be the entry endpoint to the service modules, which in turn expose access to the database.
If you expand the web module, in package.json, you will see the start command calls a library from the SAP repository called approuter. This module will receive the requests and evaluate to which backend application they need to be routed. This module will also call the authentication service if the route is defined as needing authentication.
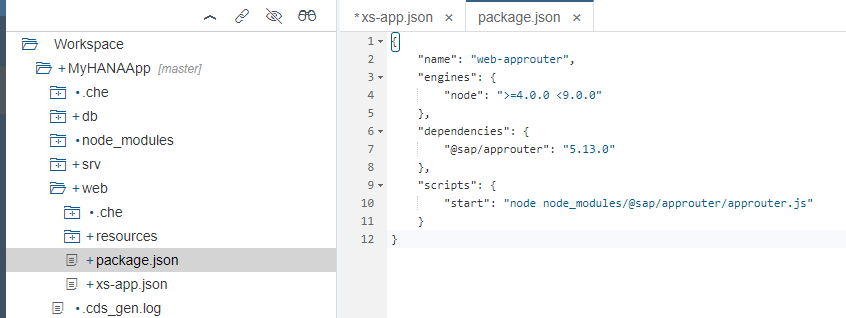
You will now modify the routing to add authentication. Open the file xs-app.json and change the authenticationMethod to route.
Add a comma after the last key-value pair and add the following within the route:
"authenticationType": "xsuaa"
If you are working in the SAP Web IDE Full-stack please add this entry to both routes.
Save the changes.
This will tell the approuter module that each route will define its own authentication method and that the Node.js module, referred to as the srv_api destination, needs authentication. This means that an authentication token will be needed before the request can be routed to and responded by the srv_api destination.
As a reminder of what you modified in the previous tutorial, the mta.yaml file is declaring the destination and allowing the authentication token to be forwarded.
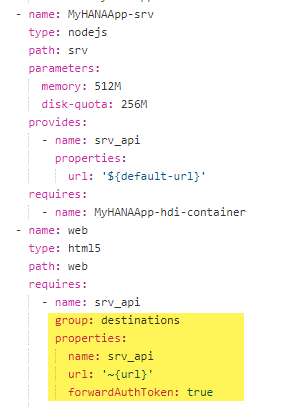
Some more information about how routing works can be found in this blog post.
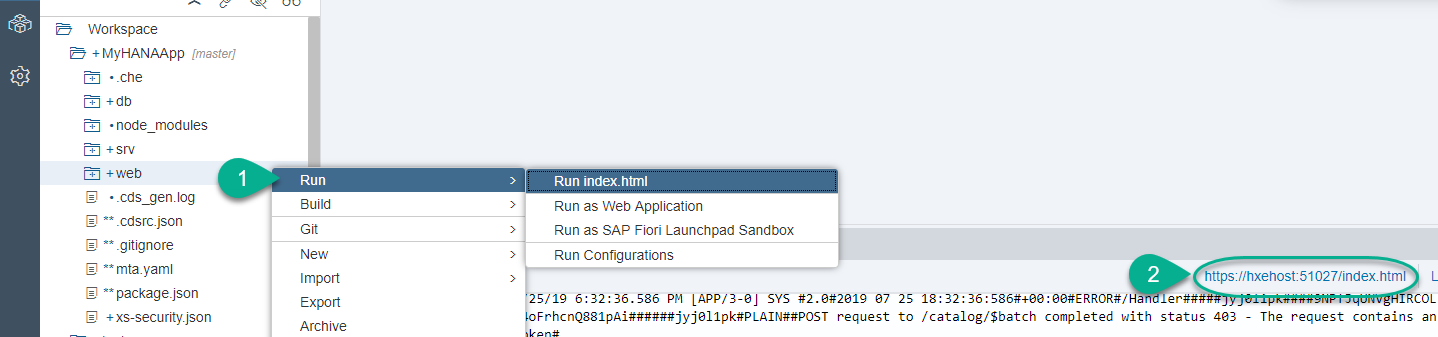
Before adding authentication, when you created the CDS services and user interface, you could access the web module without authentication. Run the web module again and use the URL in a different browsing mode (e.g., incognito) or a different browser in which you are not logged in.
Resources
Discussion
Share feedback on this tutorial or join the conversation in SAP Community.