
Overview
You will learn
- How to create an API trigger to start an instance of a business process from any service, like SAP Build Apps


Prerequisites
Prerequisites
- Acquire the template - Sales Order Management (MI01) by referring to tutorial Acquire a Template Project From the Store OR
- Complete the mission Build Your First Business Process with SAP Build Process Automation
Steps
Intro
A business process is started by defining a trigger, an event that indicates to your SAP Build Process Automation tenant to start a process instance.
Process triggers can be a form, such as a request form, an API call, where an external system starts the process or an Event.
You can start an instance of your process using an API call, with the inputs for the call configured from the process builder. These inputs can then be used as input fields in your process.
You may also start the instance with an event trigger which on-boards and listens to back-end events emitted from an external source system and reacts to such events by triggering artifacts such as processes and automations.
A data type is an artifact describing a data structure that can be used as an input and/or an output parameter in automations or processes. You have two options to create the fields in the data type. You can either import an excel file or define the fields manually.
Once you have acquired the Template Project from the Store, your process looks as below:

In this option, you will be importing an excel file to create the data type. Based on the values present in the excel, the type of field is determined automatically and the fields are created accordingly. For example orderAmount is maintained as 19000, hence the type of the field orderAmount is determined as Number.
Download SalesorderDatatype.xlsx excel file for Sales Order datatype.

Create data type Navigate to your project. Click on the Project Content icon on the top left corner > + > Create > Data Type .
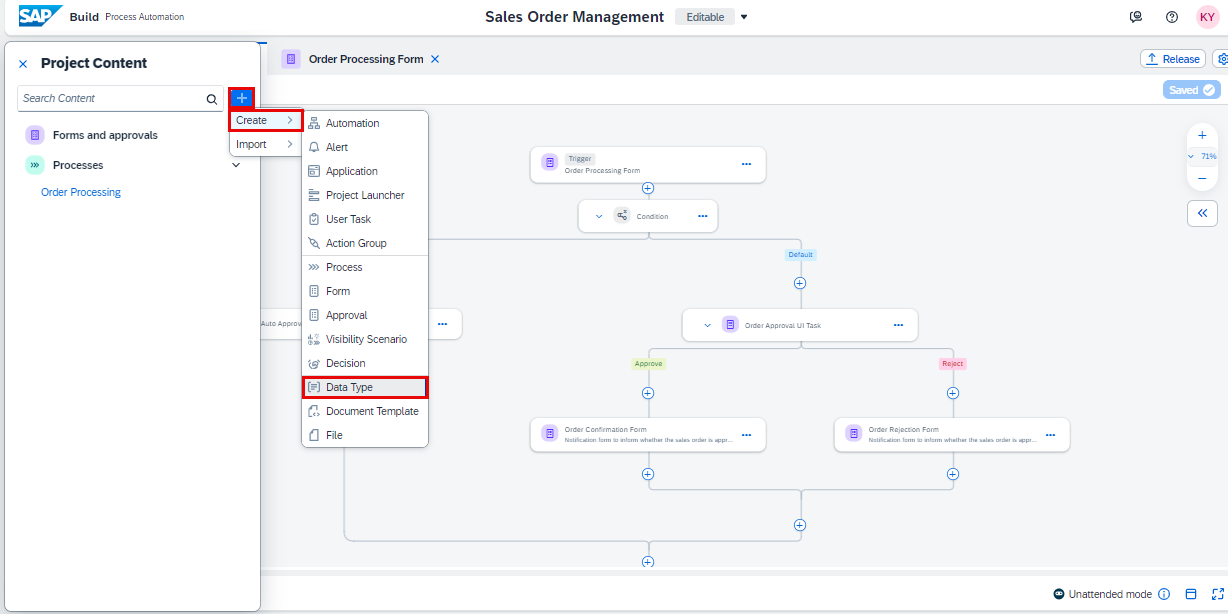
Create data type Name the data type Sales Order.

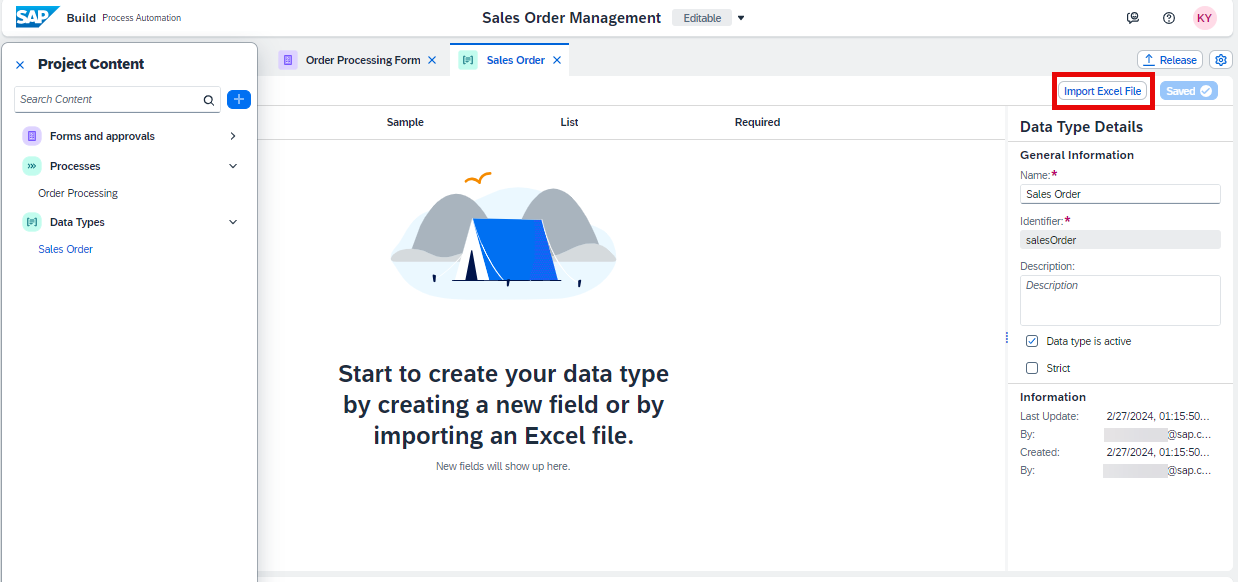
SalesOrder Click on Import Excel File.
Excelfile Click on Browse to select the excel file.
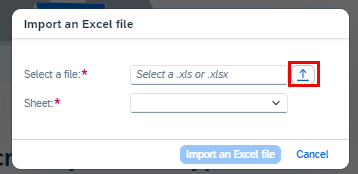
Excelfile Select Import an Excel File.

excelFile Your final data type looks as below.
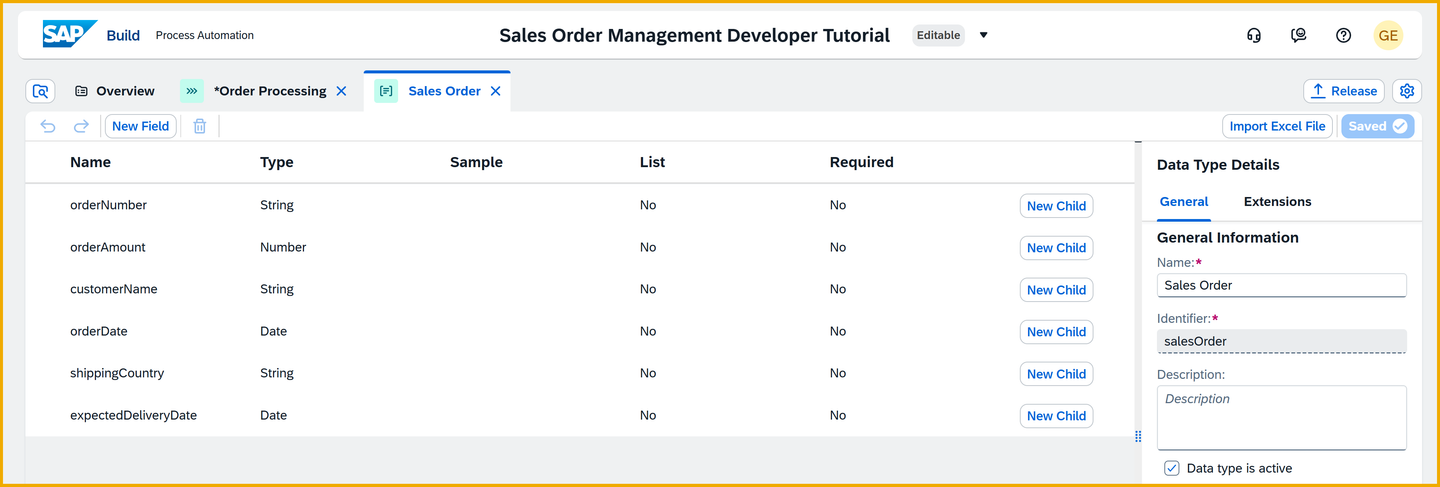
DataType
In this option you will be defining each field with field name and type of field manually.
Click on the Project Content icon on the top left corner > + > Create > Data Type.
Create data type Name the data type Sales Order.
dataType Click on New Field to add new fields to the data type Sales Order.
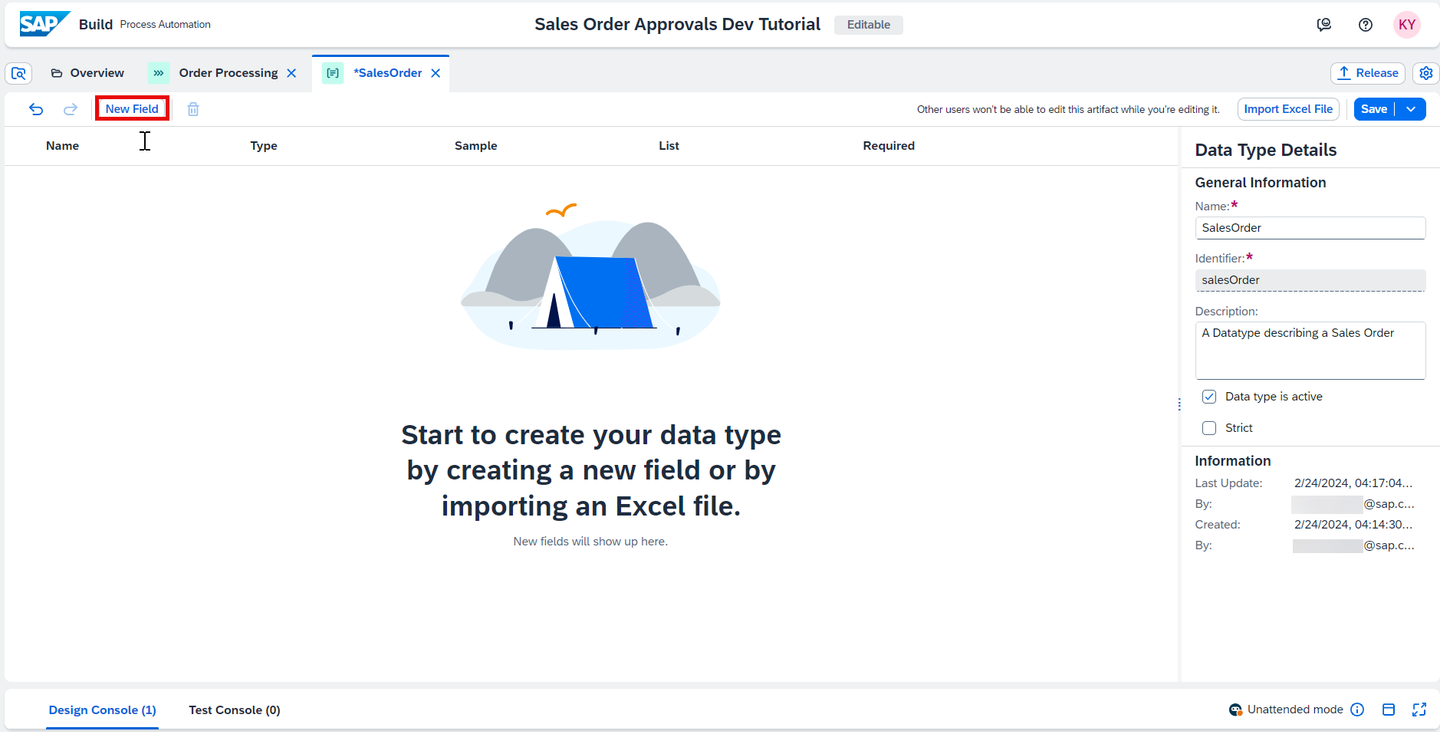
dataFields Repeat the process to add all the fields of the type as shown below.
Field Name Type customerNameString orderNumberString orderAmountNumber orderDateDate shippingCountryString expectedDeliveryDateDate IMPORTANT: The spelling and casing of the fields, as well as any extra spaces, is crucial because the API to trigger the process will require the fields exactly as written.
Your final data type looks as below. Click Save to save the data type.
DataType
Open the process Order Processing.
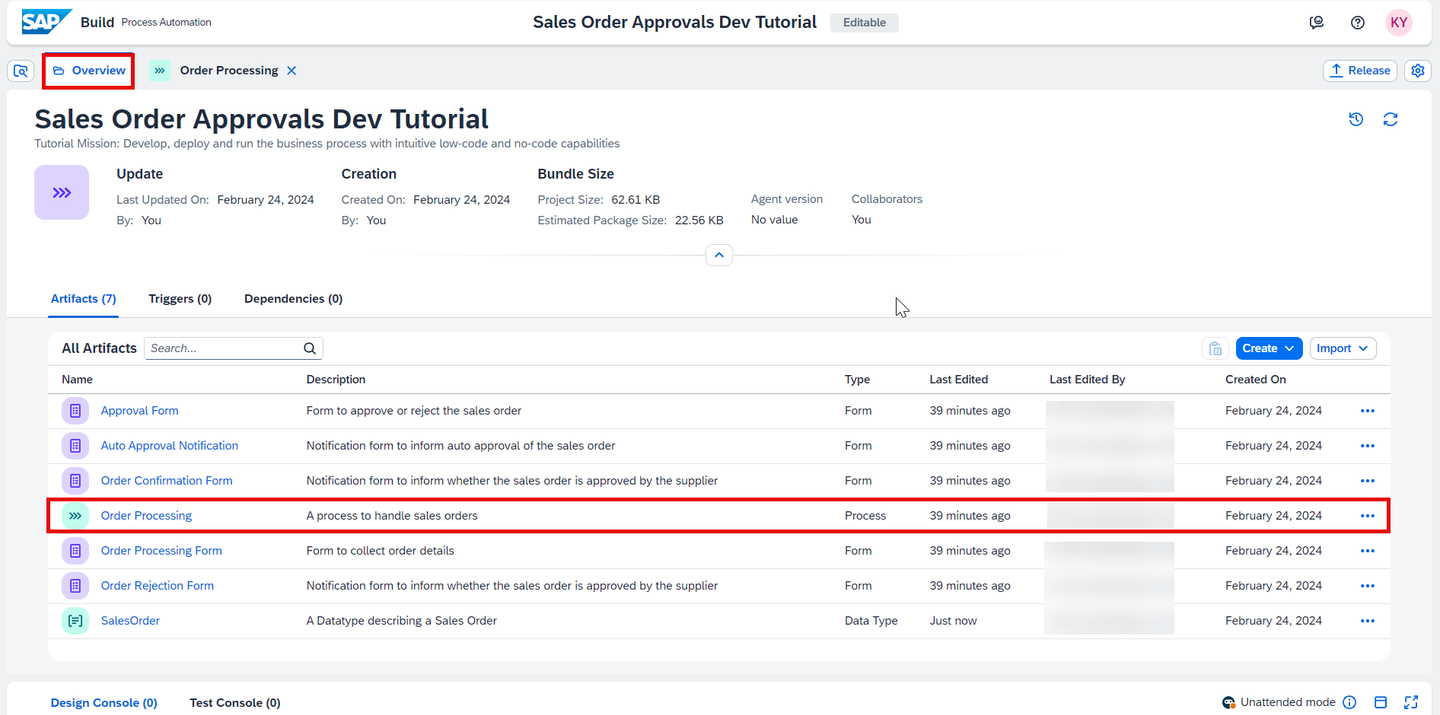
Process From the Editable version of the project, choose the three dots of the Order Processing Form and select Remove to delete the form.

Delete Form A warning message will inform you that the related bindings will be removed. Choose OK.

Warning Save the project.
To add an API trigger for the process, click on the Add a Trigger > Call an API.

New API Trigger 
New API Trigger Enter the name of the trigger as Sales Order Trigger. Choose Create.

Create API Trigger Pop Up Save your project.
Open the Process Details by clicking on the Canvas.

Process Details Choose Variables. Then choose Configure to configure process inputs.

Configure Delete the existing inputs by clicking on the delete button.
The existing inputs were configured from the Order Processing Form. Since you have removed it, you will need to configure new input parameters for the Sales Order Trigger.

Delete Choose Add Input and add the following parameter:
Name Type salesOrderDetailsSalesOrderCheck the Required box and choose Apply.
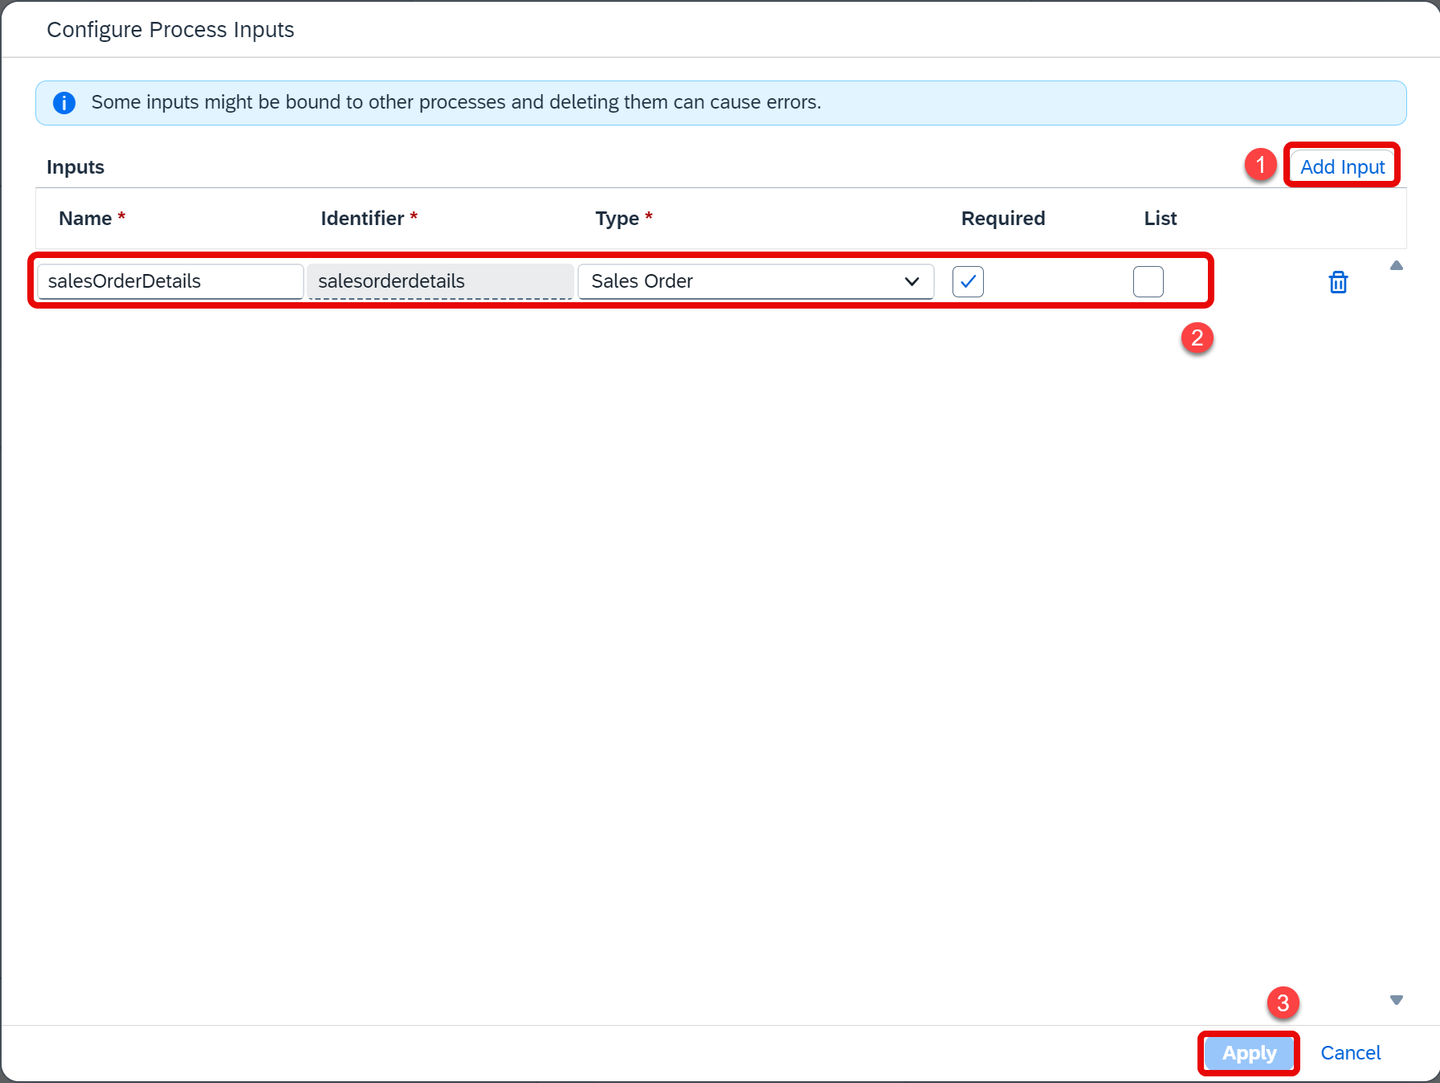
Delete Save your project.
Once the trigger is created successfully, you can view the trigger under the Triggers section in the Overview page.
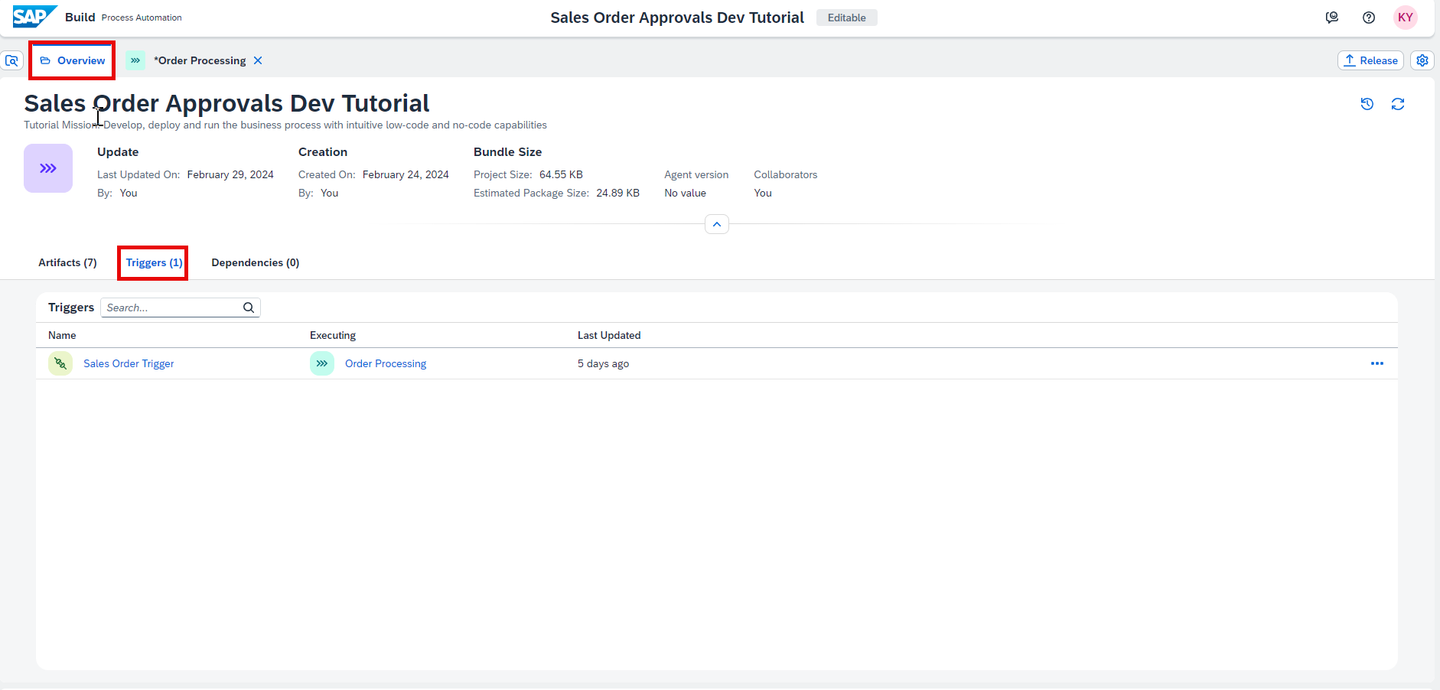
Triggers Overview You can edit, deactivate, or delete the API trigger properties from Triggers tab in the respective process builder overview.
Deactivate means that while the trigger exists in design-time, you cannot consume it in runtime.
Delete will permanently delete the trigger from design-time, but for already deployed processes the trigger will still exist at runtime.
In general, any changes in the trigger will be effective only when the process is released and deployed.
Note: All the API triggers that are created in that project will be shown.
Since you have created an API trigger, the bindings were lost. Let’s adjust the process with the new inputs configured for the API trigger.
Choose the condition artifact and click on Open Condition Editor.

Condition Enter the condition for
orderAmount.
Condition 
Condition Enter the condition for
shippingCountry.
Condition 
Condition Click on Apply.
Choose Approval Form to adjust the bindings. Modify the General section. In the Subject field, do the following:
- Enter Review and approve order
- Select Order Number from Process Inputs
- Enter from
- Select Customer Name from Process Inputs
- Enter company

Condition Since the process would be started through an API, remove the Users Process Started by and enter your
EmailIDthat was configured for the tenant.
Condition Modify the Inputs section.
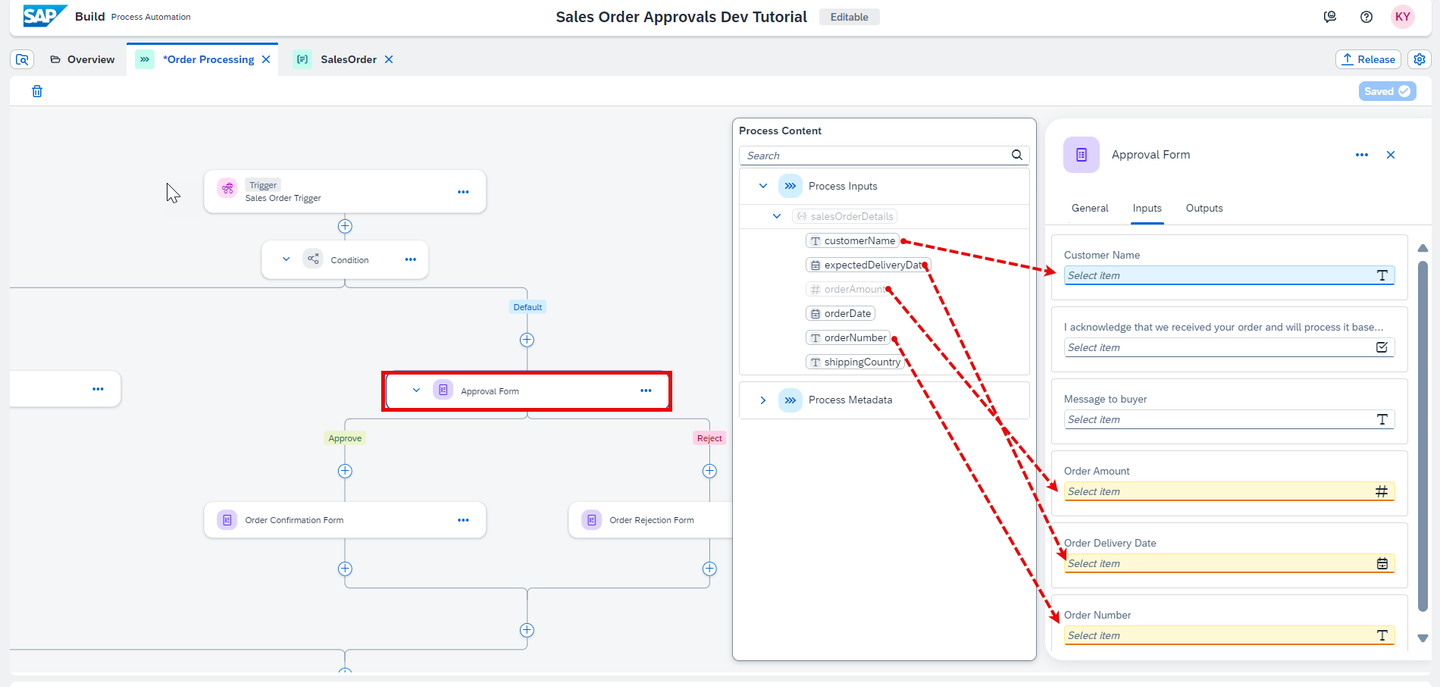
Condition Choose Order Confirmation Form to adjust the bindings. Modify the General section. In the Subject field, do the following:
- Enter Your order
- Select Order Number from Process Inputs
- Enter has been successfully received

Condition Since the process would be started through an API, remove the Users Process Started by and enter your
EmailIDthat was configured for the tenant.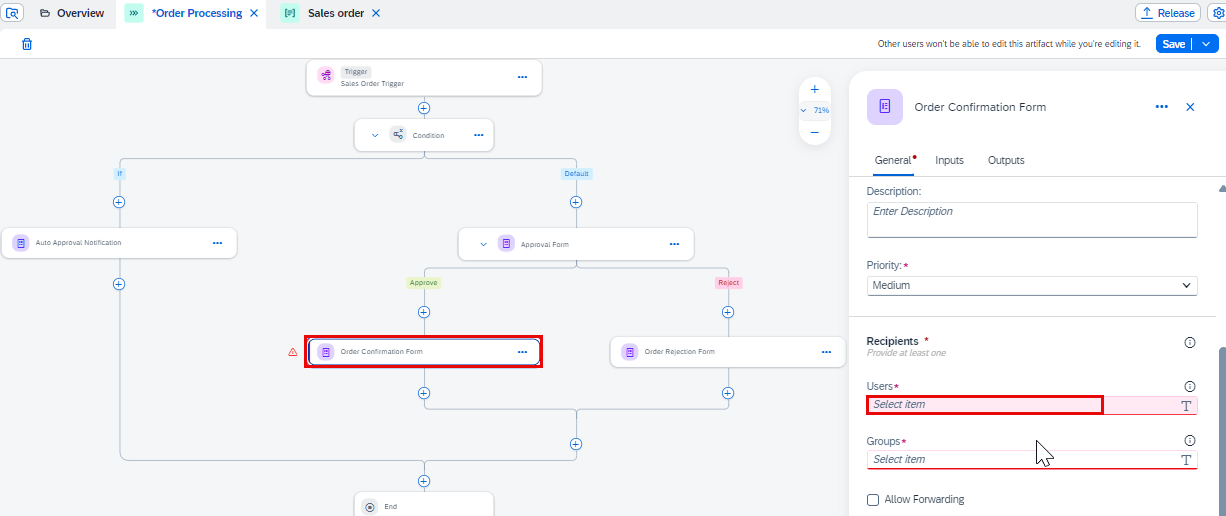
Confirmation Modify the Inputs section.

Inputs Choose Order Rejection Notification Form to adjust the bindings. Modify the General section. In the Subject field, do the following:
- Enter Your order
- Select Order Number from Process Inputs
- Enter is rejected by the supplier

Condition Since the process would be started through an API, remove the Users Process Stared by and enter your
EmailIDthat was configured for the tenant.
Rejection Form Modify Inputs section.

Inputs Choose Auto Approval Notification Form to adjust the bindings. Modify the General section. In the Subject field, do the following:
- Enter Your order
- Select Order Number from Process Inputs
- Enter has been successfully received
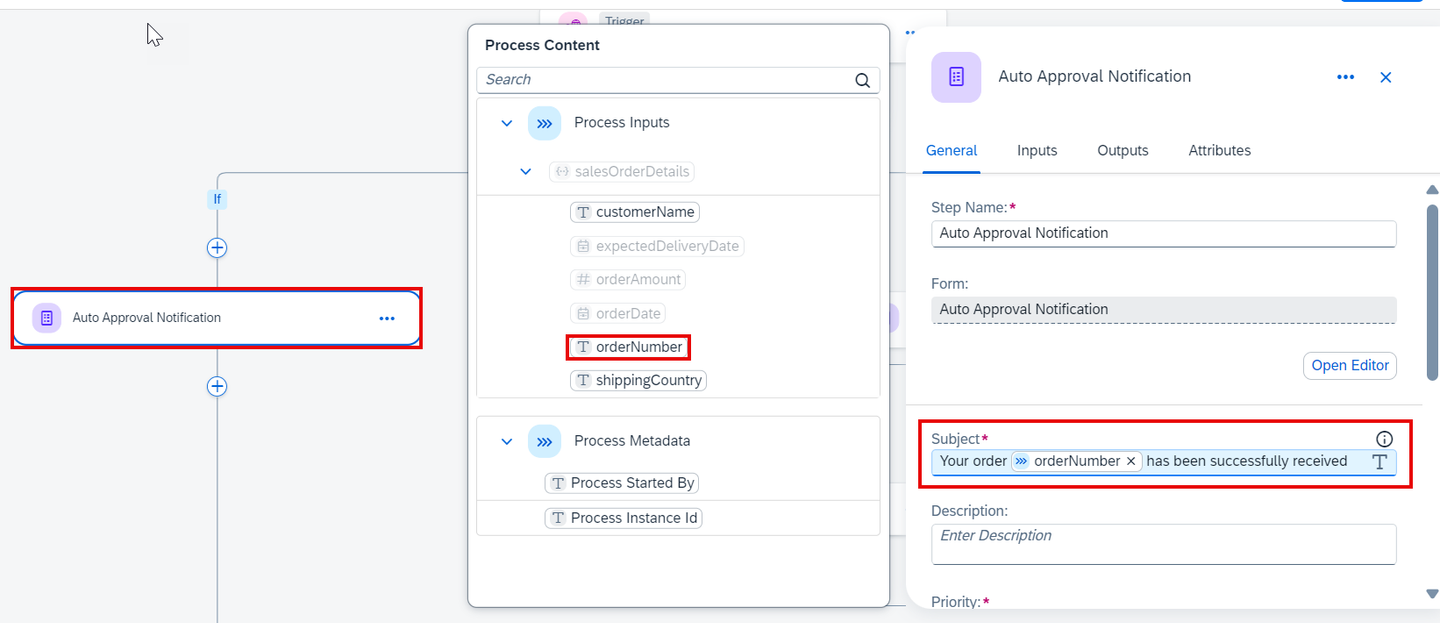
Condition Since the process would be started through an API, remove the Users Process Started by and enter your
EmailIDthat was configured for the tenant.
Approval Notification Modify the Inputs section.

Inputs Save your project.
Release the project (button is in the upper right).
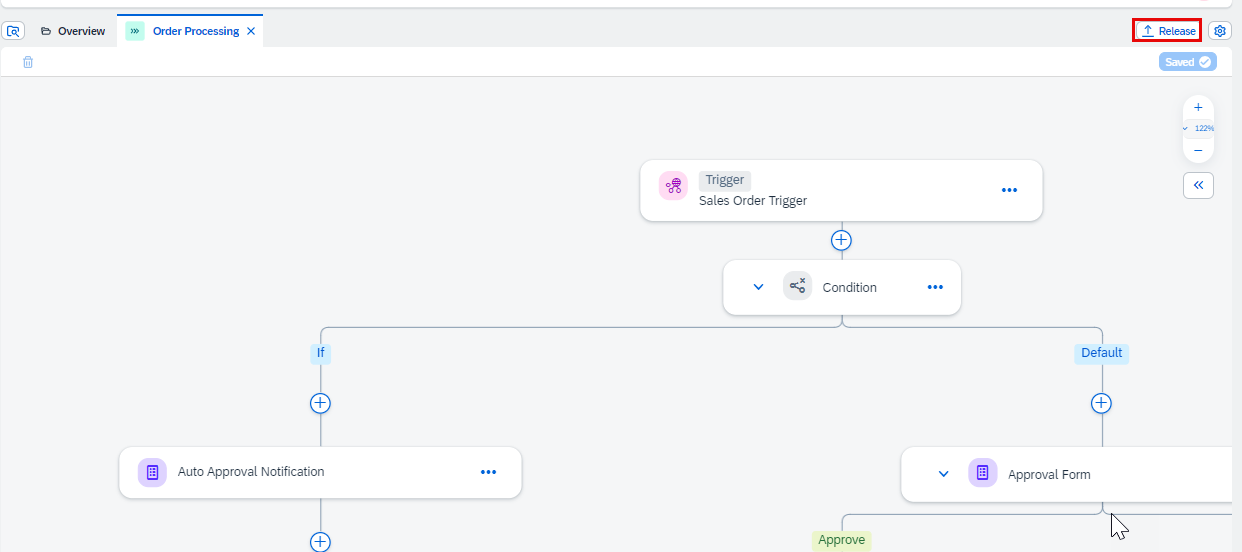
Release Select the new released version by clicking Show project version.

Release After successful release of the project, click Deploy and deploy the project to the Public environment.

Deploy The Public environment is deprecated and soon you will have to create “shared” or your own environments and set permissions and other configurations.
On the Triggers dialog, click Deploy again.

Deploy You have successfully released and deployed the process and it is ready to consume via APIs.
Resources
Discussion
Share feedback on this tutorial or join the conversation in SAP Community.