
Overview
You will learn
- How to initialize a repository in VS Code.
- How to set up your CI/CD pipeline.


Prerequisites
Prerequisites
- You’ve prepared your application for deployment in SAP BTP, Kyma runtime. Follow the steps in the Deploy in SAP BTP, Kyma Runtime tutorial that is part of the Deploy a Full-Stack CAP Application in SAP BTP, Kyma Runtime Following SAP BTP Developer’s Guide tutorial group.
- You have an enterprise global account in SAP BTP. To use services for free, you can sign up for an SAP BTPEA (SAP BTP Enterprise Agreement) or a Pay-As-You-Go for SAP BTP global account and use the free tier services only. See Using Free Service Plans.
- You have a platform user. See User and Member Management.
- You’re an administrator of the global account in SAP BTP.
- You have a subaccount in SAP BTP to deploy the services and applications.
- You have one of the following browsers that are supported for working in SAP Business Application Studio:
- Mozilla Firefox
- Google Chrome
- Microsoft Edge
This tutorial follows the guidance provided in the SAP BTP Developer’s Guide.
Steps
To be able to perform the steps for setting up a CI/CD pipeline, you need a public repository. Currently, SAP Continuous Integration and Delivery supports GitHub and Bitbucket repositories.
For real application development, you need to consider the right place for your repository.
In this example, we’re creating a repository on GitHub. You need a GitHub account for this step. Go ahead and create one if you don’t have it yet.
Create a new GitHub repository in your GitHub account.
Under Repository name, enter incident-management.
Choose Create repository.
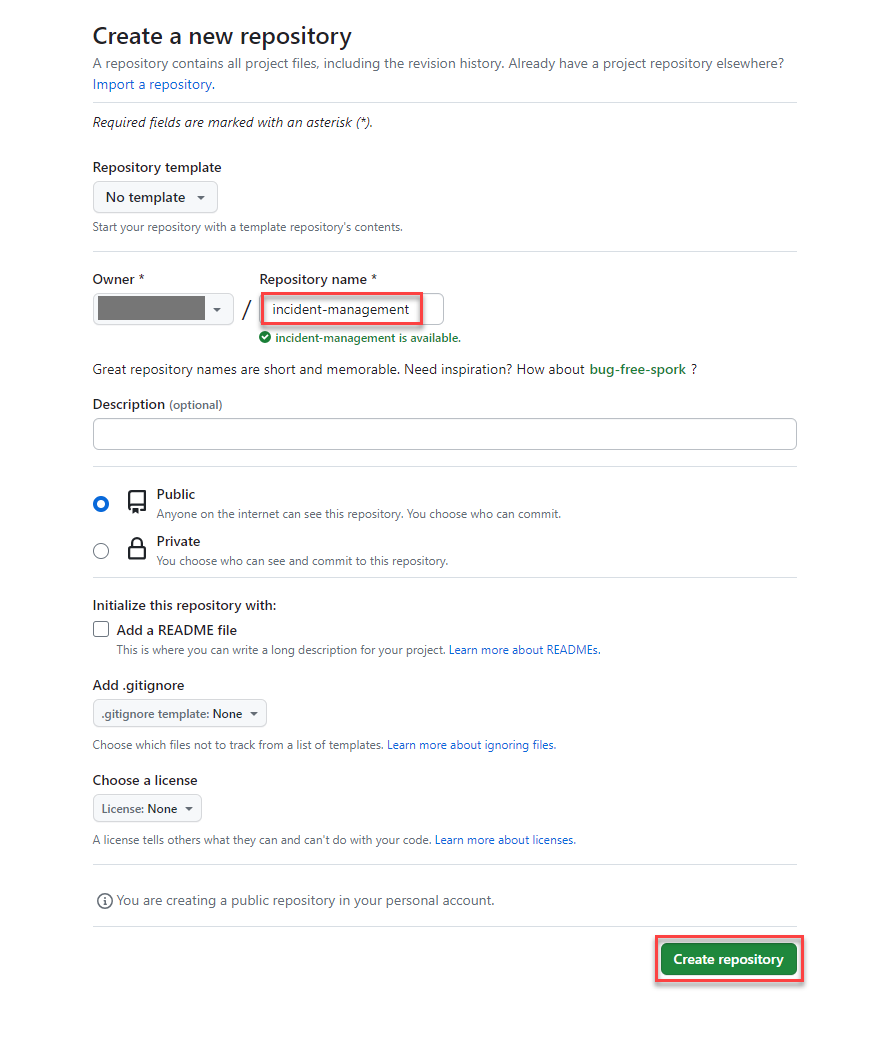
Create repository You’re directed to the Quick Setup page of your new repository. Make sure to copy the URL of the repository as you’ll need it in the next steps.

Quick Setup
Make sure you’ve opened the incident-management folder in VS Code.
Navigate to the .gitignore file in your project’s root folder and replace the contents of the file with the following code snippet:
Codenode_modules/ package-lock.json gen/*.mtar mta_archives/ mta.yaml
If .gitignore doesn’t exist, create it and paste the preceding code snippet in the newly created file.
In VS Code, navigate to Source Control on the left and choose Initialize Repository.
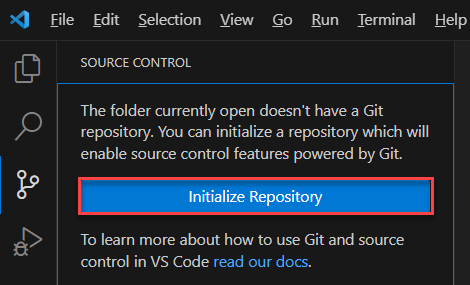
Initialize repository Open the three dots menu next to Source Control and choose Remote → Add Remote….

Add remote Paste the URL of your repository in the Provide repository URL field and press Enter.

Provide repo URL Provide a remote name and press Enter.

Provide remote name Stage your changes, add a commit message, and choose Publish Branch.
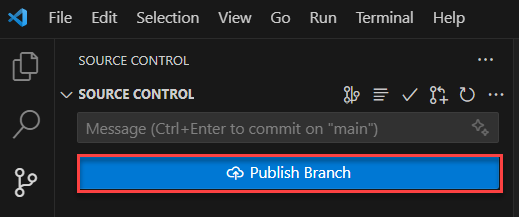
Publish branch Provide your GitHub username and password when prompted. When the changes are pushed, you see your project in your GitHub repository.
Make sure you’ve opened the incident-management folder in VS Code.
Navigate to the .gitignore file in your project’s root folder and replace the contents of the file with the following code snippet:
Codenode_modules/*.mtar mta_archives/ mta.yaml
If .gitignore doesn’t exist, create it and paste the preceding code snippet in the newly created file.
In VS Code, navigate to Source Control on the left and choose Initialize Repository.
Initialize repository Open the three dots menu next to Source Control and choose Remote → Add Remote….
Add remote Paste the URL of your repository in the Provide repository URL field and press Enter.
Provide repo URL Provide a remote name and press Enter.
Provide remote name Stage your changes, add a commit message, and choose Publish Branch.
Publish branch Provide your GitHub username and password when prompted. When the changes are pushed, you see your project in your GitHub repository.
Navigate to your subaccount and choose Services → Service Marketplace on the left.
Type Continuous Integration & Delivery in the search box and choose Create.
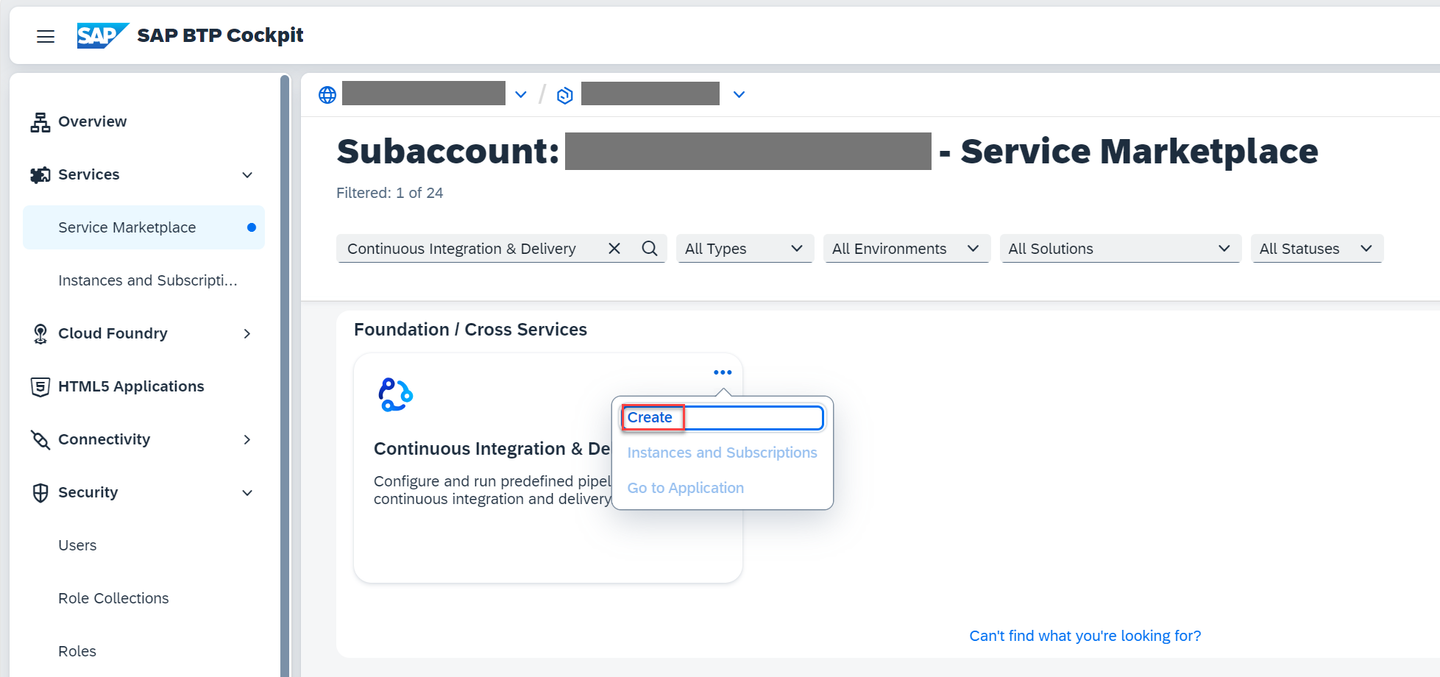
Continuous Integration and Delivery create service In the New Instance or Subscription popup select default from the Plan field.
Choose View Subscription and wait until the status changes to Subscribed.
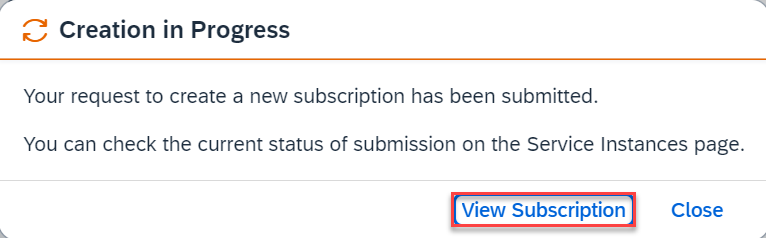
View subscription 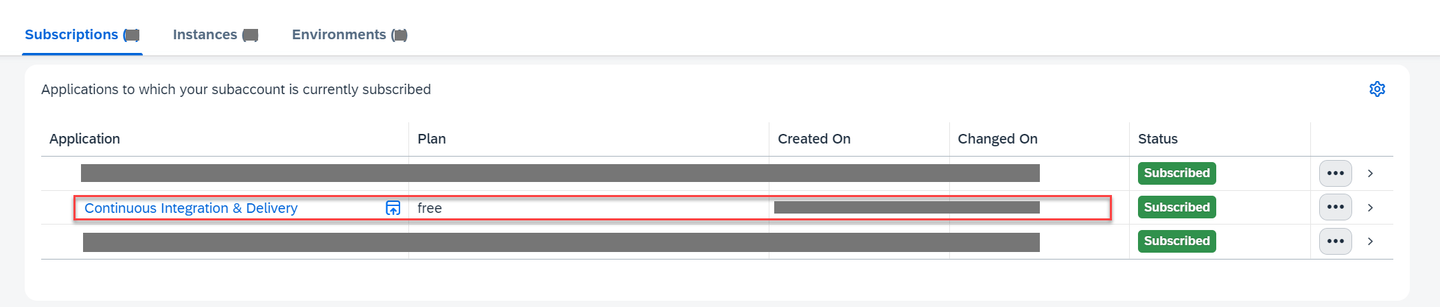
Status subscribed In your SAP BTP subaccount, choose Security → Role Collections in the left-hand pane.
Choose the role collection CICD Service Administrator.
Choose Edit.
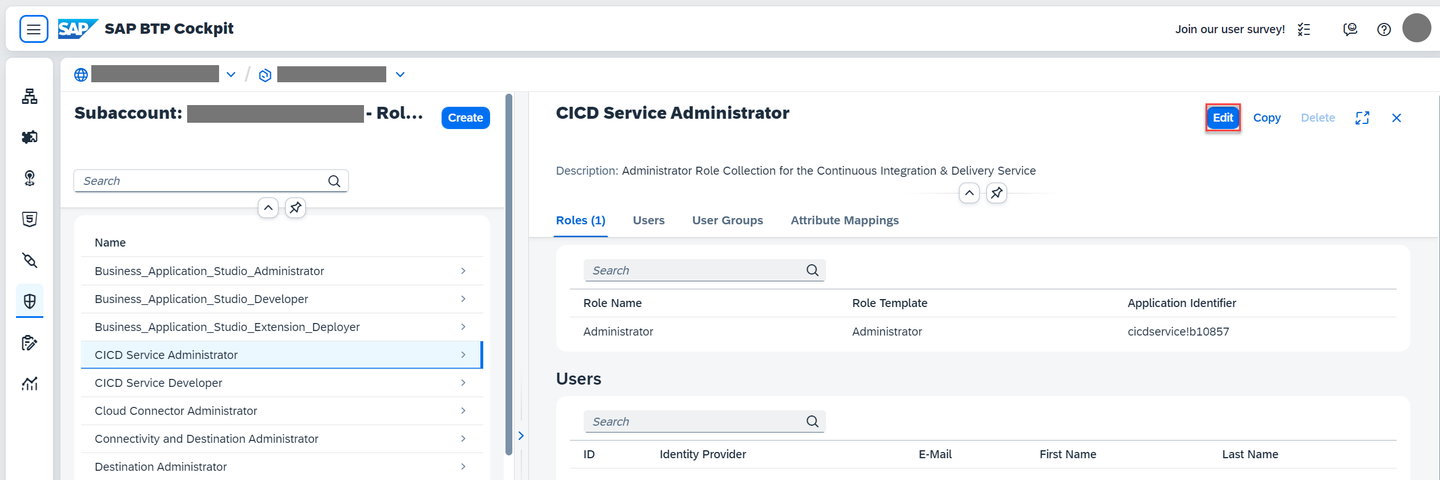
Edit role In the Users section, enter your user and select the icon to add the user.
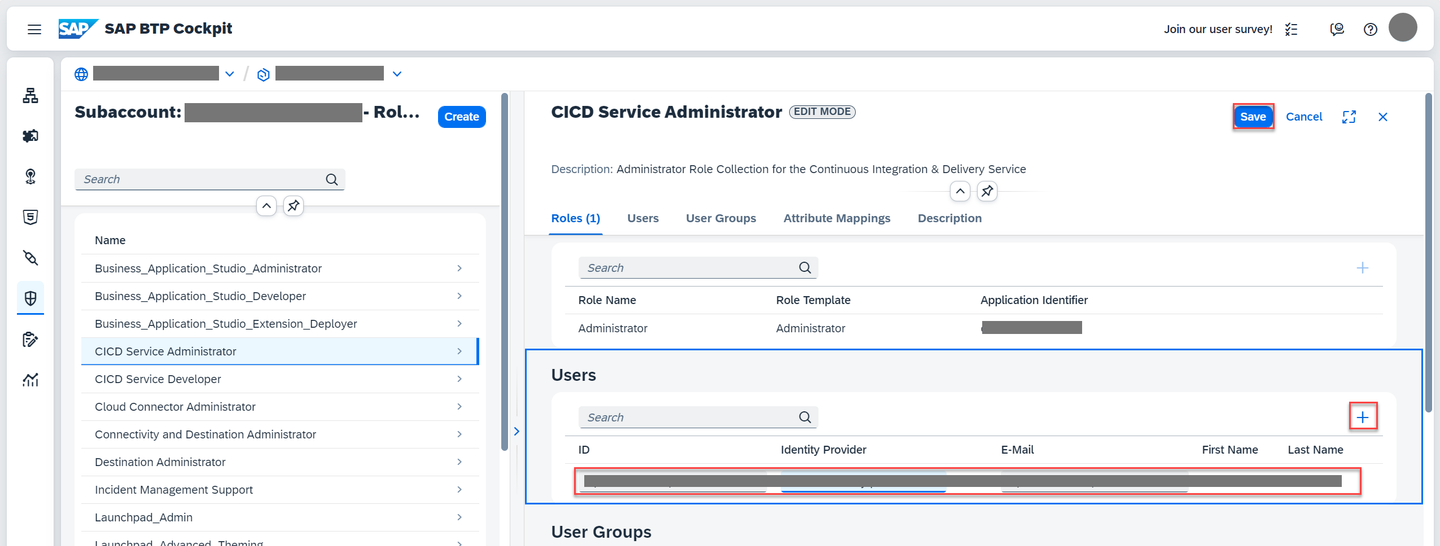
Add user Keep the setting
Default Identity Providerunless you have a custom identity provider configured.Choose Save.
You’ve assigned the CICD Service Administrator role collection to your user.
Log out and log back in to make sure your new role collection is considered.
See Initial Setup for more details on how to enable the service.
To run the pipeline using the SAP Continuous Integration and Delivery service, you need to create a service account. The service account is a non-human account that provides a distinct identity in your Kyma cluster. The service account authenticates your CI/CD pipeline to access your Kyma cluster. See Service Accounts.
Navigate to your subaccount and choose Dashboard URL under the Kyma Environment tab to open Kyma dashboard.
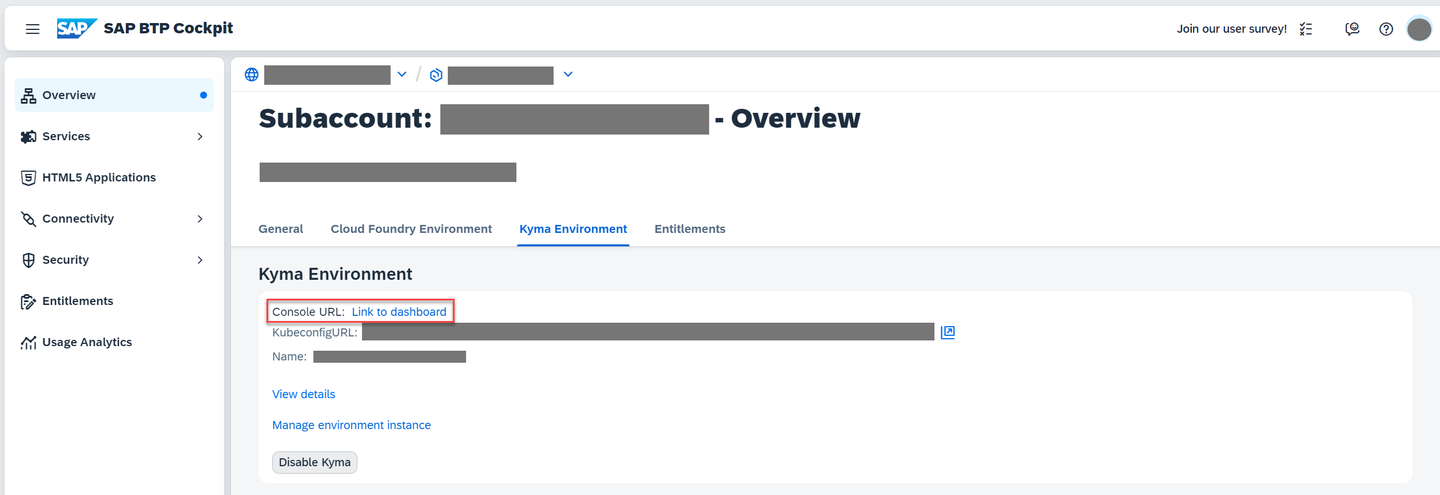
Open Kyma dashboard Choose Namespaces → Create.

Create namespace Enter a name for your namespace (for example, incident-management-namespace), switch the Enable Sidecar Injection toggle ON, and choose Create.
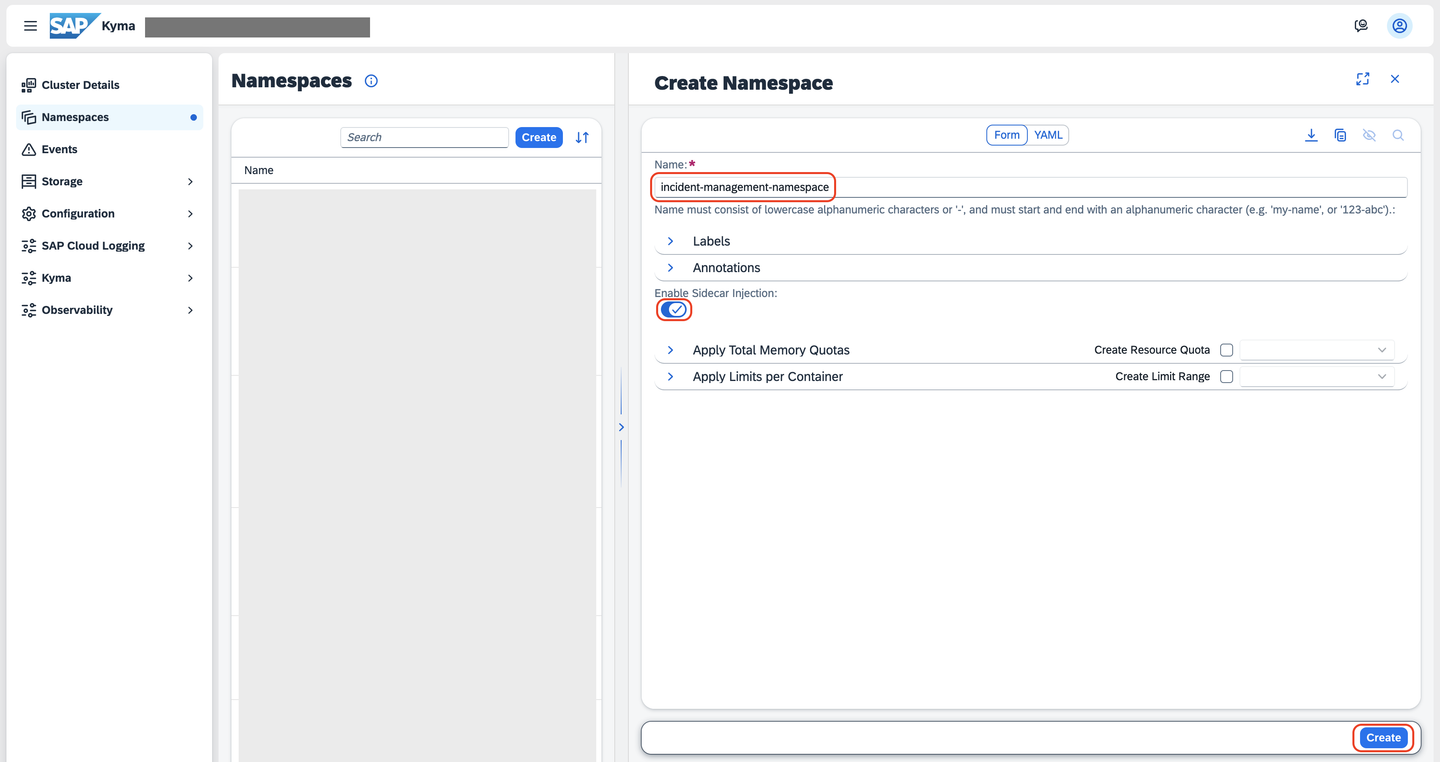
Create namespace dialog Navigate to the namespace incident-management-namespace and choose Configuration → Service Accounts on the left.

Open namespace Choose Create.
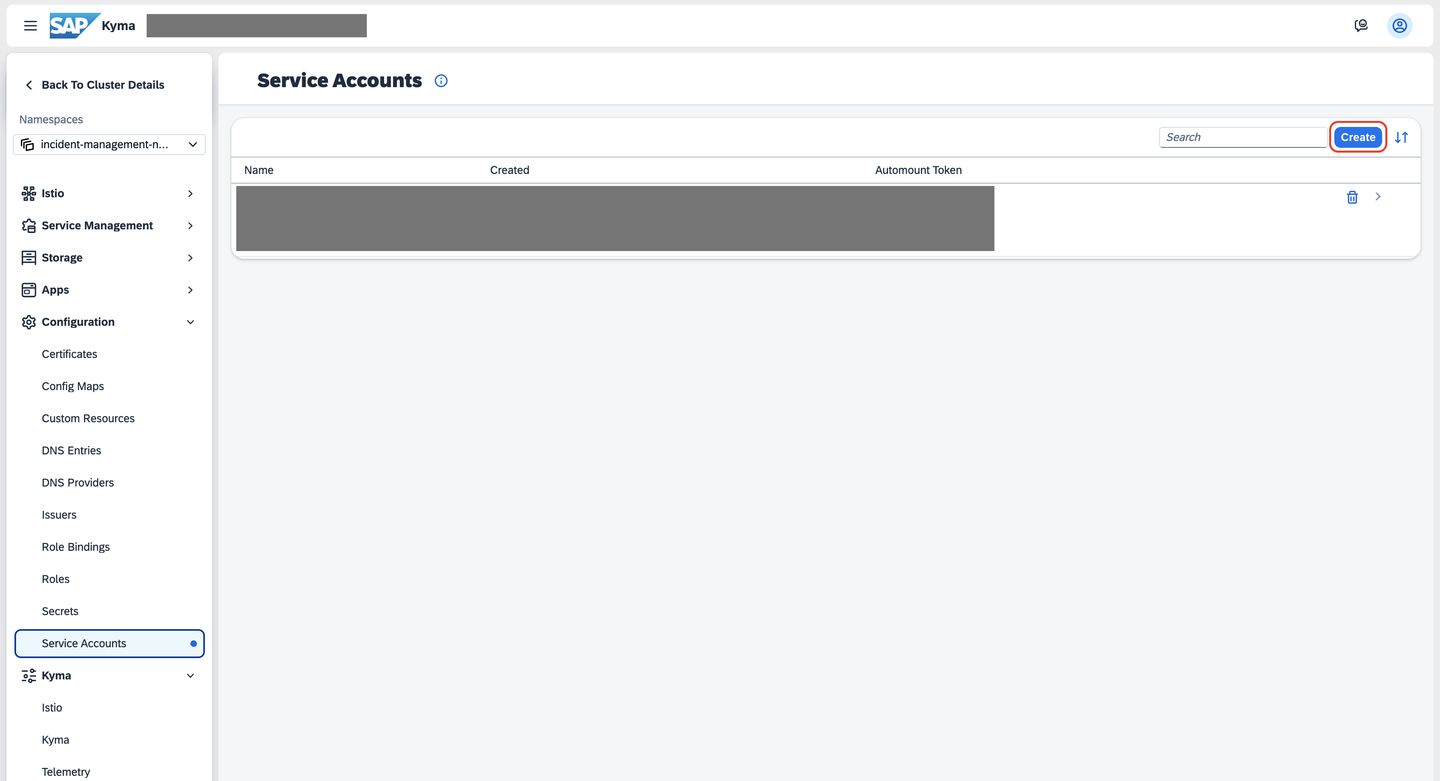
Create service account Enter a name for the service account (for example, incident-management-namespace-service-account) and choose Create.

Create Service Account dialog Navigate to the service account incident-management-namespace-service-account and choose Generate TokenRequest.

Generate token request This action generates a set of configurations that represent the kubeconfig file of the service account.
Choose a longer period from the dropdown in the Expiration seconds field and copy the TokenRequest value. You need it following in the steps.

Copy token request Navigate to the Cluster Details page and choose Configuration → Cluster Role Bindings.
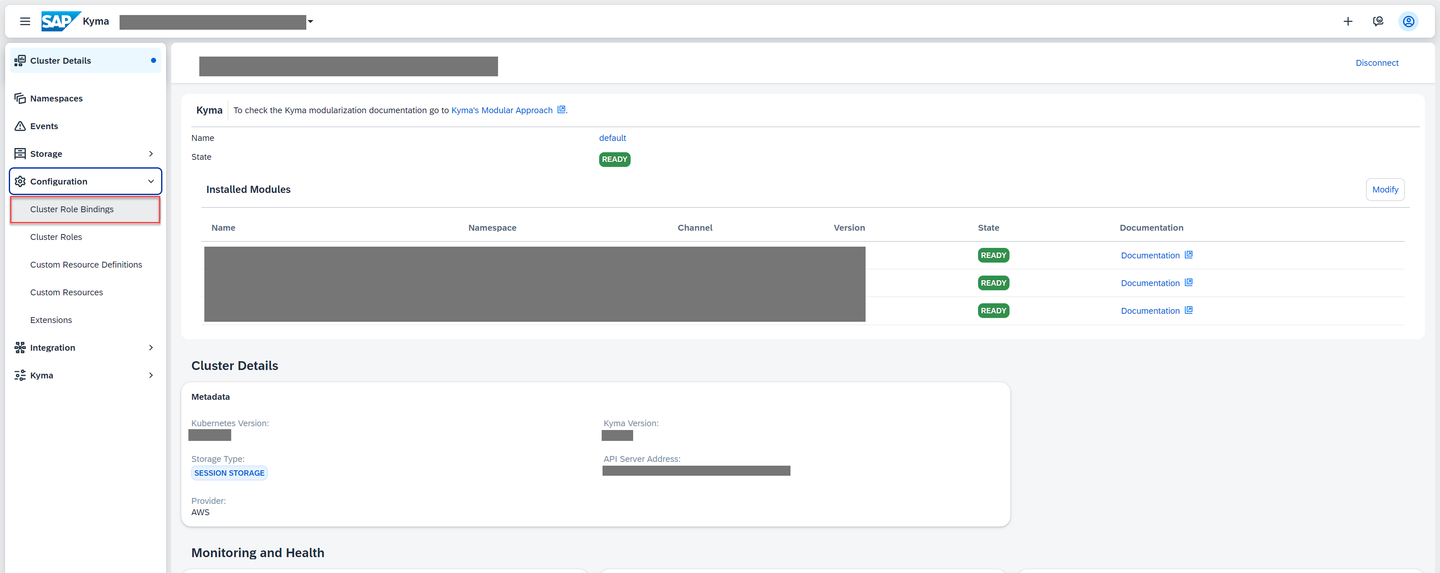
Cluster details Choose Create.

Create cluster role binding In the Create Cluster Role Binding dialog:
- Enter a unique name in the Name field. For example, incident-management-namespace-admin.
- Select cluster-admin from the dropdown in the Role field.
- Select ServiceAccount from the dropdown in the Kind field.
- Select incident-management-namespace from the dropdown in the Service Account Namespace field.
- Select incident-management-namespace-service-account from the dropdown in the Service Account Name field.
- Choose Create.
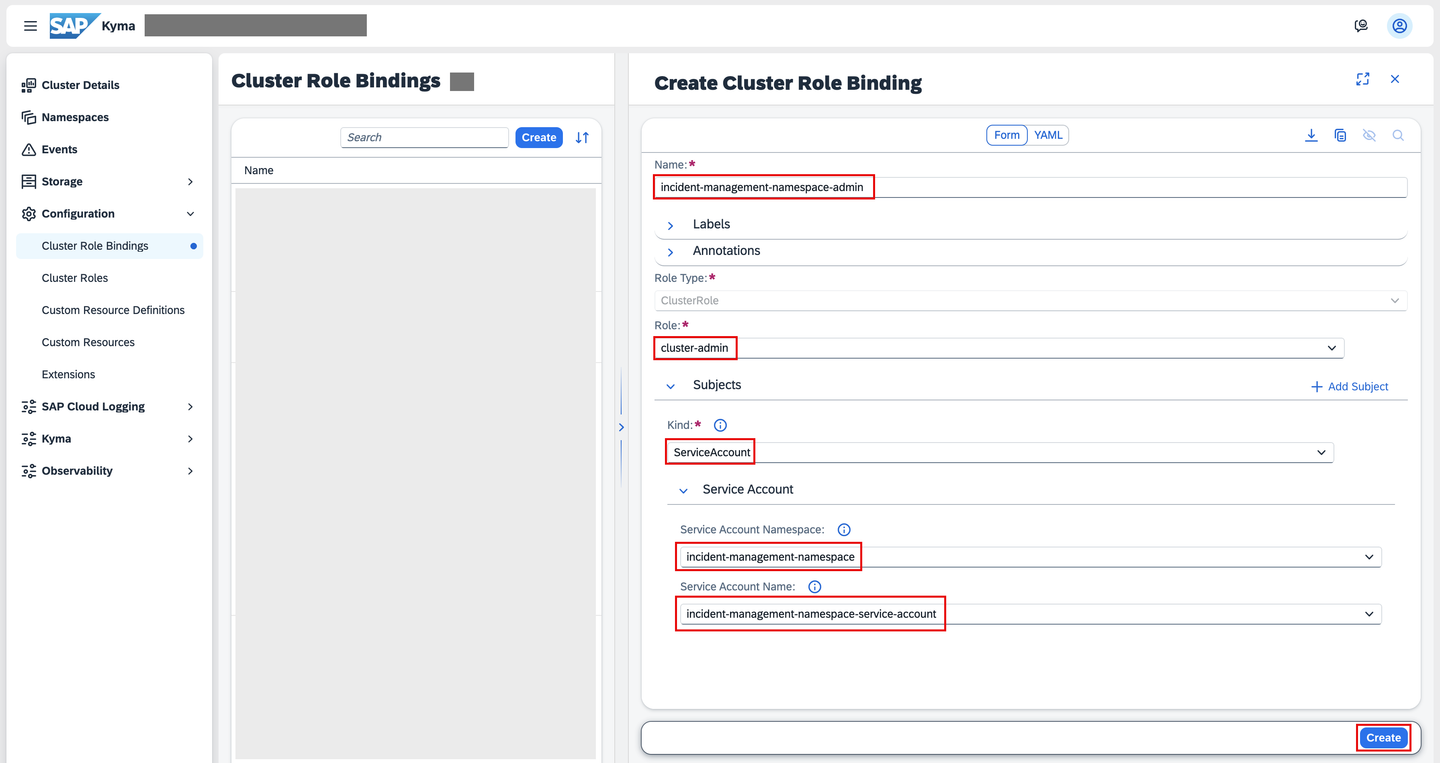
Create cluster role binding dialog
In your SAP BTP subaccount, navigate to Services → Instances and Subscriptions in the left-hand pane.
Choose Continuous Integration & Delivery.

CI/CD Go to application Use your SAP BTP global user name and global password to log in to the application.
Choose the Credentials tab and choose the icon to add a new credential.

Add new credential Under Create Credentials on the right:
- Enter github in the Credential Name field.
- Select Basic Authentication from the dropdown in the Type field.
- Enter your GitHub user name in the Username field.
- Enter your GitHub password (or GitHub access token if you’ve created one) in the Password field.
- Choose Create.

Create GitHub credential Choose the icon to add a new credential again and create a credential for Kyma.
- Enter kube-config in the Credentials Name field.
- Select Kubernetes Configuration from the dropdown in the Type field.
- Paste the TokenRequest value that you copied earlier in Step 4 in the Content field.
- Choose Create.
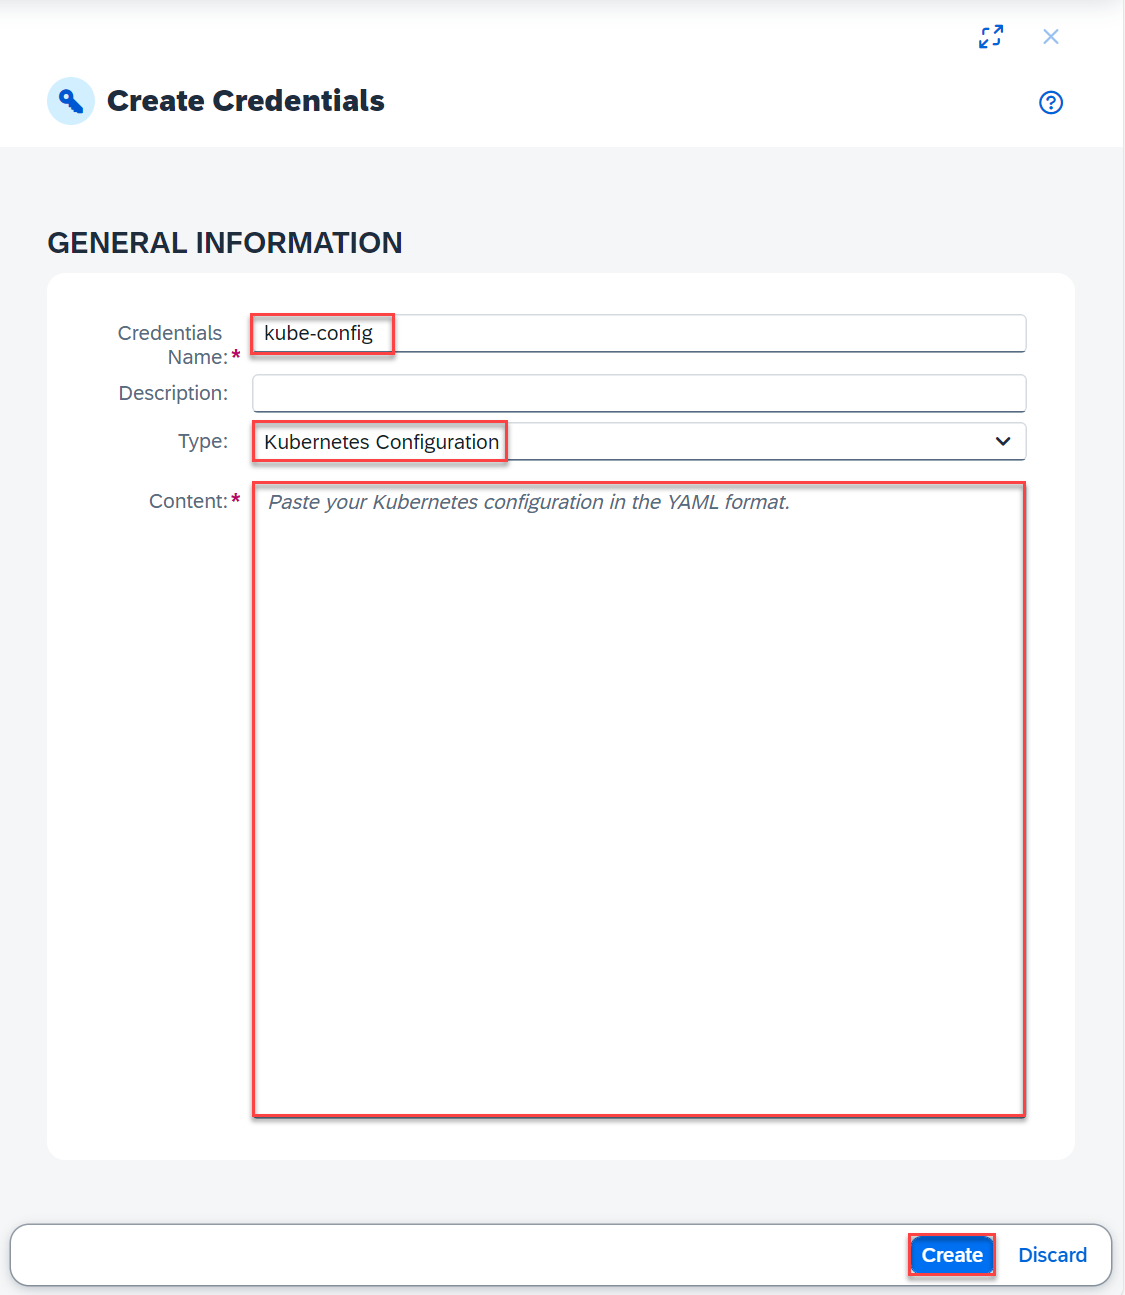
Create kube-config credential Choose the icon to add a new credential again and create a credential for your container registry.
- Enter container-registry-credentials in the Credentials Name field.
- Select Container Registry Configuration from the dropdown in the Type field.
- Paste your container registry credentials in the Content field, removing the
https://and/v1/from the container registry URL in theauthsobject. - Choose Create.
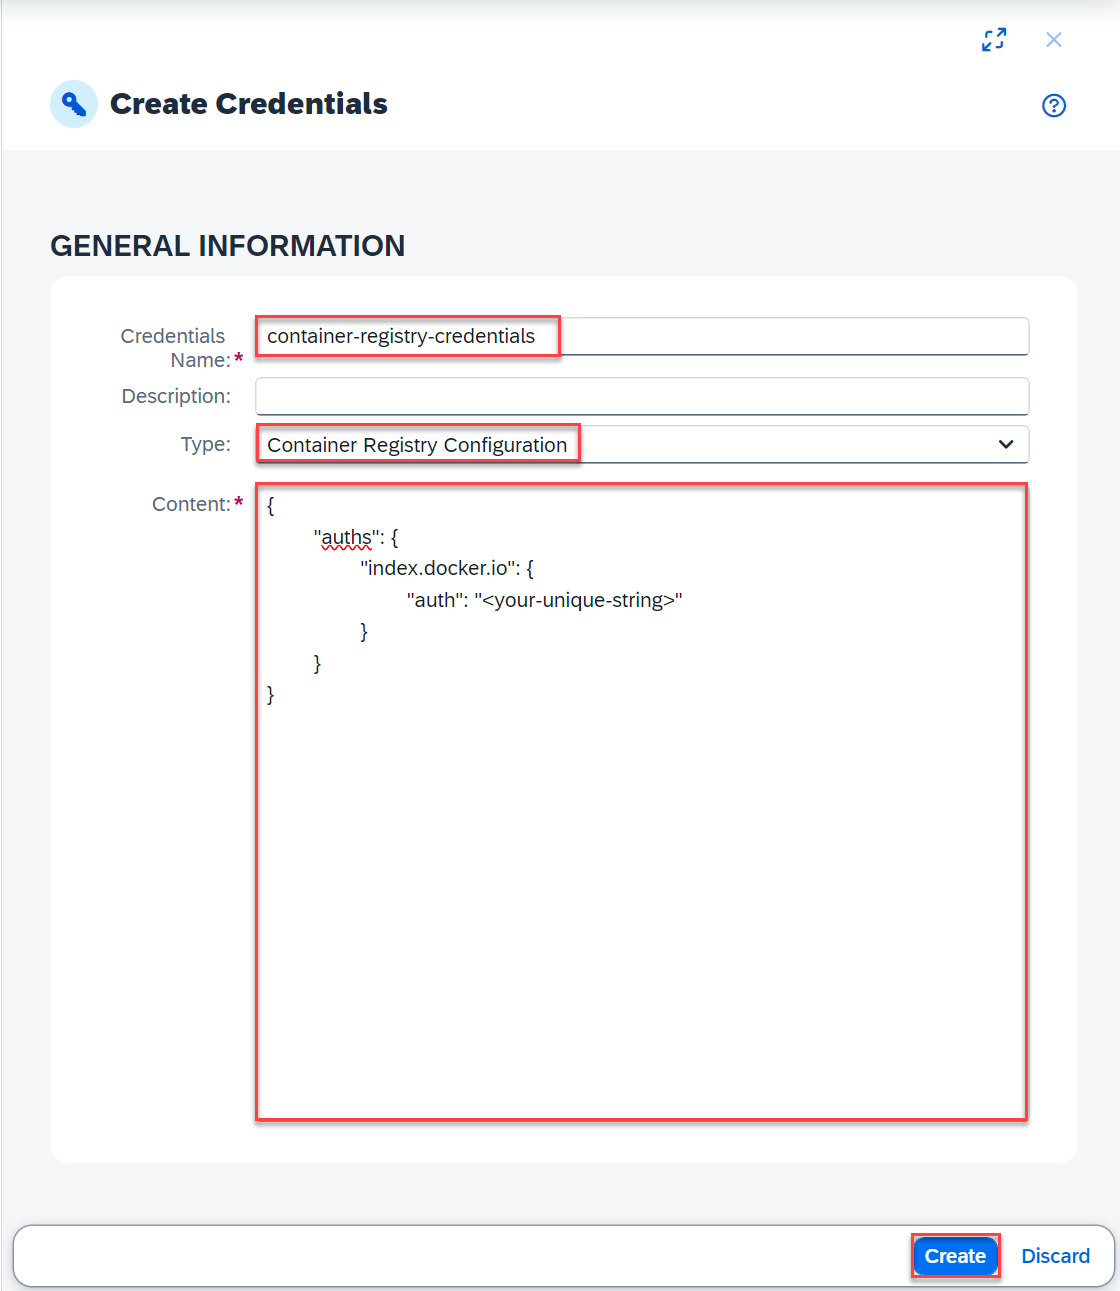
Create container registry credential Here’s how to get your container registry credentials in the required format:
Run
docker --config /tmp login docker.ioin a terminal to log in to your container registry.Run
cat /tmp/config.jsonto print your container registry credentials. The output looks like this: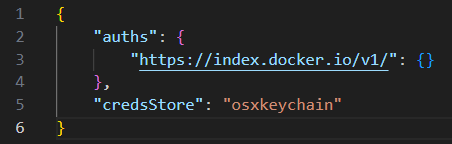
Container registry credentials Open the
/tmp/config.jsonin a text editor and delete thecredsStorekey-value pair.Run the
docker --config /tmp login docker.iocommand and provide your login credentials for your container registry.Print your container registry credentials again with
cat /tmp/config.json. The output look like this now: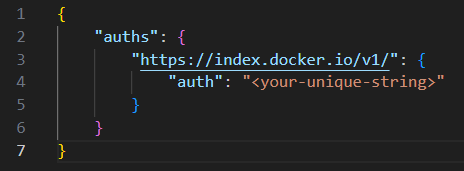
Container registry credentials
Open the package.json file in your project root folder.
Add
"@cap-js/sqlite": "^1"as adevDependencyand the script"cds-build": "npm install --include=dev && cds build --production"to the package.json file:JSON{ "name": "incident-management", ... "dependencies": { ... }, "devDependencies": { "@cap-js/sqlite": "^1", ... }, "scripts": { ... "cds-build": "npm install --include=dev && cds build --production" }, ... }In VS Code, choose Terminal → New Terminal and run
npm add -D @sap/cds-dkto add@sap/cds-dkas adevDependencyin the package.json file.Make sure to commit and push your changes to the remote repository.
Open the package.json file in your project root folder.
Add
"@cap-js/sqlite": "^1"as adevDependencyand the script"cds-build": "npm install --include=dev && cds build --production"to the package.json file:JSON{ "name": "incident-management", ... "dependencies": { ... }, "devDependencies": { "@cap-js/sqlite": "^1", ... }, "scripts": { ... "cds-build": "npm install --include=dev && cds build --production" }, ... }In VS Code, choose Terminal → New Terminal and run
npm add -D @sap/cds-dkto add@sap/cds-dkas adevDependencyin the package.json file.Navigate to the db folder and run the following command:
Shellnpm installOpen db/package.json and remove the
"build": "npm i && npx cds build .. --for hana --production"line fromscripts.json[6]{ "name": "deploy", ... "scripts": { "start": "node node_modules/@sap/hdi-deploy/deploy.js --use-hdb", "build": "npm i && npx cds build .. --for hana --production" }, ... }Make sure to commit and push your changes to the remote repository.
Navigate to the Jobs tab and choose the icon to add a new job.

Add new job Enter Incident-Management in the Job Name field.
Add repository
Open the value help for the Repository field.
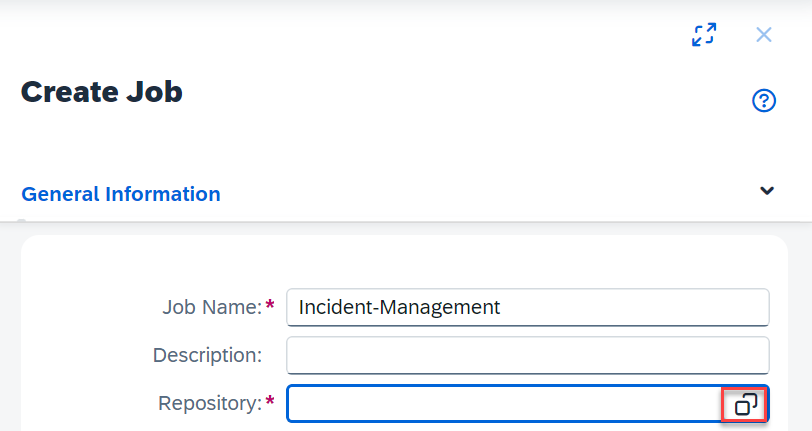
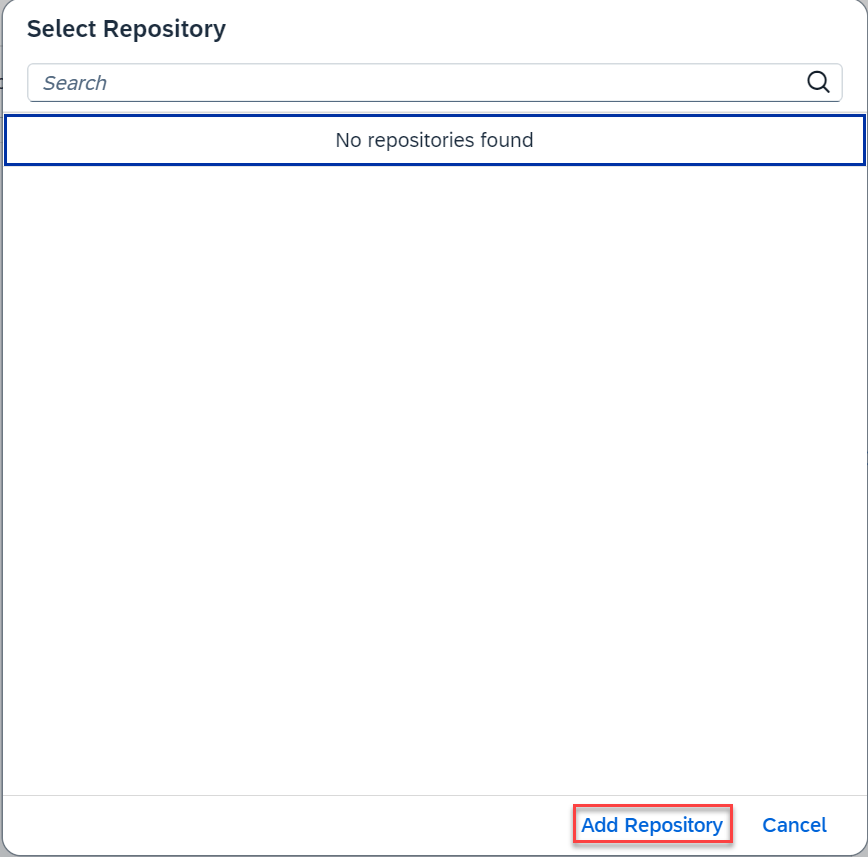
Add job name In the Select Repository popup, choose Add Repository. A popup opens.
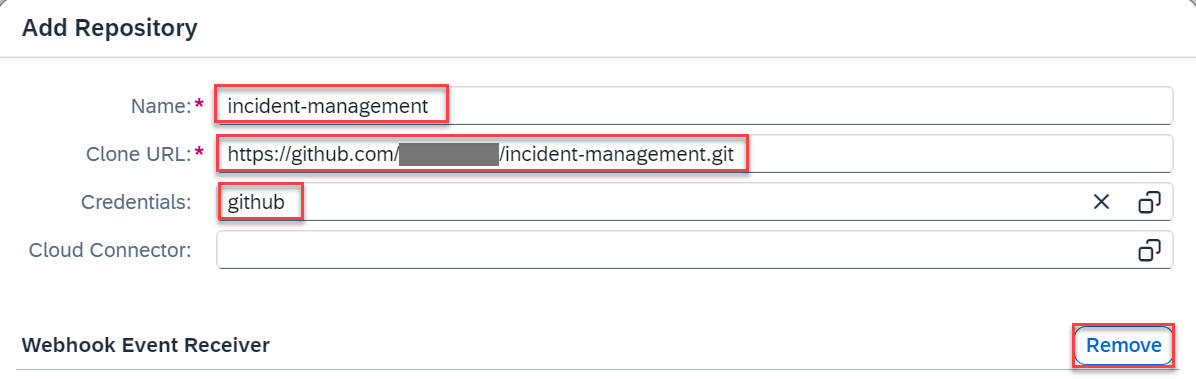
Select Repository popup In the Add Repository popup, enter details for the repository you created in Step 1: Create a repository:
- Enter incident-management in the Name field.
- Enter your repository’s URL in the Clone URL field.
- Open the value help in the Credentials field and choose the credential github that you created in Step 6: Add credentials.
- Remove the Webhook Event Receiver section.
Add Repository popup Choose Add to complete the addition of a repository.

Complete repo addition
Configure pipeline and stages
Back in the General Information tab, enter main in the Branch field.
Select Kyma Runtime from the dropdown in the Pipeline field.
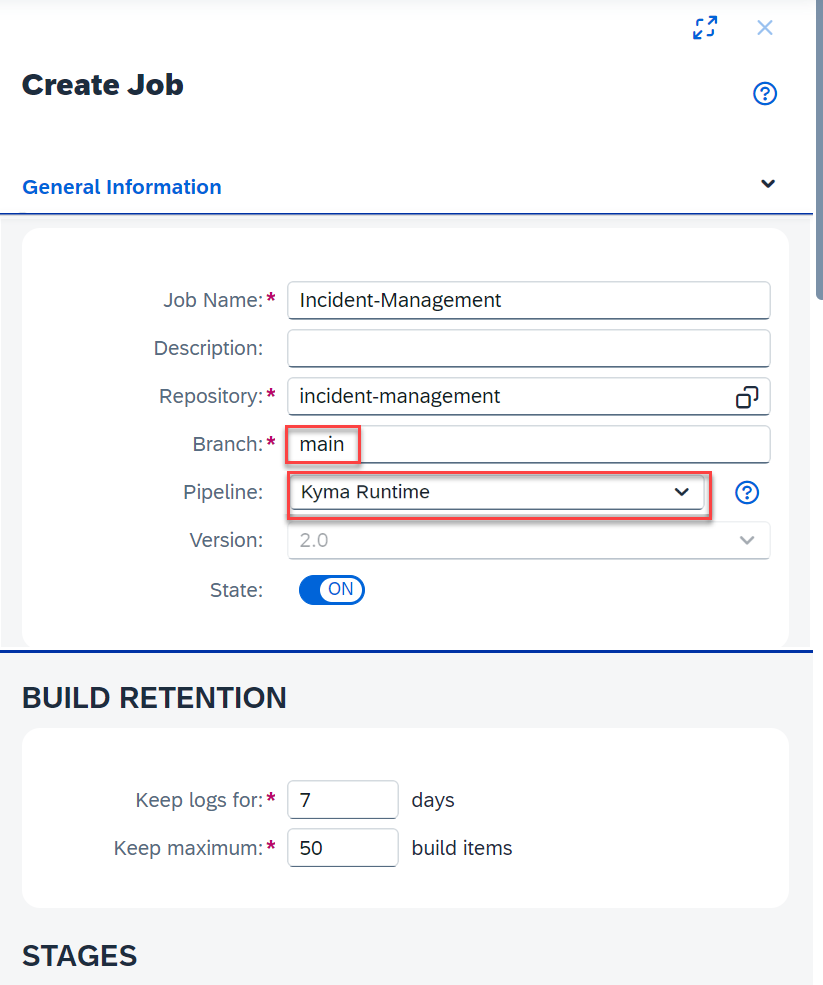
Configure pipeline In the Stages tab, enter gen/chart in the Chart Path field.
Choose + to add container images:
- Enter
<your-container-registry>/incident-management-srvin the Container Image Name field. - Enter gen/srv in the Project Subdirectory Path field.
- Choose Add.
- Choose +.
- Enter
<your-container-registry>/incident-management-hana-deployerin the Container Image Name field. - Enter gen/db in the Project Subdirectory Path field.
- Choose Add.
- Choose +.
- Enter
<your-container-registry>/incident-management-html5-deployerin the Container Image Name field. - Enter app/incidents in the Project Subdirectory Path field.
- Choose Add.

All images - Enter
Select npm from the dropdown in the Build Tool field.
Select Node 18 from the dropdown in the Build Tool Version field.
Enter cds-build in the Script field.
In the CNB Build section, enter the URL of your container registry in the Container Registry URL field (for example, https://index.docker.io if you’re using Docker Hub).
Open the value help for the Container Registry Credential field and choose container-registry-credentials.
Add unit tests and configure release
In the Additional Unit Tests section, switch the toggle button to ON.
Enter test in the npm Script field.

Add unit tests Scroll down to the Release section and switch the Release toggle ON.
Provide the required information under Deploy to Kyma:
- Open the value help for the Kubernetes Configuration Credential field and choose kube-config.
- Enter incident-management-namespace in the Kubernetes Namespace field.
- Enter incident-management in the Helm Release Name field.
- Choose + to add helm values.

Deploy to Kyma info In the Add Helm Values dialog:
- Enter xsuaa.jsonParameters in the Helm Value Path field.
- Enter xs-security.json in the Value field.
- Select file from the dropdown in the Source field.
- Choose OK.

Add Helm Values Choose Create.
Navigate to the Jobs tab and choose the icon to add a new job.
Add new job Enter Incident-Management in the Job Name field.
Add repository
Open the value help for the Repository field.
Add job name In the Select Repository popup, choose Add Repository. A popup opens.
Select Repository popup In the Add Repository popup, enter details for the repository you created in Step 1: Create a repository:
- Enter incident-management in the Name field.
- Enter your repository’s URL in the Clone URL field.
- Open the value help in the Credentials field and choose the credential github that you created in Step 6: Add credentials.
- Remove the Webhook Event Receiver section.
Add Repository popup Choose Add to complete the addition of a repository.
Complete repo addition
Configure pipeline and stages
Back in the General Information tab, enter main in the Branch field.
Select Kyma Runtime from the dropdown in the Pipeline field.
Configure pipeline In the Stages tab, enter gen/chart in the Chart Path field.
Choose + to add container images:
- Enter
<your-container-registry>/incident-management-srvin the Container Image Name field. - Enter srv/target in the Project Subdirectory Path field.
- Choose Add.
- Choose +.
- Enter
<your-container-registry>/incident-management-hana-deployerin the Container Image Name field. - Enter db in the Project Subdirectory Path field.
- Choose Add.
- Choose +.
- Enter
<your-container-registry>/incident-management-html5-deployerin the Container Image Name field. - Enter app/incidents in the Project Subdirectory Path field.
- Choose Add.
All images - Enter
Select maven from the dropdown in the Build Tool field.
Select Java 21 from the dropdown in the Build Tool Version field.
In the CNB Build section, enter the URL of your container registry in the Container Registry URL field (for example, https://index.docker.io if you’re using Docker Hub).
Open the value help for the Container Registry Credential field and choose container-registry-credentials.
Add unit tests and configure release
In the Additional Unit Tests section, leave the toggle set to OFF.
Scroll down to the Release section and switch the Release toggle ON.
Provide the required information under Deploy to Kyma:
- Open the value help for the Kubernetes Configuration Credential field and choose kube-config.
- Enter incident-management-namespace in the Kubernetes Namespace field.
- Enter incident-management in the Helm Release Name field.
- Choose + to add helm values.
Deploy to Kyma info In the Add Helm Values dialog:
- Enter xsuaa.jsonParameters in the Helm Value Path field.
- Enter xs-security.json in the Value field.
- Select file from the dropdown in the Source field.
- Choose OK.
Add Helm Values Choose Create.
You have to trigger your job manually the first time after creation. Go back to the SAP Continuous Integration and Delivery application and navigate to the Jobs tab.
Choose the Incident-Management job and choose Run.
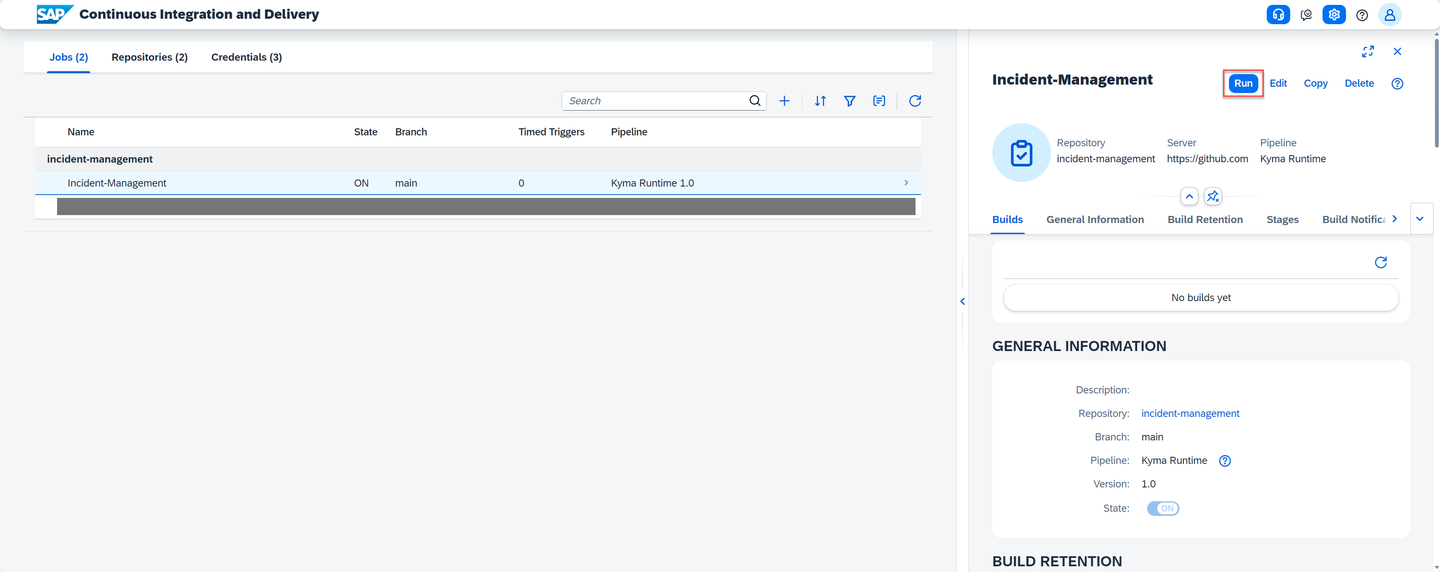
Run job Verify that a new tile appears in the Builds view. This tile is marked as running.
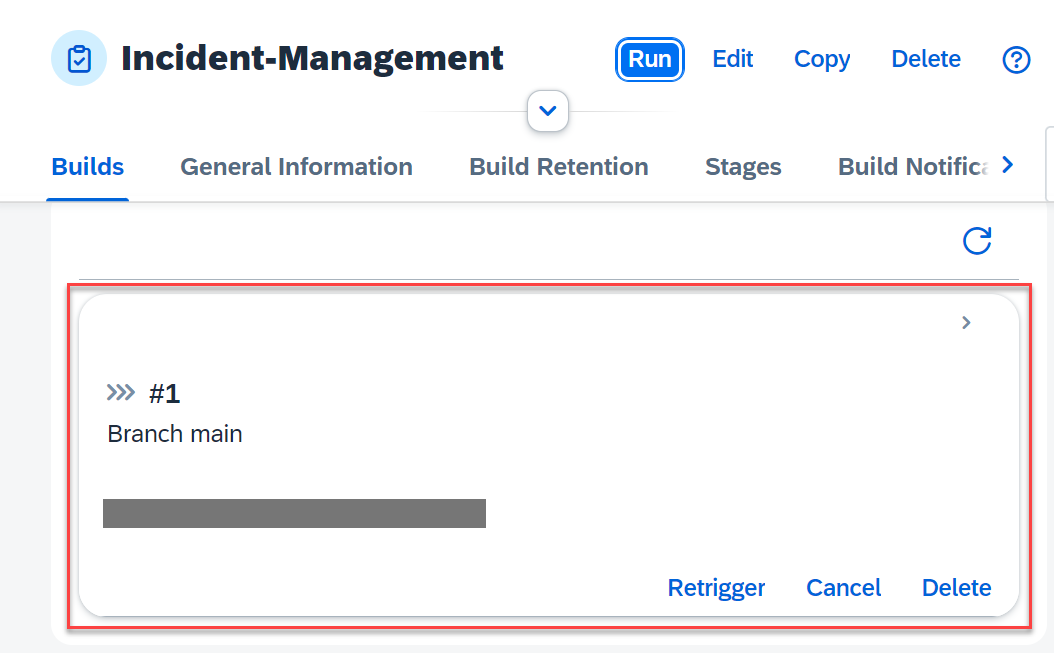
Build running Wait until the job has finished and verify that the build tile is marked as successful.
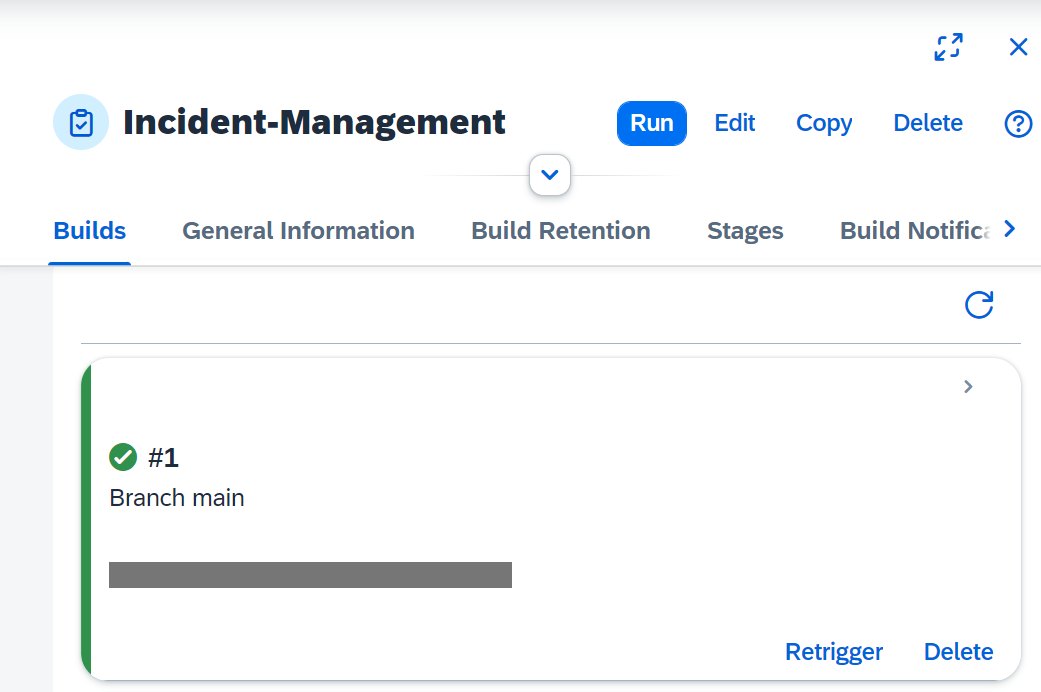
Build successful
Resources
Discussion
Share feedback on this tutorial or join the conversation in SAP Community.