
5 - Create Skill to Create / Update Shipment
Create a skill to enable the user to create a new shipment in the GTT system, or update an existing shipment.
Overview
You will learn
- How to create a skill
- How to add a condition to a skill


Prerequisites
Prerequisites
- You have completed the previous tutorial in the Joule Studio CodeJam Mission, Create Skill to Show Delayed Shipments.
Steps
Intro
The last skill creates or updates a shipment, and includes a few new things.
You will use a different action and create a different destination variable
You will use the Check Condition step to provide different messages based on whether you are adding or updating a shipment.
You will define specific output using the Send Response step.
In your project, select the Overview tab.
Click Create, and choose Joule Skill.

Create skill In the Create Joule Skill dialog, enter the following details:
Field Value Name Create ShipmentDescription A skill to create shipment or update shipment with ONLY carrier name. During update only carrier is required.Click Create.

Name skill Once the Joule skill is created, you are taken to the skill builder.
You need to tell Joule to ask the user for the details of the shipment to create, so you will create input parameters.
Click the Trigger step.
Click the Parameters tab, and next to Skill Inputs click Configure.

Configure inputs In the Configure Skill Inputs dialog, click Add Input five times and enter the following details:
Name Identifier Description Required shipmentidshipmentid Shipment ID✅ Checked srclocationsrclocation Source Location✅ Checked destlocationdestlocation Destination Location✅ Checked datetimedatetime Pick up Date - Convert this into ISO 8601✅ Checked carriercarrier Carrier Name⬜ Unchecked All identifiers are entered automatically and will be the same as the Name field.
The parameter type is automatically a string.

Add inputs Once all inputs are added, click Apply.
You need to create output an parameter so that the skill returns the shipment ID back to Joule or the agent.
Click the Trigger step.
Click the Parameters tab, and the next to Skill Outputs click Configure.

Configure outputs Click Add Ouput and add the following output parameter.
Name Description Type Required List Created Shipment IdCreated Shipment IdString ✅ Checked ⬜ Unchecked Click Apply.
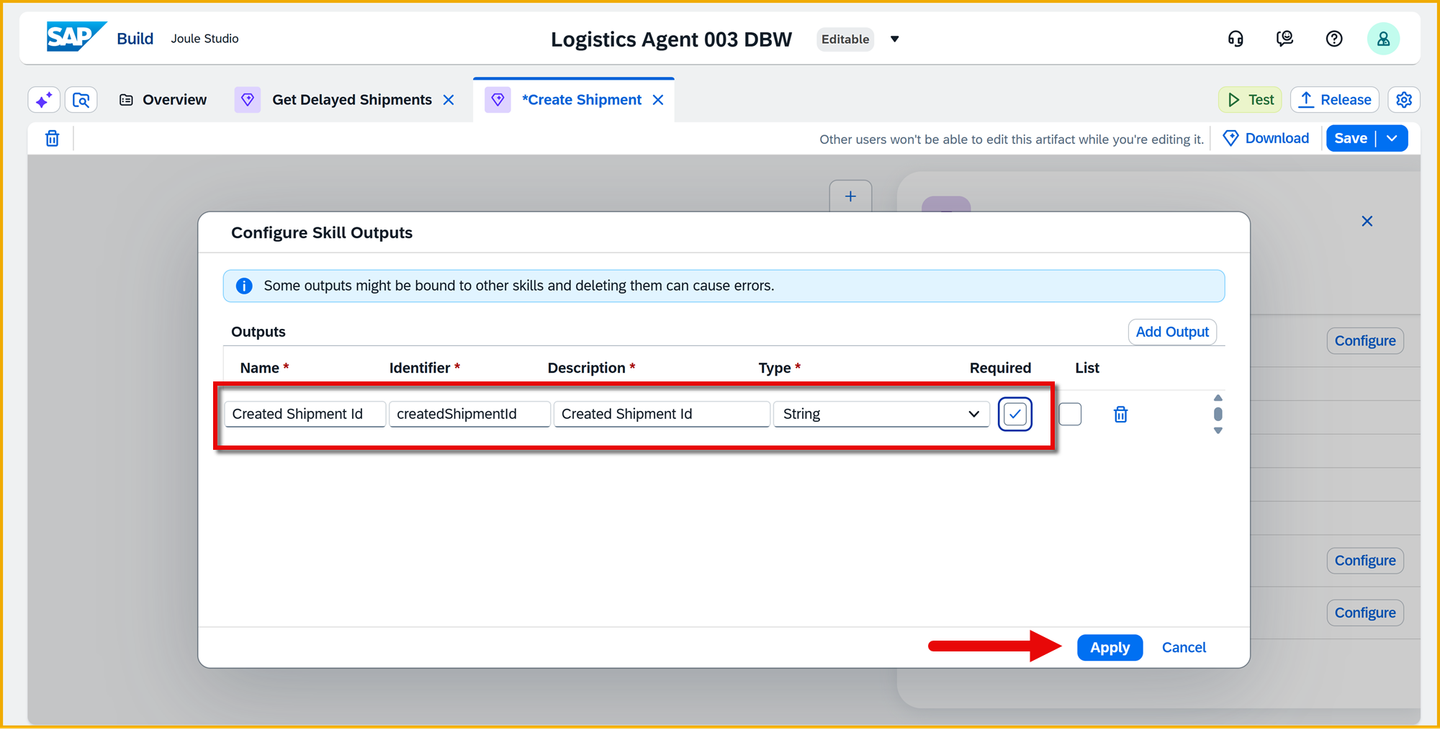
Add outputs Click Save (upper right).
Now you’ll create the action that will call the API for adding or updating a shipment.
In the skill builder, click on the + button.
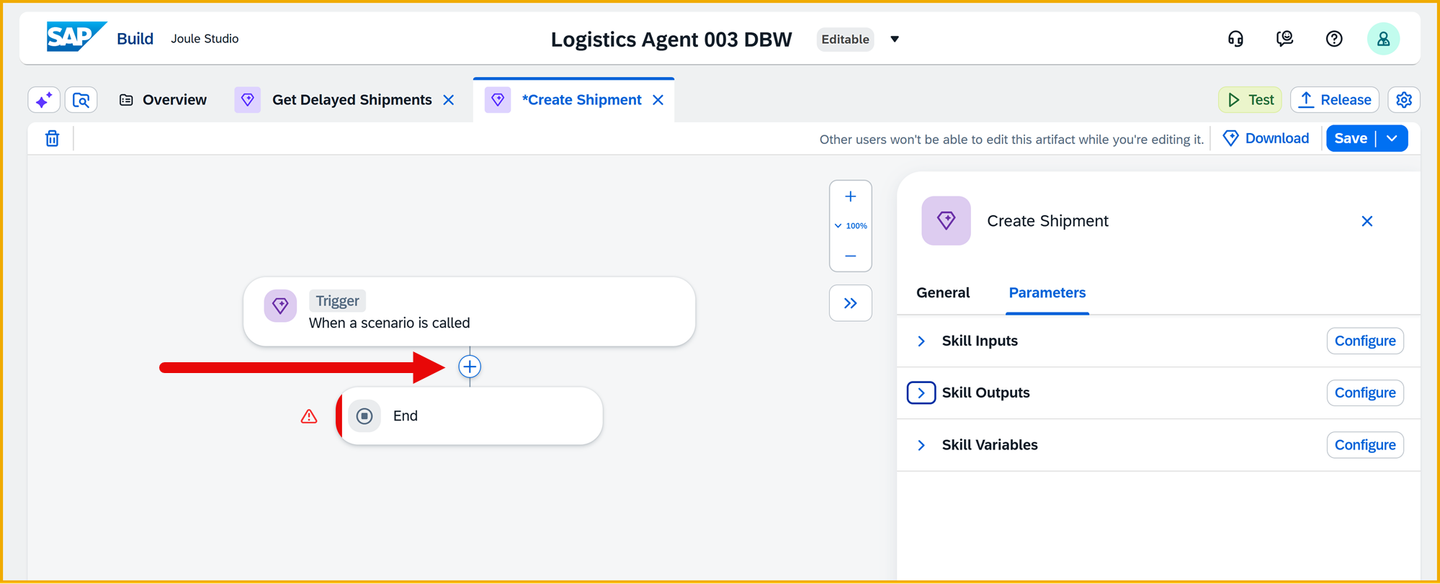
Add step Choose Call Action

Call action Click Browse All Actions, and find the action createshipment.

Browse actions If there a lot of actions, you can filter by GTTShipment (the name of the action project).
Click Add to the right of the action.
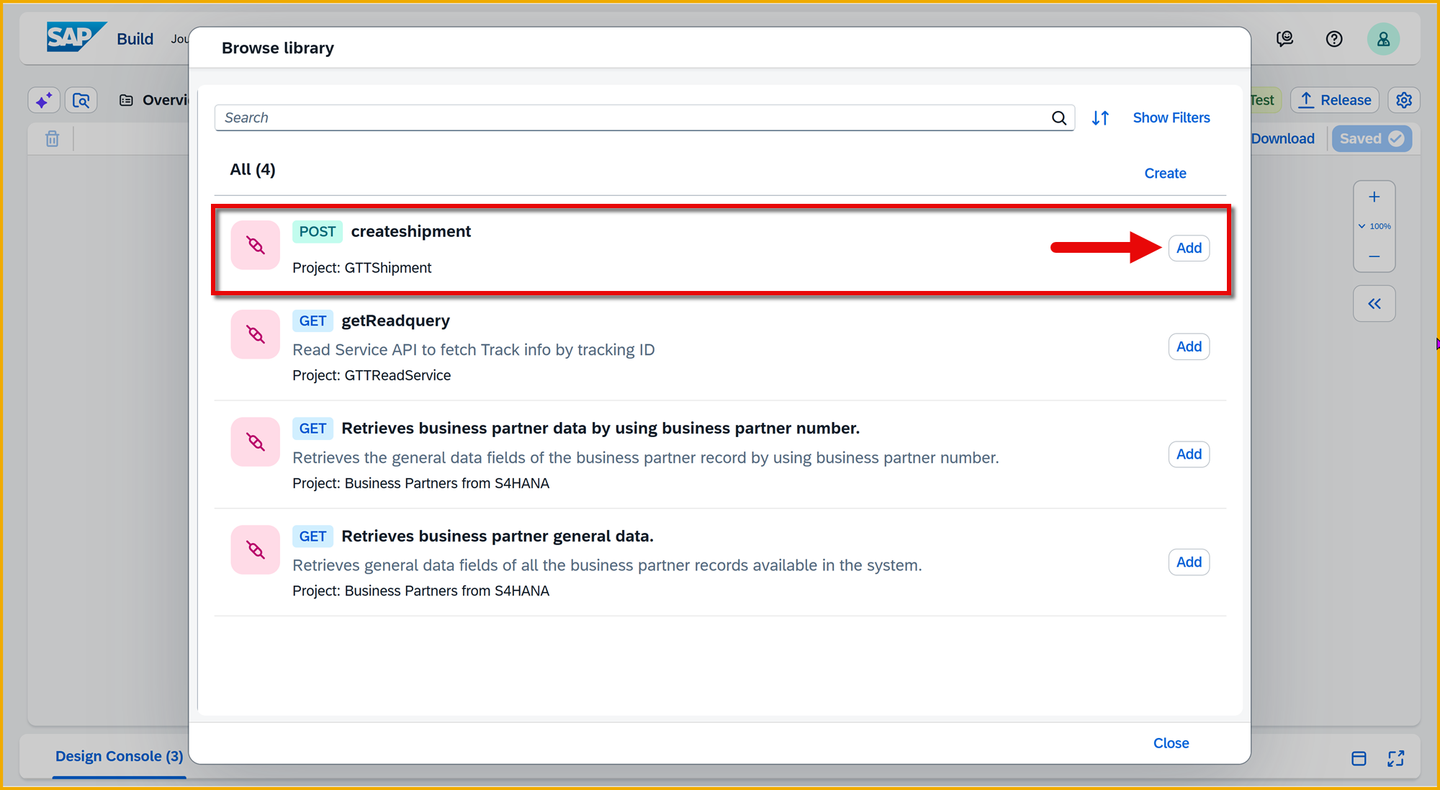
Add actions The action is added to the skill flow.
In this action, we are creating a new shipment with a POST request, and using a different destination. So we need to create a new destination variable for this action.
Make sure the action is selected.
In the first, General tab, click inside the Destination Variable field, and then click Create Destination Variable.

Add destination In the Create Destination Variable dialog, enter the following details.
Field Value Identifier PostToGTTDescription Destination to create shipment in the GTT SystemClick Create.

Name destination The variable is created but it likely will not be selected or even visible in the Destination Variable field.
Important: You may need to refresh the page, reopen the skill and reselect the action to see the new variable.
Select the new PostToGTT variable for the action.

Select destination
You need to pass the input parameters into the input fields of the action.
Make sure the action is selected.
Select the Inputs tab.

Input tab Bind the action inputs from the skill inputs.
Field Name Mapped Path or Value actualBusinessTimestamp Select Skill Input > datetime altKey Apply a Formula ConcatenateStrings(["xri://sap.com/id:LBN#10020007892:EWWCLNT220:FT1_SHIPMENT:", <Skill Input-shipmentId>], "")Replace the “Skill Input-shipmentId” placeholder with the skill input binding for shipment ID.The formula should look like this:
Input arrivalLocationId Select Skill Inputs > destlocation departureLocationId Select Skill Inputs > srclocation plannedArrivalDateTime 2026-03-31T16:30:00+02:00plannedDepartureDateTime Select Skill Input > datetime serviceAgentLbnId Select Skill Inputs > carrier shipmentNo Select Skill Inputs > shipmentid Click Save (upper right).
You created the output parameters to send data back to Joule or the agent. Now we need to supply the data.
Click the End activity, and click in the Created Shipment Id field.

End binding For Created Shipment Id output parameter, map it to Skill Inputs > shipmentid.

Binding shipment ID Click Save (upper-right).
You will now create a condition branch in the Skill builder to check if a carrier exists for the shipment (update) or you are creating a fresh shipment without a carrier.
In the skill builder, click on the + button after the action.
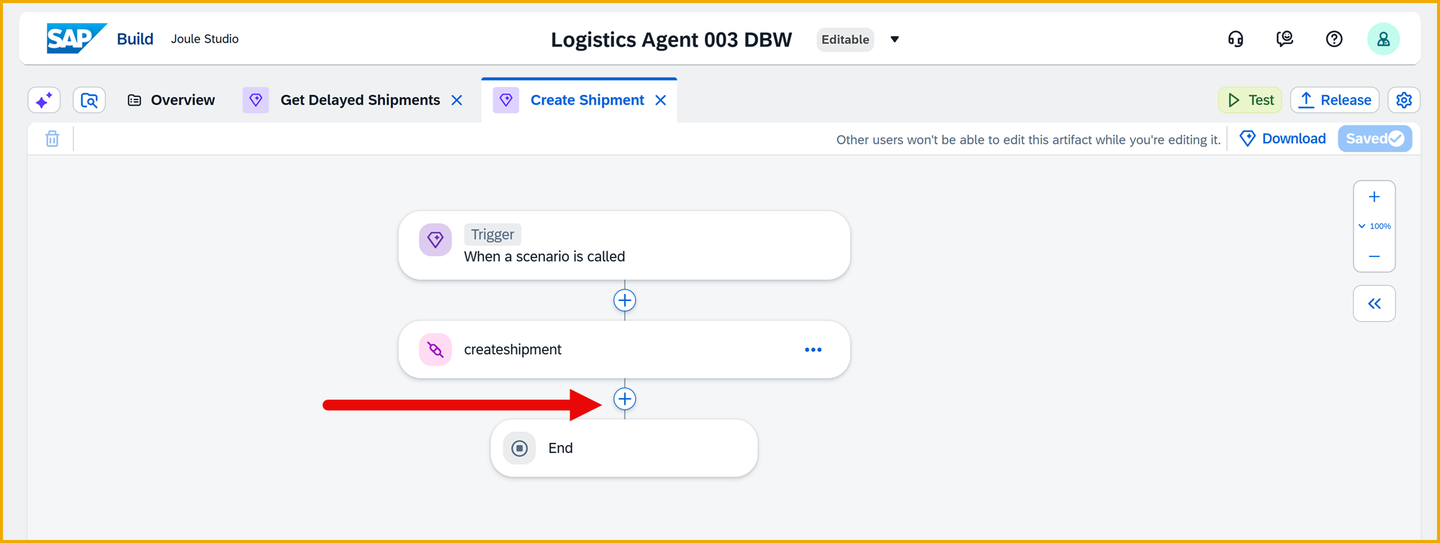
Add step Choose Check Condition.

Check Condition In the right-side panel for the condition activity, name the step Is Carrier ID Empty?.

Name Condition Click Open Condition Editor.

Open condition editor In the Edit Branch Condition dialog, do the following:
Click the first input field and select the skill input carrier.
Click the second field, a dropdown box of conditions, and select is empty.
Click Apply.

Add condition Open the condition activity, so you can see parallel paths.
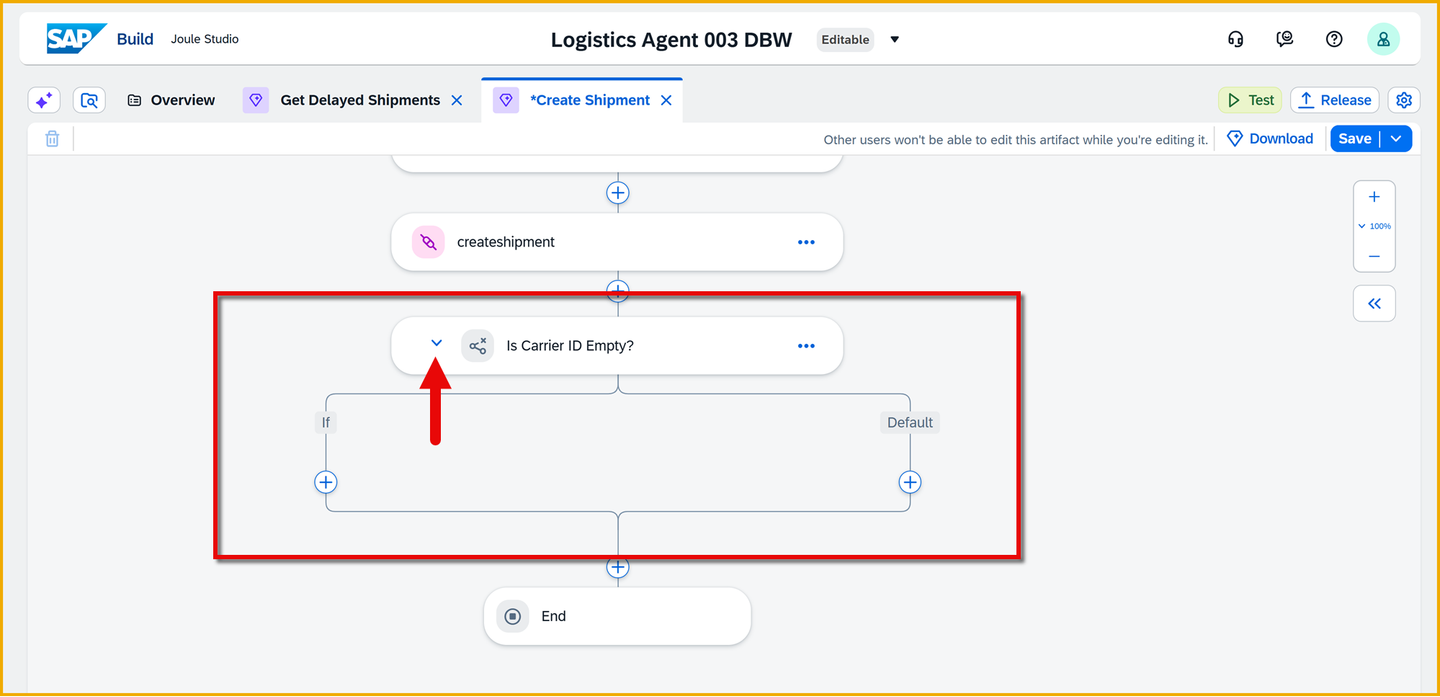
Open condition
A Send Message step enables you to send a personalized and pre-defined message to the end user instead of letting Joule design the message as it sees fit.
You will create two Send Message steps, one for each of the condition branches created in the previous exercise.
In the If branch (left), click the + button.
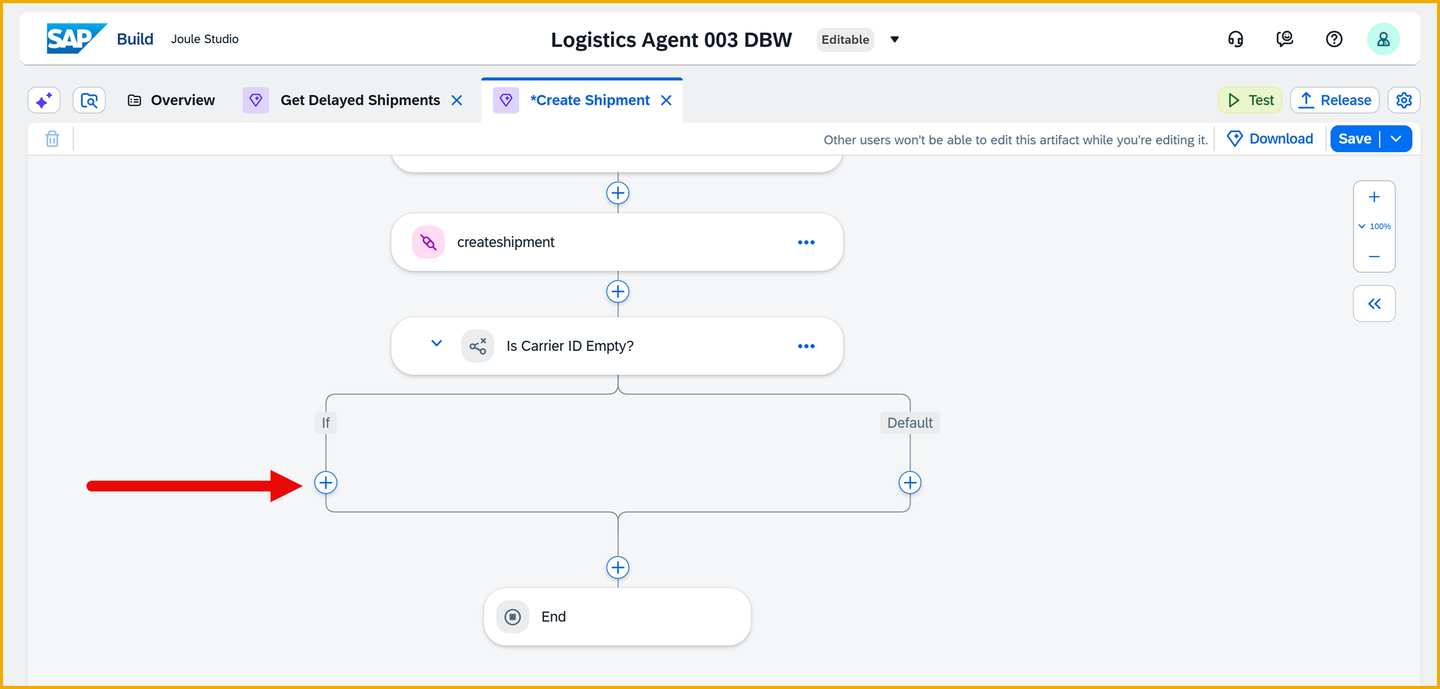
Add step Select Send Response.

Send Response Click Send Message

Send Message Select the Send Message on the If branch, and name it Create Shipment Message (i.e., set the Step Name field).
Open Message Editor on the right-side panel.

Open Message Editor Set the following configuration:
Field Name Value Message Type Illustrated Message Title SuccessText Shipment Id ${context.startEvent.shipmentid} created successfully in GTTIllustration Success High Five For the Action Button section, click Add Button and enter the following details:
Field Name Value Title View Shipmenturl https://store-content-dev.gtt-flp-lbnplatform.cfapps.eu10.hana.ondemand.com/cp.portal/site?sap-language=en#Shipment-track?sap-ui-app-id-hint=com.sap.gtt.app.sts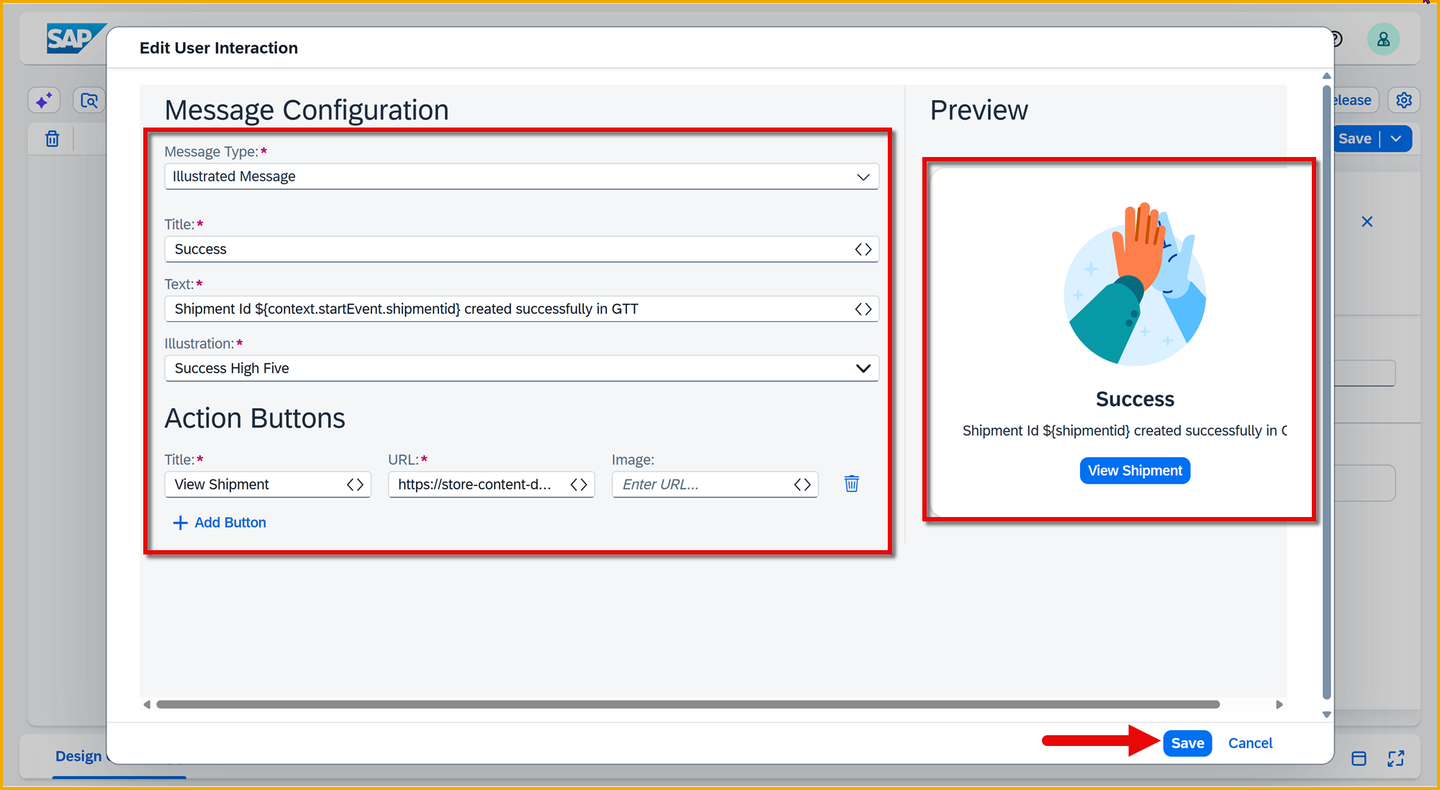
Configure message IMPORTANT: You will not be able to directly access the GTT system due to restricted authorization. Ask your instructor to show you the created shipment in the GTT system, or run the track shipment skill/agent.
In the Preview area on the right, you can see how the message will look.
Click Save.
In the Default branch (right), click the + button.

Add step Select Send Response, and then Send Message.
Select the Send Message on the Default branch, and name it Update Shipment Message (i.e., set the Step Name field).
Open Message Editor on the right-side panel.

Open Message Editor Set the following configuration:
Field Name Value Message Type Illustrated Message Title SuccessText Carrier ${context.startEvent.carrier} has been updated for Shipment ${context.startEvent.shipmentid}Illustration Success Check Mark For the Action Button section, click Add Button and enter the following details:
Field Name Value Title View Shipmenturl https://store-content-dev.gtt-flp-lbnplatform.cfapps.eu10.hana.ondemand.com/cp.portal/site?sap-language=en#Shipment-track?sap-ui-app-id-hint=com.sap.gtt.app.stsConfigure message IMPORTANT: You will not be able to directly access the GTT system due to restricted Authorization. Ask your instructor to show you the created shipment in the GTT system.
Click Save.
Click Save (upper right).
Click Test in the upper-right.
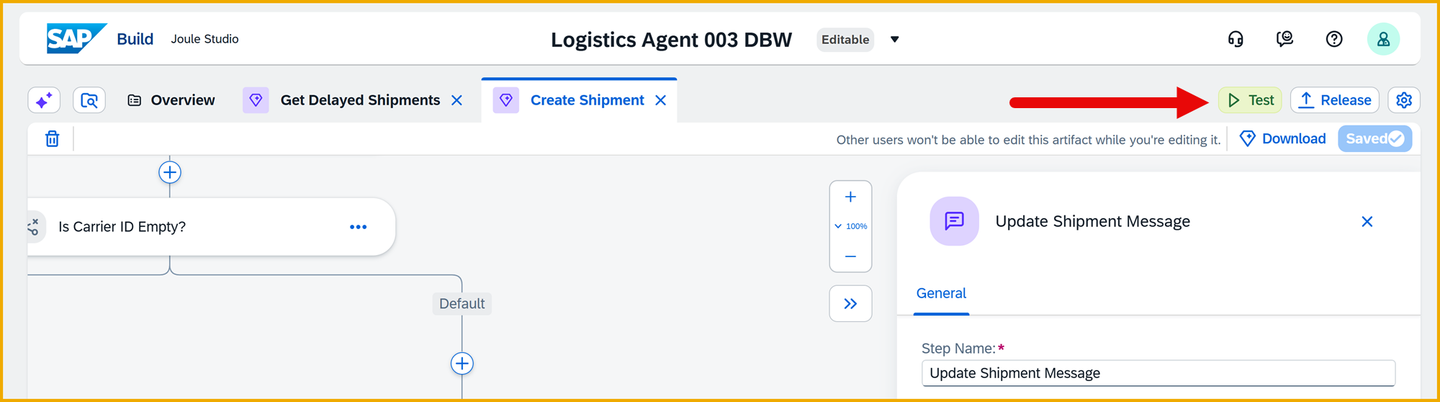
Start test The Test Project dialog should now require an additional environmental variable, while the others should already be populated with the correct details.
Set the following values:
Field Value Environment Select the email address of your user Environment variables > GetFromGTT Select gttGetService Environment variables > PostToGTT Select gttwriteservice Click Continue.

Test variables A new browser tab opens with Joule.
As a prompt, enter:
ShellHello Joule, Could you please assist me in creating a Shipment?Joule will trigger your Create Shipment skill but required parameters will be missing. Joule will prompt you for them.

Prompt for details Enter the following prompt, changing the shipment ID to 91001<user number><your initials>, for example,
91001002DBW(or any unique string):ShellShipment ID: 91001<User number><your initials> Source Location: SFO Destination Location: NYC Pick-up Date and Time: December 15, 2025 5:00:00 PM CETJoule will create a new shipment in the GTT system.
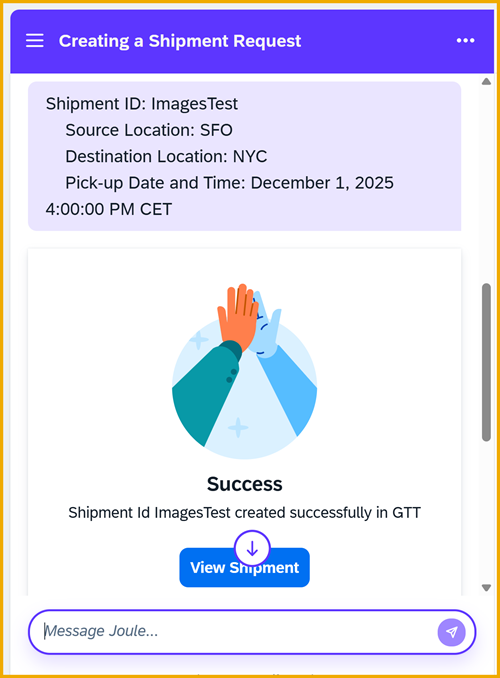
Shipment created You can check if it was created by entering a prompt to track the shipment (change the shipment ID to the one you created).
ShellTrack the shipment 91001<User number><your initials>Joule will respond with the shipment you created.
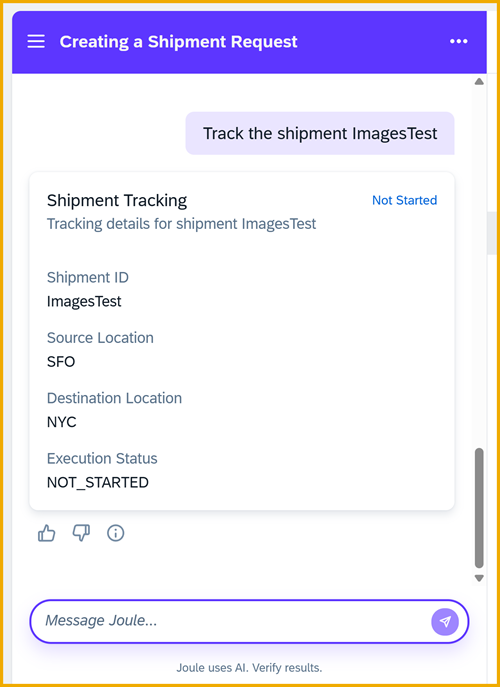
Shipment created If no such shipment exists, Joule would tell you that it cannot help you.
Update the shipment by typing the following prompt.
ShellUpdate the Shipment ID: 91001<User number><your initials> with the carrier Fly By Night. All other values remain the same.Joule will respond with the update message you created.

Shipment updated Feel free to track the shipment again.
Once you are done testing, click Stop Testing.
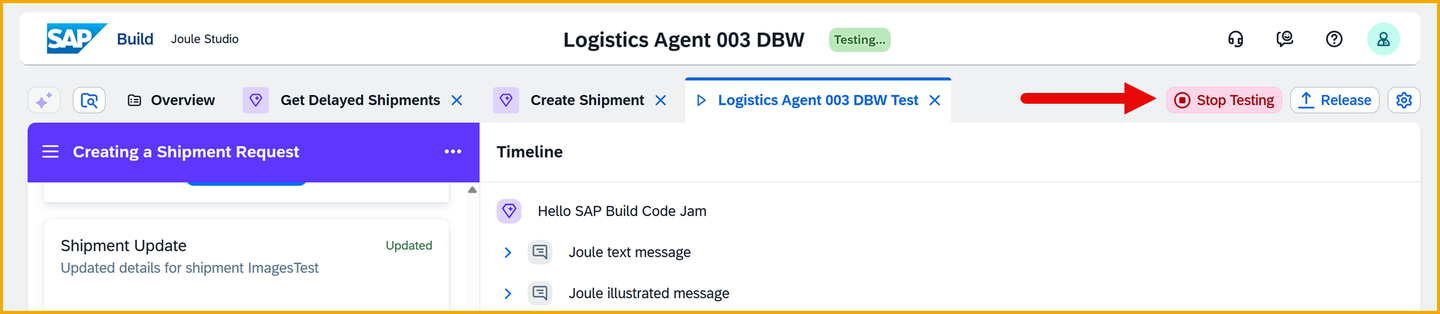
Stop testing
What is the code doing in the Text field of the messages?
What options do you have for comparing values in the condition step?
When I try to track a shipment that does not exist, why does Joule just say I cannot help you?
Resources
Discussion
Share feedback on this tutorial or join the conversation in SAP Community.