
Overview
You will learn
- How to create an application with the wizard for the SAP Cloud Application Programming model
- How to use the local Git repository for development/testing purposes


Prerequisites
Prerequisites
- This tutorial is designed for SAP HANA Cloud. It is not designed for SAP HANA on premise or SAP HANA, express edition.
- You have created a BTP, SAP HANA Cloud instance. Deploy SAP HANA Cloud
- You have setup SAP Business Application Studio for development: Set Up SAP Business Application Studio for Development
Steps
Video Version
Video version of tutorial:
Dev spaces are like isolated virtual machines in the cloud that can be quickly spun-up. Each dev space type contains tailored tools and pre-installed run-times for a target scenario such as SAP Fiori or mobile development. This simplifies and saves time in setting up the development environment as there’s no need to install anything or upgrade; letting developers focus on their business domain, anytime, anywhere.
In this step we will create a new Dev Space configured for SAP Cloud Application Programming Model (CAP) development. If you already have a dev space configured for CAP and HANA development, you can skip this step as each dev space can hold multiple projects.
Go to your SAP Business Technology Platform subaccount and click the Services -> Instances and Subscriptions option.
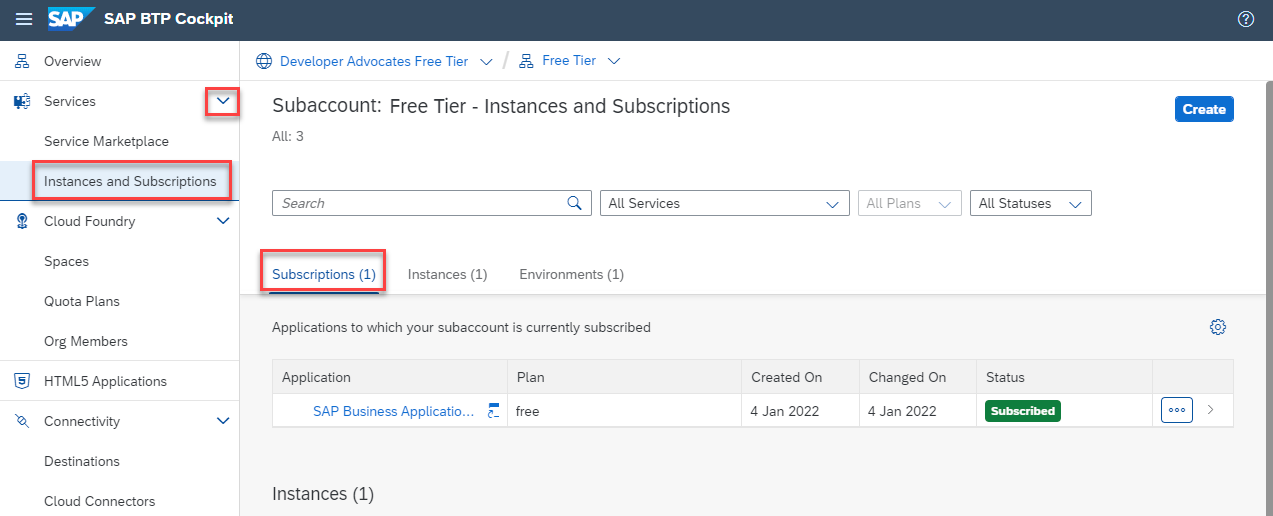
Subscriptions Locate the SAP Business Application Studio entry and click Go to Application

Go To Application Choose Create Dev Space. Please NOTE: In the SAP BTP trial and free tier you are limited to only two Dev Spaces and only one can be active at a time. If you have performed other tutorials, you might already have reached your maximum. In that case you might have to delete one of the other dev spaces in order to continue with this tutorial.
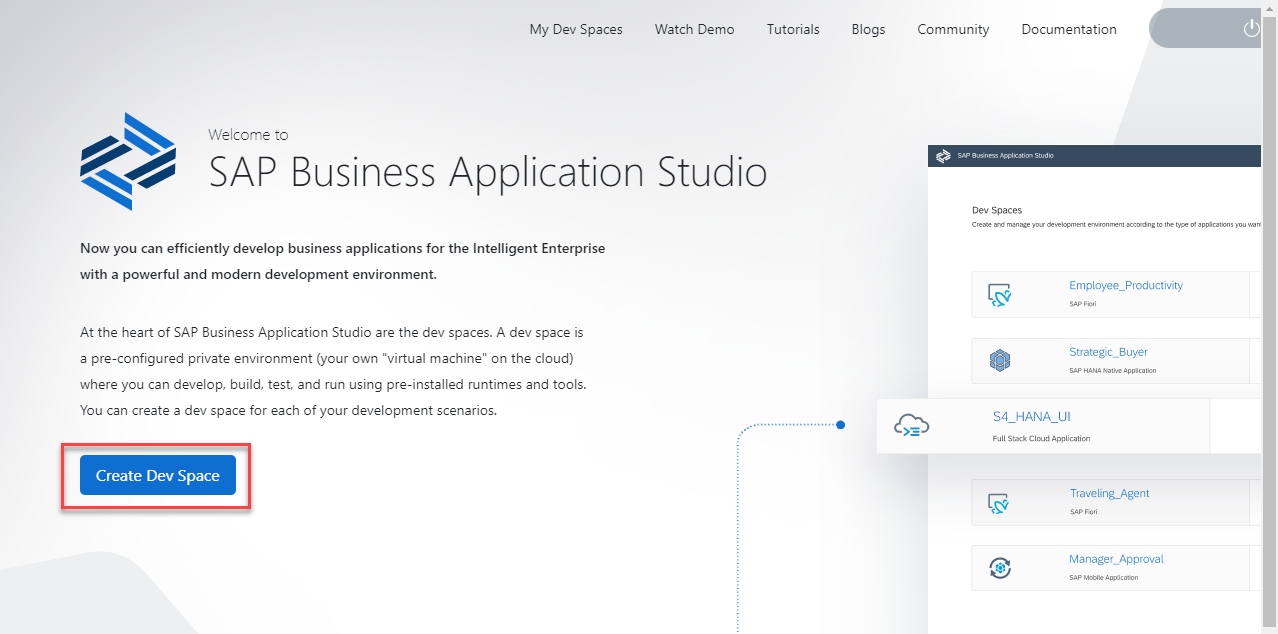
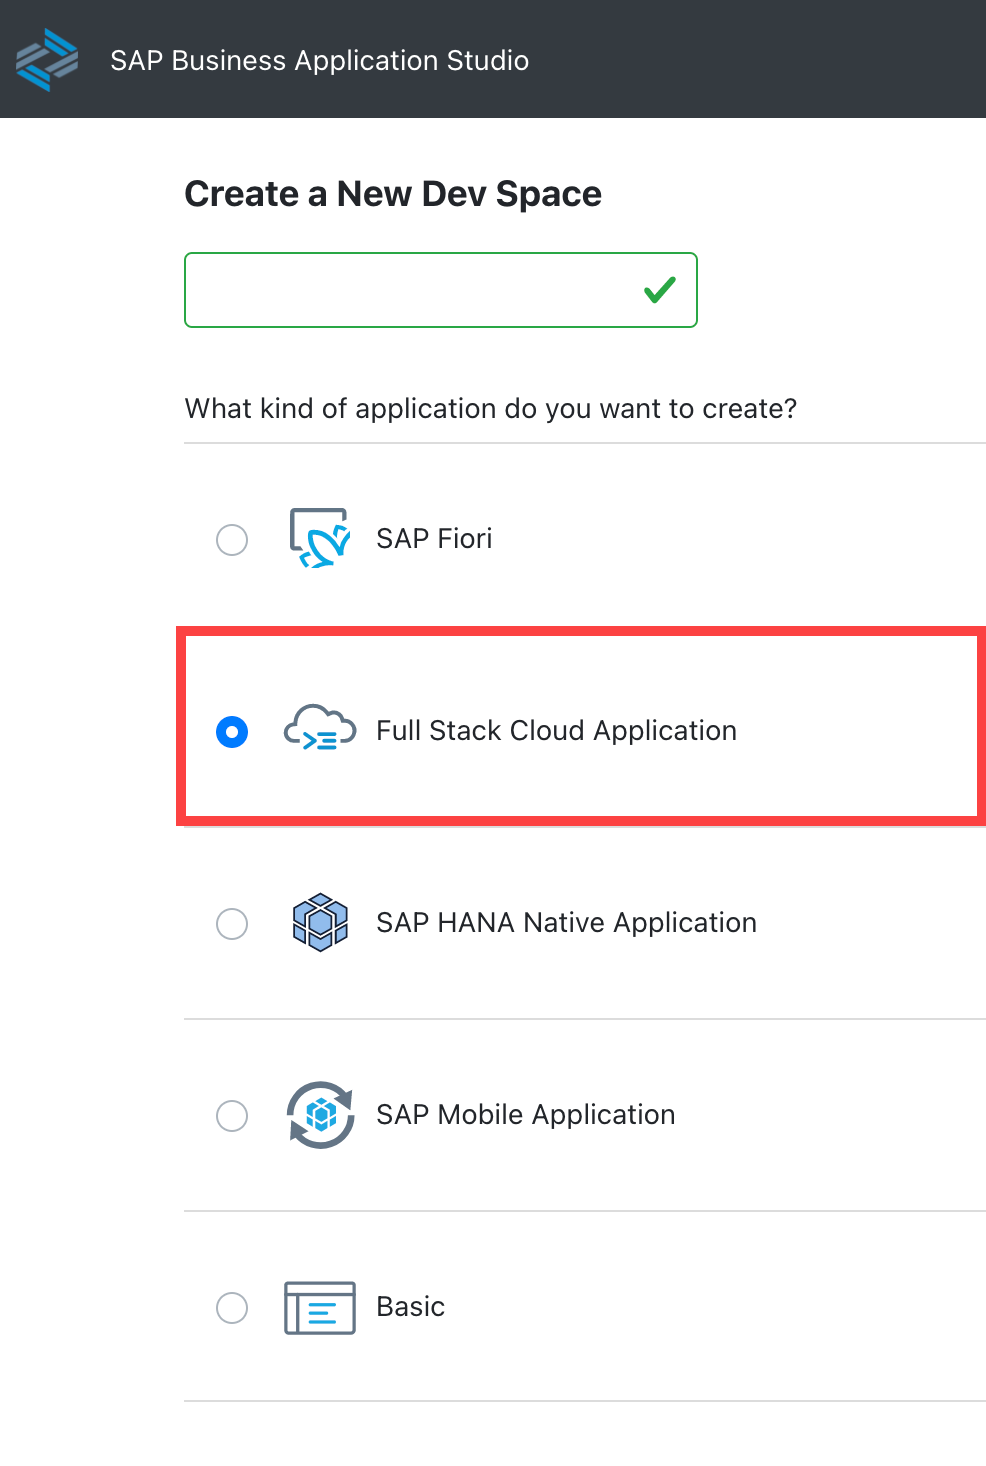
Create Dev Space Enter any name you wish for your dev space name and choose Full Stack Cloud Application as the kind of application you are creating.
Create Dev Space The Dev space will automatically be configured with the most common tools you need for the type of application you choose. However you can also choose additional, optional extensions. Since you want to combine CAP and HANA artifacts in the same project, we would ask that you also choose SAP HANA Calculation View Editor and SAP HANA Tools at minimum.
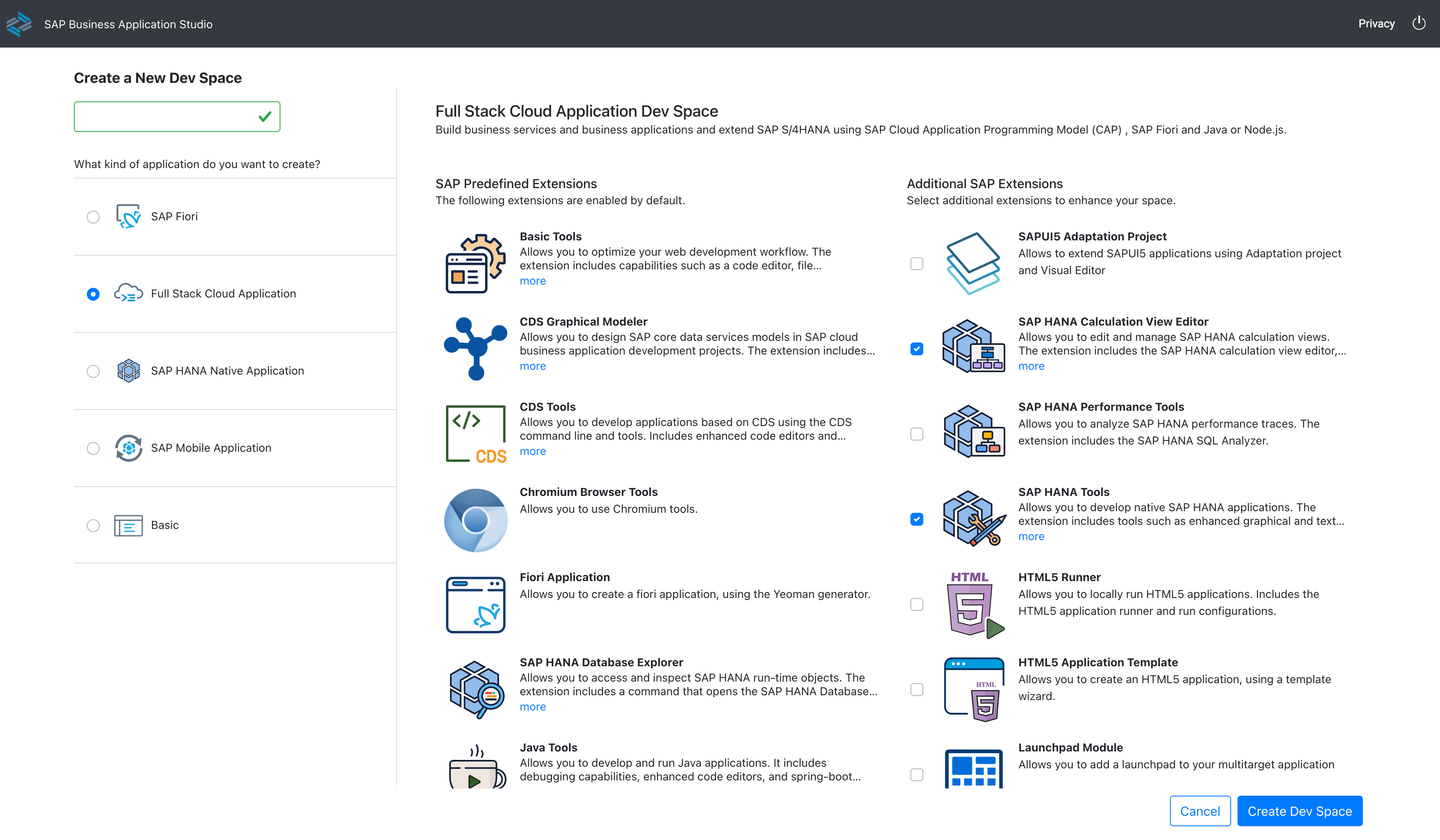
Configure Dev Space Once all selections are completed, press Create Dev Space
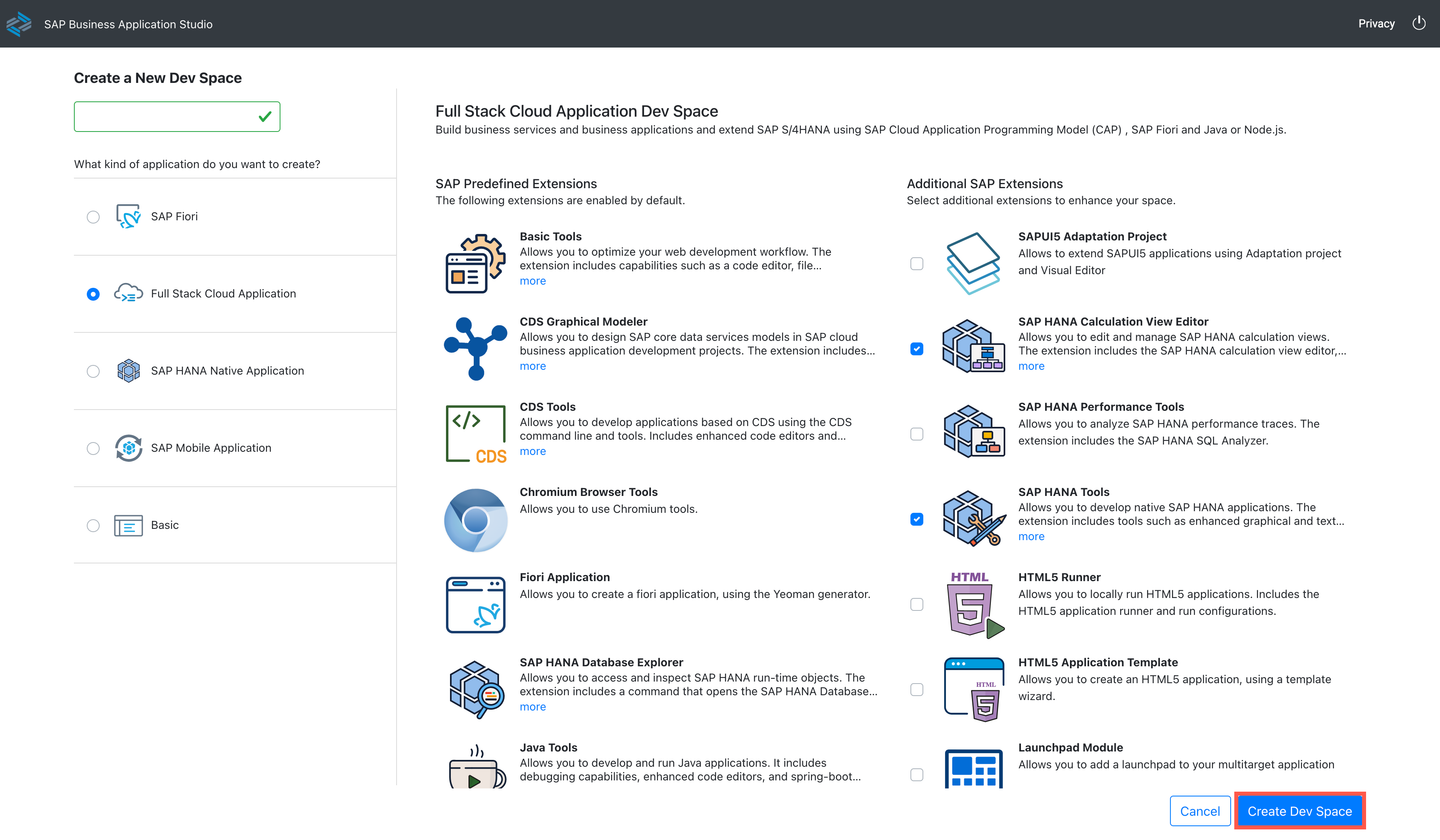
Press Create Dev Space The Dev Space will then begin starting and the process will take a minute or so as your cloud environment is being created
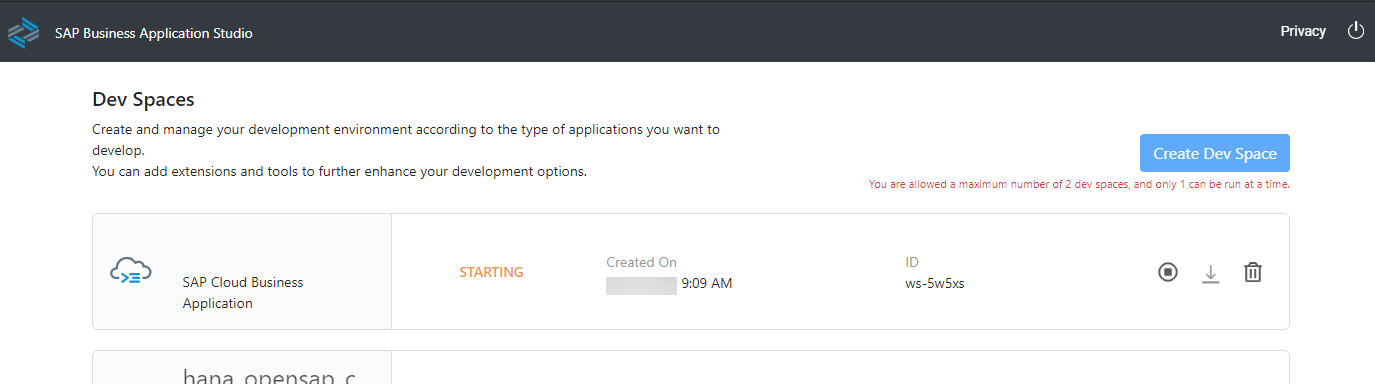
Staring Dev Space Once the Dev Space reaches the green status of RUNNING, you can click on the name of the Dev Space and it will load into the editor within your browser
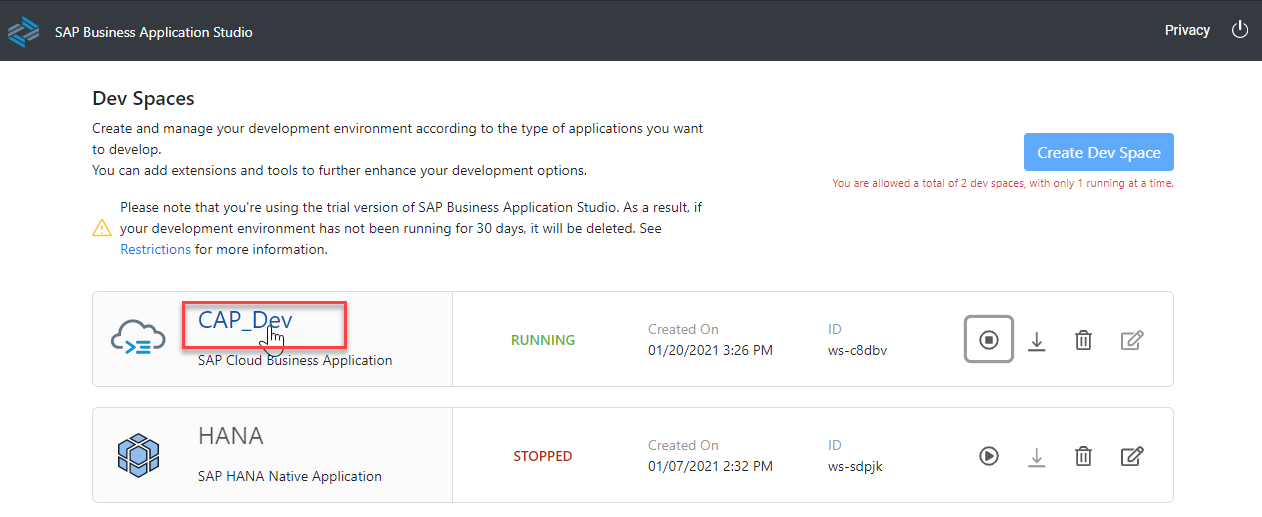
Dev Space is Running You’ll be redirected to your newly created SAP Business Application Studio Dev Space. We recommend you bookmark this URL so it’s easier for you to access this dev space of your SAP Business Application Studio in the future

Business Application Studio is running
Before we create our SAP HANA project, we want to do a few more one-time configuration steps to prepare the Dev Space
In the left side of the Business Application Studio click on the Cloud Foundry targets icon. Depending upon your screensize this option might be behind the expansion three dots (…).

CF Not Set Now in the Cloud Foundry Targets window you can expand either Service or Applications and then click on the Logon icon to continue the configuration process

Login Required The Cloud Foundry Sign In and Targets window will then open in a side panel of the SAP Business Application Studio. The first input will prompt you for the API endpoint and your credentials
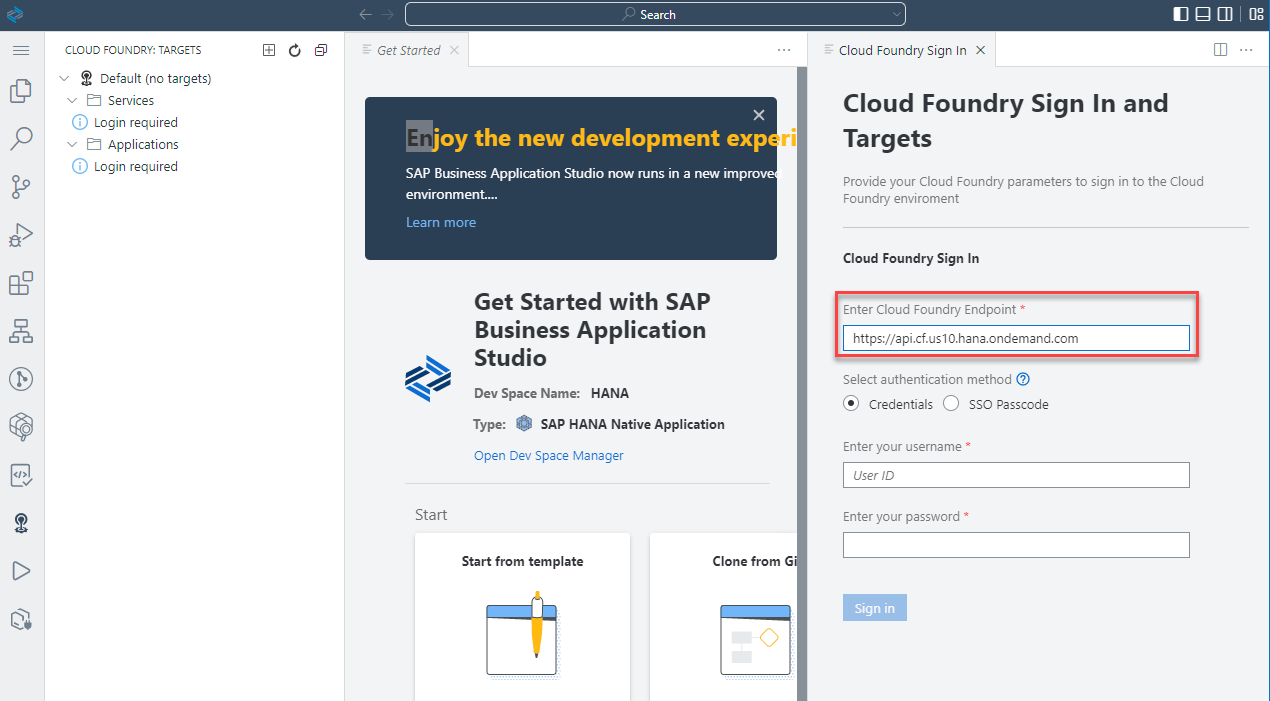
API Endpoint The default value proposed is not necessarily the correct value, please confirm. The value can be found in the SAP BTP cockpit at the Subaccount level

Finding the API Endpoint Once you have verified the API endpoint, input the email address you used to create your SAP BTP account and password and press Sign In.

Email If successful, the next input will ask you for your Organization. In most situations you will have a single choice. But like the API endpoint earlier, if you need to confirm the correct value it will be displayed in the top navigation of the SAP BTP cockpit
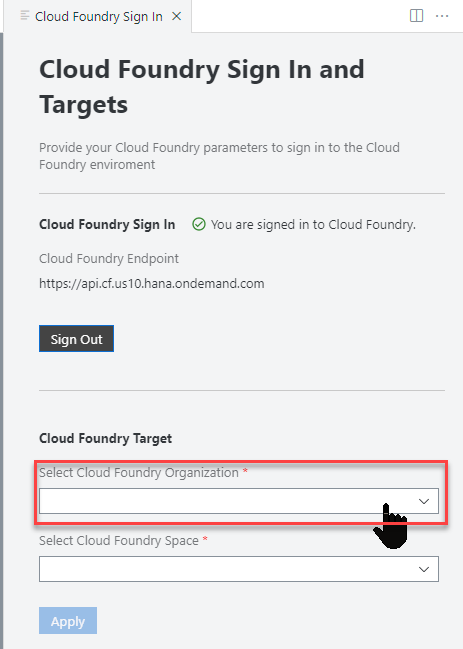
Organization The final input will ask you for your Space. Press Apply.
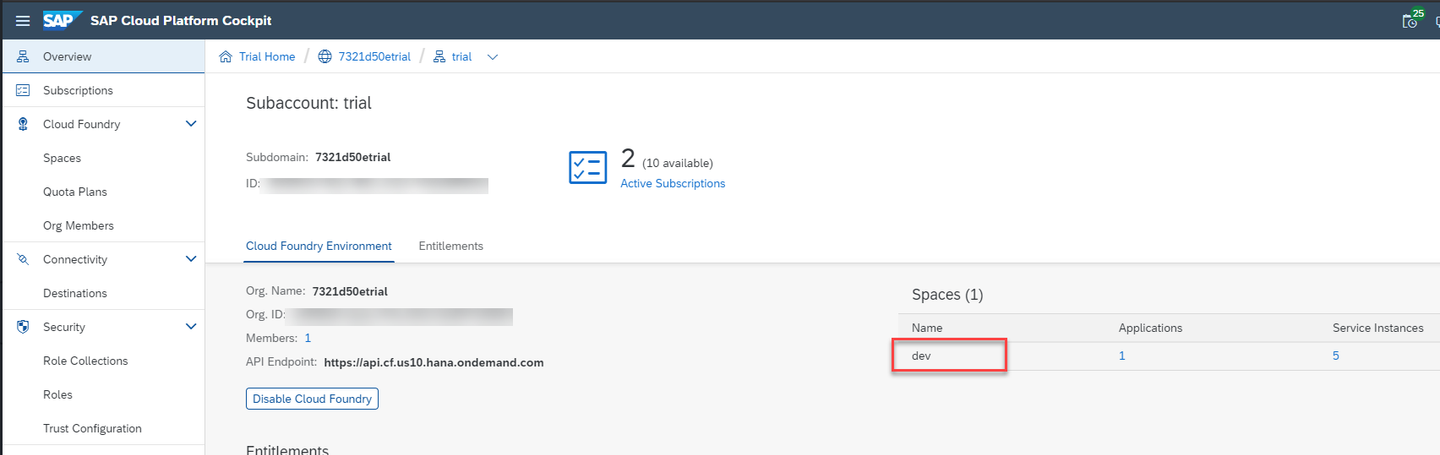
Space Upon completion of all the inputs, you should see that the Organization and Space have been set and you will see any service instances or application instances from the target space. It’s normal to see less options in this tree display than the screenshot depending upon how much other development you might have already done in your BTP account.

Org and Space Set Correctly
Return to the Explorer view. From the SAP Business Application Studio Welcome tab, click New Project from Template.

New project from template Choose CAP Project and click Start

Choose CAP Project Use the following name for your project and click Next
NameMyHANAAppThis name will be used in different steps. It is recommended that you do not change it unless you remember to replace it in future tasks.

New CAP Project Name Choose
Node.jsas the runtime. SelectSAP HANA Cloudfrom the database for your application section. ChooseCloud Foundry:MTA DeploymentandCI/CD Pipeline Integrationunder which way to deploy your project. ChooseSAP BTP Authorization and Trust Management Service (XSUAA)andSAP Application Routerfrom the productive runtime capabilities for your application section. Press Finish
New CAP Project Details The new project should be added to your workspace automatically.
The wizard has generated a Multi-target Application with two modules: a database module and a service module. Expand them to familiarize yourself with the basic folder structure.

New CAP model project structure The wizard has also populated the
mta.yamlconfiguration file with the necessary dependencies and parameters for each module. Open it in the code editor by right mouse clicking on it and using the Open With menu option to explore it.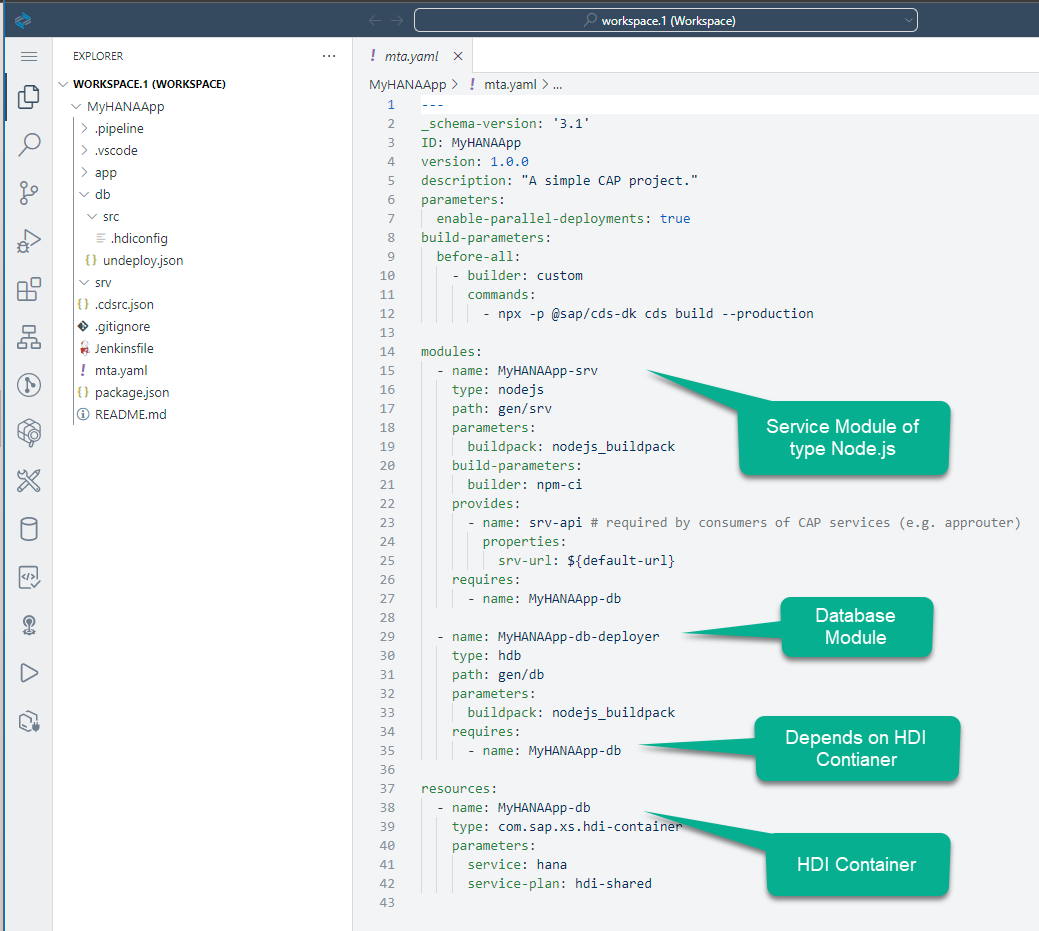
New CAP model project mta.yaml explained This file is the deployment descriptor and it is the glue that keeps all the micro-services together as a single application throughout its lifecycle. It declares the modules (applications or micro-services) and their dependencies with other micro-services or backing services. You can also use this file to inject variables into the environment variable
VCAP_SERVICESof your application.This file is very sensitive to indentation and does not allow for tabs.
We are using several dependent Node.js modules in our project. They are referenced in the dependencies section of the package.json file we were just editing. These dependencies need to be installed into your project before we can do any testing.
Open a new terminal

New Terminal The terminal will open in the bottom right of the Business Application Studio

Terminal in BAS From the terminal run the command
npm installShellnpm install
npm install We will use an open source sample utility called hana-cli to help with development tasks. From this same terminal window run the command
npm install -g hana-cliin order to install it for later usage.Shellnpm install -g hana-cli
You will use the local Git repository for basic version management.
Click on the Source Control icon
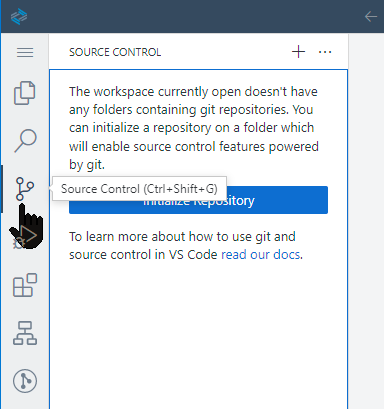
Source Control Click on the Initialize Repository icon

Initialize Repository The Source Control panel now shows that it is being managed by Git and changes are being tracked

Source Control: GIT
Each time you commit to the local or remote repository, you create a version. This will allow you to revert and compare any changes. It is recommended that you perform commits at the end of each tutorial.
Choose Changes -> Stage All Changes to include all the new or changed files in this commits

Stage All Add a commit message and click Commit All (Signed Off):
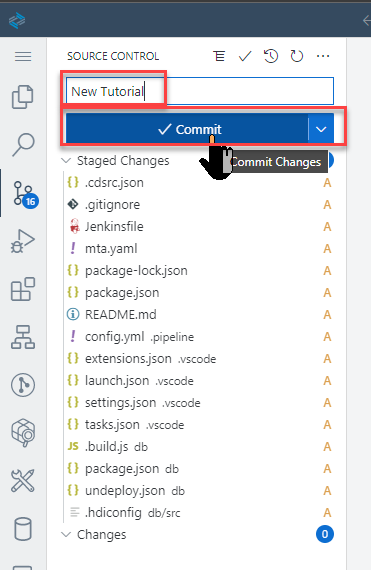
Commit
For a real project it is recommended to set a remote repository, for example GitHub. This will allow you to have a copy of your code outside the SAP Business Application Studio Dev Space.
Resources
Discussion
Share feedback on this tutorial or join the conversation in SAP Community.