
Overview
You will learn
- How to expose a Web Dynpro ABAP backend application to your site In this tutorial, you’ll use the Content Manager in SAP Build Work Zone, standard edition to add a Web Dynpro ABAP app to your site.


Prerequisites
Prerequisites
- You have created a destination in SAP BTP cockpit to the SAP Gateway Demo system
- You have subscribed to the SAP Build Work Zone, standard edition and created a site
- If you’re working with Spaces and Pages, you’ve created a space and a page and assigned the space to a role as described in this tutorial: Create a Space and a Page and Add Apps
Steps
To get to the Content Manager, click Service Marketplace in the left navigation panel of your subaccount and in the search box, enter
SAP Buildto find the SAP Build Work Zone, standard edition tile. Then click the tile.
Click subscriptions Under the Application Plans tab on the right, click the Actions icon (…) and click Go to Application.

Go to application In the side panel, click the Content Manager icon to open the Content Manager.

Open content manager
In the Content Manager, click + New and then select App from the list.

Create new app Enter a title for the app
Search POs.
Enter a title In the Configuration tab, enter these values:
Field Value Open App In placeSystem Select the value ES5- if you’re taking part in a workshop, please use your unique destination:<unique_id>_ES5.App UI Technology Select Web Dynpro ABAPApplication ID S_EPM_FPM_PO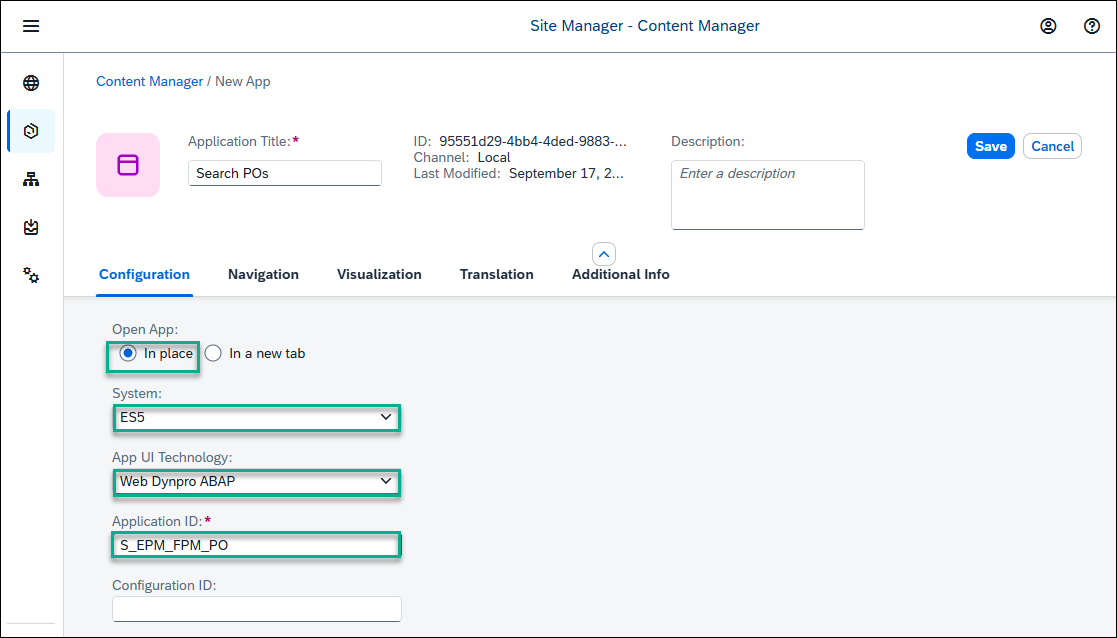
Add app properties In the Navigation tab, enter these values:
Field Value Semantic Object S_EPM_FPM_POAction Display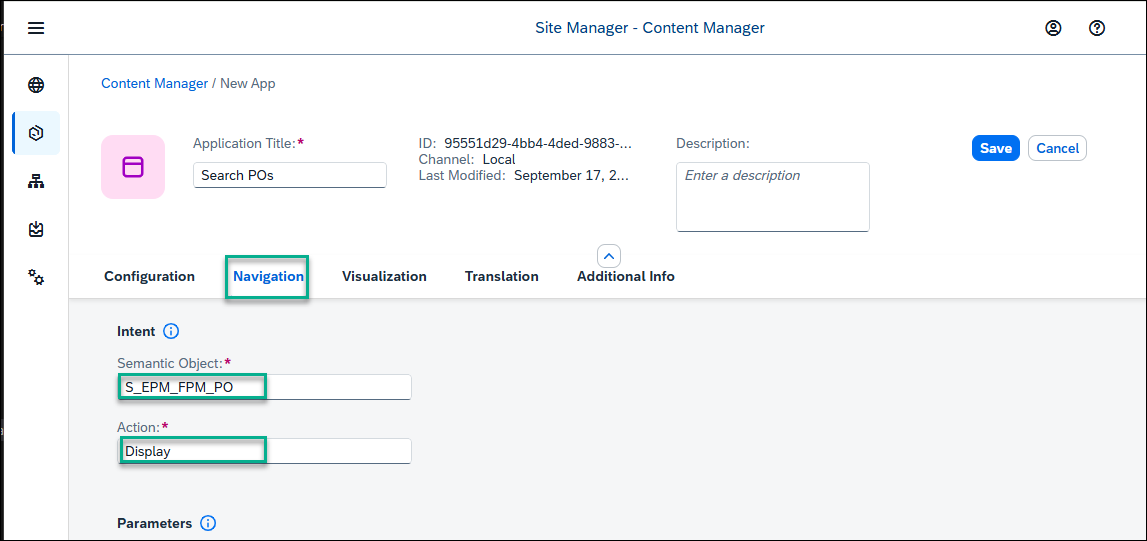
Add navigation properties In the Visualization tab, enter these values:
Field Value Subtitle Search for Purchase OrdersIcon Click the browse icon, type activity-2. You’ll see two icons. Click the first one to add it to your tile.Click Save.

Add visualization properties
Use the breadcrumbs at the top to go back to the Content Manager.

You can see your Web Dynpro ABAP app in the list:

In the next steps, we’ll make the app visible for users. To do this, we need to assign the app to a role (the same role that the user is assigned to). Depending on which view mode has been set in the Site Settings screen, we also need to add the app to a page if you’re working in Spaces and Pages - New Experience mode. If you’re working in Groups mode or in Spaces and Pages mode, then you’ll assign your app to a group.
Here’s a view of the Site Settings screen with the different view modes. In this tutorial we’ll be working in the Spaces and Pages - New Experience mode.
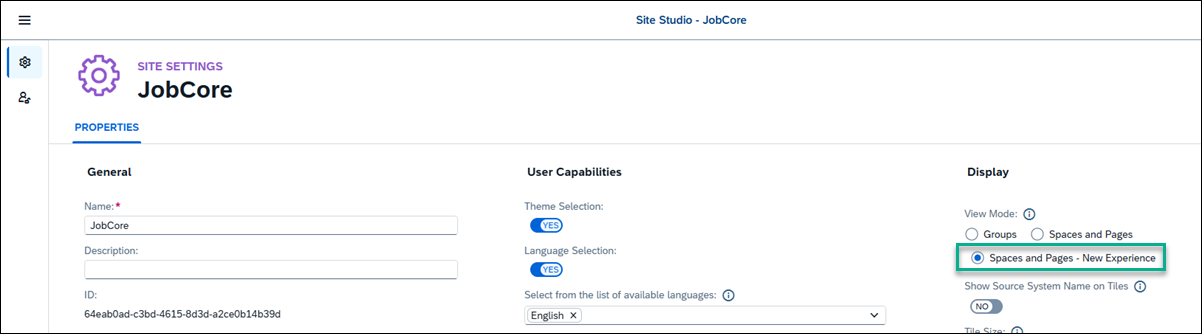
If you’re not sure what view mode is selected, go to the Site Settings screen as follows:
Open the Site Directory from the left panel and on the site tile, click the cog icon.
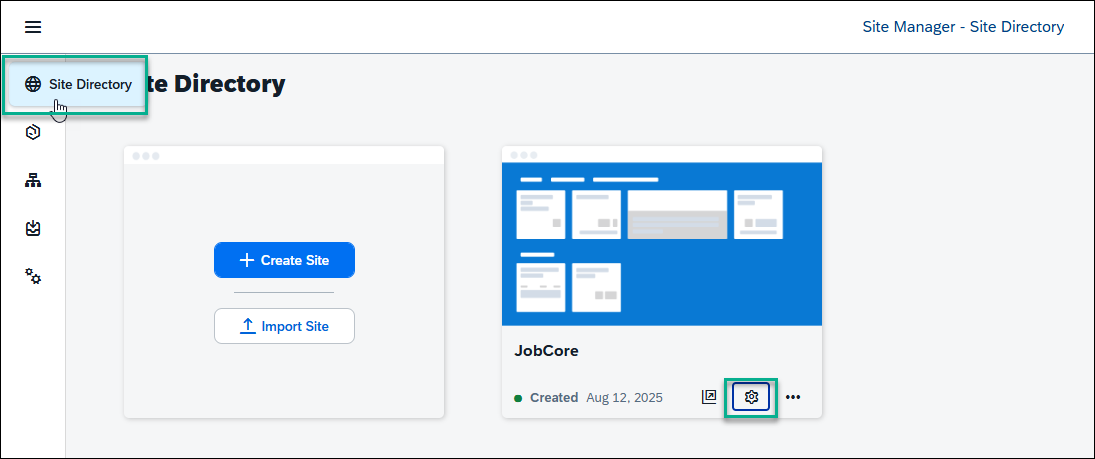
Open Site Settings On the right side of the screen, under View Mode, you can see which mode you’re working in. To change it, click Edit and then Save your changes.
Once you’re done, go back to the Site Manager by clicking Go to Site Directory.

Site Settings
To view the app in runtime, you must assign the app to a role. Content assigned to the
Everyonerole is visible to all users.
In the Content Manager, click the
Everyonerole.
Click everyone role Click Edit.
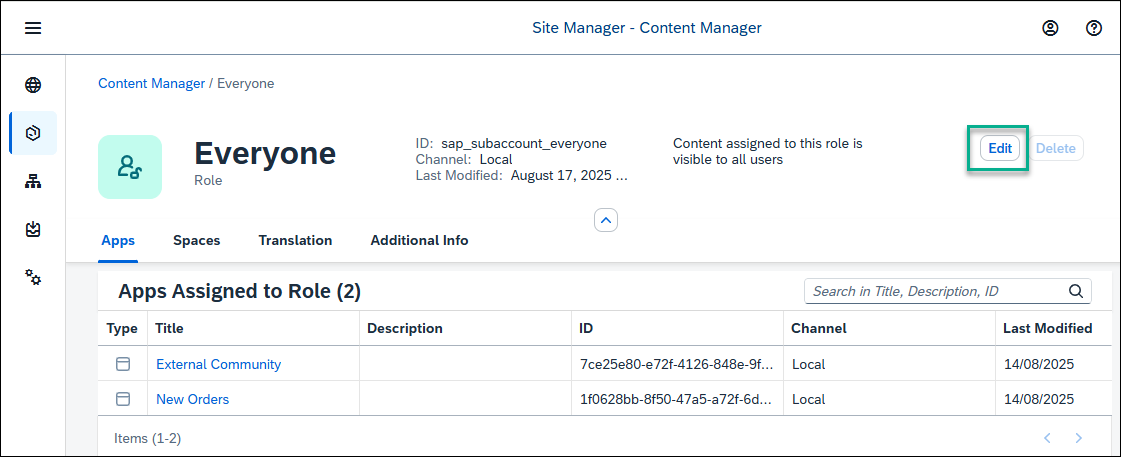
Click Edit Under the Apps tab, you’ll see that your
Search POsapp has an X in the Assignment Status column. Click the toggle to assign the app to theEveryonerole and click Save.
Assign app to role
If you have many apps, you can type some letters of your app name in the search bar, (for example,
se) to search for the app.
Do this step only if you’re working with Spaces and Pages.
In a previous tutorial, you’ve already created a Space called Home and a Page called Overview. Now let’s add the Web Dynpro app to the page.
Open the Content Manager.

Open content manager Select the
Overviewpage.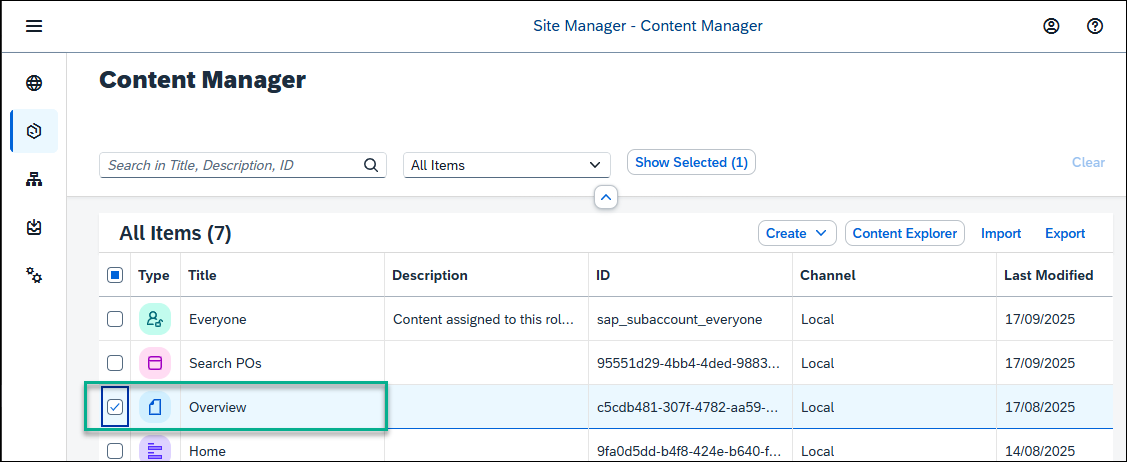
Select page You’ll see the apps that you’ve already added.
Click Edit.
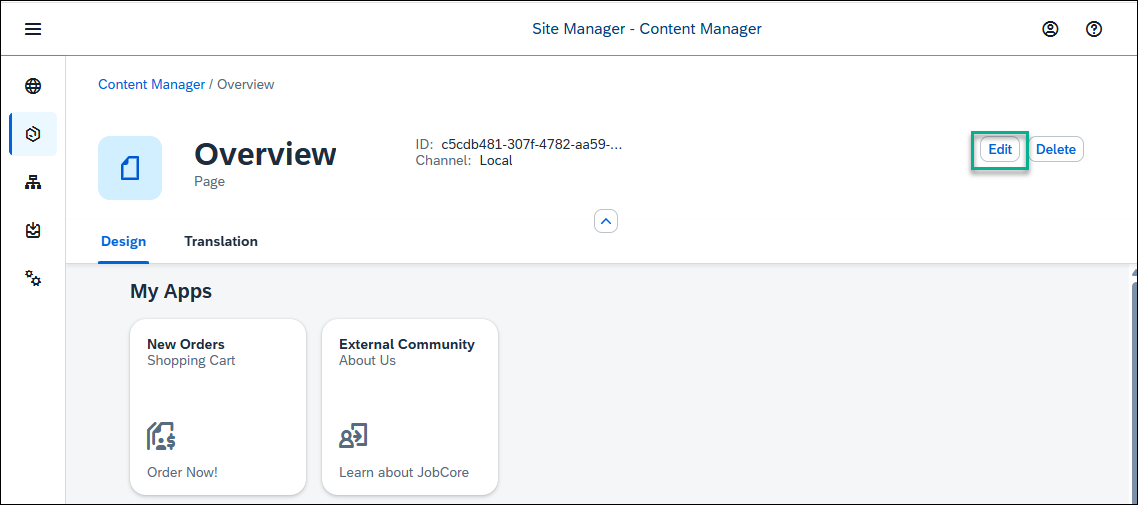
Click edit Hover in the section containing the other apps, and click the + icon on the right.

Click add icon Select the
Search POsapp that you’ve just configured and click Add.
Add the app Click Save. Your Web Dynpro is added to the
Overviewpage to the same section as your other apps.
View page
This step is only for those working in Groups view mode (defined in the Site Settings screen). If you’re working with the new site experience and selected Spaces and Pages - New Experience mode, please skip this step.
A group is a set of one or more apps displayed together in your site. Assigning apps to groups, makes them visible to users of the site.
Go back to the Content Manager using the breadcrumbs at the top of the screen.
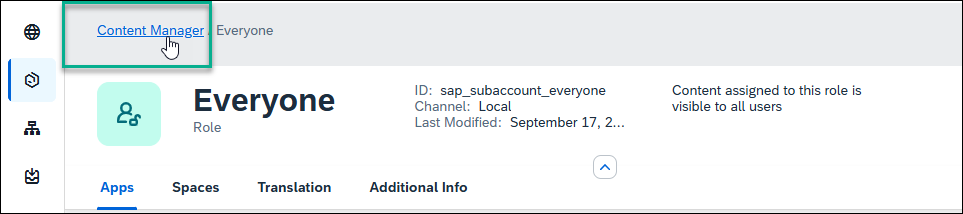
Go back to content manager Click Create and select Group from the list to create a group.

Add new Group Name the group
Purchase Orders.Under the Apps tab, you’ll see that your
Search POsapp has an X in the Assignment Status column. Click the toggle to assign the app to thePurchase Ordersgroup and click Save. If you’re taking part in a workshop, please use your unique app:<unique_id>_Search POs
Assign app to group
From the side panel, click the Site Directory icon to open the Site Directory.

Open site directory On the
JobCoretile , click the Go to site icon.
Go to site If you’re working in spaces and pages mode, you’ll see that the
Search POsapp is added to theOverviewpage in theMy Appssection.
Pages and spaces view If you’re working in groups mode, you’ll see the
Purchase Ordersgroup that includes the Web Dynpro ABAP app calledSearch POs.
View my apps Click the app to launch it. This is what you’ll see:

Resources
Discussion
Share feedback on this tutorial or join the conversation in SAP Community.