
Overview
You will learn
- How to create and activate your own schema for custom documents
- How to define the fields that you want to extract from a custom document
- How to upload a custom document to the SAP Document AI basic UI
- How to get extraction results using the schema you’ve created and LLMs


Prerequisites
Prerequisites
- You’ve created a trial account on SAP BTP: Get a Free Account on SAP BTP Trial
- You’ve access to the SAP Document AI basic UI, as described in the tutorial: Use Trial to Subscribe to the SAP Document AI Basic UI
Steps
Intro
In this tutorial, you’ll create a schema and define the fields that you want to extract from custom document types using LLMs. You’ll then use your schema to get field value predictions for various documents that you upload to the SAP Document AI basic UI, including delivery notes and birth certificates.
You can also use generative AI to extract information from standard document types (invoices, payment advices, and purchase orders). For details, see Use Trial to Extract Information from Standard Documents with Generative AI and SAP Document AI.
Before you upload a custom document for extraction, you’ll create a corresponding schema. In this tutorial, we provide sample files and settings for the following custom documents:
Delivery note
Résumé
Birth certificate
Work contract
In the first example, you’ll use a delivery note. After working through this example, you can go on and try out the other custom document types covered in Step 5.
Open the SAP Document AI basic UI, as described in the tutorial: Use Trial to Subscribe to the SAP Document AI Basic UI.
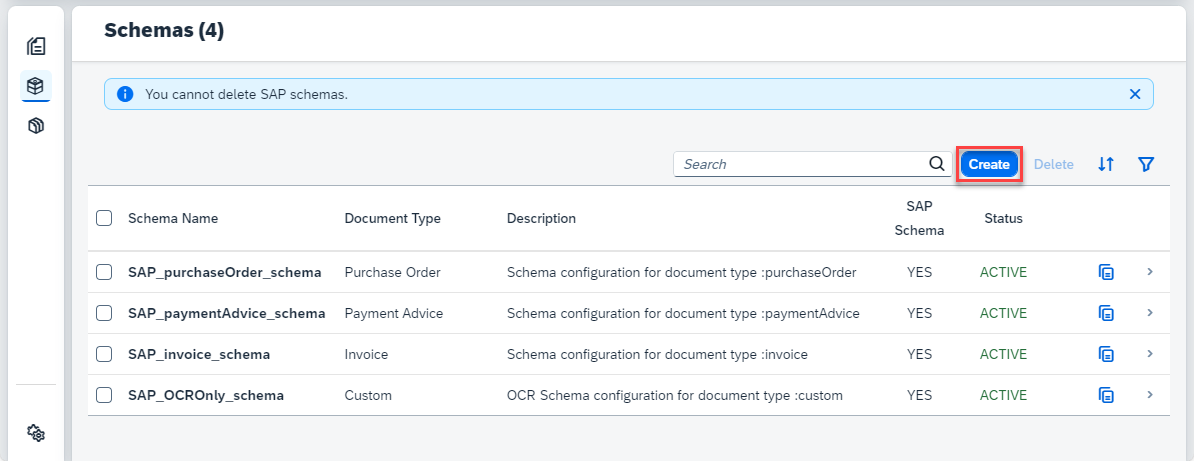
In the left navigation pane, click Schema Configuration.

LLM To create your own schema, click Create.
LLM In the dialog that opens, enter a name for your own schema – for example,
delivery_note_schema. Note that the name can’t include blanks. Next, selectCustomas your Document Type andDocumentas the OCR Engine Type.Click Create to create the schema.

LLM Your schema now appears in the list. Access the schema by clicking on it.

LLM
To add your first header field, click Add.

You must enter a field name and data type for each custom field. The available data types are string, number, date, discount, currency, country/region, and list of values. Default extractors aren’t available for custom documents. You can also optionally add a field label (user-friendly name) and a description.
A description is an optional entry. It can be useful if you want to include an explanation or some additional context for a field. When wording your descriptions, it’s often useful to imagine that you’re explaining what you want to extract to a person with no prior knowledge since SAP Document AI uses these descriptions as prompts for the LLM.
You can also use a description for other purposes, such as categorizing fields. For example, in the description of the field
limitedContractin work contracts, you could specifyyes, if the contract is limited andnoif the contract is not. Or you could specify that the line item fieldskillTypein a résumé can be technical or language.
See Step 5 for examples of schemas that use the description field.
As your first header field, add the number of the delivery note.
Enter the name for your field – for example,
deliveryNoteNumber.Select
stringas the Data Type.Use
autoas the Setup Type and click Save.
Note that when you use the setup type
autowithout a default extractor, LLMs are used to extract the information from the document. The setup typemanualsupports extraction using a template. For more details of this approach, take a look at the tutorial mission: Shape Machine Learning to Process Custom Business Documents.

The field now appears in your list of header fields, where you can see all the information that you’ve just entered. You can edit or delete the field by clicking the respective icons on the right.

Click Add again to open the Add Data Field dialog.
Enter the name for your second header field – for example,
purchaseOrderNumber.Select
stringas the Data Type.Use
autoas the Setup Type and click Save.
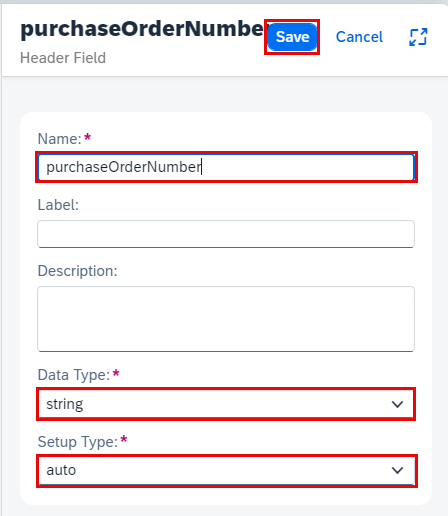
Now, go ahead and add the remaining header fields and line item fields shown in the table and image below. Pay attention to the different data types and notice that the last three fields are line item fields (not header fields). Feel free to extend or reduce the list of fields.
| Field Type | Field Name | Data Type | Setup Type |
|---|---|---|---|
| header field | deliveryNoteNumber | string | auto |
| header field | purchaseOrderNumber | string | auto |
| header field | deliveryDate | date | auto |
| line item field | materialNumber | string | auto |
| line item field | quantity | number | auto |
| line item field | unitOfMeasure | string | auto |

NOTE: The SAP Document AI basic UI also includes a feature that allows you to group schema fields by category. To use this feature, you must first activate it under UI Settings. For simplicity’s sake, we haven’t included the feature in this tutorial. If you’d like to find out more about it, see Schema Field Categories.
Once you’ve added all your fields, you need to activate the schema so that you can use it to extract information from documents. Right now, the schema has the status DRAFT, indicating that it can’t be used yet.
To activate the schema, click Activate.

Now, the status of your schema changes to ACTIVE. To make changes to your schema, you must first Deactivate it.
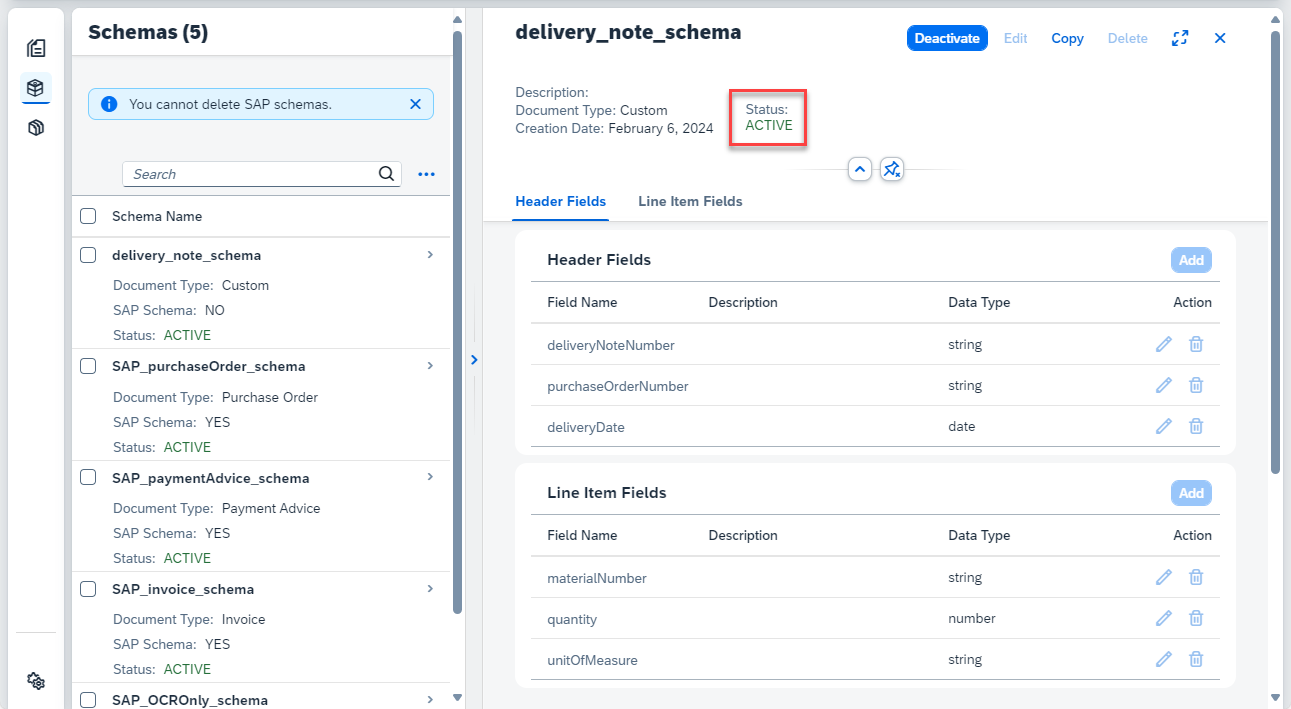
Congratulations, you’ve now created and activated your own schema for delivery note documents.
Access Document from the navigation on the left of the screen, then click + to upload the delivery note document.

LLM On the Select Document screen, choose
Customfor the Document Type.Select the Schema you created (
delivery_note_schema).Right-click on the link, then click Save link as to download the delivery note sample document locally.
Drag and drop the file directly or click + to upload the sample document.

LLM Click Confirm.
The document status changes from
PENDINGtoDONE.
LLM Access the document by clicking on it. You now see the page preview of the document file you uploaded, and the information extracted from the delivery note header fields and line items using LLMs and the schema that you created.

LLM

Congratulations, you’ve now successfully extracted information from a delivery note document using the schema configuration feature from SAP Document AI and LLMs.
You can now repeat the steps previously described for the following documents (using the suggested fields or your own fields):
- Résumé – sample document
Create the header fields shown in the table and image below. Don’t forget to add a description for degree, employer, and jobTitle (as in the image). Feel free to extend or reduce the list of fields.
| Field Type | Field Name | Data Type | Setup Type |
|---|---|---|---|
| header field | firstName | string | auto |
| header field | lastName | string | auto |
| header field | degree | string | auto |
| header field | employer | string | auto |
| header field | jobTitle | string | auto |

- Birth Certificate (in Chinese) – sample document

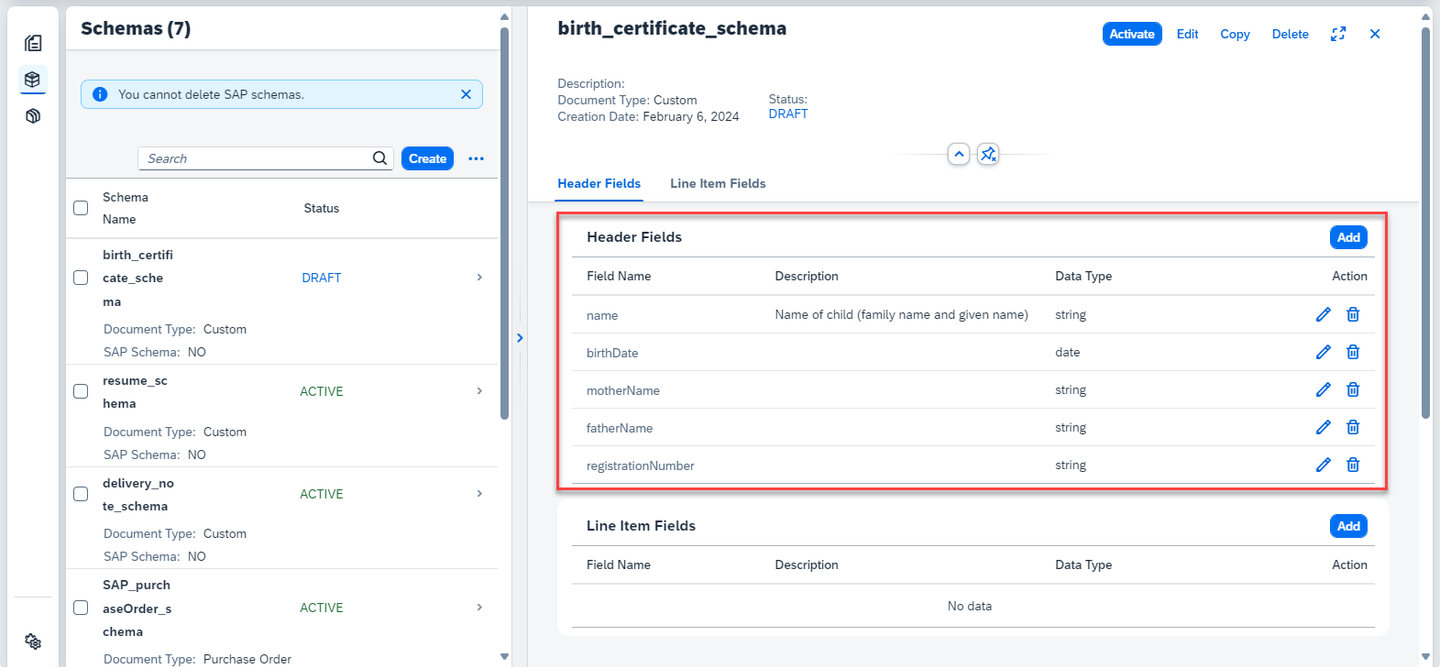
Create the header fields shown in the table and image below. Pay attention to the different data types and don’t forget to add a description for name (as in the image). Feel free to extend or reduce the list of fields.
| Field Type | Field Name | Data Type | Setup Type |
|---|---|---|---|
| header field | name | string | auto |
| header field | birthDate | date | auto |
| header field | motherName | string | auto |
| header field | fatherName | string | auto |
| header field | registrationNumber | string | auto |
- Work Contract (in German) – sample document
Create the header fields shown in the table and image below. Pay attention to the different data types and don’t forget to add a description for all fields (as in the image). Feel free to extend or reduce the list of fields.
| Field Type | Field Name | Data Type | Setup Type |
|---|---|---|---|
| header field | companyName | string | auto |
| header field | employeeName | string | auto |
| header field | limitedContract | string | auto |
| header field | salary | number | auto |
| header field | startDate | date | auto |

Congratulations, you’ve completed this tutorial. Feel free to repeat the steps using your own custom documents.
Resources
Discussion
Share feedback on this tutorial or join the conversation in SAP Community.