
Deploy the SAP SuccessFactors Extension to Cloud Foundry
In this phase of the development you will deploy the finished extension to BTP Cloud Foundry environment.
Overview
You will learn
- How to build the MTA archive
- How to deploy the MTA archive to Cloud Foundry
- How to assign a role collection to a BTP business user
- How to launch and test the deployed application


Prerequisites
Prerequisites
- Complete the tutorial: Prepare to Develop the SAP SuccessFactors Extension
- Complete the tutorial: Jump start the SAP SuccessFactors Extension CAP Project
- Complete the tutorial: Import SAP SuccessFactors OData Services definitions
- Complete the tutorial: Create the CDS Data Model for the SAP SuccessFactors Extension
- Complete the tutorial: Create the CAP Service for the SAP SuccessFactors Extension
- Complete the tutorial: Add Business Logic to the SAP SuccessFactors Extension
- Complete the tutorial: Prepare the SAP SuccessFactors Extension UI with CDS Annotations
- Complete the tutorial: Add Security to the SAP SuccessFactors Extension
- Complete the tutorial: Deploy the SAP SuccessFactors Extension Database to SAP HANA Cloud
- Complete the tutorial: Develop the SAP Fiori Elements Application for the SAP SuccessFactors Extension
Steps
Before you build the MTA Archive for deployment, do not forget to switch back the database from in-memory SQLite to SAP HANA (if not already). For that, just open the package.json file from the CAP service and set the cds.requires.db.kind parameter to hana like demonstrated below:

Now you can start the procedure to build the archive. You begin by building the CAP service.
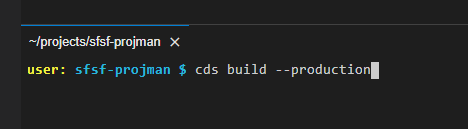
In the Terminal type cds build –-production and press Enter (don’t forget to press CTRL+C to terminate cds watch if it was previously running).
On the left-hand pane right-click the mta.yaml file and select Build MTA Project.
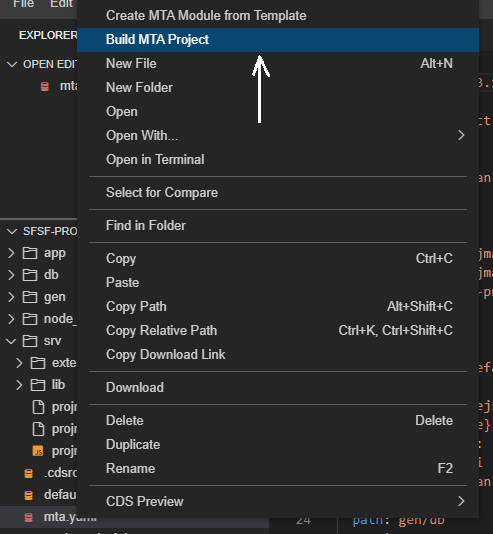
It’s going to take some seconds until the build process completes. When it does, it will display a message “Terminal will be reused by tasks” in a dedicated terminal named “Task Build MTA Project”. Look for the message “Build succeeded” among the lines in that console to make sure the build process was successful.

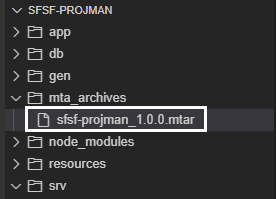
If the process is successful you’ll notice that a file named sfsf-projman_1.0.0.mtar will be generated into a new folder named mta_archives like demonstrated below:
IMPORTANT NOTE: before you trigger the process to deploy the MTA archive to Cloud Foundry you MUST make sure you comply with two requirements:
- You are properly logged to Cloud Foundry as instructed in step 2 of the tutorial: Jump start the SAP SuccessFactors Extension CAP Project
- Your SAP HANA Cloud database is up and running (remember that everything shuts down overnight on trial accounts!)
On the left-hand pane right-click the sfsf-projman_1.0.0.mtar file and select Deploy MTA Archive.

It’s going to take a while until the deployment process finishes. When it does, it will display a message “Terminal will be reused by tasks” in a dedicated terminal named “Task Deploy MTA Archive”. Look for the message “Process finished” in the last lines and see that there’s no errors/failures listed among the other lines in that console to make sure the deployment process was truly successful.

Before you jump into testing the application, you must remember that it’s meant for project administrators, meaning, users with the Admin role assigned. So, assign the role to your user in SAP BTP.
In the SAP BTP cockpit, on the left-hand pane expand the Security menu and click on Role Collections. On the right side, using the search box, search for the sfsf_projman_Administrator role and click on it.

Click on the Edit button at the top-right corner, then, in the Users list, select the Default identity provider from the dropdown list and provide your SAP BTP user ID and your e-mail (usually in trial accounts they are both your e-mail). Click on the “+”" button on top of the list and then click on the Save button at the top-right corner.

Now you are OK to test the application.
On the left-hand pane, (1) click on HTML5 Applications and locate your Business Solution (sfsf-projman-<your subdomain>). Then, (2) click on the link of the Application Name.

An SAP Fiori Launchpad will open-up in a new browser tab with the application tile in it:

Click on the tile and the List Report page for the Project entity will be loaded:

Now, click on the Go button and the initial test data (loaded to the HANA database from the CSV files) will be displayed:

And that’s it! You have successfully deployed a fully working SAP Fiori Elements application to SAP BTP Cloud Foundry!
You can, now, test it at your will, in the same way you did using the Fiori Preview in step 6 of the tutorial: Prepare the SAP SuccessFactors Extension UI with CDS Annotations.
Finally, the last step in the journey of this tutorial group is to add your application to a user-driven launchpad using SAP BTP’s Launchpad Service.
Resources
Discussion
Share feedback on this tutorial or join the conversation in SAP Community.