
Overview
You will learn
- How to build a CAP service with low-code tools
- How to create roles to enable authorization for your data entities
- How to deploy your CAP service to SAP BTP


Prerequisites
Prerequisites
- You have created a trial account in US East (Va) region, as described in Get a Free Account on SAP BTP Trial.
- You have installed SAP Build Apps on your trial subaccount, as described in Set Up SAP Build Apps (with Booster) on SAP BTP Trial Account.
- You have created an instance of SAP HANA database, as described in Deploy SAP HANA Cloud.
- You have given your user on the custom identity provider the role collection
Business_Application_Studio_Developer.
Steps
Intro
You will quickly build a Risk Management service with 2 entities: Risks and Mitigations. Each risk can have 0 or 1 mitigations, while mitigations can be assigned to multiple (or no) risks.
Another key feature is the creation of roles, one for viewer of the data and one for manager, meaning a person who can update the data. The role, exposed in SAP BTP as a role collection, can be assigned to a user once the service is deployed.
You must set up your SAP BTP tenant with SAP HANA Cloud and SAP Build Apps – your deployed CAP service and SAP Build app must be on the same tenant. For this tutorial, we will assume you are using a trial account.
You can use SAP Business Application Studio on any tenant, and when it comes time to deploy, deploy the service on the tenant with your SAP HANA Cloud and SAP Build Apps.
These steps open SAP Business Application Studio in the traditional way, without using SAP Build’s lobby.
Open the your subaccount, making sure Instances and Subscriptions on the left-side menu is selected.
Click SAP Business Application Studio.

Open BAS After opening SAP Business Application Studio, click Create Dev Space.

Create dev space Enter a name for your dev space, select Full-Stack Application Using Productivity Tools, and then click Create Dev Space.

Create LCNC dev space The dev space will be created, and you will see that is being started.

Starting dev space Soon it will say Running.

dev space runnings Click the dev space name to open it, and you will the main canvas of SAP Business Application Studio.

dev space runnings Click Create Project.
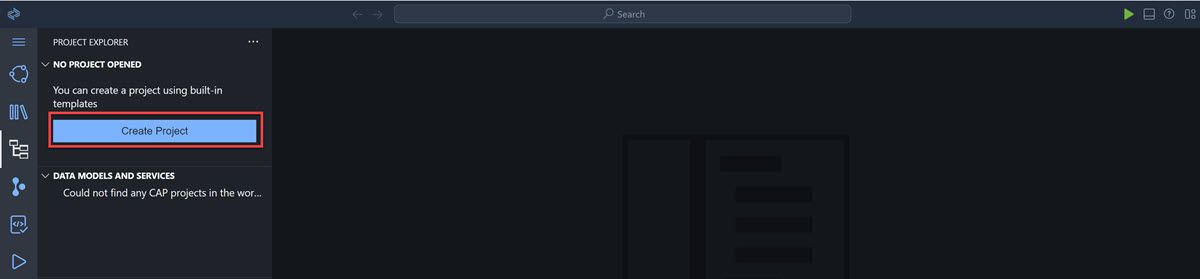
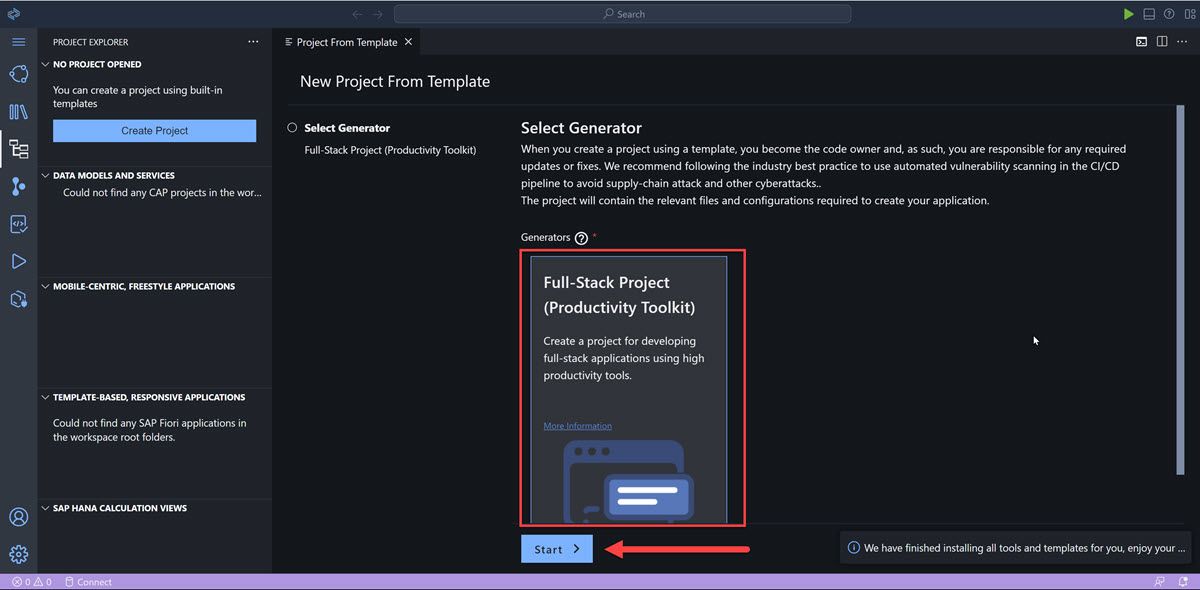
Create project Select the Full-Stack Project generator, and click Start.
Create project For the name of the project, enter
RiskManagement, and then click Finish.
Create project BAS will generate the project and all the files, and you will see the following, where you can create data models, the services that will expose the data, and more:

Create project
In the storyboard, click the plus sign ( + ) above Data Models.

New data model This will display the data model canvas, with a new data entity called
Entity1. You will now change the name and add the fields.Click the Show Details icon to open the editor.

Alt text In the editor, change the name of the entity to
Risks(save by clicking the checkmark ☑️) and add the following fields:Property name Property Type Max Length title string 100 prio string 5 descr string 100 impact integer criticality integer Close the editor by clicking the top-right X.

Risks entity fields Create another entity called Mitigations by clicking Add Entity and dropping the new entity on the canvas.

New entity Again, click the Show Details icon (select the entity to see its side menu).

Alt text Change the name of the entity to
Mitigations(and click ☑️) and add the following fields:Property name Property Type Max Length description string 100 owner string 100 timeline string 100 
Alt text Close the editor by clicking the top-right X.
Add relationship between the entities by selecting the Mitigations entity, and clicking the Relationship icon.
This will create an arrow for you to indicate the other entity with which to form a relationship.

Mitigations relationsip Drag the icon and drop it on the Risks entity, and click.

Risks relationsip This will open the relationship editor.

Alt text All of the following properties will be set:
Field Value Type Association Multiplicity To-many Name risks Target Entity RiskManagement.Risks Backlink Property mitigations Click Create.
This will create a relationship.

Relationship created For both entities, open the Show Details pane again.
Select the Aspects tab, and enable the managed aspect.

Aspects Repeat for Mitigations entity.
Back in the storyboard, click the plus ( + ) next to Services to add a service.
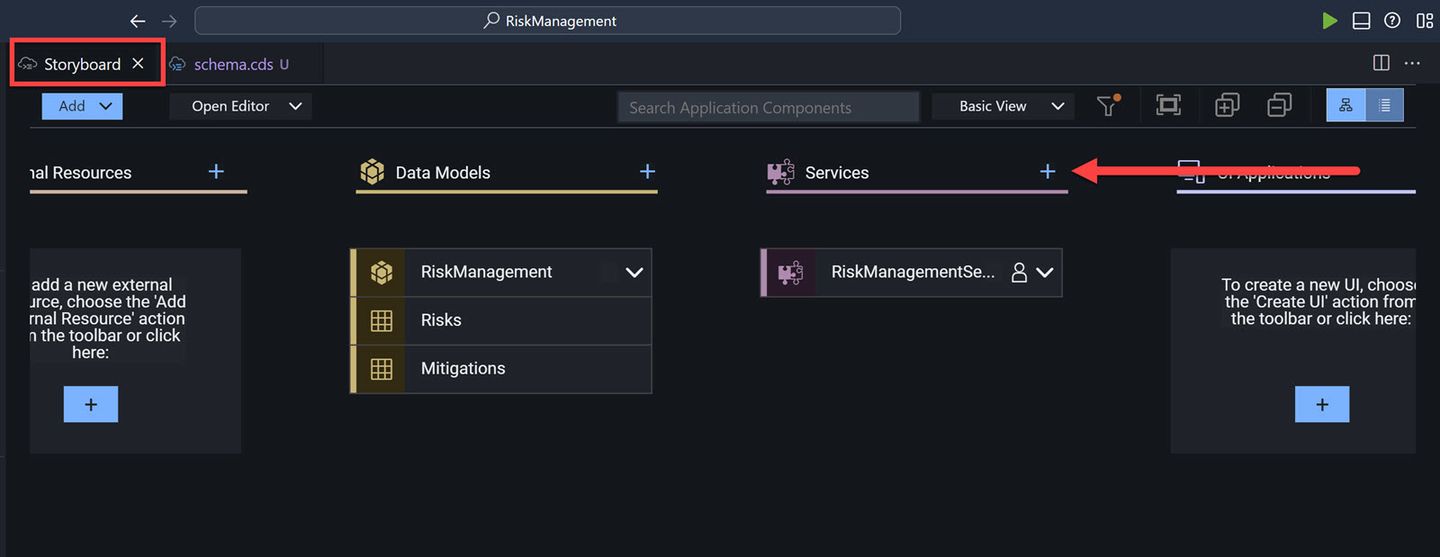
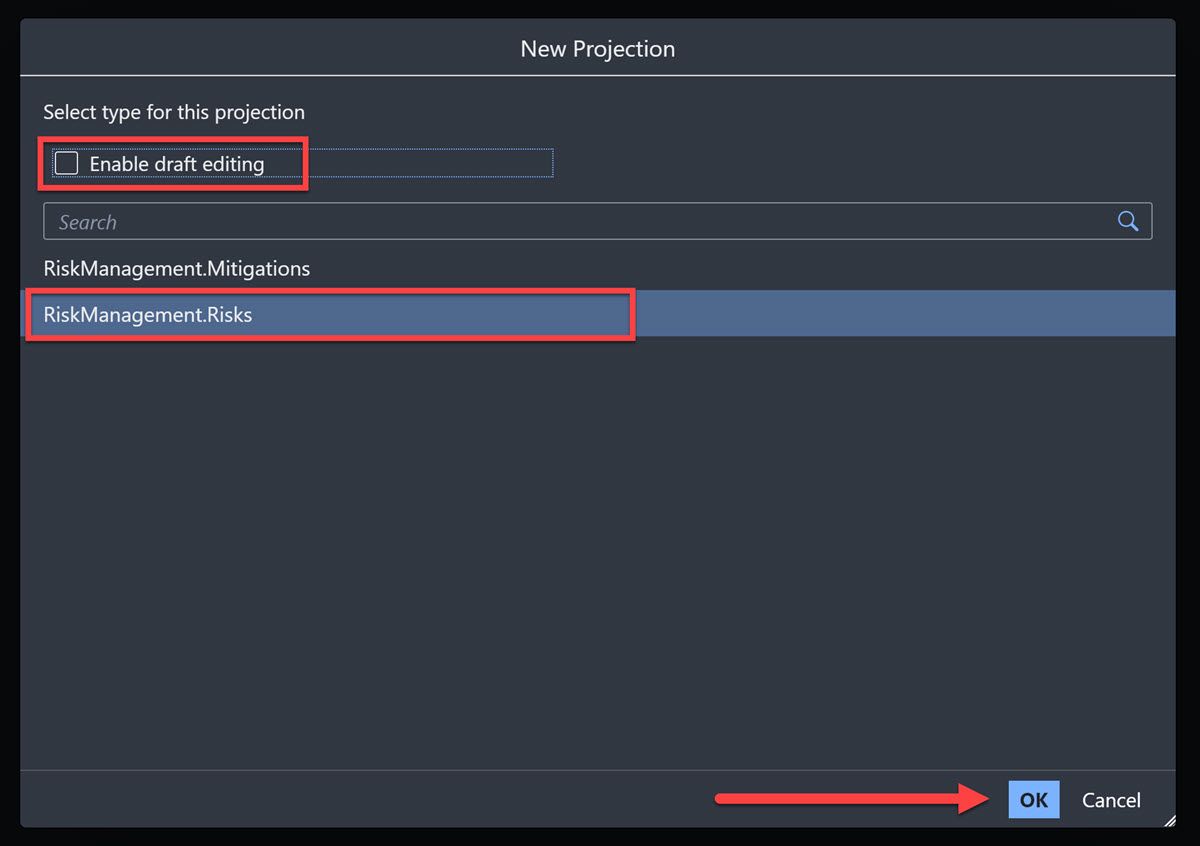
Add service Choose the Risks entity, disable the Enable Draft Editing, and click OK.
IMPORTANT: Please make sure that the Enable Draft Editing checkbox is disabled, as this will prevent you from adding records and seeing the data in the following tutorials. Note that if you disable the checkbox and then select an entity, the checkbox will be re-enabled.
Risks entity Click Add Entity and place the new entity in the canvas.
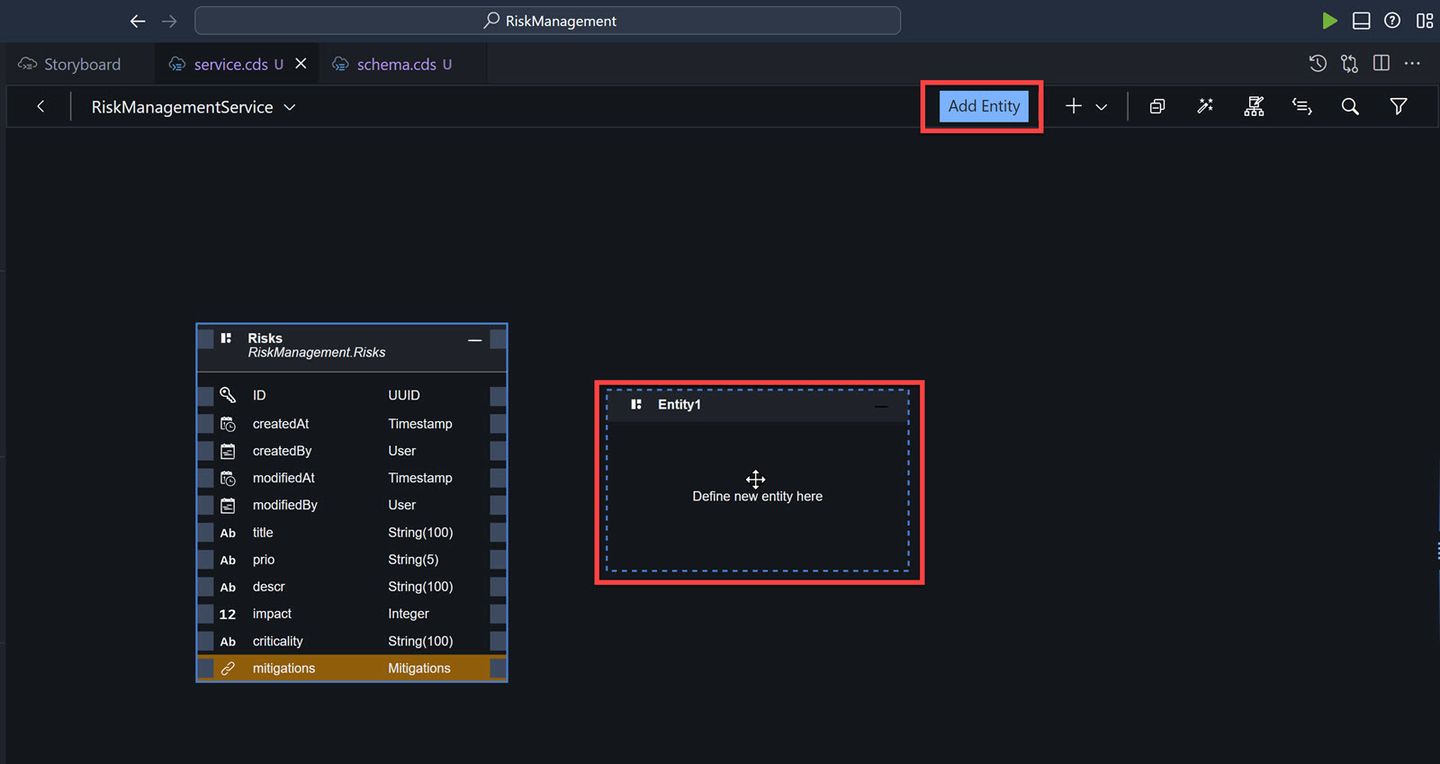
Add entity Choose the Mitigations entity, disable the Enable Draft Editing, and click OK.
Download the CSV data files RiskManagement-Risks.csv↓ and RiskManagement-Mitigations.csv↓.
Go back to the storyboard.
Right-click the Mitigations entity, and select Add Sample Data.
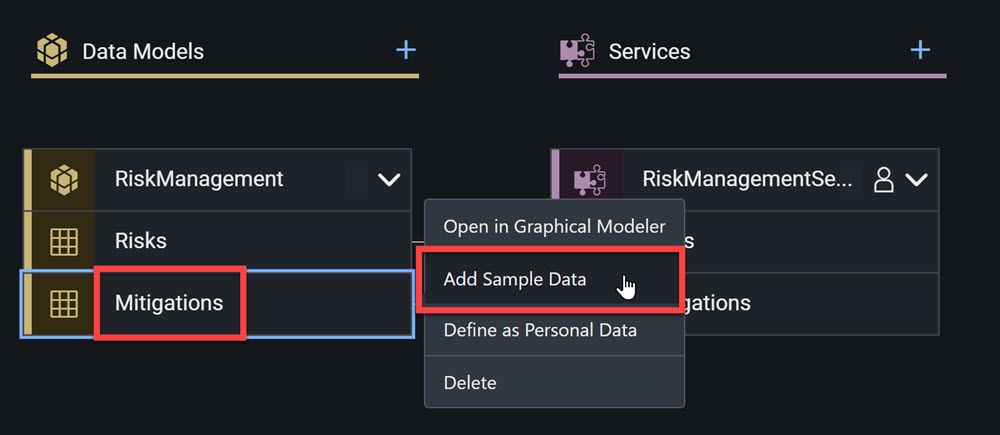
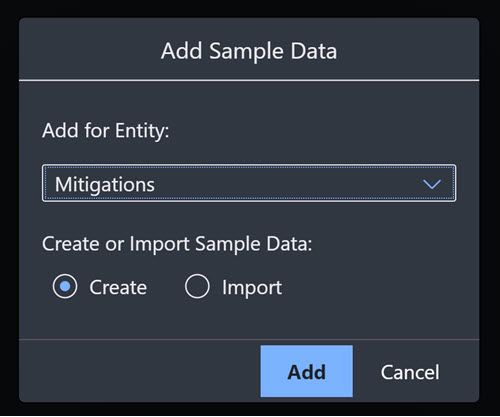
Add sample data Choose Import, and click Add.
Import data Select the downloaded
RiskManagement-Mitigations.csvfile.The data is automatically added and saved.
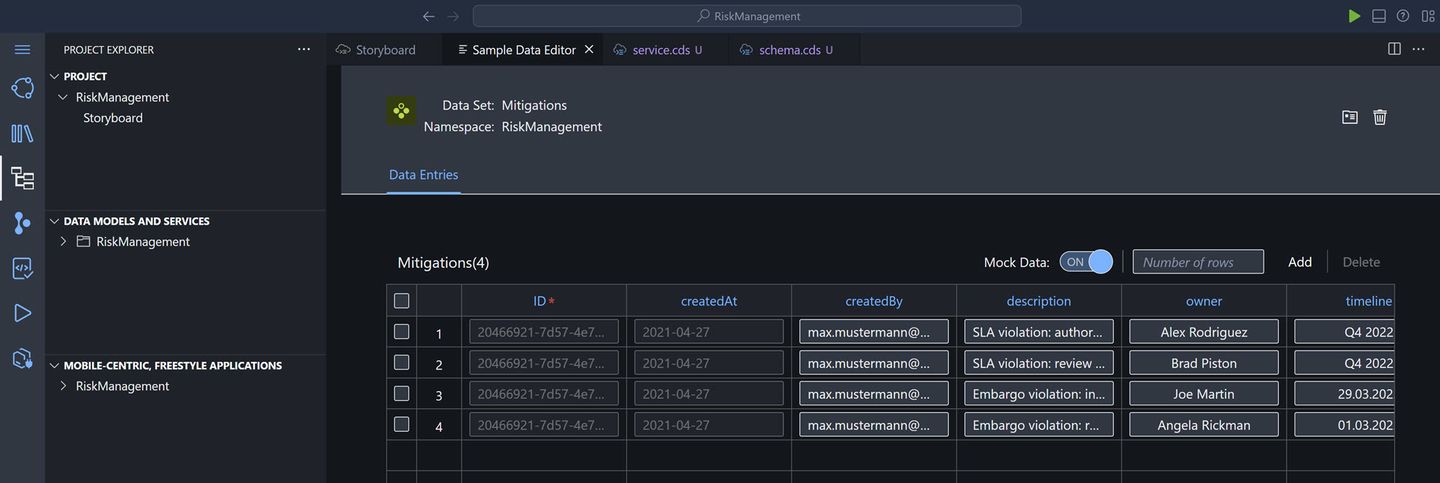
Data added Go back to the storyboard, and do the same for the Risks entity with the
RiskManagement-Risks.csvfile.
On the storyboard, select the little person icon next to RiskManagementService.
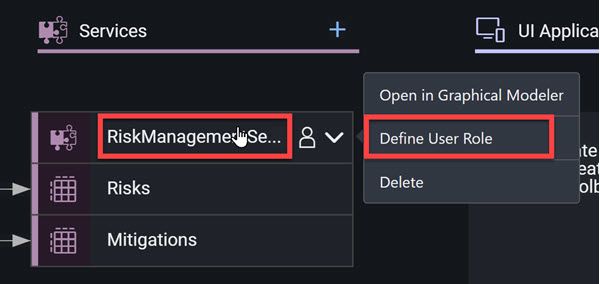
Open roles editor You can also open the User Roles editor by selecting the Open Editor dropdown and choosing User Roles.
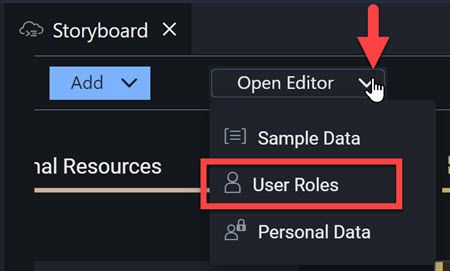
Open editor alternative Add a role by clicking the plus sign ( + ) next to User Roles.

Plus for roles Call the role
RiskViewerand keep the privilege at Read.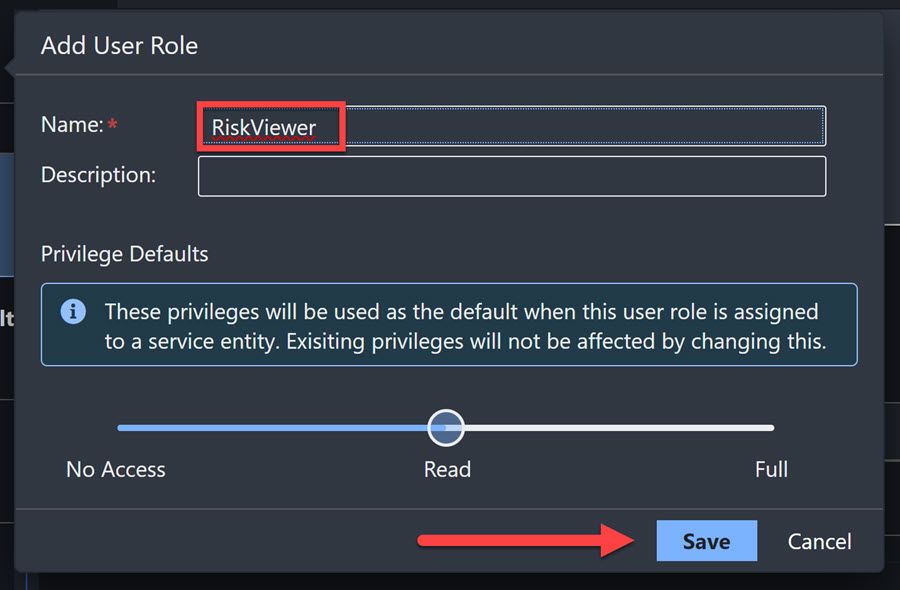
Add role Click Save.
Select the new role, and then select your service, RiskManagementService from the dropdown.
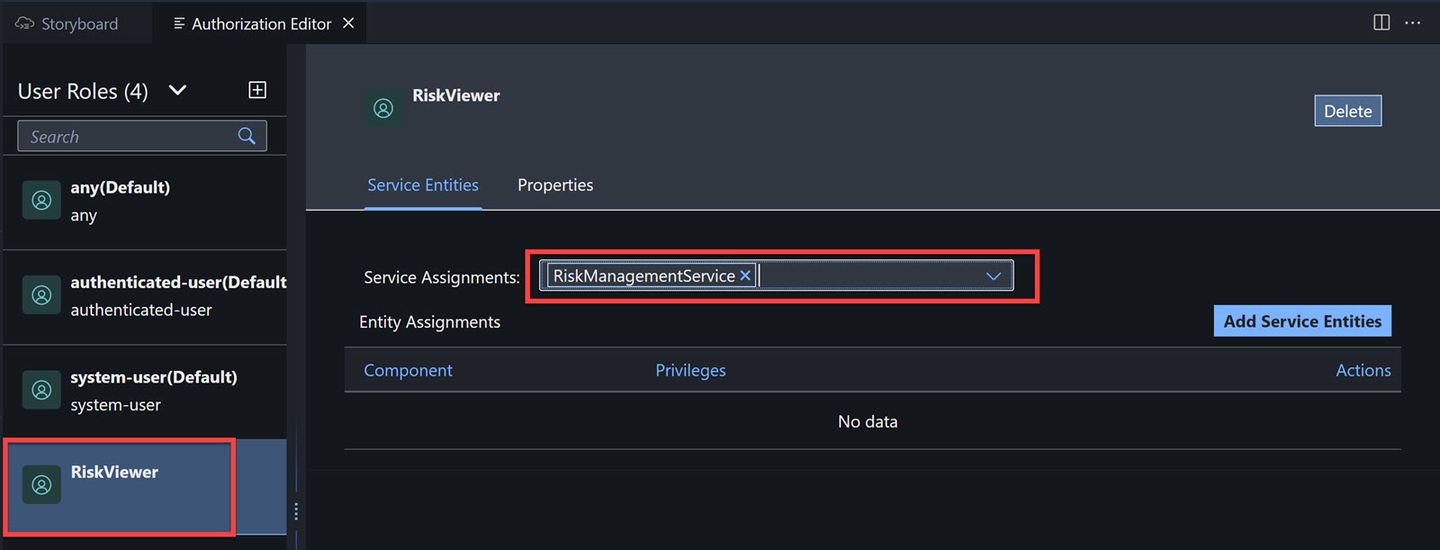
Add service to role Click Add Service Entities, and toggle on the two entities. The privileges should already be set to Read.
Click Save.
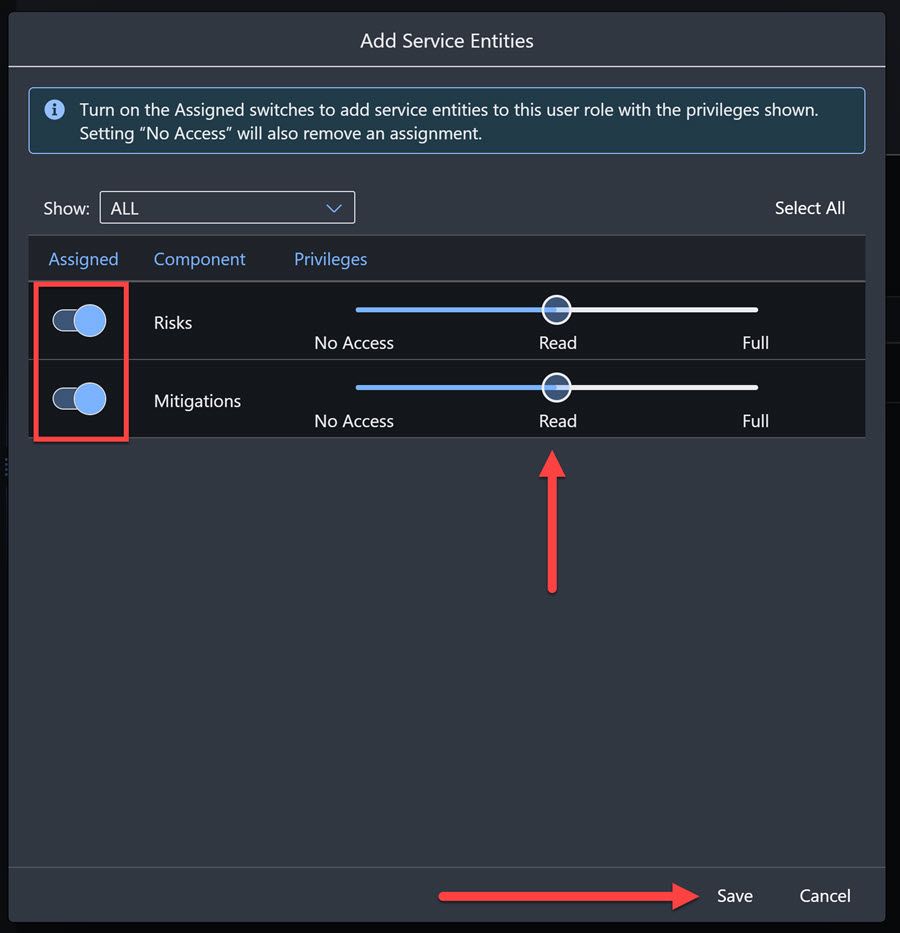
Add entities Add another role by clicking the plus sign ( + ).
Call the role
RiskManagerand change the privilege to Full.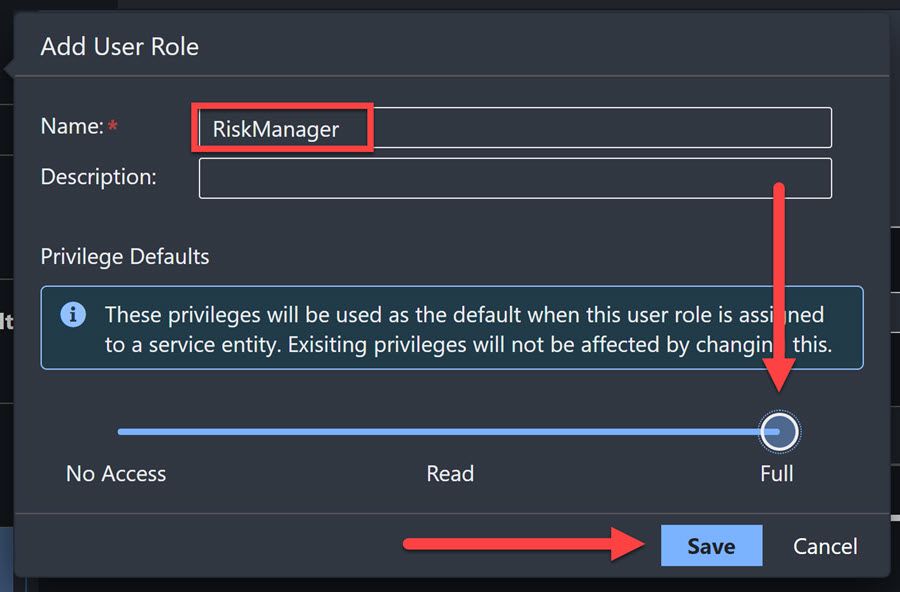
Add role Click Save.
Select the new role, and then select your service, RiskManagementService from the dropdown.
Click Add Service Entities, and toggle on the two entities. The privileges should already be set to Full.
Click Save.
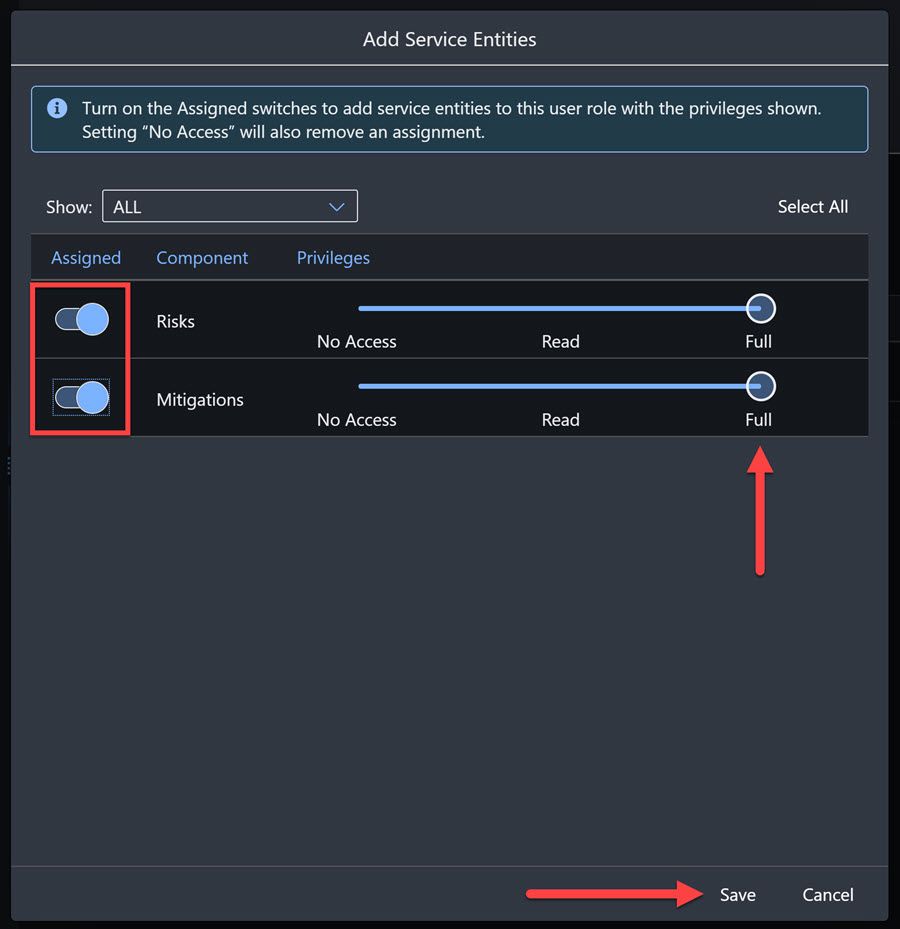
Add entities
Open the Task Explorer by clicking on the side panel.

Task Explorer Expand the Deploy node to see your project.

Expand node Hover over Enable Discovery and Deploy RiskManagement and click the Run icon next to your project.

Expand node The deployment process will run briefly, a Terminal window will open at the bottom of the screen, and then the Cloud Foundry login screen will appear. (You may need to make the Terminal area smaller to see the login screen.)
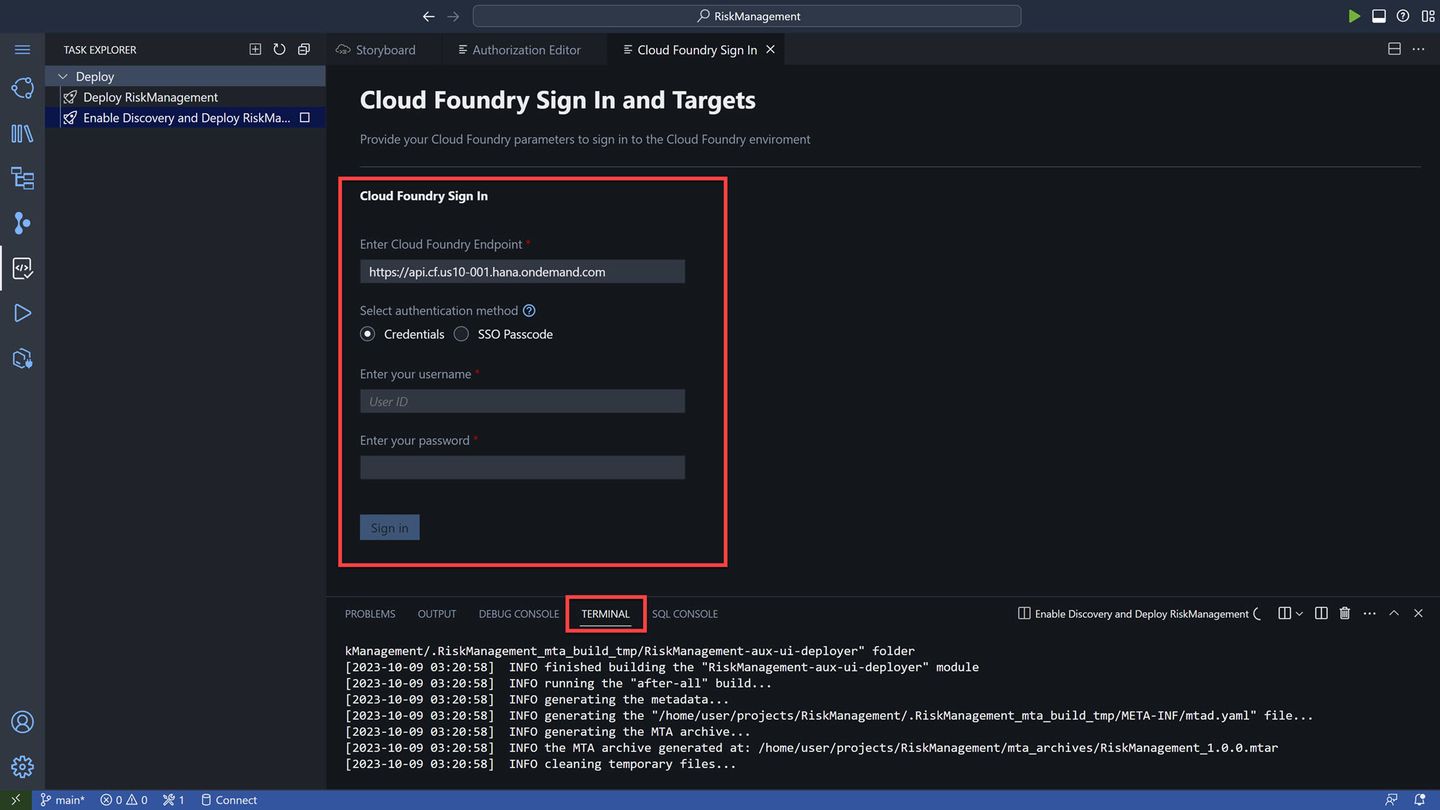
Cloud Foundry login You are deploying to Cloud Foundry, so you must login and tell BAS to which Cloud Foundry to deploy.
Enter your Cloud Foundry endpoint, and your username and password for SAP BTP trial, and click Sign-in.
Once you login to Cloud Foundry in general, BAS will want to know to which subaccount and space you want to deploy to.

Subaccount and space Select the subaccount (Cloud Foundry organization), and then the space.
If you are working on trial, you will likely have only one choice for each.
Click Apply.
The deployment will take about 5 minutes to finish. When complete, you will get the URL to your service, though you will not have permissions to view it.
TROUBLESHOOTING:
In a SAP BTP trial account, SAP Business Application Studio allows only 2 deployments using a Full-Stack Application Using Productivity Tools dev space. If you created the application from the SAP Build lobby, this is the type of dev space used behind the scenes.
If you have trouble redeploying the CAP service, you may want to remove the previous deployment by running the following command in a terminal window:
Codecf undeploy RiskManagement --delete-services --delete-service-keysThe above assumes your app is named
RiskManagement. You can check all deployed apps by running the commandcf mtas.
In your trial account, on the left-side menu, click Cloud Foundry > Spaces. You likely will have only one space, called dev.
Click the space, and you will now see your application.

Check app Click on the link
RickManagement-srv, and you will see a link. Click on it.
Service start You will get a page with information about your service, with a link to the service (
service/RiskManagement).You will not see anything yet since you are not authorized. In the next tutorial, we will test it from SAP Business Application Studio, and in the following tutorial you will access it from SAP Build Apps.
The destination for your service – so that other services like SAP Build Apps can call it – was already created. But if you needed to create it yourself, you would do so by getting information about your service.
Go back to the previous page, and on the left click Service Bindings, and then click
RiskManagement-uaa.
Service bindings On the right you will see a service key, and by clicking View you will get the client ID, and secret and other information for this service that would be needed to create a destination.

Service key
Resources
Discussion
Share feedback on this tutorial or join the conversation in SAP Community.