
Overview
You will learn
- Convert Oracle schema to SAP HANA


Prerequisites
Prerequisites
- Oracle DB instance (version >= 11), where a new user and SQL objects will be created with a script provided in the tutorial
- Oracle JDBC driver (ojdbc7.jar)
- SAP HANA or SAP HANA Cloud instance. Minimum versions are 2.0 rev31 and QRC3-2021 respectively
- SAP Advanced SQL Migration tool installed and configured properly as indicated in the installation guide: https://dam.sap.com/mac/app/p/pdf/asset/preview/cLmo5vJ?ltr=a
- Java >= 1.8 installed in the host where the migration tool is executed
Steps
Intro
The SAP Advanced SQL Migration tool is SAP’s migration tool to migrate custom applications running on top of non-SAP databases into SAP databases.

The tool can extract SQL data models (e.g., tables, views, indexes) and SQL objects containing SQL code (e.g., stored procedures, functions) via either accessing source database catalogs or using text files containing the object definitions (DDLS) and convert them to the chosen target SAP database.
Download the script provided in the link below (
APPDEMO2.sql) and copy it to a local folder (e.g.c:\sql_scripts\APPDEMO2.sql) in a host where you have the Oracle client installed and access to the Oracle instance:Connect to the Oracle database with the
sqlplusutility and run the script with@directive:@ c:\sql_scripts\APPDEMO2.sql
Select Data Source
Create what will be the project folder, for example,
C:/tmp/Advanced_SQL_Mig_tutorial.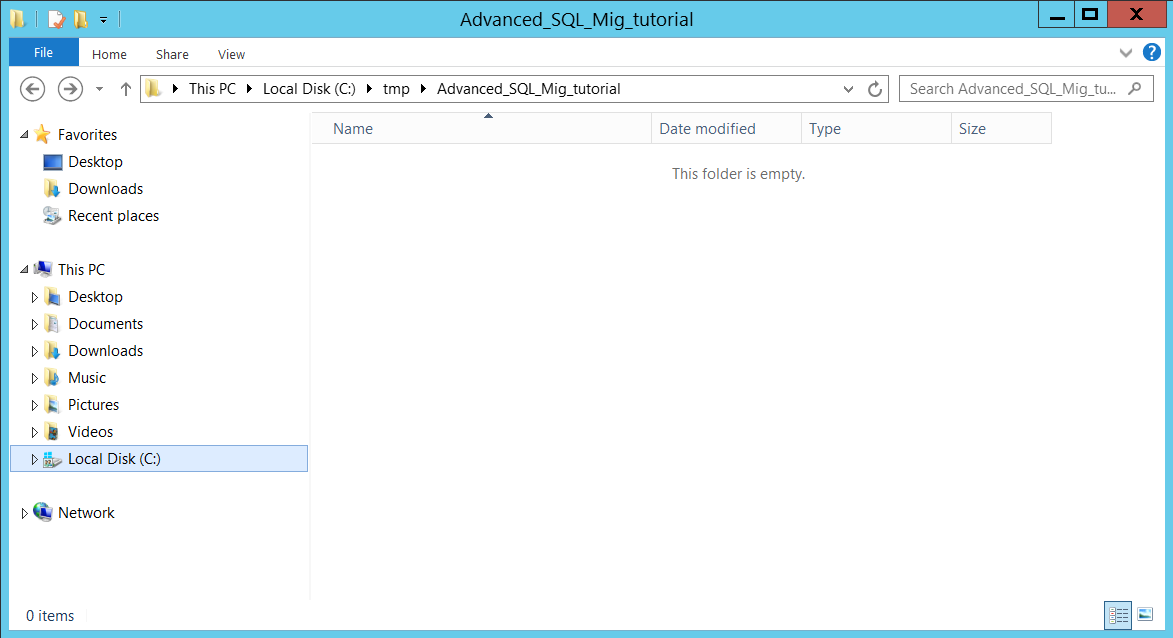
Select Data Source Open a migration tool command line with
C:\cygwin\start_bash.bat.Check the installation guide if needed (see Prerequisites).
From the command line, execute the migration tool utility
sapdbmtkwithconfigoption, specifying the full path to the project folder:sapdbmtk config C:/tmp/Advanced_SQL_Mig_tutorialThe
Source/Targe DBsconfiguration window appears. SelectOracleas source DB andSAP HANAwith the corresponding version as target.
Select Data Source Click Save & Continue.
A popup window appears asking you to save the selected databases. Click OK and the migration tool configuration window for this particular project appears.

Select Data Source Set the following options as indicated (if you want to get information for an option click the corresponding question mark):
ID # 110 > IP address for the host (or hostname) where the gateway will run (for simplicity the gateway can run on the same host as the migration tool is running)
ID # 111 > port where the gateway will listen (e.g.,
12345)ID # 112 > set to
600ID # 113 > set to
noif you want to keep gateway up when extract command finishesID # 120 > set to
in ('APPDEMO2')(this will make the extract command get only objects under APPDEMO2 schema)ID # 201 > set the default password you want to use for users to be created in SAP HANA
ID # 210 > set to
yesID # 212 > increase the default value to
150ID # 220 > set to
INTID # 221 > set to
300ID # 222 > set to
numeric (8,2)ID # 223 > set to
INTID # 300 > set to
direct_selectID # 330, # 331, # 332 > set to
lowercaseID # 383 > set to
warningID # 740 > tenant DB name in SAP HANA
ID # 751 > host where SAP HANA is running
ID # 752 > port where SAP HANA is running
ID # 753 > SAP HANA username, for simplicity use SYSTEM to avoid having missing permissions
ID # 754 > SAP HANA user password for user specified in previous parameter
ID # 757 > set to
no
Click Validate & Save, and a popup window appears to confirm the changes.
Click OK and then Exit to finish the configuration window.
The project folder is configured now, and a subfolder called config is created.

Every migration tool command creates a log file located under subfolder called
reports(the folder is created automatically if it doesn’t exit).
Data model and SQL objects extraction can be done either by connecting to the source database via the migration tool gateway or using text files with object definitions (DDLS). Section 1 is mandatory and you will go through the extraction via the migration tool gateway. Then section 2 is optional, do it if you want to see the extraction using a text file as well.
IMPORTANT: It is recommended for you to try both methods, go through the gateway first in section 1 and then go through optional steps in section 2
The migration tool gateway is usually executed in a separate host, but for simplicity in this tutorial it will be executed in the same host where the migration tool is installed, notice that Java version 1.8 minimum is required to run the gateway.
You are going to configure and start the gateway now.
Open
config.propertiesfile underc:\sapdbmtk\gatewayfolder and modify lines 4 and 5 as described in the picture below.The
bindaddressshould be theipadress/hostnamefor the host where the migration tool is installed, and the port should be the one you have specified in configuration setting withID #111(12345 as specified in step number 2).
Select Data Source Oracle JDBC driver has to be installed in the host where the gateway runs – in this case it is installed under
c:\sapdbmtk\Gateway\ora_jdbc(ojdbc7.jar).
Select Data Source Create a
.batfile calledSTART_SAPDBMTK_Gateway_oracle.batunderc:\sapdbmtk\gatewayto start the gateway, you can use a variable to set the full path to the JDBC driver, the content of the file should be this:Codeset ORACLE_JDBC=C:\sapdbmtk\gateway\ora_jdbc\ojdbc7.jar start_sapdbmtk_gateway %ORACLE_JDBC%
Select Data Source Start the gateway executing the new
START_SAPDBMTK_Gateway_oracle.batfile – a new command line window will be opened. Check that theipadress/hostnameand port are the right ones.
Select Data Source You are ready to run the migration tool
extractcommand.Once the gateway is up and running execute the migration tool utility
sapdbmtkwithextractoption, the command line parameters you have to specify are:sapdbmtk extract <project_folder> <ora_intance> <ora_host> <ora_port> <ora_user> <passwd>For example:
c://sapdbmtk 32# sapdbmtk extract C:/tmp/Advanced_SQL_Mig_tutorial <ora_intance> XXX.XXX.XXX.XXX 1521 <oracle_user> <system_passwd>NOTE: the Oracle user you specify for this command needs to have read permissions on the catalogs, it will not perform any modification in the source database, SELECT_CATALOG_ROLE is enough for this purpose.
IMPORTANT: windows firewall or antivirus software can prevent the migration tool connecting to the gateway, if you have connectivity issues try stopping/configuring firewall/antivirus
When you execute the
extractoption for the first time in a new project folder you will get 2 popup windows to confirm that compliance with 3rd party rights has been verified. When each of those 2 popup windows appears just read and click on I confirm, then rerun the command again (you will have to rerun the command twice the first time).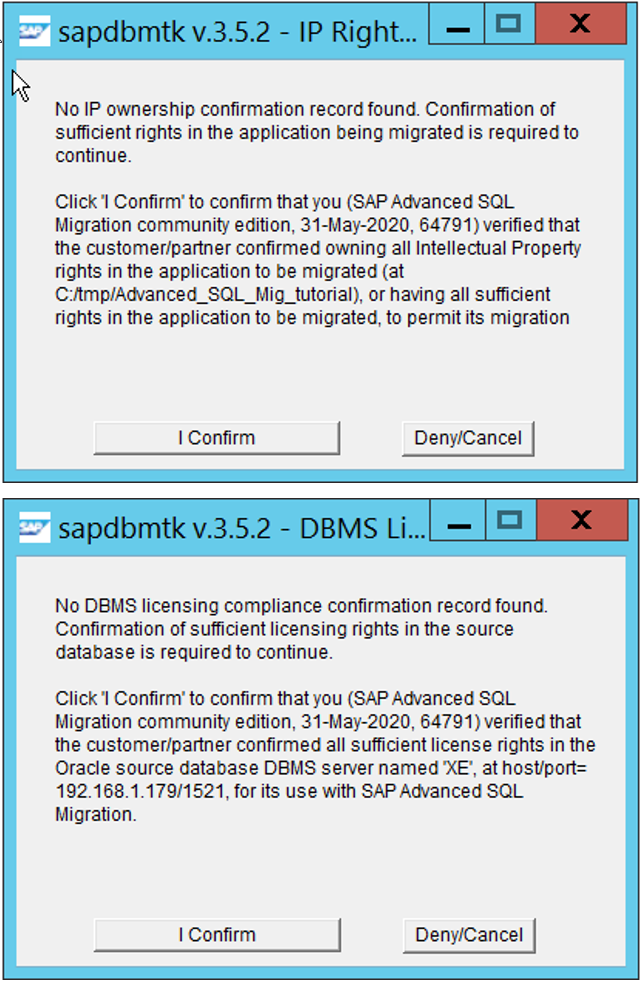
Select Data Source Execute the
extractcommand, you will see something like this.
Select Data Source The
extractcommand is done when you get the prompt again.
Select Data Source The complete output for the extract is located under
<project_folder>\reportsin a file named .SQL-Extraction.Oracle-HANA.YYYYMMMDD.hhmiss.logWith the
extractcommand the migration tools builds its own metadata about the data model and SQL objects found in the source database. A new subfolder calledextractedis created under the project folder, in it you will find a file for every SQL object like a stored procedure/function/trigger. and another subfolder calledcatalogstoring files with information about users, tables, columns and so forth.
Select Data Source
Before proceeding with this optional step you have to delete subfolder called
extractedunder the project folder, it was generated when runningextractoption with the Gateway and will generate it again now
DDL file/s preparation.
The script that is provided and used to create the Oracle user and data model in step 1 can be used for this purpose as well.
Copy that script (
APPDEMO2.sql) to the Windows host where the migration tool is running, for example, under folderc:\sql_scripts\APPDEMO2.sql.Migration tool
extract_offlinecommand.Migration tool
extract_offlinecommand is used to perform the extract using a text file, this command has the following command line parameters:sapdbmtk extract_offline <project_folder> '<full_path_to_text_file>'Execute this command with the right parameters in your case:
sapdbmtk extract_offline C:/tmp/Advanced_SQL_Mig_tutorial 'c:/sql_scripts/APPDEMO2.sql'The output when it starts will be something like this:
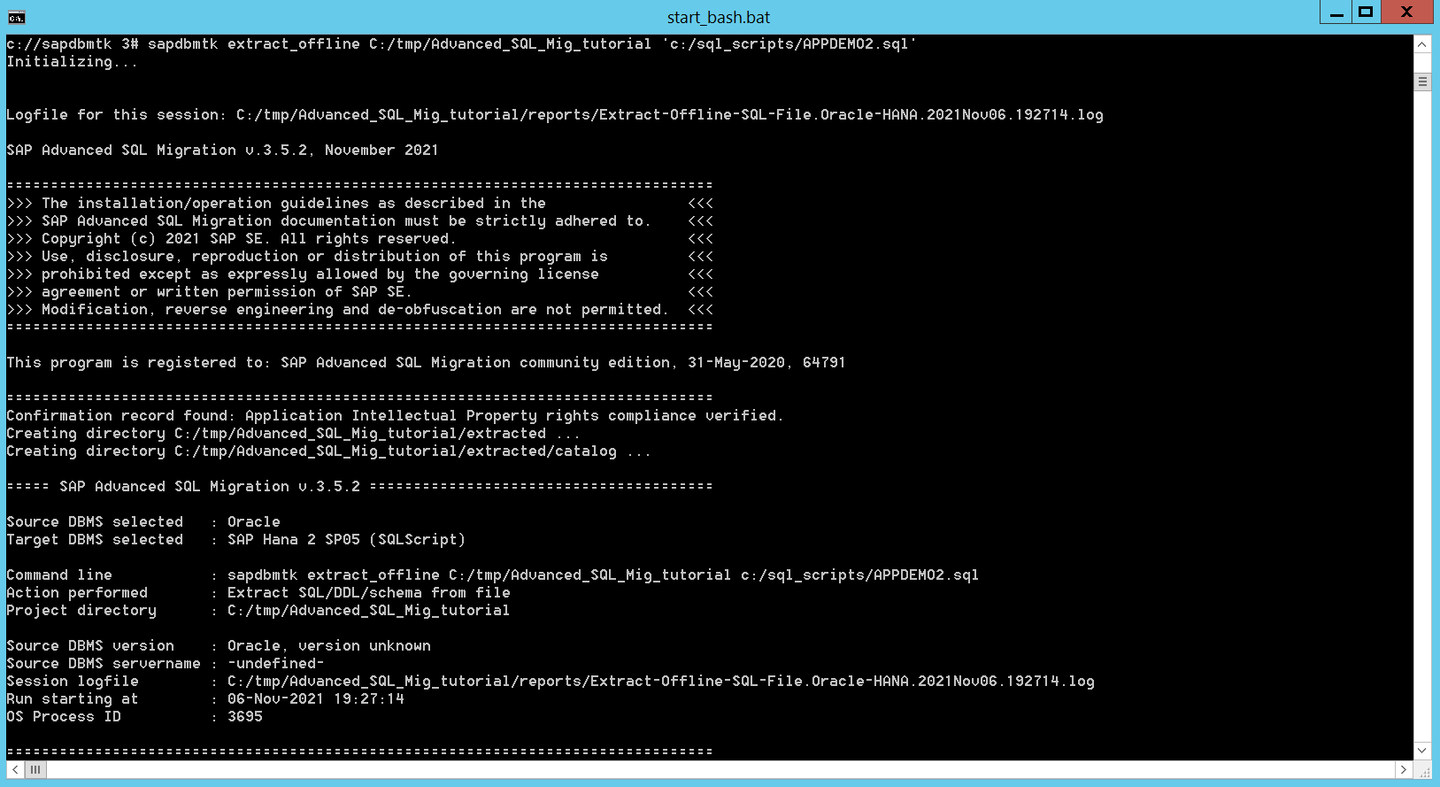
Select Data Source Once the command is finished you will see the following:

Select Data Source Subfolder
extractedis created under the project folder in the same way it was created for theextractcommand in section 1.
Once the source data model and SQL object are extracted, the next step is to run the conversion to the target database – SAP HANA in this case. For that, you have to use the migration tool convert command with the following parameters:
sapdbmtk convert <project_folder>
For example:
c://sapdbmtk 32# sapdbmtk convert C:/tmp/Advanced_SQL_Mig_tutorial
When you run the convert command, you can see this output in the command line window.

And once it is completed, you will get the prompt with this output:

The complete output for the extract is located under
<project_folder>\reportsin a file namedSQL-Conversion.Oracle-HANA.YYYYMMMDD.hhmiss.log.
When convert is executed, 2 new subfolders are created in the project folder: converted_orig and scripts.
In
converted_origyou can find a.sqlscriptfile with the converted code for each procedure/function/trigger and a.convertlogfile per object as well with conversion details.In
scriptsyou can find all the ready-to-run shell scripts and SQL scripts generated by the migration tool to be directly executed against the target database. Notice that a copy ofconverted_origfolder is created underscriptswith nameconverted.

After running the convert command two shell scripts called run_ddl_scripts.sh and run_sql_scripts.sh. have been created under <project_folder>\scripts, they are ready to be executed against SAP HANA. The former will create the data model (tables/views/indexes/synonyms …etc.) and the latter will create SQL objects like stored procedures, functions, views,…etc.
Below you see how they look like, this screen shot belongs to run_ddl_scripts.sh but run_sql_scripts.sh is similar. Notice that the connection parameters specified in configuration settings #740, #750, #751, #752, #753 and #754 (this was done in step number 2) are used in these 2 shell scripts.

Execute
run_ddl_scripts.sh, which will give you something like this:
Select Data Source When it is complete, you will get the prompt and an output similar to this:

Select Data Source Note: If you are using SAP HANA Cloud you will get some warnings when executing this script.
Execute
run_sql_scripts.sh, which will give you something like this: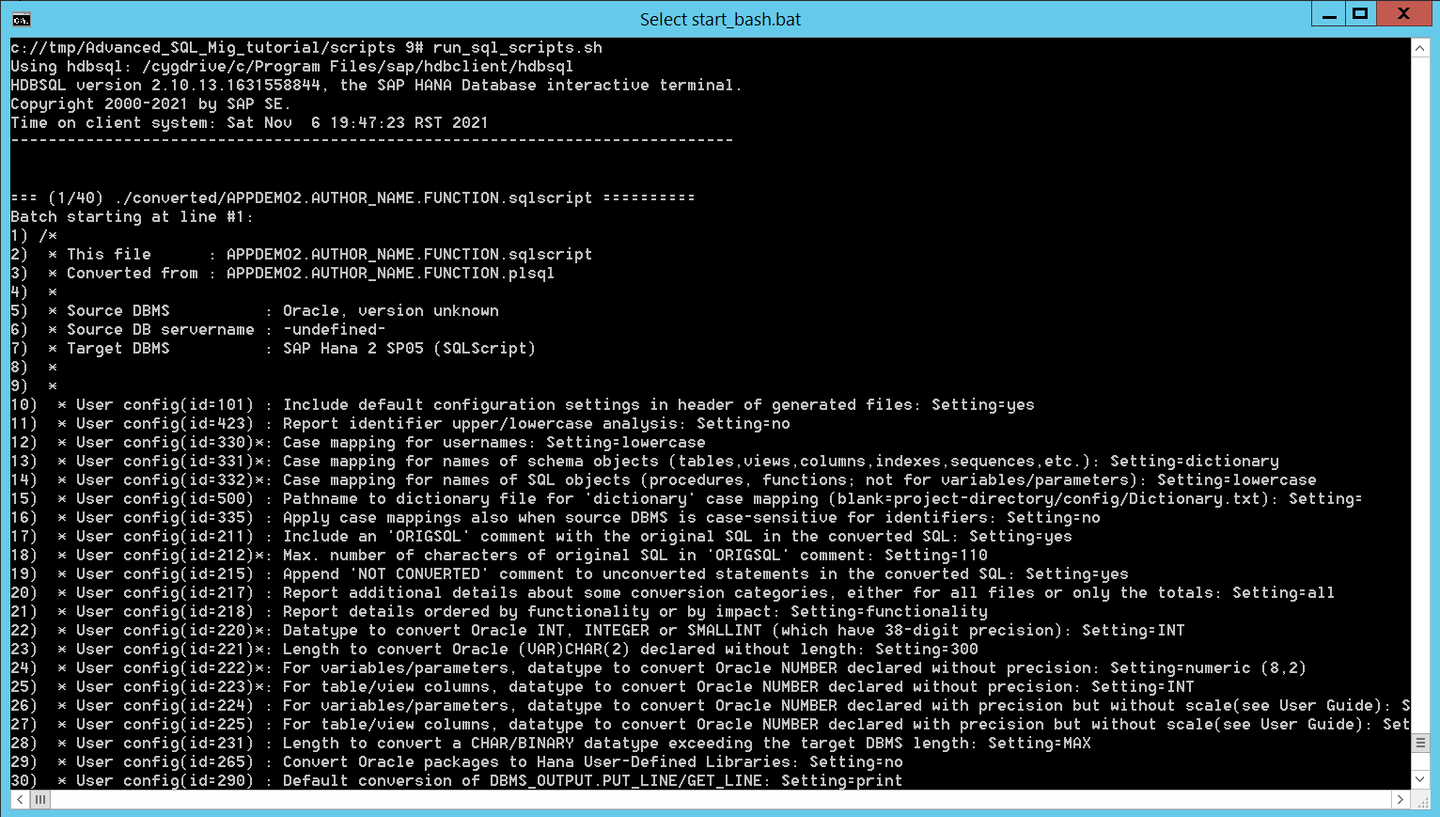
Select Data Source When it is complete, you will get the prompt and an output similar to this:

Select Data Source Note: You will get some warnings as well if you are using SAP HANA Cloud in the same way you got them when running
run_ddl_scripts.sh.After running these two shell scripts, the data model and SQL objects have been created into SAP HANA, you can check it with SAP HANA Studio.

Select Data Source
Run some SQL stuff in Oracle to force a couple of errors and see how Oracle behaves, then run exactly the same in SAP HANA to confirm it is working similarly and showing the same behavior after the conversion.
Oracle
Open the provided text file with the Oracle data model (
APPDEMO2.sql) and check the SQL code for a stored procedure calledappdemo2.insert_author.Notice that it is checking different things before performing the real insert into
appdemo2.authorstable and raising errors when apply – for example, it checks thatstatevalue is no longer than 2 characters andphonehas an specific format with no letters (it is being validated using an Oracle function).
Select Data Source Connect to your Oracle instance with the
sqlplusutility and run the following procedure call:SQLcall appdemo2.insert_author ( 'Javier', 'Martin', '+34 a666 666', 'C/ Torrelaguna Nº 77', 'Madrid', 'MAD', 'Spain', '28043', null ) /It fails with the following error:

Select Data Source Modify the stored procedure call by removing last letter (
D) fromstatefield:SQLcall appdemo2.insert_author ( 'Javier', 'Martin', '+34 a666 666', 'C/ Torrelaguna Nº 77', 'Madrid', 'MA', 'Spain', '28043', null ) /Run the new stored procedure call, and a second error appears:

Select Data Source Modify the stored procedure call again by removing character
afromphonefield:SQLcall appdemo2.insert_author ( 'Javier', 'Martin', '+34 666 666', 'C/ Torrelaguna Nº 77', 'Madrid', 'MA', 'Spain', '28043', null ) /Run the stored procedure call again. Now it works well and the author is created.

Select Data Source SAP HANA
Now you are going to repeat the same procedure calls against SAP HANA and see that behavior is similar to Oracle.
Connect to your SAP HANA instance with
hdbsqlusing the following parameters:hdbsql -u SYSTEM -p XXXXXX -n <ipdress>:<port> -d <SID> -j -A -m -fn -a -cgo -strictseparatorlineRun the following stored procedure call:
SQLcall appdemo2.insert_author ( 'Javier', 'Martin', '+34 a666 666', 'C/ Torrelaguna Nº 77', 'Madrid', 'MAD', 'Spain', '28043', null ) goNotice that the same error you had in Oracle is appearing in SAP HANA as well.

Select Data Source Modify the stored procedure call by removing
Dfromstatefield:SQLcall appdemo2.insert_author ( 'Javier', 'Martin', '+34 a666 666', 'C/ Torrelaguna Nº 77', 'Madrid', 'MA', 'Spain', '28043', null ) goRun the stored procedure call again and the second error pointing to an invalid phone appears.

Select Data Source Modify the stored procedure call by removing character
afrom the phone number:SQLcall appdemo2.insert_author ( 'Javier', 'Martin', '+34 666 666', 'C/ Torrelaguna Nº 77', 'Madrid', 'MA', 'Spain', '28043', null ) goRun the stored procedure again, you see now that it work properly and the new author is created

Select Data Source
Resources
Discussion
Share feedback on this tutorial or join the conversation in SAP Community.