
Overview
You will learn
- How to create a UI from template in SAP Web IDE
- How to adapt that UI to your needs
- How to test that UI
- How to deploy that UI as application to the S/4HANA Cloud system’s SAPUI5 ABAP Repository


Prerequisites
Prerequisites
Authorizations: Your user needs
- (a) business role(s) with Unrestricted Write Access for business catalog Extensibility - Fiori App Development (ID:
SAP_CORE_BC_EXT_UI) and Extensibility - Custom Business Objects (ID:SAP_CORE_BC_EXT_CBO) and in your S/4HANA Cloud system - access to SAP Web IDE
Steps
Intro
As building UIs in SAP Business Technology Platform (Side-by-Side Extensibility) offers more possibilities than UI Adaptation within S/4HANA Cloud (In-App-Extensibility), this tutorial shows you roughly how to build an UI based on a S/4HANA Cloud Custom Business Object’s OData service in Web IDE and how to get it to the S/4HANA Cloud system.
Additional Information
- SAP S/4HANA Cloud Release (tutorial’s last update): 1902
In your SAP Business Technology Platform Subaccount go to Services, search for SAP Web IDE and select it.

Click Go to Service to open SAP Web IDE.

Select New Project from Template to start wizard for UI project creation.
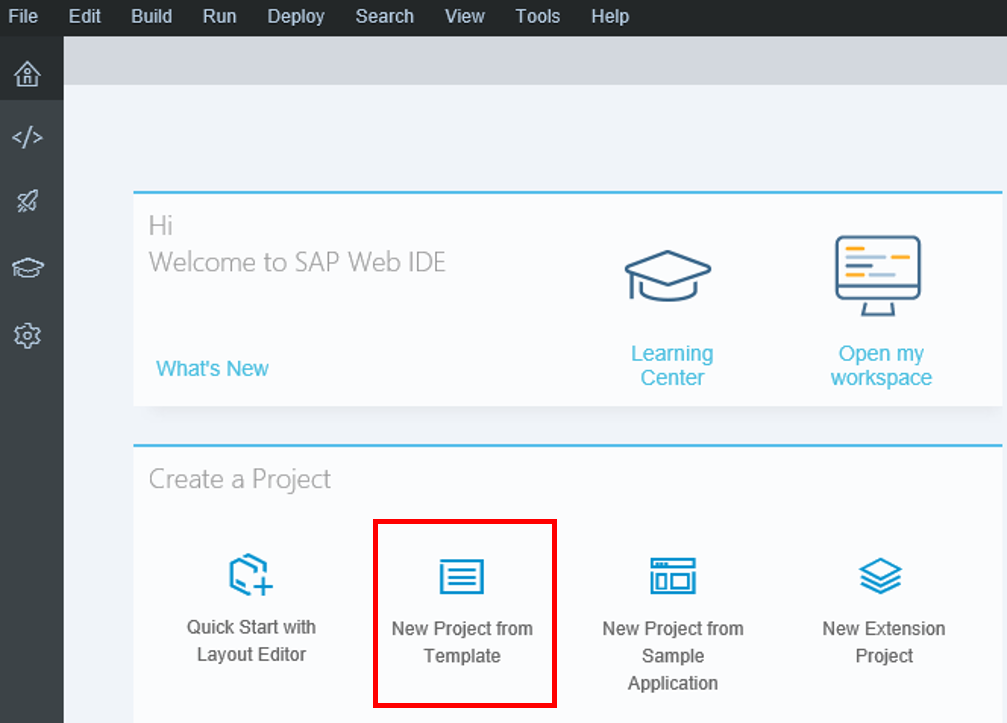
If you don’t see this welcome page then follow the alternative way:
File > New > Project from Template
Select the List Report Application template and click Next to create a new UI of this type.

Enter basic information for the project, like Bonusplan as name and title.
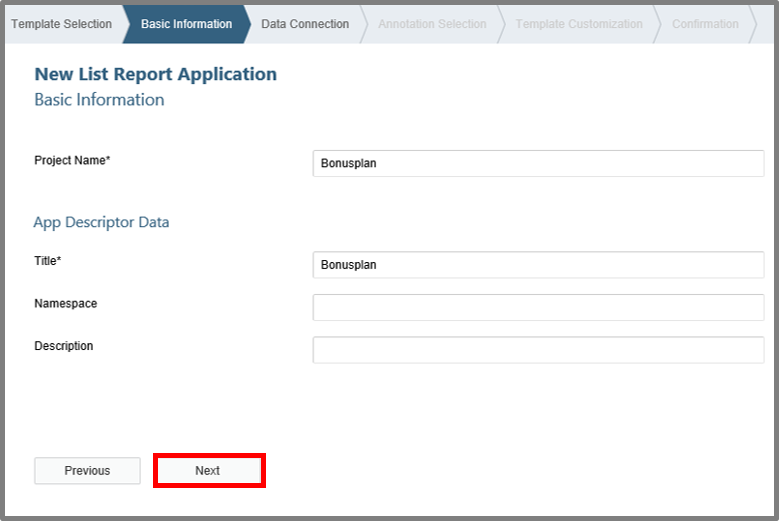
Click Next.
To add a data connection click Service Catalog and set the destination SAP_DEV_SYSTEM which you have previously created on your SAP Business Technology Platform Subaccount.
Choose YY1_BONUSPLAN_CDS as service and click Next.

Choose all annotations in this view and move on with Next.
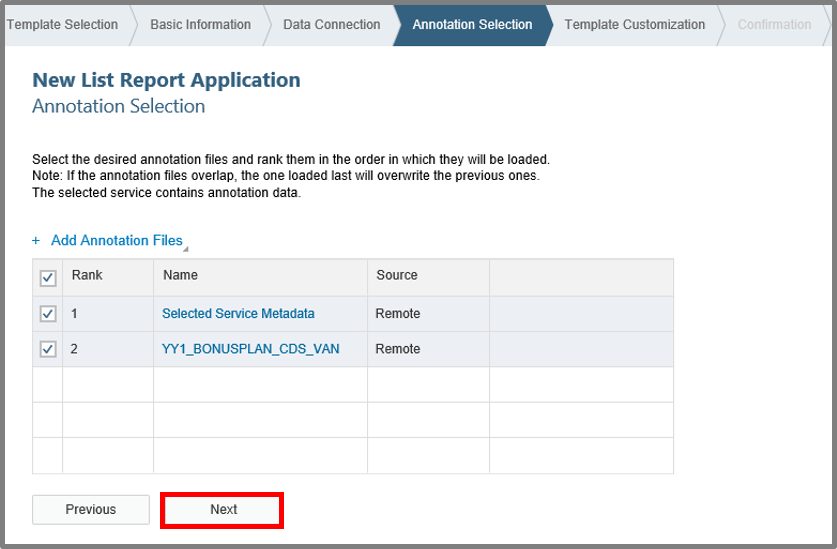
Customize the template by selecting YY1_BONUSPLAN as OData collection and click Finish.

To configure the tile that will appear in your S/4HANA Cloud Fiori Launchpad later, do the following:
Open the webapp folder and manifest.json file, and make sure to be in Descriptor Editor for the file.
Then go to Navigation
Add the following information:
| Inbound | |
|---|---|
| Semantic Object | Bonusplan |
| Action | maintain |
| Inbound Tile | |
|---|---|
| Title | Bonusplan |
| Icon | sap-icon://money-bills |

Save the file.
Open the SAPUI5 Visual Editor for your project Bonusplan via context menu.

Switch via Edit button to edit mode.

Click the column header area for the “Validity Start Date” column to mark it. On the right the marked control’s properties will appear. You can see that you marked the whole column and not only the header cell’s text, if the control property area has the heading “Column” instead of “Text”. Scroll down in the column’s properties to “Visibility” and set it to false.

Make the “Validity End Date” column invisible as well.
Save your changes with CTRL+S.
Although the Preview in SAPUI5 Editor already gives you an idea on how the UI will look and behave like a test in an own browser window is started this way.
Having just chosen a file of your project in the navigation tree or editor, click the play button to run your application in the test environment of SAP Web IDE.

Now you get the UI previewed in an own browser window. It has functionality already. For example by pressing the Go button, you’ll get the list of Bonusplans from your S/4HANA Cloud system.
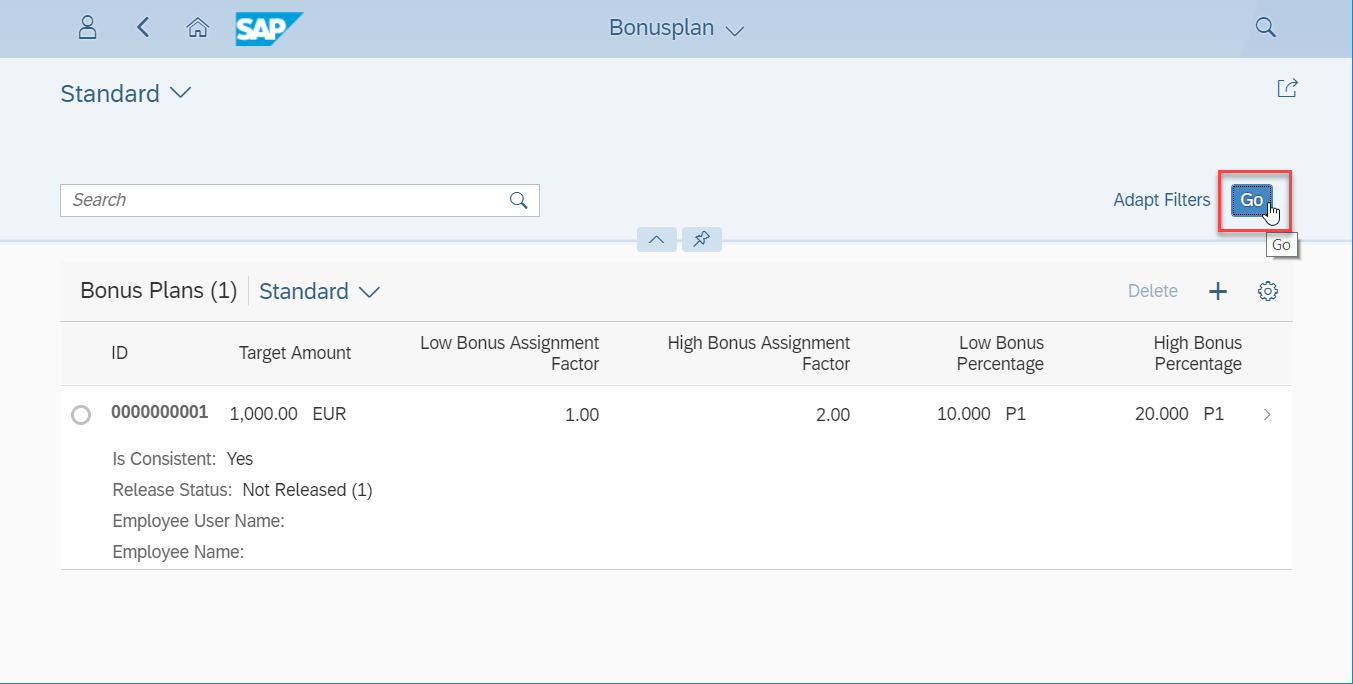
Right click your project Bonusplan and deploy it to your S/4HANA Cloud system via context menu Deploy > Deploy to SAPUI5 ABAP Repository.

A wizard opens. Set the destination to your S/4HANA Cloud system ones. Ensure that the UI is deployed as a new application. Click Next.

Give an application name and description, click Next and Finish.

Resources
Discussion
Share feedback on this tutorial or join the conversation in SAP Community.