
Overview
You will learn
- How to generate a Fiori elements list report with object page UI
- How to preview the UI
- How to deploy the UI as custom application to your SAP S/4HANA Cloud system
- This process of custom UI development is the way to go if the UI generated within the SAP S/4HANA Cloud system does not match your needs


Prerequisites
Prerequisites
- You have an SAP S/4HANA Cloud system for development and a business user with UI Development authorization. This requires a business role with unrestricted write access containing business catalog
SAP_CORE_BC_EXT_UI(Extensibility - Fiori App Development). - You have a custom business object with OData service running in the SAP S/4HANA Cloud system, for example
YY1_BONUSPLAN, see Create a Custom Business Object as well as Generate the UI for a Custom Business Object and grant Access. - Note: During creation of the custom business object, select the option to generate a Back End Service and deselect the option to generate a User Interface. Otherwise label texts may not be populated automatically!
- You have an SAP Business Technology Platform (SAP BTP) Trial account with an SAP Business Application Studio subscription and a dev space within that, see preceding tutorials of this tutorial group.
Steps
Additional Info
- This tutorial illustrates all the needed steps to build a UI with all SAPUI5 options in SAP Business Application Studio, how to test it, and how deploy it into the SAP S/4HANA Cloud system. If your goal is simply to generate a user interface and make limited adjustments within the SAP S/4HANA Cloud system using in-app extensibility, refer to Generate the UI for a Custom Business Object and grant Access and Adapt the UI of a Business Object.
- If you want to create a custom SAP Fiori app with developer extensibility check out Develop an SAP Fiori App to Trigger Purchase Requisitions API
- Tutorial last checked for feasibility with SAP S/4HANA Cloud Release 2608
SAP Business Application Studio is a subscription-based service in SAP BTP. The SAP trial account offers a Quick Tool Access directly from https://account.hanatrial.ondemand.com, however the following sequence describes the procedure via the global account in SAP BTP cockpit as needed for customer accounts. By choosing the trial specific Quick Tool Access (red dashed box) you can skip the following sequence.
In your web browser, open the SAP BTP Trial cockpit https://account.hanatrial.ondemand.com and Go To Your Trial Account, which is a so called global account.

Enter Global Trial Account On your global account page, select default subaccount
trial.
Enter trial Subaccount In the navigation pane expand the Services section.

Open SAP Business Application Studio from Subaccount Select Instances and Subscriptions.
Click the link or the icon at the SAP Business Application Studio Subscription.
SAP Business Application Studio offers UI generators with a wizard approach to create UI projects.
Start your Dev Space in case it is not running

Start Dev Space Open your Dev Space

Open Dev Space Click the three lines on top of the navigation to open View > Command Palette….

Open “Find Command” Search for command >Fiori: Open Application Generator and execute it.

search and choose “Fiori: Open Application Generator” command
As UI project template choose List Report Page (1) and click Next (2).

During the Data Source and Service Selection step, you define which system and OData Service the UI is based on, so that data structure and action information is used to generate a UI. It’s also used for the preview to show and change data.

As your Data Source, select Connect to a System.
As your System, choose the destination you have created earlier in the tutorial Connect SAP Business Application Studio and SAP S/4HANA Cloud system.
Select the OData service of your custom business object which ends with
_CDS, for exampleYY1_BONUSPLAN_CDS.Click Next.
In this step you define the root node for your UI in the OData service.

As Main Entity, select the custom business object root node
YY1_BONUSPLAN.Choose Next.
In this step, you set project attributes and choose to add further optional configurations.

Define a Module name, which will later be the folder name of the UI Project and - in combination with optional namespace - the application ID in SAP S/4HANA Cloud system. Example:
bonusplansSet the Application title, which will be visible as the browser tab title and title within the app. Example:
Bonus PlansChoose to Add Deployment configuration within the wizard by selecting
Yes.Choose to Add FLP configuration within the wizard by selecting
Yes.Select Next.
In this step, you define where you want the UI project to be deployed to as a runnable application.

Leave the default
ABAPas target platform and as Destination the one you have created earlier (see Connect SAP Business Application Studio and SAP S/4HANA Cloud system).Enter a name for the SAPUI5 ABAP Repository. This is the repository that will be created and where the application will be deployed to. Example:
YY1_BONUSPLAN. This repository name will be visible as your Custom UI App ID in your SAP S/4HANA Cloud system.Enter a Deployment Description for the UI5 ABAP repository. This repository description will be visible as Custom UI App Description in your SAP S/4HANA Cloud system.
Select Next.
Note that you can also configure the deployment later via the command line interface by using the following command:
Shell/Bashnpx fiori add deploy-config
The SAP Fiori launchpad (FLP) configuration is required to embed your application as a tile into the FLP.

Set a Semantic Object, for example
bonusplanDefine the general Action that you want to be executed on the semantic object with the app, for example
manageEnter a Title, which will be displayed as the tile title in the FLP, for example
Manage Bonus PlansSelect Finish.
The UI project is now being generated and dependencies are being installed. This may take a while and is displayed at the bottom right.

Once the generation finished a pop up appears to ask if and how to open it. Choose Add project to workspace

Note that you can also configure the launchpad later via the command line interface by using the following command:
Shell/Bashnpx fiori add flp-config
In case your SAP Business Application Studio’s explorer does not show the project, do the following.
To view the newly created project in the explorer with all features, select Open Folder.

Choose Open Folder Option Choose the
home/user/projectsfolder and select OK.
Choose projects folder to open
In this step, you can test the UI with the preview functionality.
After Opening the project, Business Application Studio also opens an Application Info tab. Click the Preview Application tile.

Start Preview Note that in case there is no Application Info tab you can open it from the context menu of the project:

Open Application Info tab Select the
startoption, which will perform a preview based on the configured data source system, retrieve real data and enable you to create, edit and delete data in that system.
Choose start preview option A terminal is opened that automatically executes the underlying command.

At preview opening terminal Once the command has reached the required state, a new browser tab with the preview is opened.
Alternatively to Preview from Application Info tab, you can open a terminal for your project by right-clicking it and choosing Open in Integrated Terminal from the context menu.

Open Project in Integrated Terminal In the
cli(command line interface) terminal, enter the following command:Shell/Bashnpm run startPress return.
To view existing entries, select GO or Create to add a new entry.

Resulting preview browser tab
Once the UI is set up to your needs, you can deploy it to the development SAP S/4HANA Cloud system, where it can be tested and transported to test or productive tenants.
In the Application Info tab, click the Deploy tile

Start Deploy Alternatively to Application Info, in the
cli(command line interface) terminal, enter the following command:Shell/Bashnpm run deploy
Enter deploy command in cli Press return.
Check the deployment configuration.
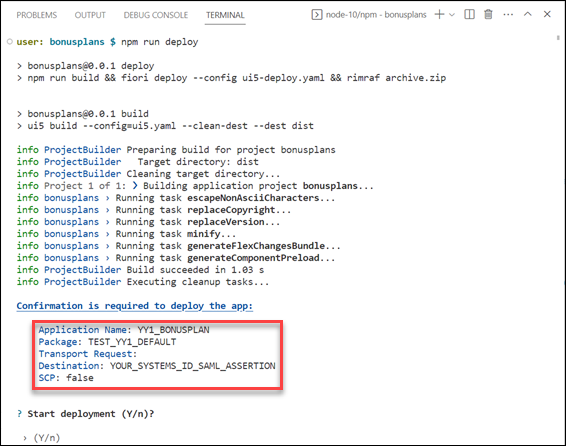
Check deployment configuration in command output Confirm the deployment by entering
y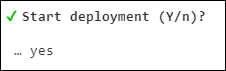
Confirm deployment configuration Deployment will start, which might take a while.
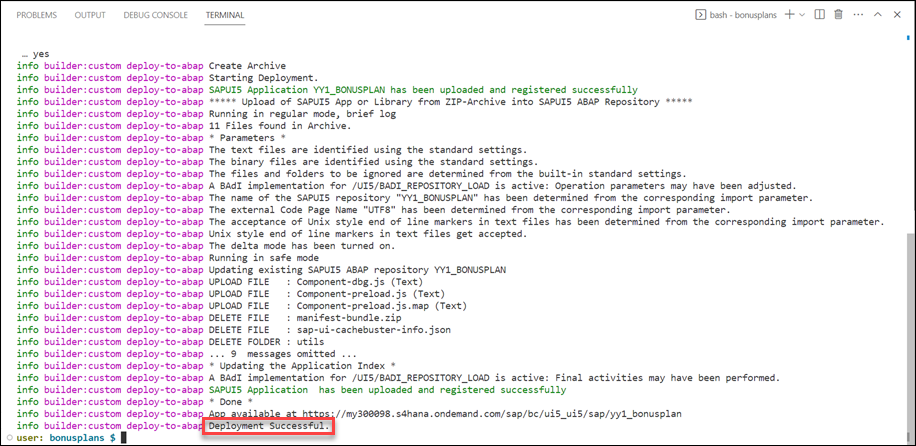
Deployment log Once the deployment is completed, a Deployment Successful. message is displayed in the log.
Resources
Discussion
Share feedback on this tutorial or join the conversation in SAP Community.