
Overview
You will learn
- How to configure your ABAP development environment with ABAP Development Tools (ADT)
- How to create your first ABAP project


Prerequisites
Prerequisites
- You have a valid instance of an on-premise AS ABAP server, version 7.51 or higher (some ABAP Development Tools may not be available in earlier versions). You can download a free ABAP application server, developer edition, from SAP Developers Community - Trials and Downloads, e.g. AS ABAP 7.52 SP04
- Tutorial: Create an ABAP Project in ABAP Development Tools (ADT)
Steps
Follow the instructions on the ABAP Development Tools site.
- If the Welcome Page appears, close it.
- Switch to the ABAP perspective choosing Open Perspective from the toolbar or using the menu: Window > Open Perspective > Other.

Then switch to the ABAP Perspective by choosing ABAP in the list and choosing OK.
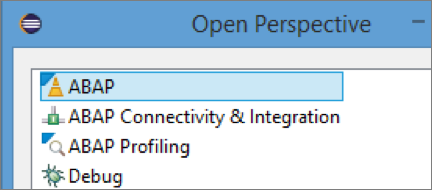
In the ABAP Perspective, the ABAP tools are ideally positioned in the IDE to facilitate your development tasks. Nevertheless you are free to rearrange all views and editors to your personal needs.

You need to create one ABAP project for each system connection. To do this:
In the File menu, choose New > Other ABAP Project. Choose the ABAP backend system from the list of SAP System connections, then choose Next. For example, if you are using the AS ABAP 7.5x developer edition, this will be
NPLorA4H.
Image depicting step4-system-connection In Connection Settings, accept the defaults and choose Next.

Image depicting step4b-connection-settings Enter your logon data and choose Finish.
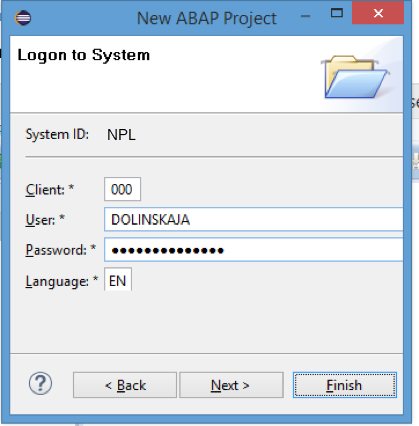
Image depicting step4c-logon-data
The ABAP Project has been created. It represents a system connection to your chosen SAP system.

Resources
Discussion
Share feedback on this tutorial or join the conversation in SAP Community.