
Consume a Basic OData Service
Consume a Basic OData Service within UI5 binding the service to a Table
Overview


Prerequisites
Prerequisites
- This tutorial is designed for SAP HANA on premise and SAP HANA, express edition. It is not designed for SAP HANA Cloud.
- Proficiency: Intermediate
- Tutorials: SAPUI5 User Interface
Steps
We have prepared a skeleton application for you with several sections that need to be completed marked To-Do.
Import this this template into web/resources folder from the following URL: https://github.com/SAP-samples/hana-xsa-opensap-hana7/raw/snippets_2.4.0/ex4/odataBasic.zip
Create a folder named odataBasic within the web/resources folder
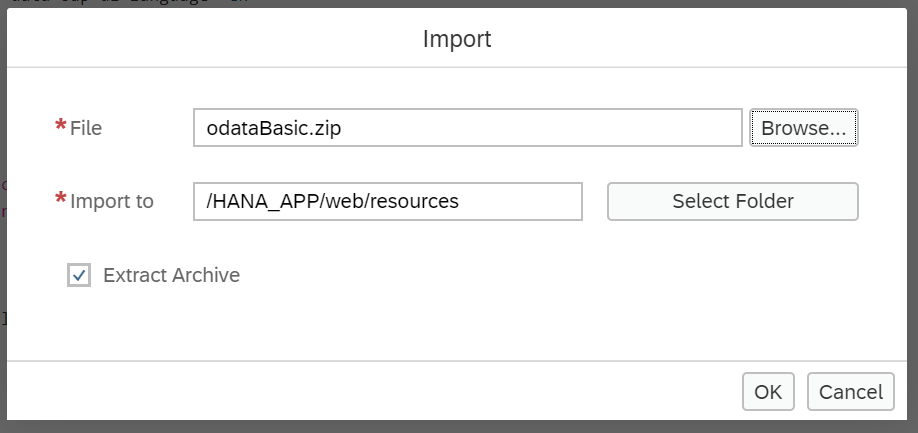
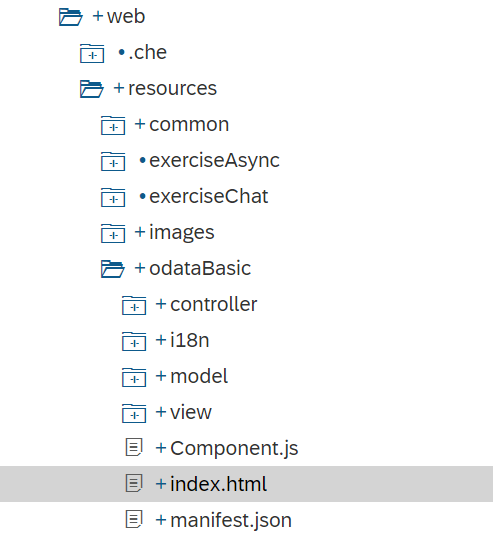
After the import, please check to see if you have a /web/resources/common folder with a file startup.js within it. This could have been created earlier if you completed tutorial SAP HANA XS Advanced - Asynchronous Non-Blocking I/O within Node.js SAP HANA applications. If you do not have this file, you can create it now without having to perform the entire previous tutorial. Here is the source code of startup.js.
/*eslint no-console: 0, no-unused-vars: 0, no-use-before-define: 0, no-redeclare: 0, no-shadow:0*/
function onLoadSession(myJSON) {
	try {
		var result = JSON.parse(myJSON);
		if (result.session.length > 0) {
			if (result.session[0].familyName !== "") {
				return result.session[0].givenName + " " + result.session[0].familyName;
			} else {
				return result.session[0].UserName;
			}
		}
	} catch (e) {
		return "";
	}
	return "";
}

function getSessionInfo() {
	var aUrl = "/node/getSessionInfo";

	return onLoadSession(
		jQuery.ajax({
			url: aUrl,
			method: "GET",
			dataType: "json",
			async: false
		}).responseText);
}

function localShellStartup(name) {

	sap.ui.getCore().attachInit(function () {
		var ComponentContainer = new sap.ui.core.ComponentContainer({
			height: "100%"
		});
		var username = "Test User";
		// create a shell
		new sap.ui.unified.Shell({
			id: "myShell",
			icon: "/images/sap_18.png",
			headEndItems: new sap.ui.unified.ShellHeadItem({
				icon: "sap-icon://log",
				tooltip: "Logoff",
				press: function () {
					window.location.href = "/my/logout";
				}
			}),
			user: new sap.ui.unified.ShellHeadUserItem({
				image: "sap-icon://person-placeholder",
				username: username
			}),
			content: ComponentContainer
		}).placeAt("content");

		var oComponent = sap.ui.component({
			id: "comp",
			name: name,
			manifestFirst: true,
			async: true
		}).then(function (oComponent) {
			ComponentContainer.setComponent(oComponent);
		});

	});
}So far, you have created a skeleton of an application. Just copying and pasting is no fun, so you have some pending coding to do. The objective here is to bind the xsodata service you created within the js module to a table displayed in your SAPUI5 interface. You will reuse the service businessPartners.xsodata. In order to achieve this, you need to declare this service as a data source. This is done in the manifest.json file, replacing the first //To-Do comment with the following:
"dataSources": {
			"bpService": {
				"uri": "/xsodata/businessPartners.xsodata/",
				"type": "OData",
				"settings": {
					"odataVersion": "2.0"
				}
			}
		}
Scroll down until the next //To-Do comment and add the following model:
"bpModel": {
	"dataSource": "bpService",
	"type": "sap.ui.model.odata.v2.ODataModel",
	"preload": true,
	"settings": {
		"useBatch": false,
		"json": true,
		"defaultBindingMode": "TwoWay",
		"defaultUpdateMethod": "PUT"
	}
},Now that you have a data source and a model exposing it, you need to bind it to the table in your view. You will first bind the table to the entity BusinessPartners and tell the SmartTable control which columns to display. You fill find the to-do in onInit method in the App.controller.js:
oTable.setModel(bpModel);
oTable.setEntitySet("BusinessPartners");
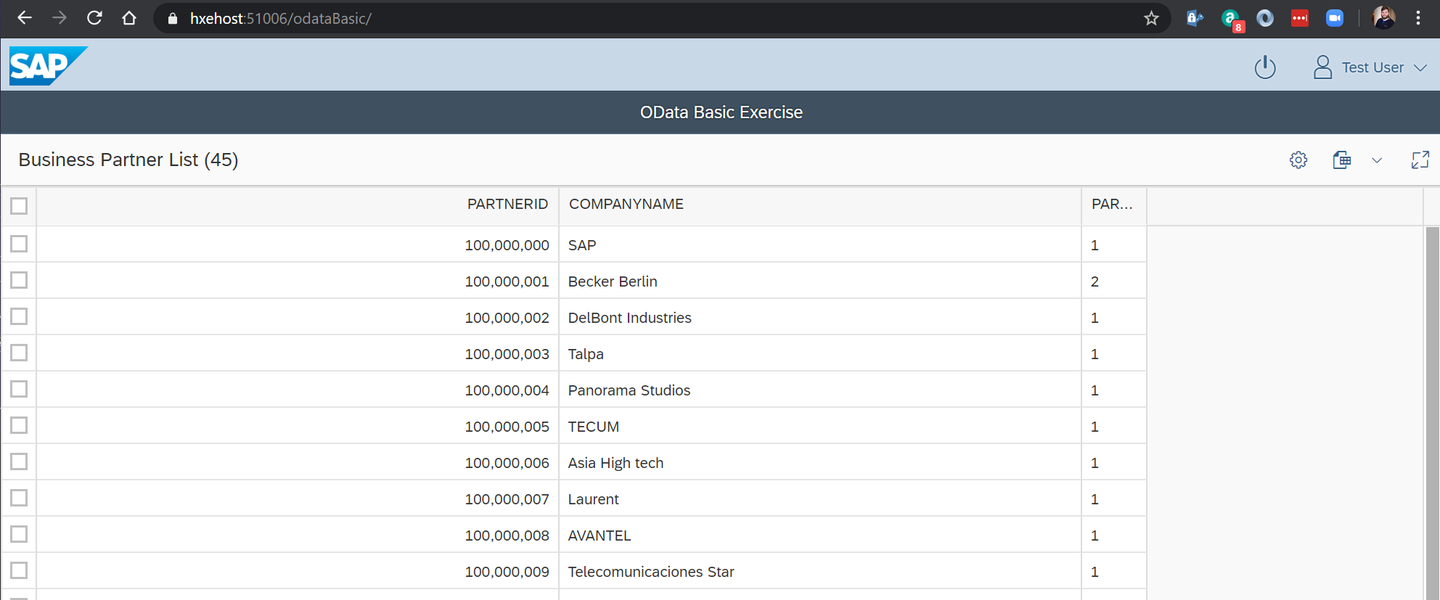
oTable.setInitiallyVisibleFields("PARTNERID,COMPANYNAME,PARTNERROLE");Save the files you have modified and run the web module
Change the path in the new tab to /odataBasic:
Resources
Discussion
Share feedback on this tutorial or join the conversation in SAP Community.