
Overview
You will learn
- How to create an HTML5 web interface
- How to configure the
approuter


Prerequisites
Prerequisites
- This tutorial is designed for SAP HANA on premise and SAP HANA, express edition. It is not designed for SAP HANA Cloud.
- You have created a Multi-Target Application using the Cloud Application Programming Model.
- You have created database artifacts and loaded data as explained in this tutorial.
Steps
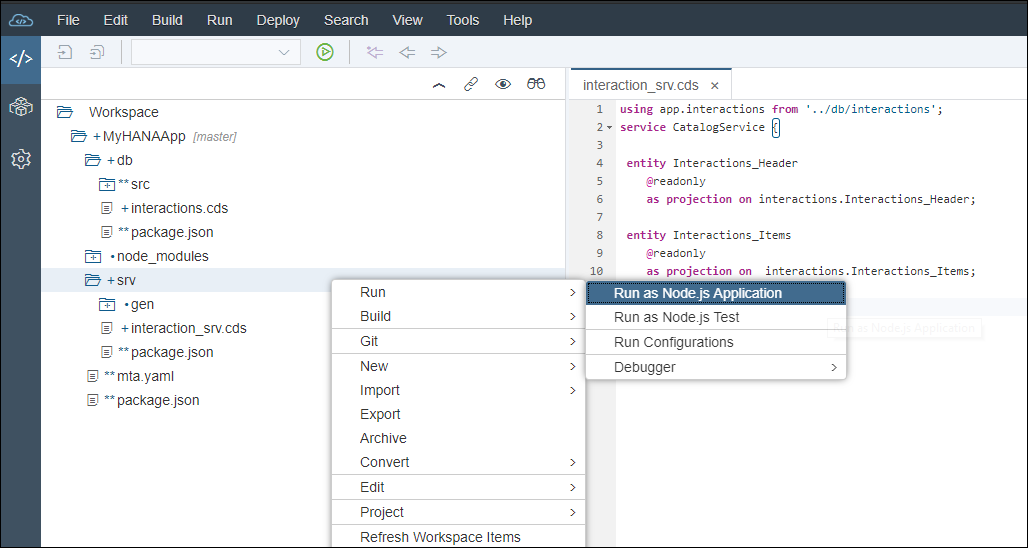
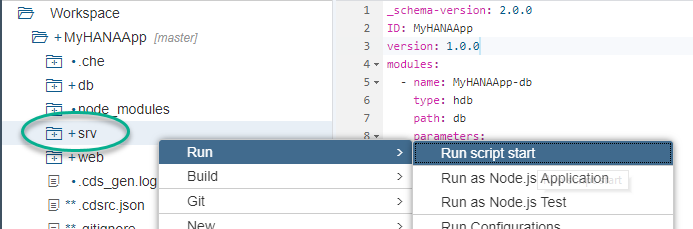
Return to the code editor and right-click on the srv folder. In the file interaction_srv.cds you created the definition for two read-only services that expose the header and items entities in your database module.
Choose Run > Run as Node.js Application.
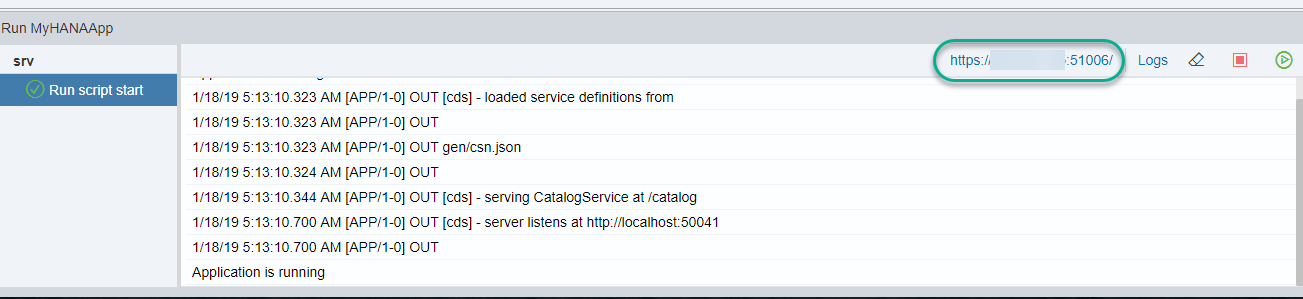
You will see the run console shows the progress. Once the application is running, click the URL to open the service.
You should see the list of entities you exposed.
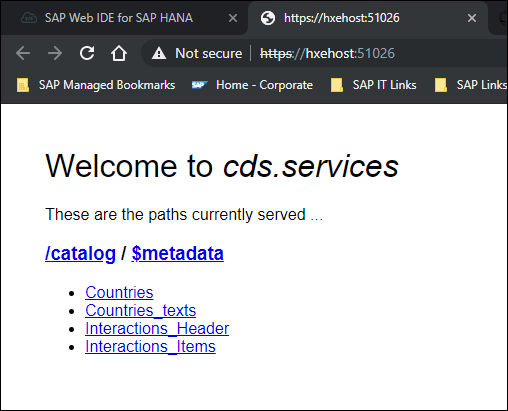
You can click on the entities to see the values in a JSON format.
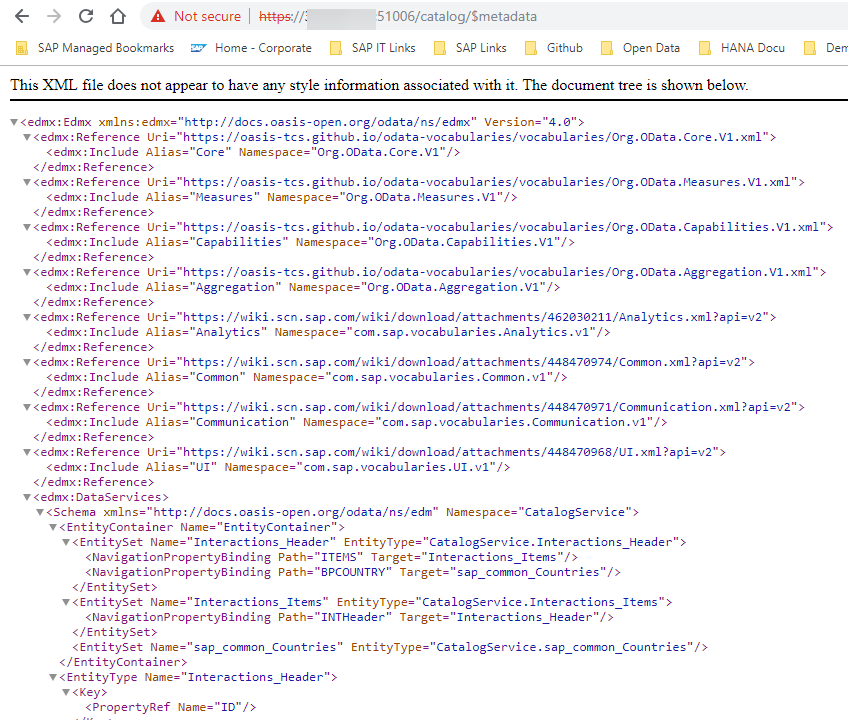
Add $metadata to the service and you can see a technical description of the service (for example, https://hxehost:51026/catalog/$metadata ).
You can use different methods in the OData v4 services you have created. Go back to the welcome page for the service and click Interactions_Items. Add the following to the URL:
?$search=DEFor example, https://hxehost:51026/catalog/Interactions_Items?$search=DE:

You can find out more about OData V4 at the OData organization and the documentation for SAPUI5.
You will now create a basic web module. This module is very important as it will become the entry point for your application. Every request coming to this module will be routed into the different backend services.
Right-click on the project folder and choose New > Basic HTML5 Module (or just New > HTML5 Module if using the SAP Web IDE Full-stack).
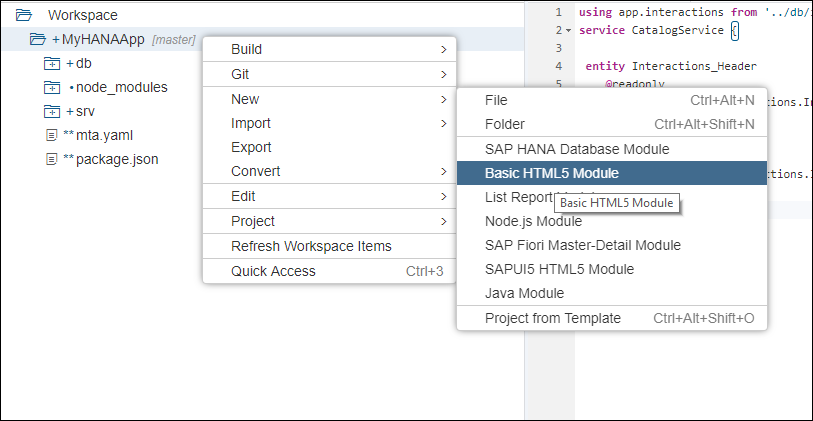
If using the SAP Web IDE Full-stack there will be a question here asking for template selection. Please choose SAPUI5 Application.
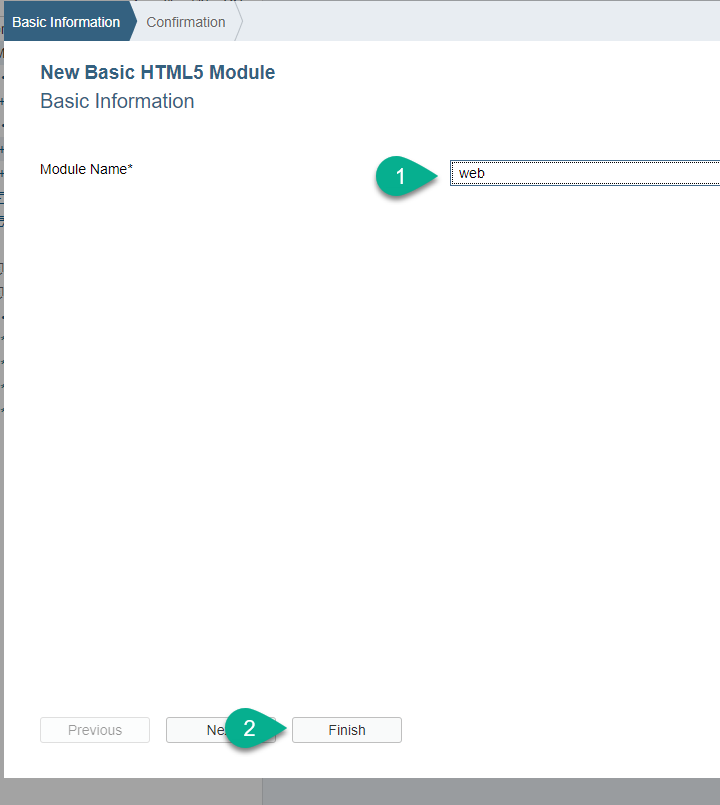
Call it web and click Finish.
Since the web module will be receiving the requests and routing them into the proper processing backend services, such as the OData service you have just defined, it will also be responsible for enforcing authentication.
These routing logics are done by an application called approuter. You can see the Node.js module being called as the starting script for the web module as defined in the file package.json.
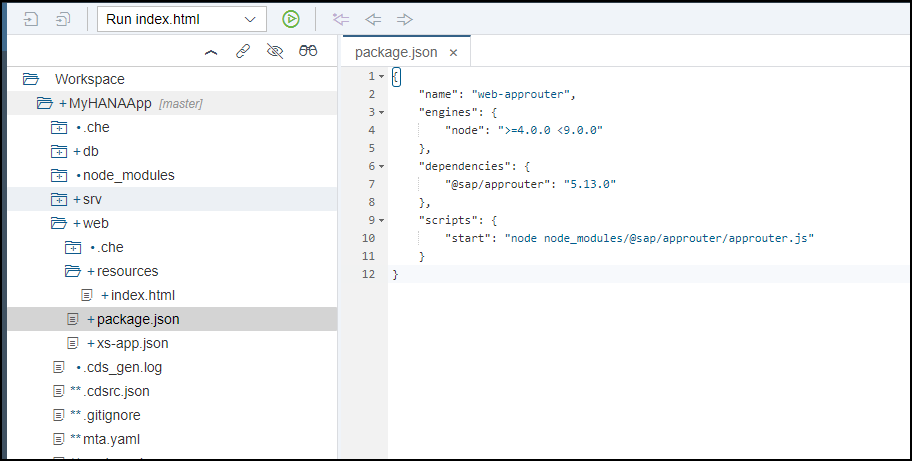
The approuter will scan the file xs-app.json to route patterns in the request to the right destinations.
Replace the content of xs-app.json with the following content if you are using SAP Web IDE for SAP HANA:
{
	"welcomeFile": "index.html",
	"authenticationMethod": "none",
	"routes": [{
		"source": "/catalog/(.*)",
		"destination": "srv_api",
		"csrfProtection": true
	}]
}
If you are using the SAP Web IDE Full-stack, use this code instead:
{
	"welcomeFile": "index.html",
	"authenticationMethod": "none",
	"routes": [{
		"source": "/catalog/(.*)",
		"destination": "srv_api",
		"csrfProtection": true
	},
	{
		"source": "^/web/(.*)$",
		"target": "$1",
		"localDir": "webapp"
	}]
}
Save the changes.
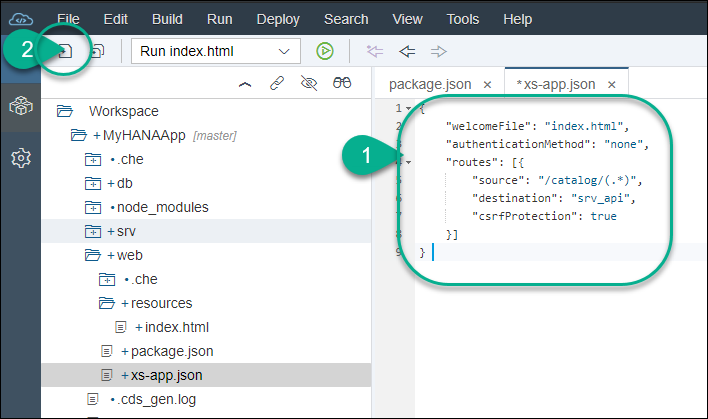
Among other information, this configuration is declaring that requests containing the pattern /catalog/(.*) are routed to a destination called srv_api.
This destination can be defined in the mta.yaml file.
When an application is deployed, the mta.yaml file is used to establish the dependencies between the modules and resources. During this binding process, environment variables such as the name of the destinations are set.
Open the mta.yaml file and you will notice the srv module provides a variable called url. This variable is taking the value of the default URL provided at runtime.
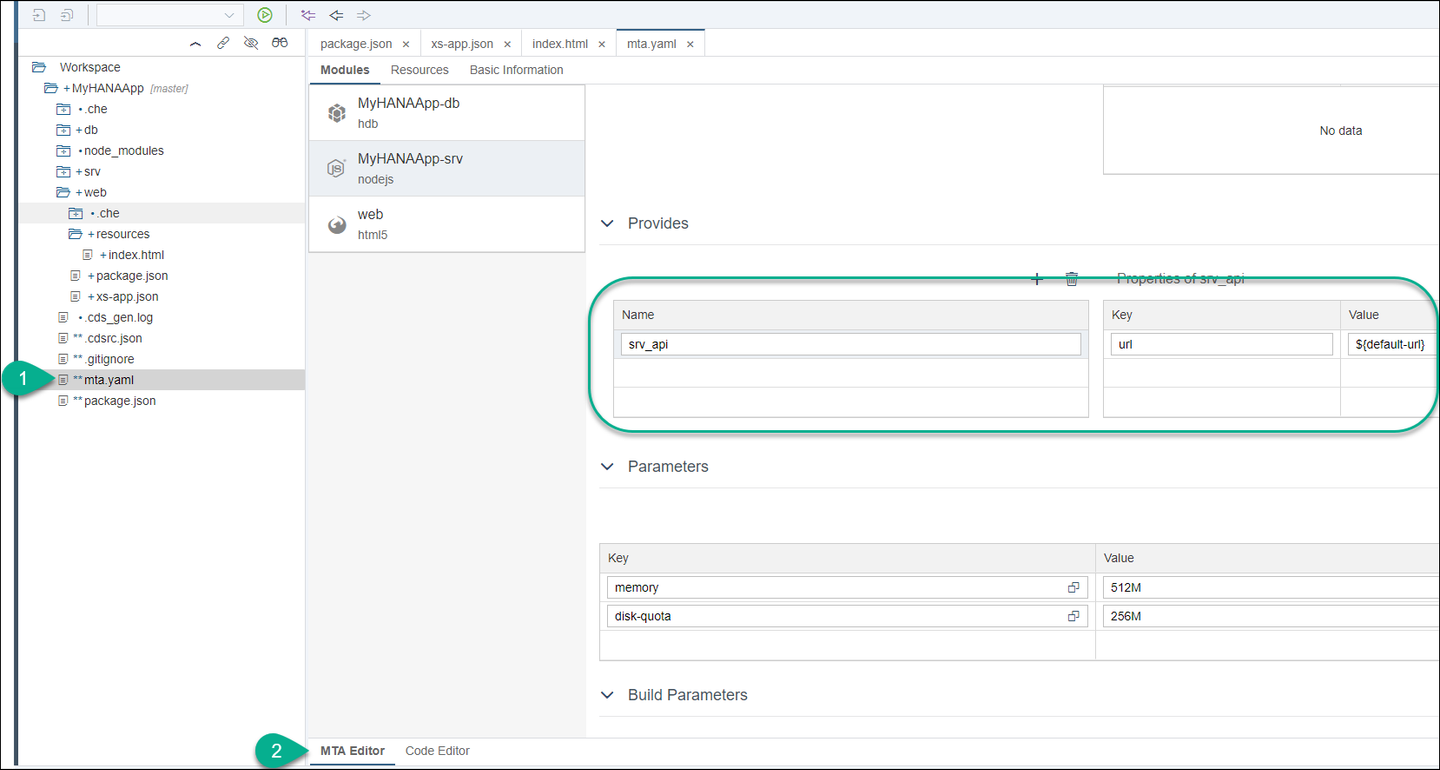
Click on the web module. You will establish its dependency with the srv module and declare the destination. The name of the destination here needs to match the name you used in xs-app.json in the previous step.
Add a new Requires entry for the web module.
Choose
srv_apiunder Requires in the dropdown.Enter
destinationsunder Group.Fill in the properties with the following key-value pairs …
Key Value name srv_apiurl~{url}forwardAuthTokentrue … as follows:
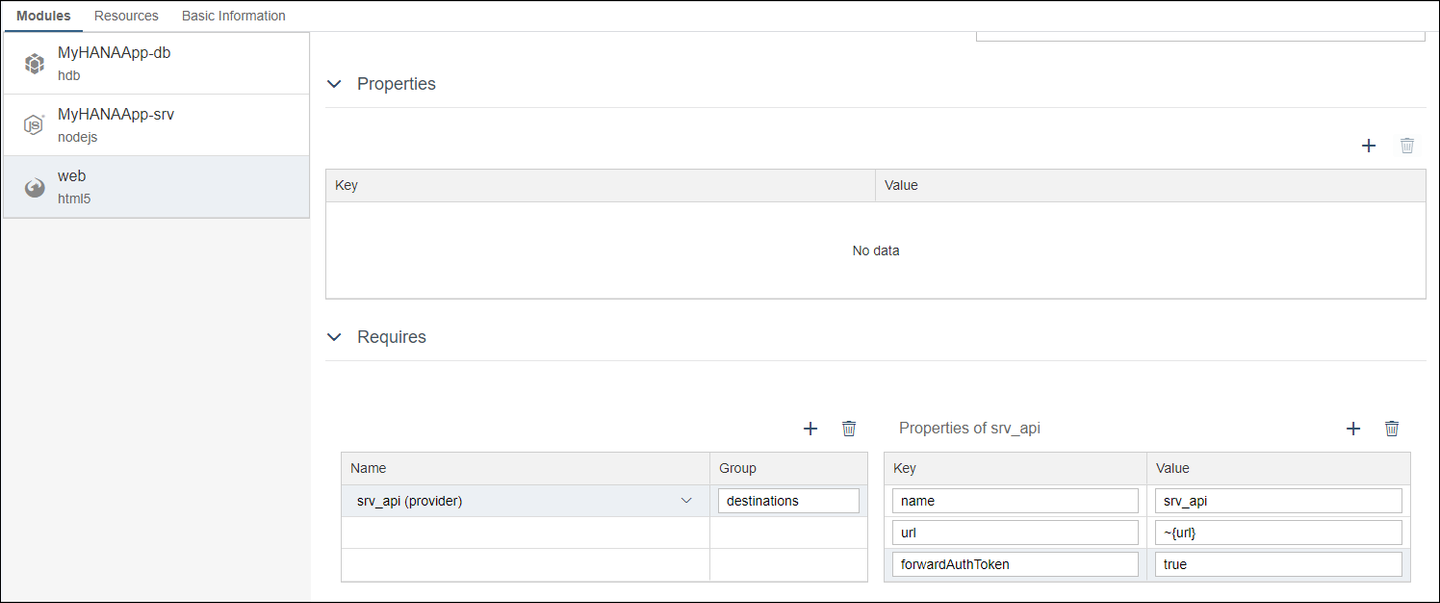
Web module Save the changes in the deployment descriptor file.
Here is what the file looks like in the code editor:
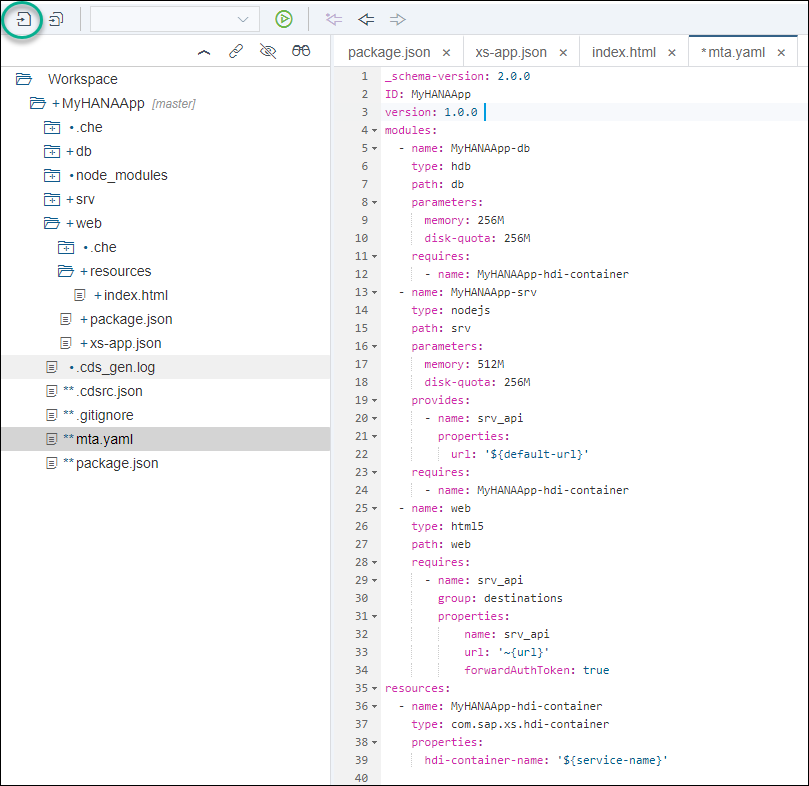
For more information and examples about the
approuter, refer to this section in the help.
Open the index.html file generated by the wizard in your web module.
Replace the entire contents with the following code:
<!DOCTYPE html>
<html>
	<head>
		<meta charset="utf-8">
	    <meta name="viewport" content="width=device-width, initial-scale=1.0">
		<title>web</title>
<!-- 1.) Load SAPUI5 (from a remote server), select theme and control library -->
<script src="https://sapui5.hana.ondemand.com/resources/sap-ui-core.js"
	id="sap-ui-bootstrap" data-sap-ui-libs="sap.m, sap.ui.table"
	data-sap-ui-theme="sap_fiori_3">
		</script>

	<script>

	var oModel = new sap.ui.model.odata.v4.ODataModel({  synchronizationMode : "None", serviceUrl : "/catalog/" });
	var oTable = new sap.ui.table.Table({ title: "My first table" });
	oTable.addColumn(new sap.ui.table.Column({ label: "Text", template: "LOGTEXT" }));
	oTable.setModel(oModel);
	oTable.bindRows("/Interactions_Items");
	oTable.placeAt("uiArea");

	</script>
	</head>
	<body class="sapUiBody">
		<div id="uiArea"></div>
	</body>
</html>Save the changes.
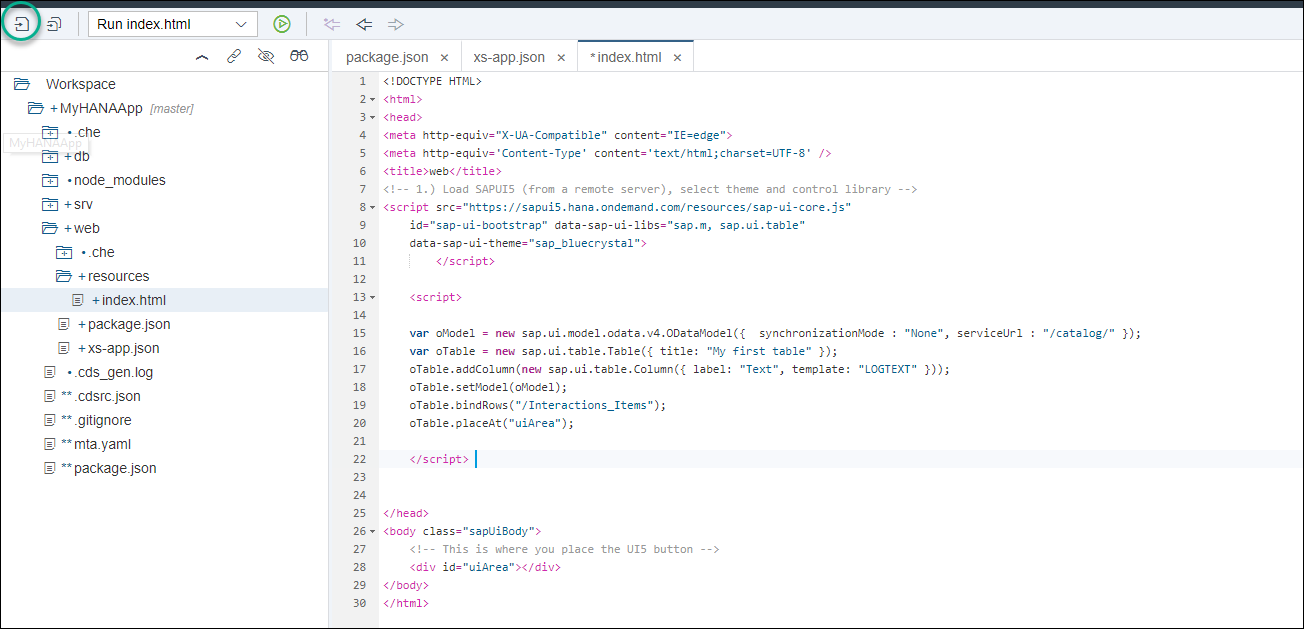
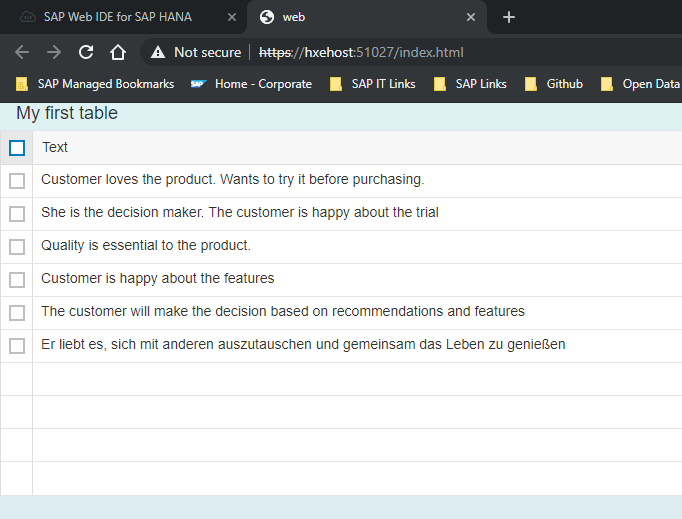
This very simple code is creating a model from the OData V4 service and using it in a table. This is only test code to show the consumption of the model, but there is a lot to improve here.
Run the srv module again.
Once the srv module is running, run the web module if you are using the SAP Web IDE for SAP HANA.
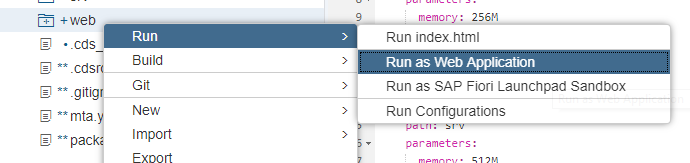
If you are instead using the SAP Web IDE Full-stack, please choose Run Configurations for the web module. Then select Run on Cloud Foundry and press the Save and Run button.

Congratulations! You have created your first application.
Now it is a good time to commit your application into the local or remote Git.
Resources
Discussion
Share feedback on this tutorial or join the conversation in SAP Community.