
Overview
You will learn
- How to create a Git repository on SAP BTP and synchronize your project in SAP Web IDE with the Git repository on SAP BTP


Prerequisites
Prerequisites
- IMPORTANT: This tutorial cannot be completed on a trial account.
Steps
To go to the overview screen of the SAP BTP cockpit, choose your user ID at the top of the screen.
In the navigation area on the left, choose Repositories | Git Repositories.
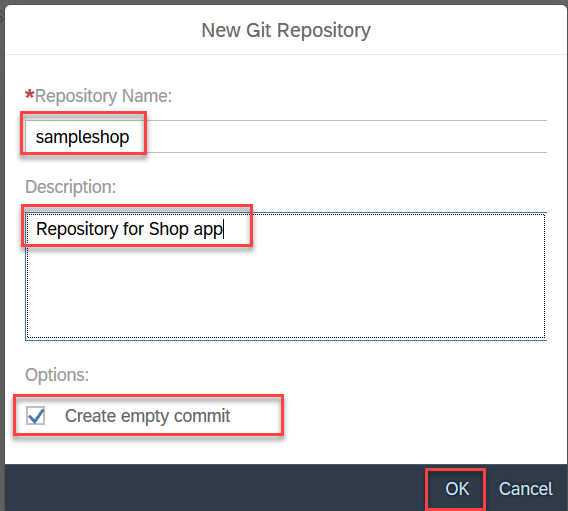
Choose New Repository, and enter the following details:
| Field | Value |
|---|---|
| Repository Name | sampleshop |
| Description | Repository for Shop app |
Make sure the Create empty commit box is selected. To create your Git repository, choose OK.
Choose the sampleshop repository link to open the repository overview page.

On the repository overview page, copy the repository URL:

Open your project in SAP Web IDE, right-click the root folder (sample.shop) and choose Git | Initialize Local Repository.

An alert appears in the upper right corner of the SAP Web IDE window. Choose Set Remote in the alert.

In the Configure Git Repository dialog box, paste the repository URL that you copied in step 3 in the URL field by choosing Ctrl + V. Leave the Add configuration for Gerrit checkbox deselected and then choose OK.
This will initialize your local repository and link it to the Git repository on SAP BTP.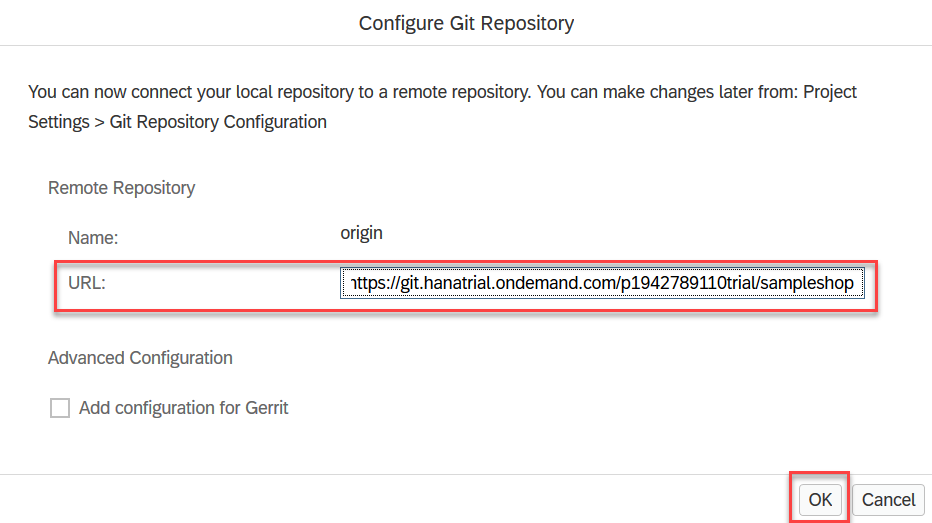
When the Changes Fetched dialog box opens, choose OK.
Open the Git pane in the right of SAP Web IDE and confirm that the correct repository (sample.shop) appears at the top of the Git pane.
If a different Git repository appears, choose your project folder (
sample.shop) in the left of the SAP Web IDE window.

To merge your local branch with the remote origin/master branch, choose the Merge button in the Git pane.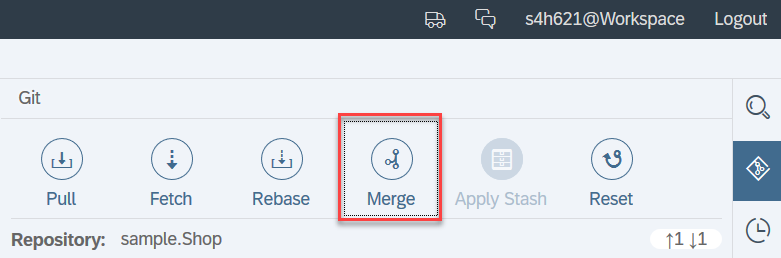
When the Merge “master” dialog box opens, make sure the origin/master remote branch is selected and choose OK.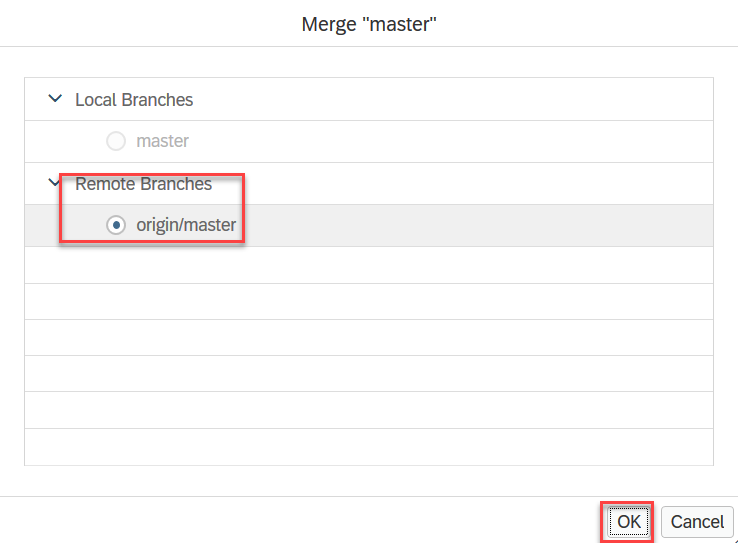
At this point, your Git repository is set up.
In the following steps, you’ll commit and push your project files to the Git repository.
Commit all project files by choosing the Stage All checkbox.

Scroll down in the Git pane and enter a description like initial commit.

To add your files to the master branch, choose Commit and Push and select origin/master from the menu.

If the User Information dialog box appears, confirm or enter your Git credentials and choose OK to push the changes to the remote repository.

You’ll see a confirmation alert appear briefly just below Logout in the top right of the SAP Web IDE window. You’ll also see the decorations change to green dots, which indicate that the files in your project match the versions in the Git repository.

Now it’s time to deploy your app.
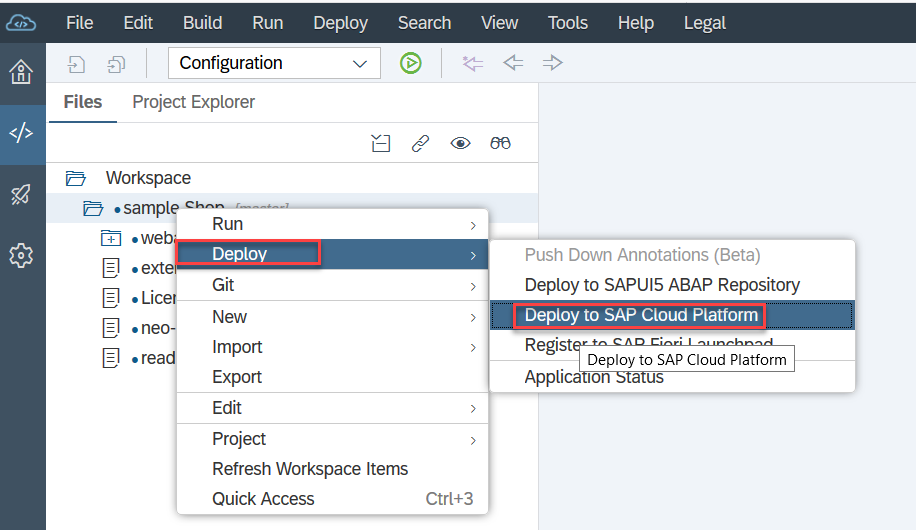
Right-click the root folder, sample.shop, and choose Deploy | Deploy to SAP BTP.
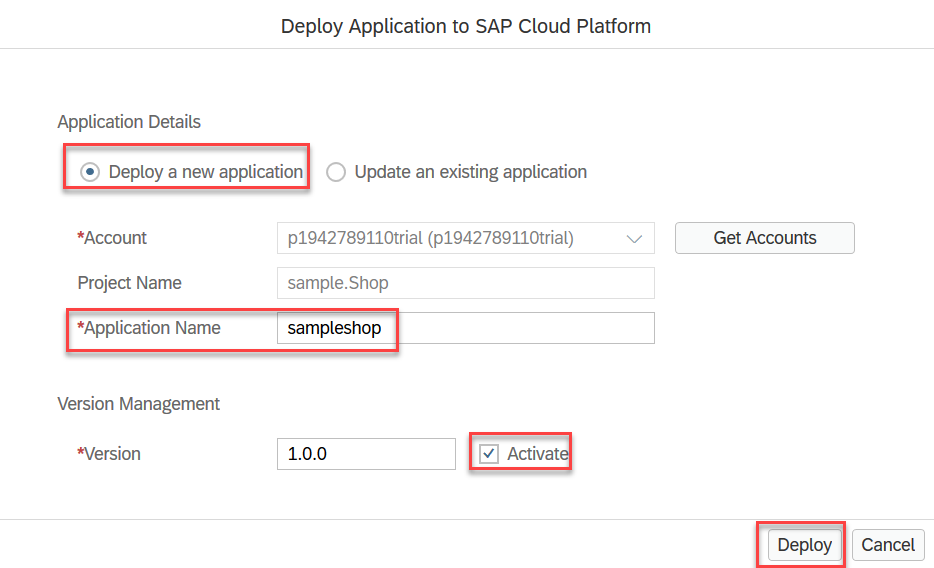
In the Deploy Application to SAP BTP dialog box, confirm that the Deploy a new application and Activate checkboxes are selected. Then choose Deploy.
Confirm in the popup that you want to use the existing sample shop repository.

After the app has been deployed, a success message appears. Close the Successfully Deployed dialog box. You’ve now prepared everything for the translation step.

Resources
Discussion
Share feedback on this tutorial or join the conversation in SAP Community.