
Overview
You will learn
- How to release and deploy the business process project


Prerequisites
Steps
Since the automation requires human intervention, with a popup dialog, the automation has to be executed in attended mode. This means that the user must be present for the automation to run.
You will trigger the automation using the project launcher.
The project launcher allows you to launch your automation in attended mode in two different ways:
- You can launch your automations manually in attended mode from the agent using the Launch manually from the agent section.
- You can configure events to trigger and launch your automations automatically using the Launch automatically by events section.
In this tutorial, you will manually launch your automation from the agent by adding it in the Launch manually from the agent section of the project launcher.
In Build Process Automation overview page, choose Create and Project Launcher.

Project Launcher In the Create Project Launcher window, name the project Get Order Details and choose Create.

Project Launcher A project launcher editor opens in the main panel of Build Process Automation. On the Project Launcher details right-hand side panel, you can see the automations available in your project.
In the Project Launcher Details, drag the automation and drop it in the Launch manually from agent section of the project launcher.
Choose Save.

Project Launcher
Now you may release and deploy it in attended mode. You need to select this trigger type since the user is asked to perform an action, which is to approve or decline retrieving the order details in an excel spreadsheet.
In the Process Builder, choose Release.

Release Automation Add a Version Comment if needed and choose Release.

Release Project What’s going on?
Every time you release, a new version will be created. Versions are incremented automatically based on how you want to store the changes in the repository (that is as major or minor updates or as a patch). Versions use an x.y.z format where x is a major version number, y is minor, and z is the patch number. For instance, if you are releasing your process project for the first time, then the version will start with 1.0.0. The next time you release there will be options to choose from – that is, if the new version is a major, minor, or patch update; version numbers will be automatically updated.
The project released successfully and is ready to be deployed.

Released Project You can deploy Business Process projects from each released version of the project in the Process Builder or through the Lobby. Deploying the project makes it available for others to use it. Bare in mind that you can only deploy a released version of the project.
From the released version of the Business Process project in the Process Builder, choose Deploy.
Select an Environment and choose Deploy.
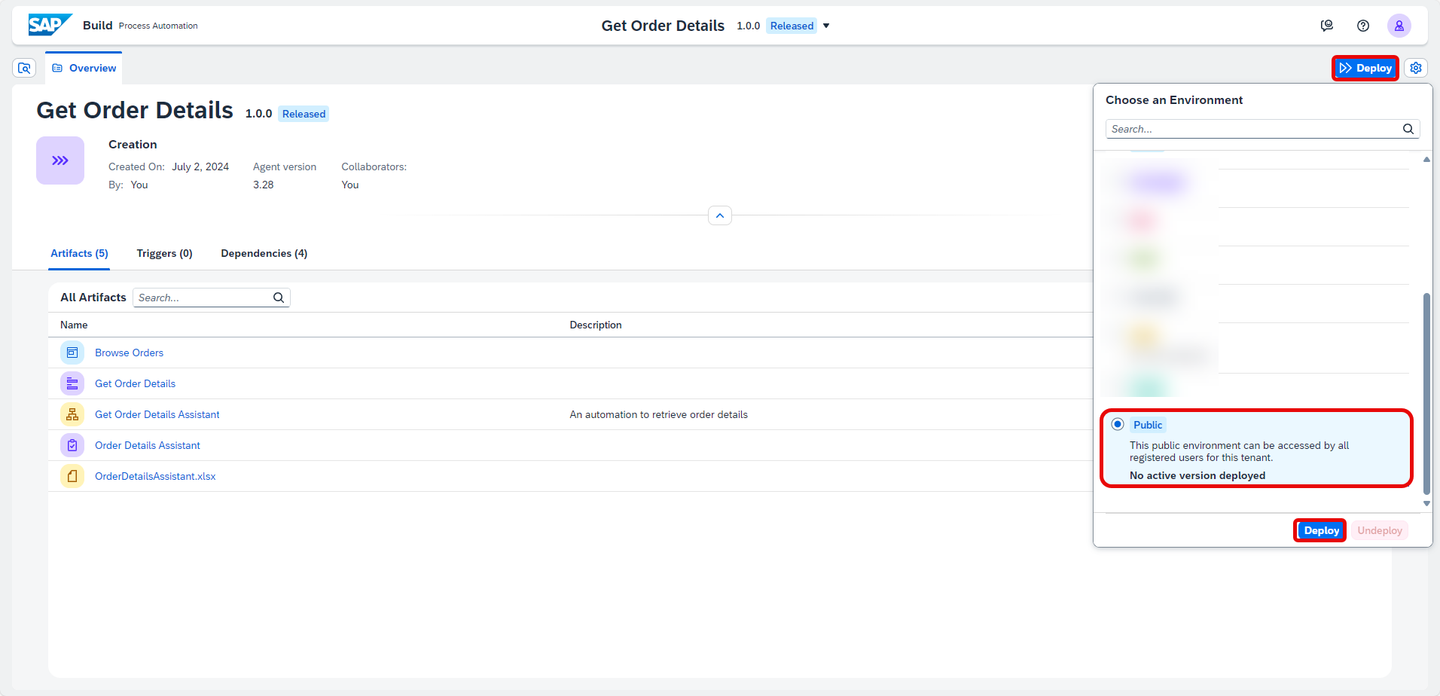
Deploy Project To Deploy will take a couple of seconds/minutes depending upon how big your project is and how many different skills it has. Any errors during the deployment will be shown in the Design Console.
The project deployed successfully and is now ready to be executed.

Deployed Project You cannot edit released or deployed projects. To continue working on your project, you need to select the Editable option from the list of released versions.
Create an attended trigger
Navigate back to SAP Build > Control Tower > Environments.
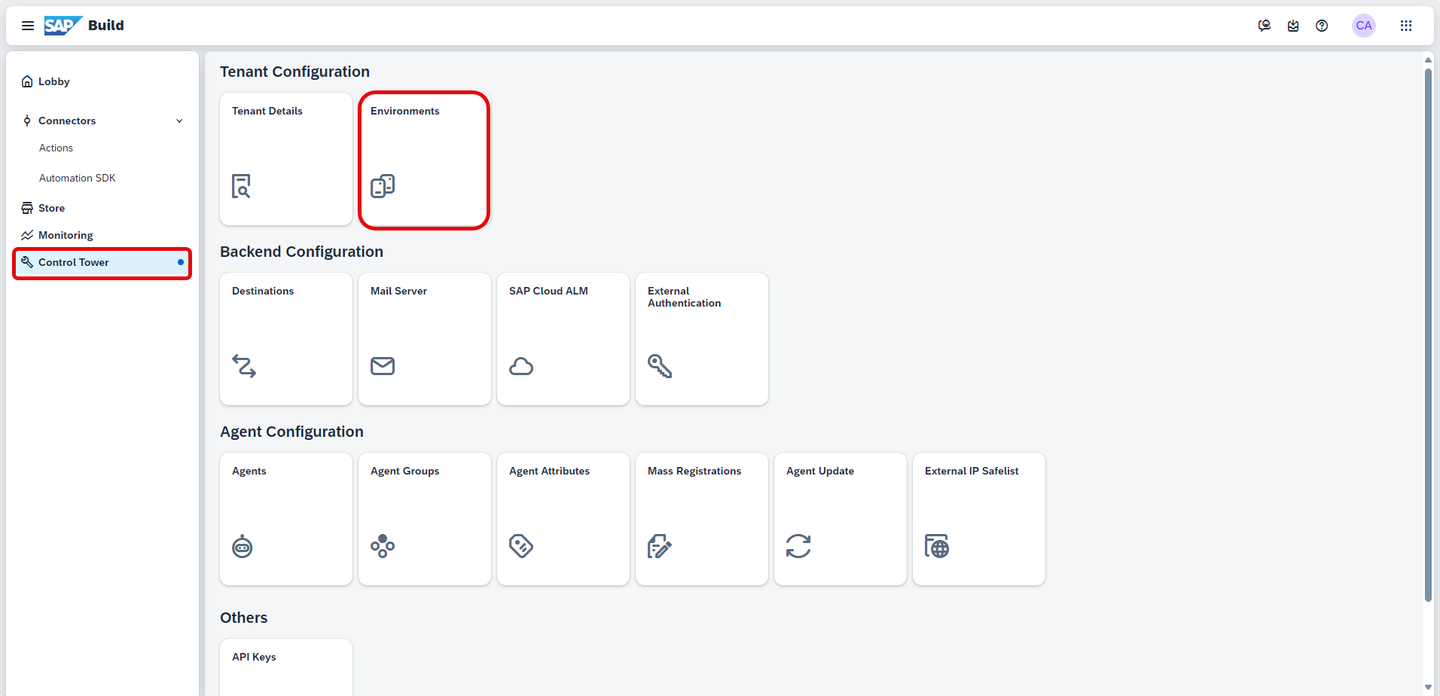
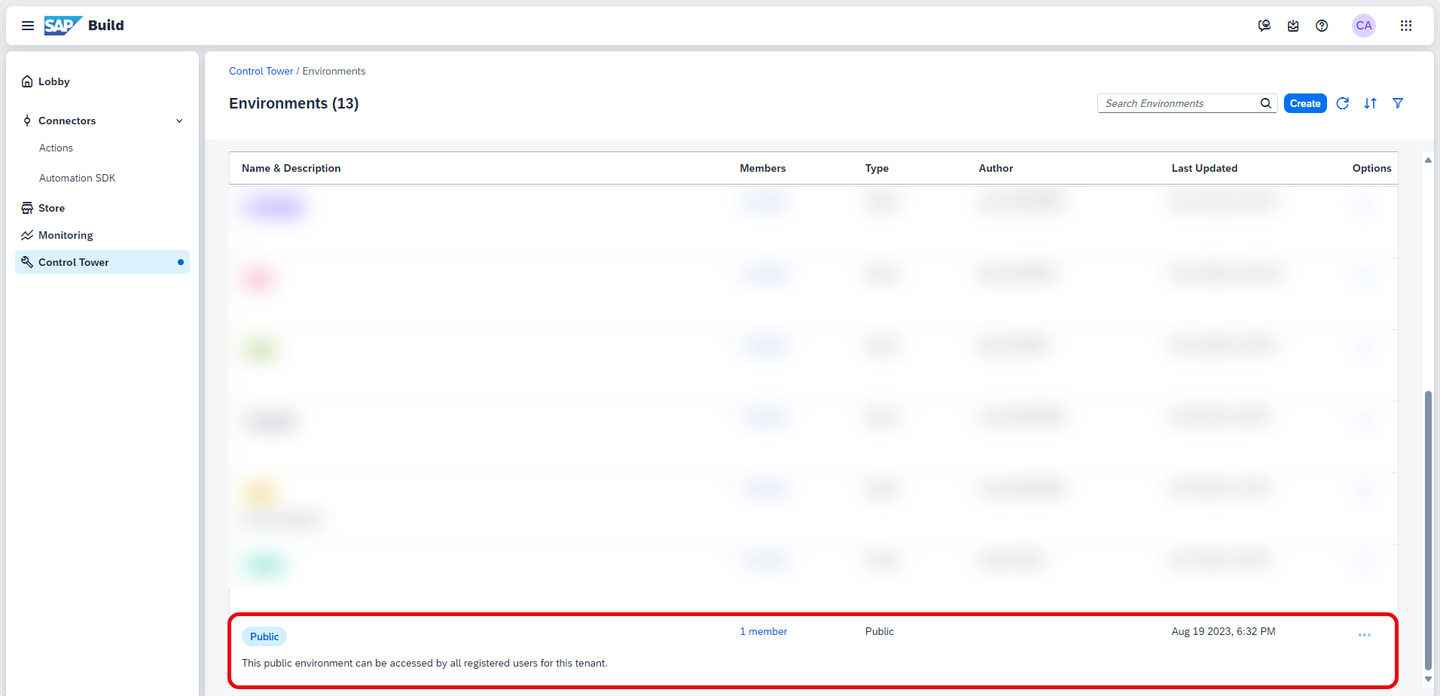
Trigger Select your environment.
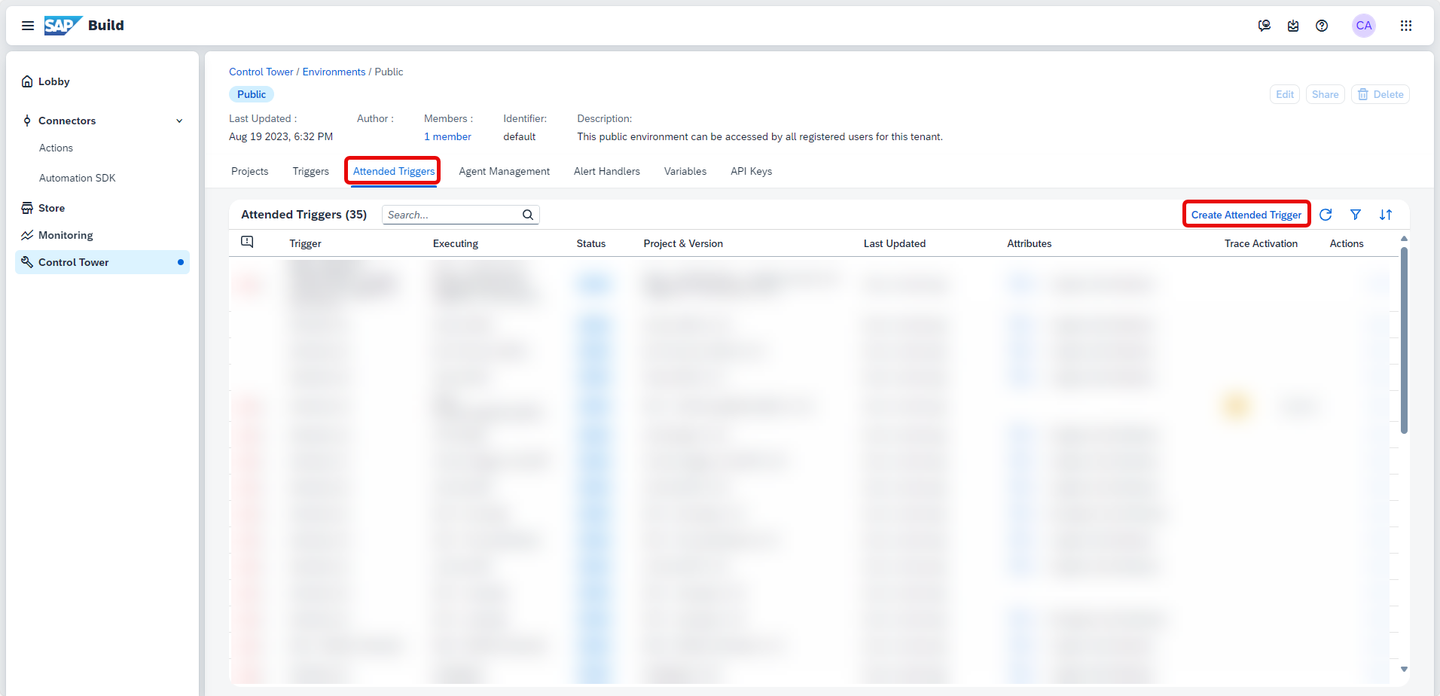
Environment Go to Attended Triggers > Create Attended Trigger.
Project In the Create Attended Trigger box, do the following:
- Select Get Order Details project
- Name the trigger
Attended_Trigger - Enter the Schedule details

Create attended trigger Choose Distribution tab and configure the Distribution restriction policy to Agents matching attributes.
Choose + Add and set your attribute and value.
Choose Create.
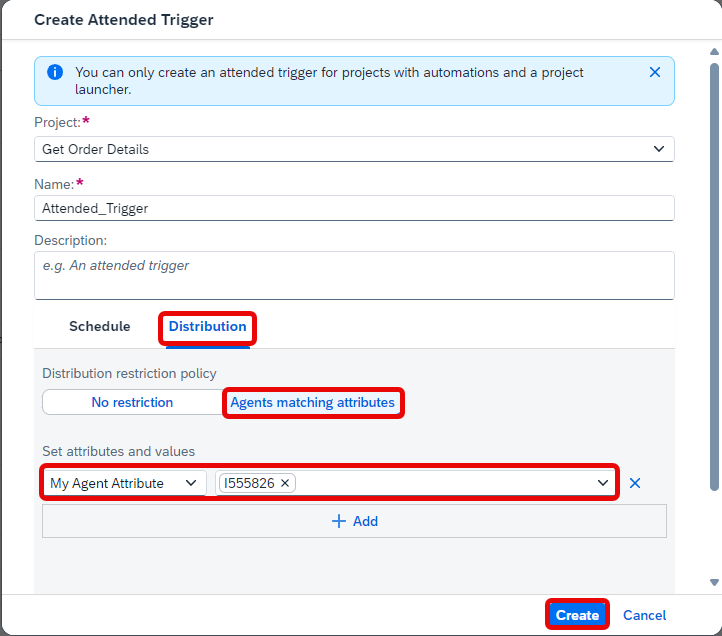
Distribution Your Attended Trigger is created.
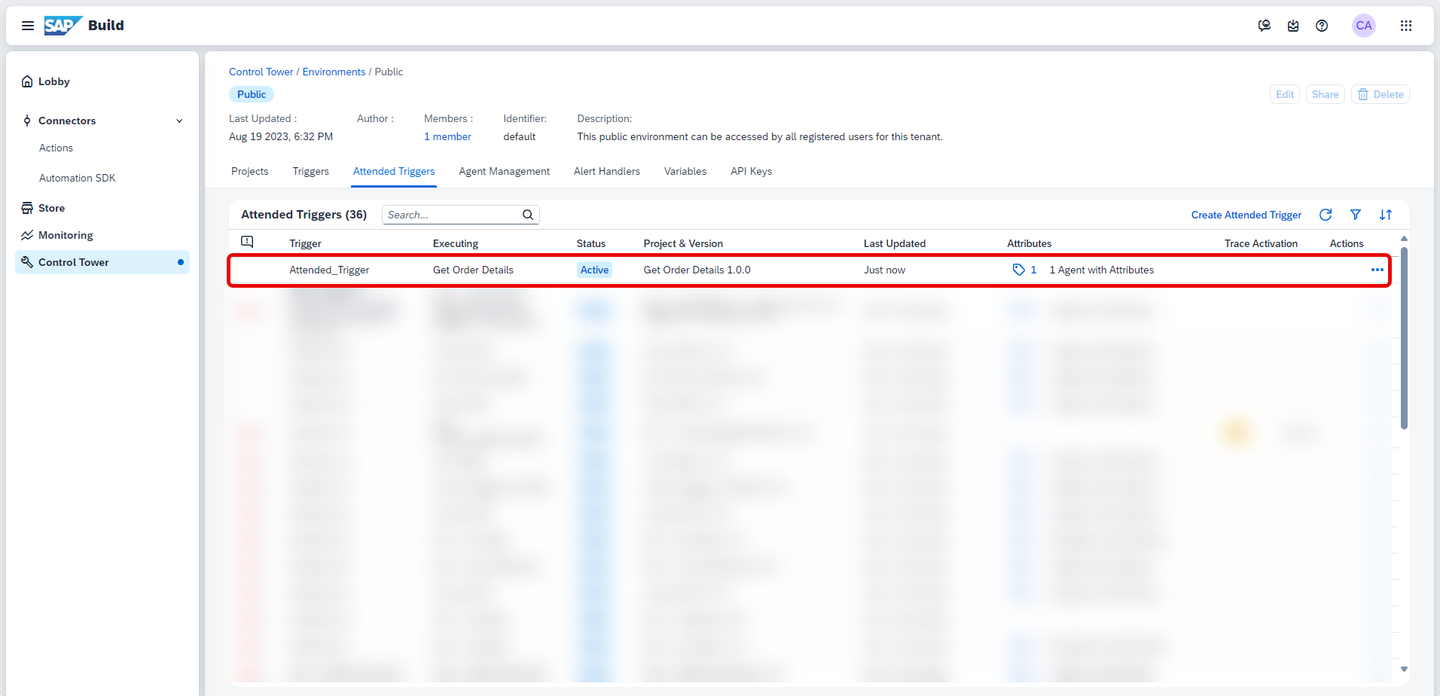
Attended Trigger Go to your Desktop Agent > Settings > Mode and make sure the agent is in attended mode. If not, activate the Attended Mode.
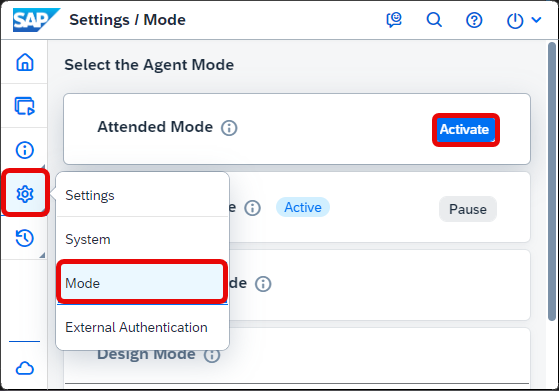
Attended mode Choose Projects.
Your project is ready to be launched in attended mode. Choose Activate.

Choose Start.

Start Project CAUTION: Please make sure your Browse Orders application is open.
Resources
Discussion
Share feedback on this tutorial or join the conversation in SAP Community.