
Overview
You will learn
- How to configure SAP Build Work Zone, standard edition in SAP BTP Cockpit to gain visibility in your dashboard


Prerequisites
Prerequisites
- Space in BTP Cockpit subaccount created (with a Free Tier and a Free Trial account, space is automatically created)
- A SAP BTP Free Trial or Free Tier account with SAP Build Process Automation enabled
Steps
Intro
In this tutorial, you will configure everything needed for the creation of a SAP Build Work Zone, standard edition in SAP BTP Cockpit to gain visibility of your processes.
Navigate to SAP BTP Cockpit subaccount and select Service Marketplace under Services.
Search for SAP Build Work Zone, standard edition and click on the tile.

Create subscription Choose Create.

Create subscription For the new subscription:
- Under Plan, select standard as subscription.
- Choose Create.

Subscription The subscription is created.

Subscription
When you subscribe to SAP Build Process Automation with Free tier, SAP Build Work Zone, standard edition is not available in Service Marketplace by default unlike the Trial account.
Hence you need to manually add SAP Build Work Zone, standard edition entitlement to your subaccount.
Navigate to SAP BTP Cockpit subaccount and select Entitlements. Choose Edit.

Configure entitlements Choose Add Service Plans.

Add service plans Search and select SAP Build Work Zone, standard edition.
Choose free (Application).
Click on Add 1 Service Plan.

Select SAP Build Work Zone Choose Save.

Select SAP Build Work Zone Select Instances and Subscriptions under Services. Choose Create.

Create subscription For the new subscription:
- Under Service, select SAP Build Work Zone, standard edition.
You will notice under Plan that the subscription is free.
- Choose Create.
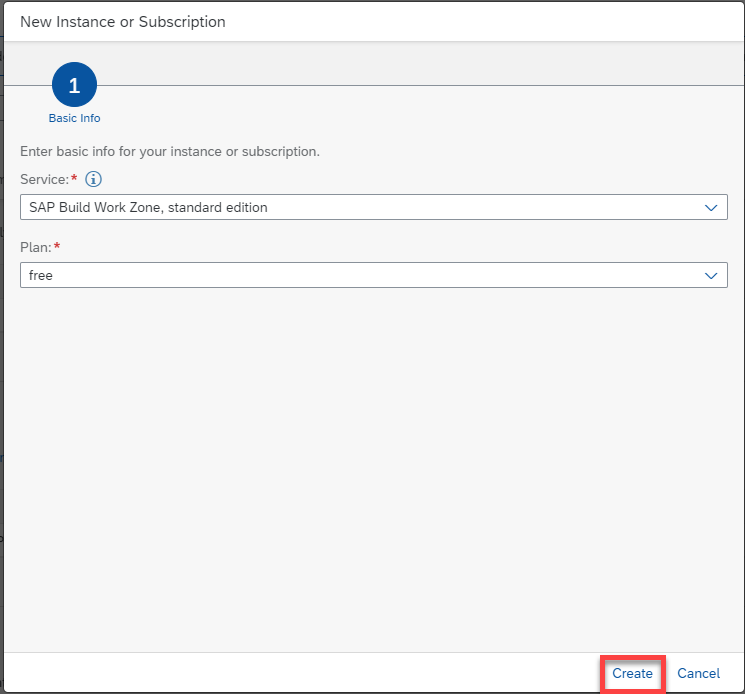
Subscription The subscription is created.

Subscription
CAUTION: If you are using a Free Tier account and subscribed to SAP Build Process Automation through Booster, please skip this step. The instance is automatically created through the Booster.

However, if you are using a Free Tier account and subscribed to SAP Build Process Automation manually, please follow this step as the instance is not created automatically.
Since there are two products for SAP Build Work Zone, make sure to mention standard edition without fail.
After creating a subscription for SAP Build Work Zone, standard edition in your subaccount, you must now create an SAP BTP service instance for SAP Build Work Zone, standard edition to run in.
Navigate to SAP BTP Cockpit subaccount. Select Services > Instances and Subscriptions. Choose Create.
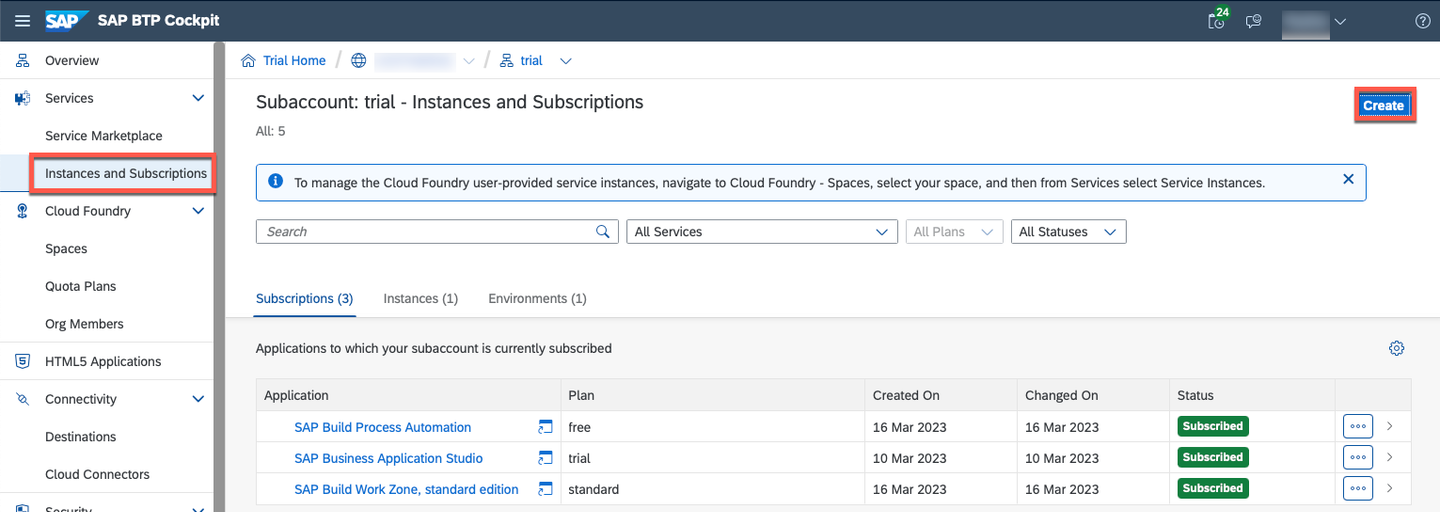
Create instance For the new instance:
- Select SAP Build Process Automation as a Service.
- Select standard plan from the Plan list.
- Select Cloud Foundry as Runtime Environment.
- Select a space from Space list.
- Set Instance Name as SPA-instance.
- Choose Create.

Instance The instance was added.

Instance
You can use service keys to generate credentials to communicate directly with a service instance. Once you configure them for your service, local clients, apps in other spaces, or entities outside your deployment can access your service with these keys.
CAUTION: If you are using a Free Tier account, please skip this step. The service Key is automatically created.

In your SAP BTP subaccount, under Services > Instances and Subscriptions, select the instance that you created above.

Select instance On the details screen that opens, choose Service Keys > Create.

Create service key On the creation screen, enter any name for your service key.
Optional. Upload a JSON file.
Choose Create.

Create service key The service key is created and you can view the credentials.

View credentials Once you open it, download the json file.
You will need these credentials to configure destinations.

View credentials
Before developing with SAP Build Process Automation or for configuring SAP Build Work, standard edition for use with SAP Build Process Automation, you must create an SAP BTP destination for your subaccount.
You have created a service instance and service key for SAP Build Process Automation and noted down the service key credentials for configuring this destination.
Choose Connectivity > Destinations > Create Destination.

New destination Choose Blank Template, and enter the following details from the downloaded json file:
CAUTION: When copying the values for URL, Client ID, Client Secret and Token Service URL, please select the values without the quotes and paste them in the destination template.
Field Value Name sap_process_automation_serviceType HTTP Proxy Type Internet Authentication OAuth2ClientCredentialsURL <"endpoints"."api">Client ID <"uaa"."clientid">Client Secret <"uaa"."clientsecret">Token Service URL <"uaa"."url">add /oauth/tokenFor your values, please refer to screenshot below:

New destination Add additional properties copied from the service key:
CAUTION: When copying the values for
saasregistryenabled,sap.cloud.serviceandsap.cloud.service.alias, please select the values without the quotes.Field Value endpointsendpointscopy the whole JSON structure including{and}html5-apps-repohtml5-apps-repocopy the whole JSON structure including{and}saasregistryenabledsaasregistryenabledsap.cloud.servicesap.cloud.servicesap.cloud.service.aliassap.cloud.service.aliasFor your values, please refer to the screenshot below:

New destination Save your changes.

New destination Test the destination by selecting Check Connection.

New destination
With a Free Tier account, if you have subscribed with SAP Build Process automation using Booster, the destination needed is automatically created.
Choose Connectivity > Destinations.
Select the destination called
sap_process_automation_service. This destination authenticates withOAuth2ClientCredentials.Check the connection.

Destination
Once you have created a destination, you must now assign roles to any user who needs access to that destination (including your own user account).
Navigate to SAP BTP Cockpit subaccount > Security > Users.
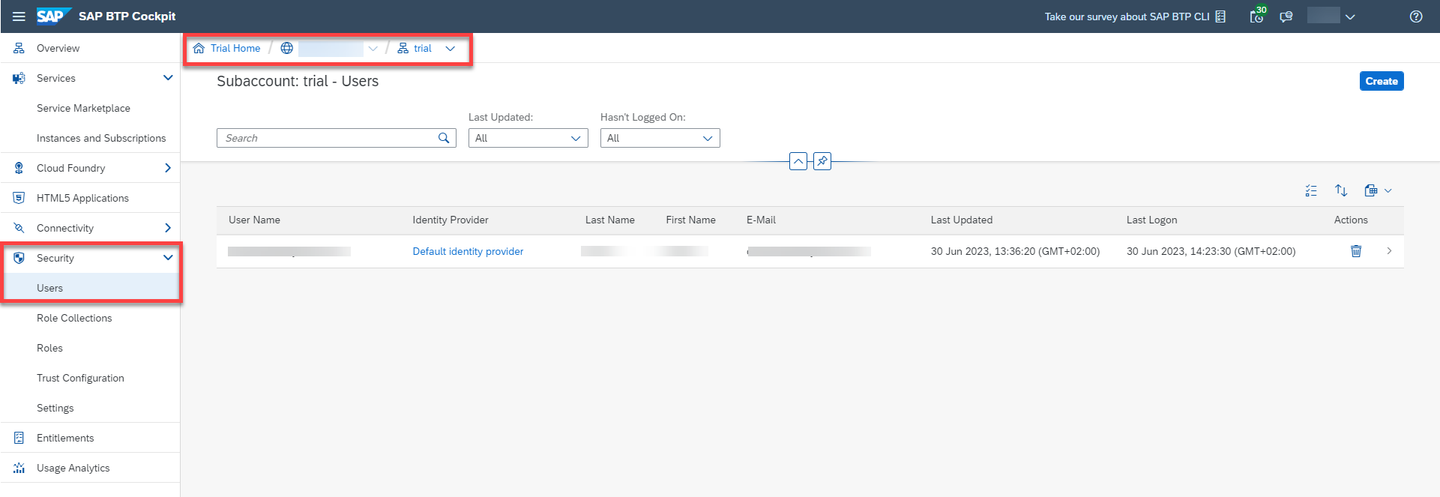
navigate to Users Select the user to whom you will give the roles then on Enter Full-Screen Mode .

Select user Choose Assign Role Collection.

Assign Role Collection button Select Launchpad Admin and Launchpad External User then choose Assign Role Collection.
Launchpad Admin is the role for whom is going to design the Business Site in the Business Site editor. Launchpad Admin should not be given to all users for security purposes.
Launchpad external user is the role for whom accesses the final Business Site.

Select Roles The roles are assigned.

Result assignation
Navigate back to SAP BTP Cockpit subaccount. Choose Services then Instances and Subscriptions. Choose Go to Application next to SAP Build Work Zone, standard edition.

SBWSE In the Site Directory, click the + Create Site button.
Enter a site name of your liking such as SPA Launchpad.

Create New Site The Site Editor opens. Navigate back to Settings.

Site Editor Your site gets created in the Site Directory.
The Site Manager is now ready to use. Select Channel Manager.

SBWSE Choose Update Content.

SBWSE The content updates and the status changes to Updated.
Select Content Manager. On the top tabs select Content Explorer and then select HTML5 Apps.

SBWSE 
SBWSE Select all items and choose Add.

SBWSE Navigate to Content Manager. Choose Create and select Group.
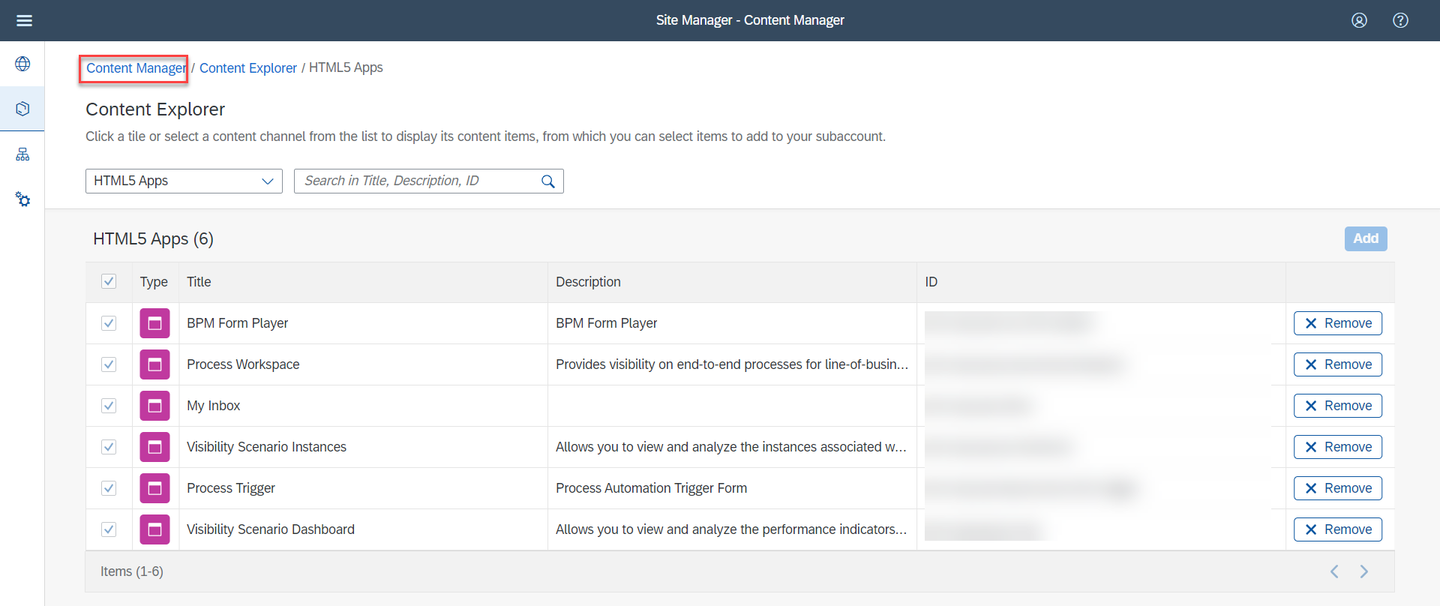
SBWSE 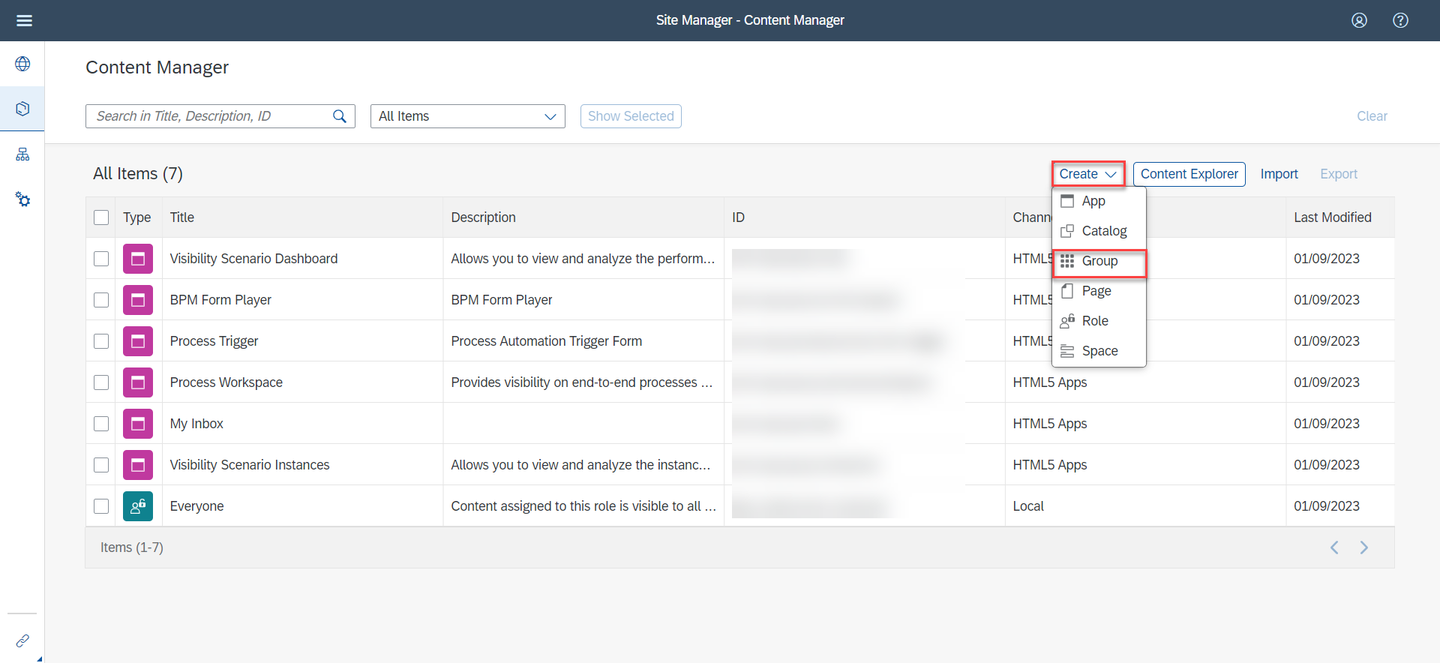
SBWSE Manage the Group:
- Set Title to SAP Build Process Automation.
- Assign My Inbox and Process Workspace to the group.
- Choose Save.
- Go back to Content Manager.

SBWSE Select Everyone item to edit it. Select Edit to edit role.

SBWSE 
SBWSE Manage changes:
- Assign My Inbox, Process Workspace, Visibility Scenario Dashboard and Visibility Scenario Instances to Everyone role.
- Choose Save.

SBWSE
Resources
Discussion
Share feedback on this tutorial or join the conversation in SAP Community.