
Overview
You will learn
- The basics of the Luigi micro frontend framework and Luigi Container
- How to install Luigi Container
- How to use Luigi Container inside a sample UI5 application


Prerequisites
Steps
Intro
Project “Luigi” is an open-source micro frontend framework suitable for SAP environments, providing Fiori-compliant navigation out-of-the-box. Luigi is technology-agnostic, allowing you to create your app using any given frontend toolkit.
Normally, Luigi consists of two main parts: Luigi Core and Luigi Client. Core refers to the main app which houses the micro frontends, while Client refers to the micro frontends themselves.
However, a third feature called Luigi Container allows you to easily insert Luigi micro frontends anywhere without the need for a Luigi Core application. This feature simplifies the use of Luigi for developers, eliminating the need for significant changes in their applications.
This tutorial will show you how to incorporate micro frontends inside a UI5 application. Nevertheless, a similar process will also apply to other frontend frameworks such as Angular or React.
Note: In addition to this tutorial, you can also experiment with the Luigi Container test app on GitHub.
Open a new Command Prompt/Terminal window and install the UI5 generator:
npm install -g yo generator-easy-ui5Run this command to ensure that Yeoman has been installed correctly:
yo
Make sure the easy-ui5 generator is listed.
Create your UI5 project:
yo easy-ui5Answer the prompts in this way to create your new project:
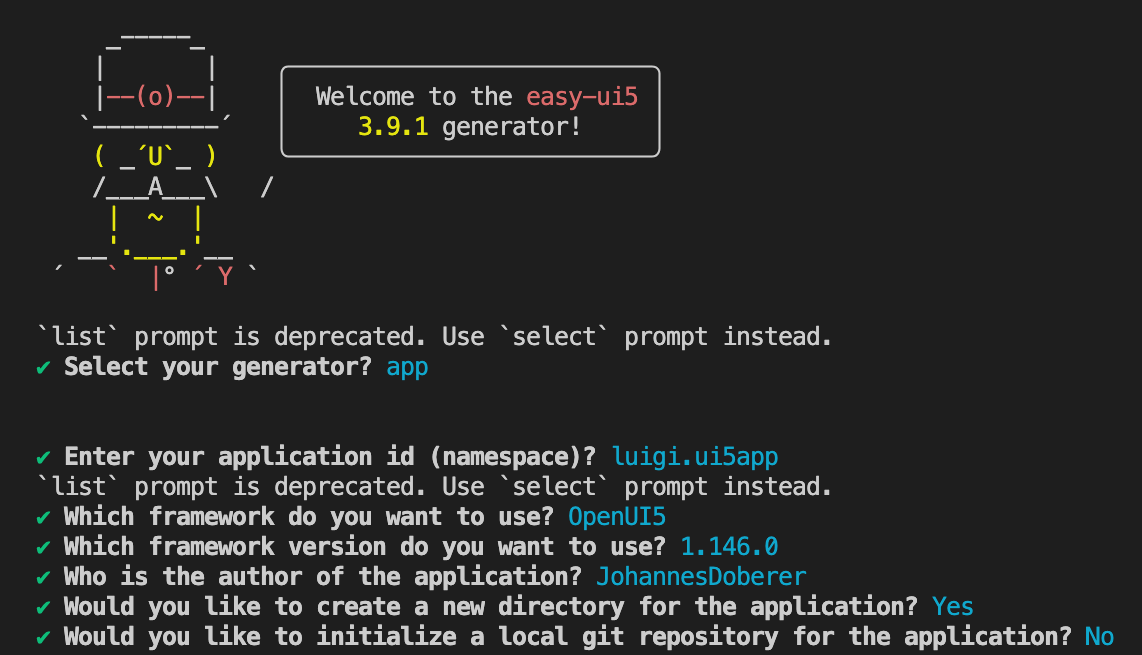
UI5 Generator Run the app locally:
Shellcd luigi.ui5app npm start # or "yarn start"
Luigi Container can be installed via a npm package.
To use npm packages in UI5, you need to first install the tooling extension ui5-tooling-modules.
In your project directory, run:
Shellnpm install ui5-tooling-modules -DIn this step, you will add the UI5 tooling task and middleware declaration. Open your application’s
ui5.yamlfile. Replace the content with the one below. Keep in mind that the version numbers might be higher in your case.YAMLspecVersion: "4.0" metadata: name: luigi.ui5app type: application framework: name: OpenUI5 version: "1.146.0" libraries: - name: sap.m - name: sap.ui.core - name: themelib_sap_horizon builder: resources: excludes: - "test/e2e/**" customTasks: - name: ui5-tooling-modules-task afterTask: replaceVersion server: customMiddleware: - name: ui5-tooling-modules-middleware afterMiddleware: compression configuration: debug: true persistentCache: false - name: "@ui5/middleware-code-coverage" afterMiddleware: compression configuration: excludePatterns: - "resources/" - "test/" - name: ui5-middleware-livereload afterMiddleware: compressionIn Command Prompt/Terminal, download the Luigi Container npm package:
Shellnpm install @luigi-project/container npm install --save-dev @ui5/webcomponentsGo to the
package.jsonfile and ensure that the@luigi-project/containerandui5-tooling-modulesdependencies are added. Keep in mind that the version numbers might be higher in your case.JSON[...] "devDependencies": { [...] "ui5-tooling-modules": "^3.35.0", "@ui5/webcomponents": "^2.21.0", }, "dependencies": { "@luigi-project/container": "^1.7.6" }
In this step, you will use Luigi Container in your app and configure the Luigi viewurl property in order to render a micro frontend on the page. Go to the
webapp/view/Main.view.xmlfile of your UI5 application. Replace the content with the following:XML<mvc:View controllerName="luigi.ui5app.controller.Main" displayBlock="true" xmlns="sap.m" xmlns:mvc="sap.ui.core.mvc" xmlns:core="sap.ui.core" xmlns:webc="@ui5/webcomponents" xmlns:luigi="@luigi-project/container" core:require="{ core: 'sap/ui/core/Core' }"> <Page title="{i18n>appTitle}" icon="sap-icon://accept" id="page"> <content> <luigi:LuigiContainer viewurl="https://sdk.openui5.org/test-resources/sap/m/demokit/cart/webapp/index.html" theme="{= core.getConfiguration().getTheme() }"/> </content> </Page> </mvc:View>Run your application:
Shellnpm startOpen
http://localhost:8080/in your browser. You should see a sample shopping app with the URLhttps://sdk.openui5.org/test-resources/sap/m/demokit/cart/webapp/index.htmlon your page:
Shopping micro frontend Now that your application is using Luigi Container, you can easily exchange micro frontends in order to create a modular, scalable app. To insert a different micro frontend, simply go back to
webapp/view/Main.view.xmland change the Luigi viewURL property like so:XML[...] <content> <luigi:LuigiContainer viewurl="https://fiddle.luigi-project.io/examples/microfrontends/fundamental/table-demo-page.html" theme="{= core.getConfiguration().getTheme() }"/> </content> [...]Open
http://localhost:8080/in your browser. You should see the new micro frontend on your page: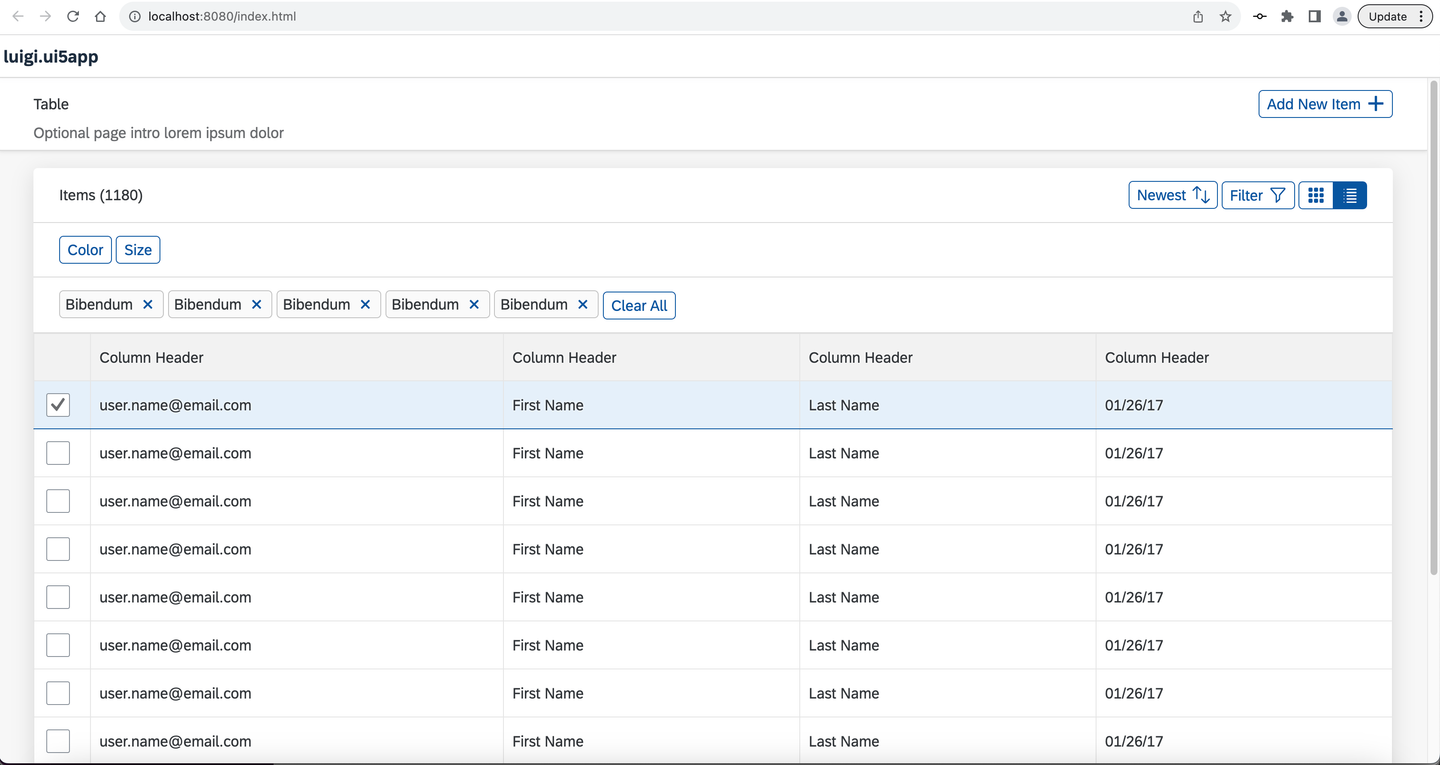
Table micro frontend
Resources
Discussion
Share feedback on this tutorial or join the conversation in SAP Community.