
Overview
You will learn
- How to use the command line interface (CLI) to deploy a Node.js app to Cloud Foundry or XS advanced
- How to view the logs and enable tracing in the deployed app
- How to connect from a Node.js app running in Cloud Foundry to an on-premise SAP HANA instance through the Cloud Connector


Prerequisites
Prerequisites
- You have completed the first 4 tutorials in this mission
Steps
Intro
In the previous tutorials, applications that queried SAP HANA were run on a local machine. In this tutorial, a simple application will be run within the SAP BTP which uses Cloud Foundry or within the SAP HANA on-premise which uses XS advanced (and is also based on Cloud Foundry).
For additional details, consult Developing Applications on SAP BTP, Cloud Foundry runtime or The XS Advanced Programming Model.
The command line interface (CLI) for Cloud Foundry is named cf while the CLI used for apps running in SAP HANA on-premise is named xs.
Check to see if you have the CF CLI installed and verify the version.
Shellcf -v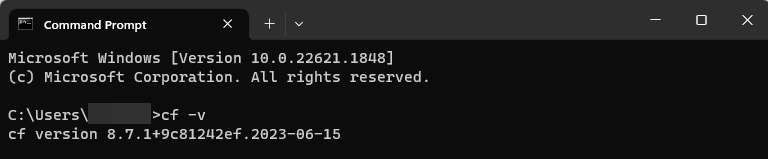
cf cli version To install the CLI, see Installing the cf CLI. After installing, add the
Cloud Foundryfolder to your path environment variable.Check to see if you have the XS CLI installed and verify its version.
Shellxs -v
xs cli version The installer for xs can be downloaded from SAP Software Downloads under SAP HANA PLATFORM EDITION | SAP HANA PLATFORM EDITION 2.0 | XS RUNTIME 1.
Access help by running the following:
Shellcf help cf help loginShellxs help xs help loginLog in to the Cloud Foundry or XS advanced.
Shellcf login
cf login If you are an SAP employee, you may need to enter your password followed by a two-factor authentication passcode or if you have single sign-on enabled use the –sso option.
The API URL, if requested, can be found in the Overview page in SAP BTP cockpit.
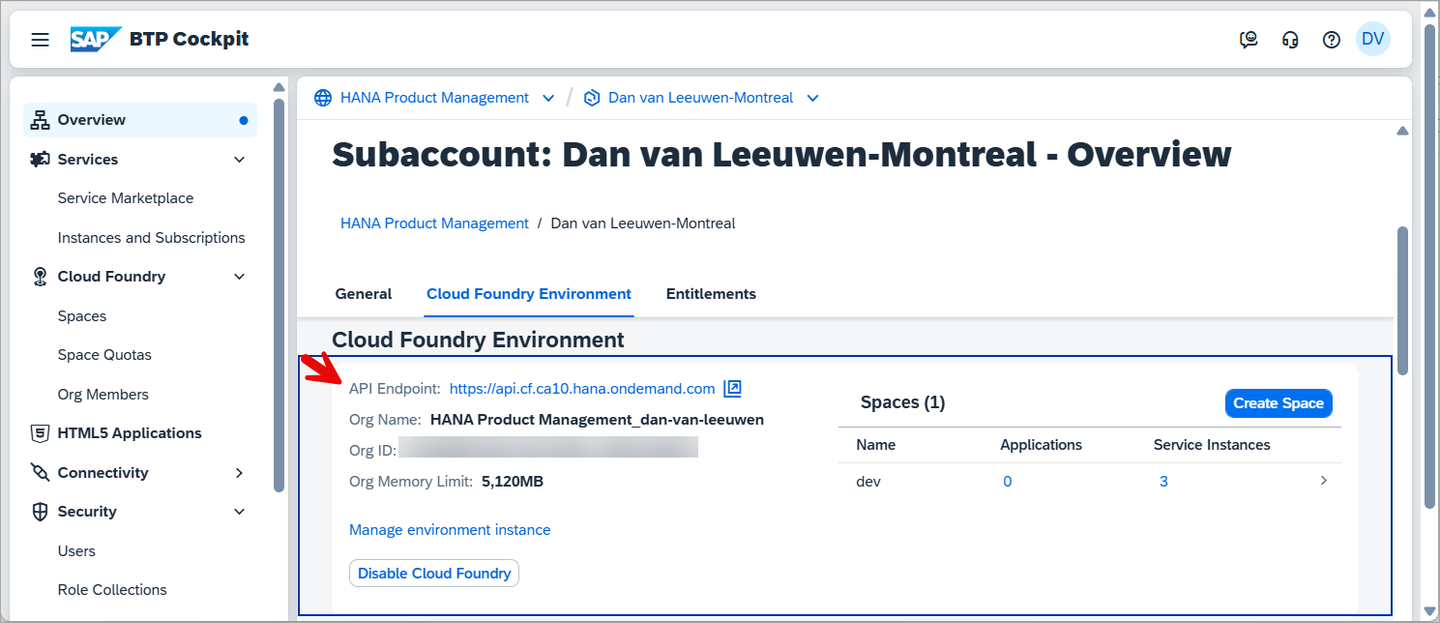
api URL The API URL can be set with the below command.
Shellcf api <API Endpoint>XS advanced
Shellxs login
xs login The API URL, if requested, can be verified in the XSA is up app.

xsa running Additional examples are shown below to view the target information, running services, and deployed apps.
Shellcf target cf services cf apps cf buildpacksXS advanced
Shellxs target xs services xs apps xs buildpacks
services Additional details can be found at Getting Started with the cf CLI and Get Started with the XS CLI Client.
Create a folder named
nodeCF\nodeQueryCFand enter the newly created directory.Shellmkdir %HOMEPATH%\HANAClientsTutorial\nodeCF\nodeQueryCF cd %HOMEPATH%\HANAClientsTutorial\nodeCF\nodeQueryCFShellmkdir -p $HOME/HANAClientsTutorial/nodeCF/nodeQueryCF cd $HOME/HANAClientsTutorial/nodeCF/nodeQueryCFInitialize the project, install express, and
@sap/hana-clientfrom NPM.Shellnpm init -y npm install express npm install @sap/hana-clientOpen a file named
server.jsin an editor.Shellnotepad server.jsShellpico server.jsAdd the code below to
server.js. Be sure to update theserverNodevalue (SQL Endpoint from your instance) and user credentials if necessary.JavaScriptvar express = require('express'); var hana = require('@sap/hana-client'); var app = express(); app.get('/', function (req, res) { res.send('Hello World'); }) app.get('/Customers', function (req, res) { var connOptions = { serverNode: 'XXXXXX.hana.trial-XXXXX.hanacloud.ondemand.com:443', //serverNode: 'linux-bj72:39015', UID: 'USER1', PWD: 'Password1' //traceFile: 'stdout', //traceOptions: 'sql=warning' }; var connection = hana.createConnection(); connection.connect(connOptions, function(err) { if (err) { return console.error(err); } var sql = 'select * from HOTELS.CUSTOMER;'; var rows = connection.exec(sql, function(err, rows) { if (err) { return console.error(err); } console.log(rows); res.send(rows); connection.disconnect(function(err) { if (err) { return console.error(err); } }); }); }); }) const port = process.env.PORT || 3000; var server = app.listen(port, function () { var host = server.address().address var port = server.address().port console.log("Example app listening at http://%s:%s", host, port) })Update the values for host and port.
Run and test the app locally.
Shellnode server.jsOpen a browser and enter a URL similar to http://localhost:3000/Customers.

running locally
Create a deployment descriptor.
Shellcd .. notepad manifest.ymlShellcd .. pico manifest.ymlAdd the code below to
manifest.yml.yml--- applications: - name: nodeQueryCF random-route: true type: nodejs path: nodeQueryCF command: node server.js memory: 128MFor additional details, consult App Manifest Attribute Reference.
Deploy the app to Cloud Foundry or XS advanced.
Before deploying the app to Cloud Foundry, ensure that you have the Cloud Foundry Runtime Environment entitlement enabled for your subaccount. You can find the Entitlements page in the left-hand side menu of SAP BTP Cockpit.

Entitlement for CF runtime If necessary, you can add the entitlement by clicking Edit. Don’t forget to save your changes when finished.

Add CF Memory service plan After verifying that you have the necessary entitlements, run the following:
Shellcf push
push result Notice above the URL to open the app was generated as the
manifest.ymlcontained the random-route setting.Shellxs push
push result Alternatively, the URL of the app can be found by running the following command:
Shellcf app nodeQueryCFShellxs app nodeQueryCFTest the app.

cf app XS advanced

xs app
For additional details see:
Developing Node.js in the Cloud Foundry Environment
Tutorial: Setting up your JavaScript Application in XS Advanced
The available buildpacks can be found using the command below.
Shellcf buildpacksIf you use another buildpack such as .NET and encounter the error “Cannot find a matching libadonetHDB.so”, this can be corrected by adding the below entry to the .csproj file.
Shell<ItemGroup> <Content Include="./libadonetHDB.so"> <CopyToOutputDirectory>PreserveNewest</CopyToOutputDirectory> </Content> </ItemGroup>The app can be stopped and started with the below commands:
Shellcf stop nodeQueryCF cf start nodeQueryCFThe applications lifecycle events can be seen with the below command:
Shellcf events nodeQueryCF
events The logs of the application can be seen with the below command:
Shellcf logs nodeQueryCF --recentThe following command will show the tail of the log.
Shellcf logs nodeQueryCFAs of version 2.7, the SAP HANA client interfaces can output trace information to
stdoutorstderr.Shellcf set-env nodeQueryCF HDB_SQLDBC_TRACEFILE stdout cf set-env nodeQueryCF HDB_SQLDBC_TRACEOPTS SQL=WARN cf restage nodeQueryCF cf env nodeQueryCF cf logs nodeQueryCFAlternatively, the trace settings can be specified in the application code.
Refresh the browser and notice that the trace information can now be seen.

trace The deployed app can also be managed in the associated cockpit.
SAP BTP Cockpit

SAP BTP cockpit Details of the application
nodeQueryCF
SAP BTP cockpit SAP HANA XS Advanced Cockpit

XS advanced cockpit Note that the number of running instances can be scaled if needed.
The Cloud Connector enables communication from the SAP BTP running in the public internet to securely connect to a configured on-premise system such as SAP HANA on-premise. The following steps demonstrate how to do this with the previously deployed app nodeQueryCF.
Follow step 3 in Access Remote Sources with SAP HANA Database Explorer to install and configure the Cloud Connector.
In the project created in step 2, perform the following steps to bind a connectivity service instance to the application.
Navigate to Service Bindings and choose Bind Service.

bind service Add the Connectivity service.

connectivity service Provide an instance name such as
MyConnectivityService.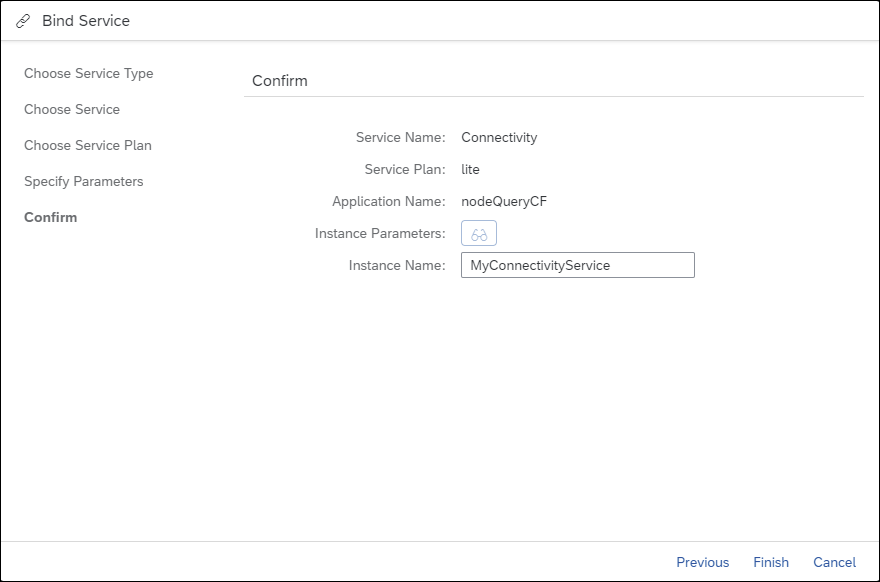
connectivity service Examine the values of the connectivity service. The indicated values below are used for the
proxyPortandproxyHostnamevalues in theserver.jsfile. It will be to access the proxy service which enables communication with the cloud connector.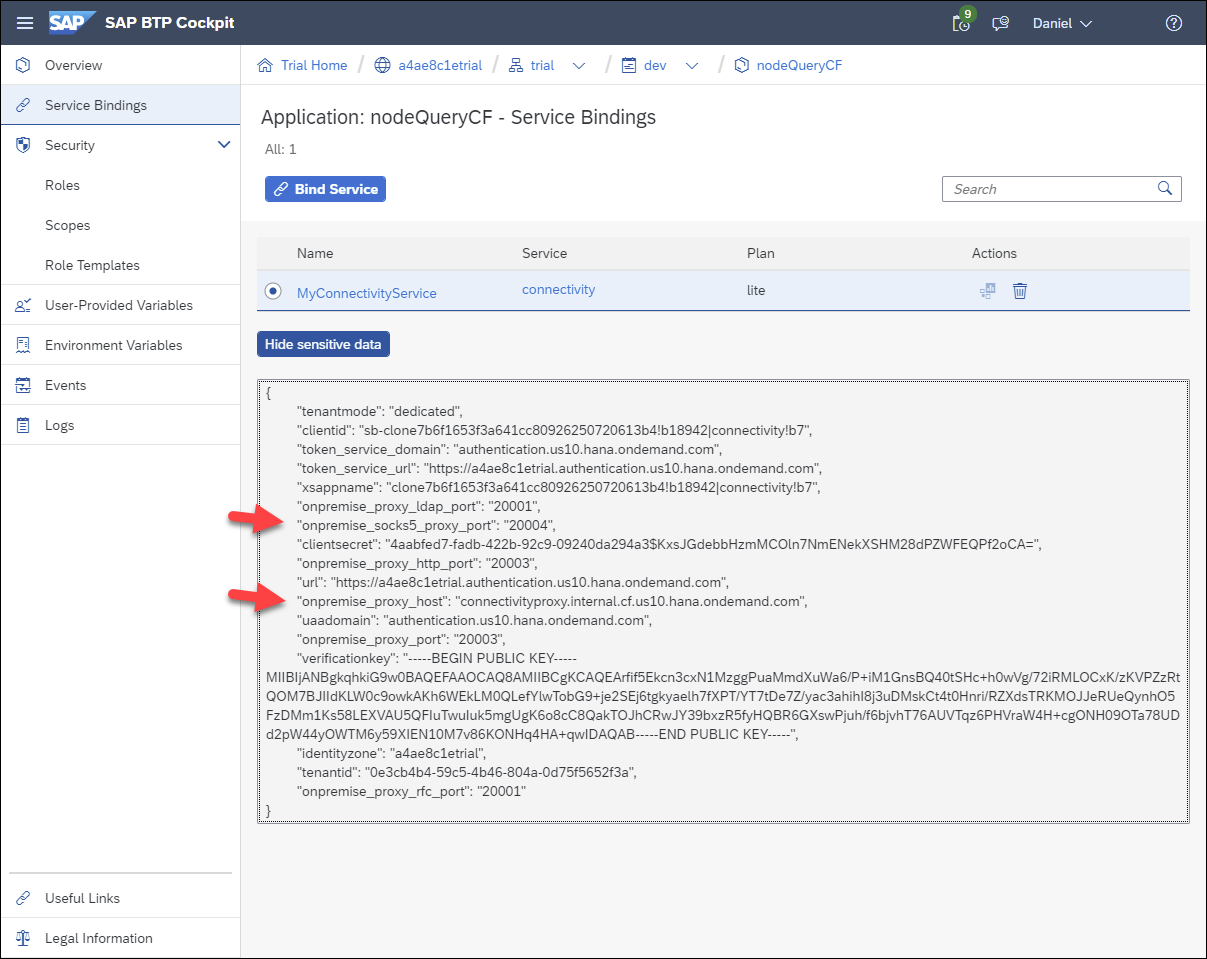
connectivity service
Add the service name to the project’s manifest.yml.
Shellcd %HOMEPATH%\HANAClientsTutorial\nodeCF notepad manifest.ymlShellcd $HOME/HANAClientsTutorial/nodeCF pico manifest.ymlymlservices: - MyConnectivityServiceMake a backup of the server.js file and add the node module
axioswhich is promise based HTTP client and is used to fetch a JWT token. For further details see SAP Cloud Platform: How to call – on-Premise System – from Node.js app – via Cloud Connector.Shellcd nodeQueryCF copy server.js server.js.bak npm install axiosShellcd nodeQueryCF cp server.js server.js.bak npm install axiosOpen the file named
server.jsin an editor and replace the contents where necessary.Shellnotepad server.jsShellpico server.jsJavaScriptvar axios = require('axios'); var express = require('express'); var hana = require('@sap/hana-client'); var app = express(); const VCAP_SERVICES = JSON.parse(process.env.VCAP_SERVICES); const conSrvCred = VCAP_SERVICES.connectivity[0].credentials; app.get('/', function (req, res) { res.send('Hello World'); }) app.get('/Customers', async function (req, res) { const connJwtToken = await _fetchJwtToken(conSrvCred.token_service_url, conSrvCred.clientid, conSrvCred.clientsecret); var connOptions = { serverNode: 'v-linux-bj72:39015', // Virtual host specified in the Cloud Connector proxyUsername: connJwtToken, proxyPort: conSrvCred.onpremise_socks5_proxy_port, proxyHostname: conSrvCred.onpremise_proxy_host, //proxyScpAccount: 'myLocID', // Cloud Connector's location ID if specified in the Cloud Connector // A location ID is used when multiple Cloud Connectors are connected to the same subaccount UID: 'USER1', PWD: 'Password1' //traceFile: 'stdout', //traceOptions: 'sql=warning' }; var connection = hana.createConnection(); connection.connect(connOptions, function(err) { if (err) { return console.error(err); } var sql = 'select * from HOTELS.CUSTOMER;'; var rows = connection.exec(sql, function(err, rows) { if (err) { return console.error(err); } console.log(rows); res.send(rows); connection.disconnect(function(err) { if (err) { return console.error(err); } }); }); }); }) const port = process.env.PORT || 3000; var server = app.listen(port, function () { var host = server.address().address var port = server.address().port console.log("Example app listening at http://%s:%s", host, port) }) const _fetchJwtToken = async function(oauthUrl, oauthClient, oauthSecret) { return new Promise ((resolve, reject) => { const tokenUrl = oauthUrl + '/oauth/token?grant_type=client_credentials&response_type=token' const config = { headers: { Authorization: "Basic " + Buffer.from(oauthClient + ':' + oauthSecret).toString("base64") } } axios.get(tokenUrl, config) .then(response => { resolve(response.data.access_token) }) .catch(error => { reject(error) }) }) }Redeploy the app.
Shellcd .. cf pushThe application running in the cloud, is now accessing data from an on-premise SAP HANA instance.

Result
Congratulations, you have built, deployed, and run an app that queries SAP HANA in Cloud Foundry and XS advanced as well as become familiar with the command line interface.
Resources
Discussion
Share feedback on this tutorial or join the conversation in SAP Community.