
Overview
You will learn
- How to add additional fields to the field group of an object page
- How to create a new field group within a section
- How to add a custom section to the object page
- How to add an additional column to an object page table
- How to enable the flexible column layout


Prerequisites
Prerequisites
- You have prepared your development environment by completing the tutorial Prepare your Development Environment
- You have generated the Incident Management application from the previous tutorial Create an SAP Fiori elements application
Steps
Open the object page of your application by clicking one of the incidents within the list report table. You´ll see the field group Incident Details on the Incident Overview section.

Annotation Cursor Open the Page Editor for the object page of your app: from the Application Information page, click on ObjectPage within Pages.

Open Object Page The Page Editor view opens up listing all the major page elements in the application outline structure.
Expand the nodes Sections - Incident Overview - Subsections - Incident Details - Form, press the + icon in the Fields sub-node and choose Add Basic Fields.
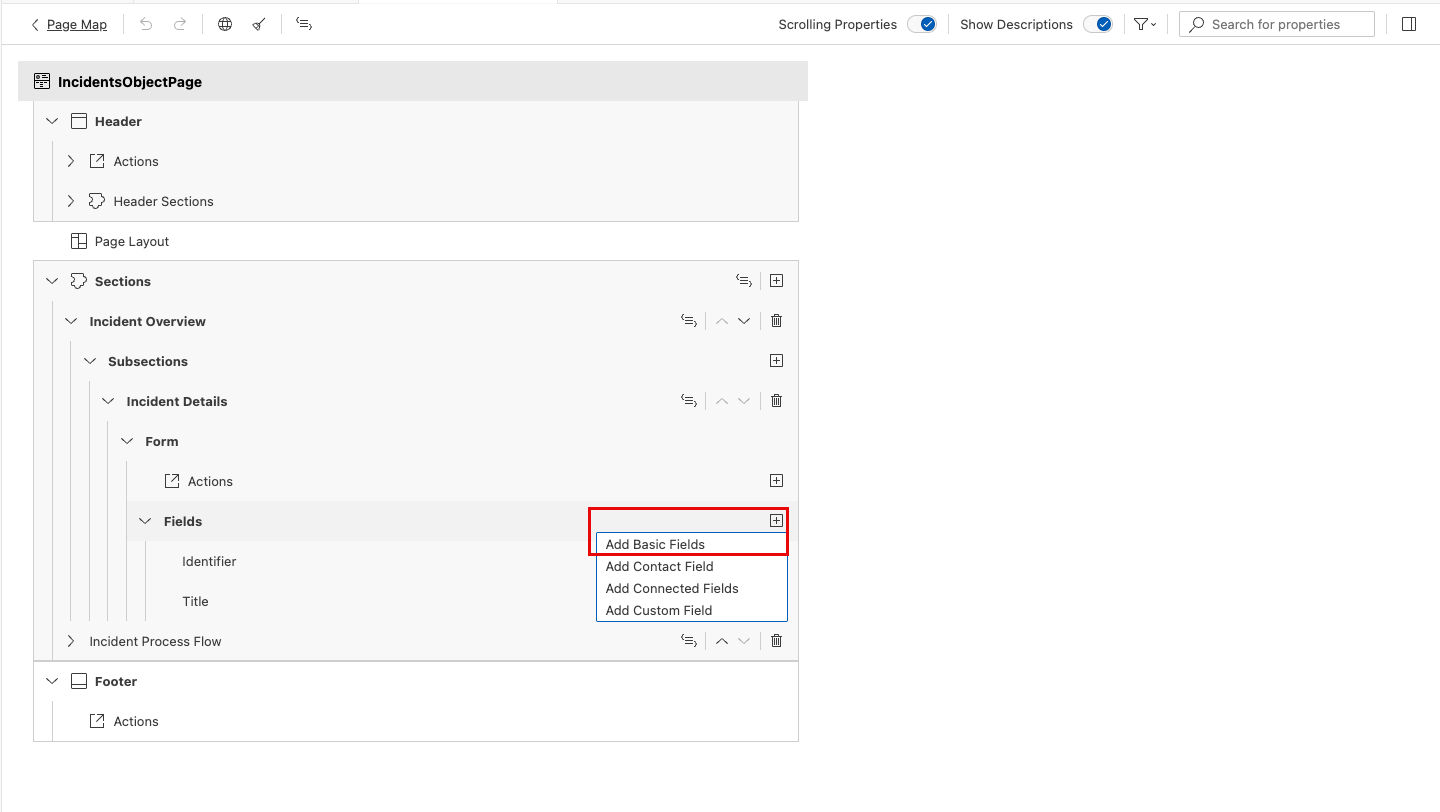
Add Fields Icon When prompted, choose description in Fields and press Add.

Add Fields Dialog Application preview automatically refreshes (if started) to show the additional field Incident Description within the field group Incident Details.

Annotation Cursor
In the previous step, you added a new field to an existing field group. Now you will add a new field group to the section Incident Overview.
In Page editor, expand the nodes Sections - Incident Overview if not already expanded, press the + icon in the Subsections sub-node and choose Add Form Section.

Add Section Icon When prompted, type General Information in the Label field and press Add.

Add Sections Dialog General Information section is visible in the outline.
Expand the nodes General Information -> Form, press + icon in the Fields node and choose Add Basic Fields.

Add Fields Icon When prompted, choose priority_code, category_code and incidentStatus_code as Fields and press Add.

Add Fields Dialog Application preview refreshes and shows the additional field group General Information within the section Incident Overview.

Annotation Cursor
If you need to extend your application beyond the refinements possible with annotations, the flexible programming model allows you for instance to add a custom section containing your own specific content.
To simplify this exercise, you will find prepared content in the ext folder of the project. It contains files needed to implement the new section, for example UI fragments to show a Gantt chart, and controller files to ensure the correct initialization of the UI elements.
Using drag&drop move the existing folder
extlocated intest-resourcesto thewebappfolder of the incidents application.
Annotation Cursor In Page Editor, press the + icon in the Sections node and choose Add Custom Section.

Annotation Cursor In the Add Custom Section dialog, modify the content of the fields as showed in the image below and press Add.

Annotation Cursor The content of field Fragment Name represents one of the prepared artifacts located in the
extfolder.In the Page Editor, you can now see the new custom section Maximum Processing Time. When you select the new section you will see its parameters on the right part of the UI.
You have now finished the creation of the new custom section. Once the application preview is refreshed, check the new section displayed on the object page.

Annotation Cursor
Now you are going to add a new column to the object page table Incidents Process Flow showing the criticality of the listed items.
In Page editor, expand the nodes Sections->Incident Process Flow->Table, press the + icon in the Columns sub-node and choose Add Basic Columns.
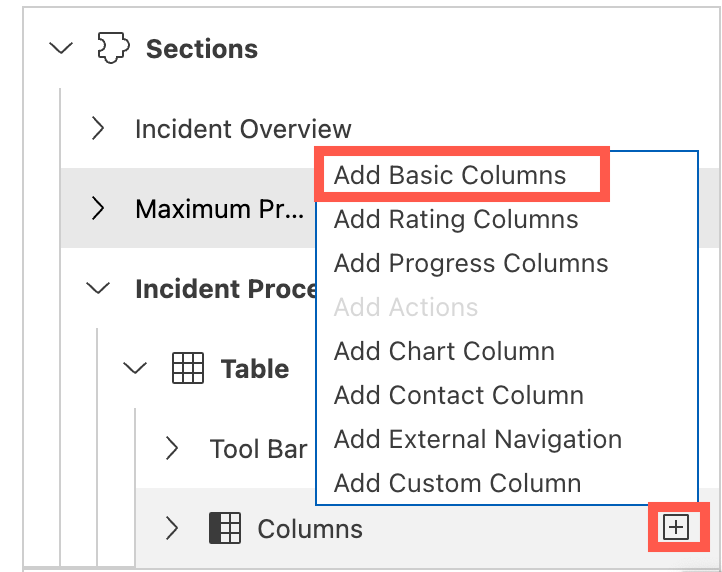
Add Columns Icon When prompted, choose stepStatus in the Columns field and press Add.
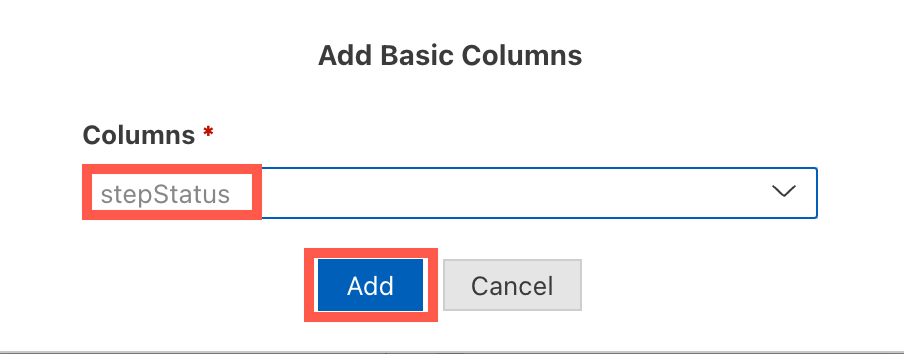
Add Column Dialog Process Step Status column is added at the bottom of the columns list section in the outline.
Drag the newly added column to the top of the columns list and drop it there.

Move Column Choose the Process Step Status column to display its properties in the Properties pane to the right of the outline. In the Criticality field, change the value to criticality.

Define Criticality Once the application preview is refreshed, the new column added to the object page table.

Annotation Cursor
The flexible column layout allows you to have the list report and the object page open at the same time without the need to switch the UI when changing the selection of items in the list report.
Right-click the
webappfolder and select Show Page Map.In the Property Panel select the Flexible Column Layout and choose the
Mid-Expandedoption for the two column layout.
Annotation Cursor In the application preview, the list report and object page are now shown in a two column layout. When you click on a different row in the list report the object page will update accordingly.

Annotation Cursor
At this point, your list report object page application is complete.
To prepare your app for translation, you can generate the translation keys for all the language dependent fields in your app. For that, choose the globe button at the top of the screen and, once prompted, press Create.

Over the past four tutorials, you have used the SAP Business Technology Platform, SAP Fiori tools and SAP Fiori elements to build this application. You have learned how to:
Set up your development environment using SAP Business Technology Platform
Use the wizard-style approach of SAP Fiori tools to generate an application based on an existing service and SAP Fiori elements UI templates
Refine the user interface using Page Editor
Extend the user interface by applying the custom section concept of the Flexible Programming Model
All of these tools (and more) can be used with any of the available SAP Fiori elements page types. Enjoy your future projects!
Resources
Discussion
Share feedback on this tutorial or join the conversation in SAP Community.