
Integrate an SAPUI5 App to SAP Build Work Zone
Add an existing SAPUI5 app to a site in the SAP Build Work Zone, standard edition.
Overview
You will learn
- How to add an existing SAPUI5 app to your site


Prerequisites
Prerequisites
- You’ve already created the
JobCoresite
Steps
Intro
In this tutorial, you’ll use the Content Manager to add apps to SAP Build Work Zone.
Click the Content Manager icon in the side panel to open the Content Manager.
When you open the Content Manager you’ll see a list of content items that have been added to your subaccount. From here you can manually configure new content items and view any other available content items. You can also access the Content Explorer where you can explore exposed content from available channels, select the content, and add it to your own content.

Click Create and select App from the list.
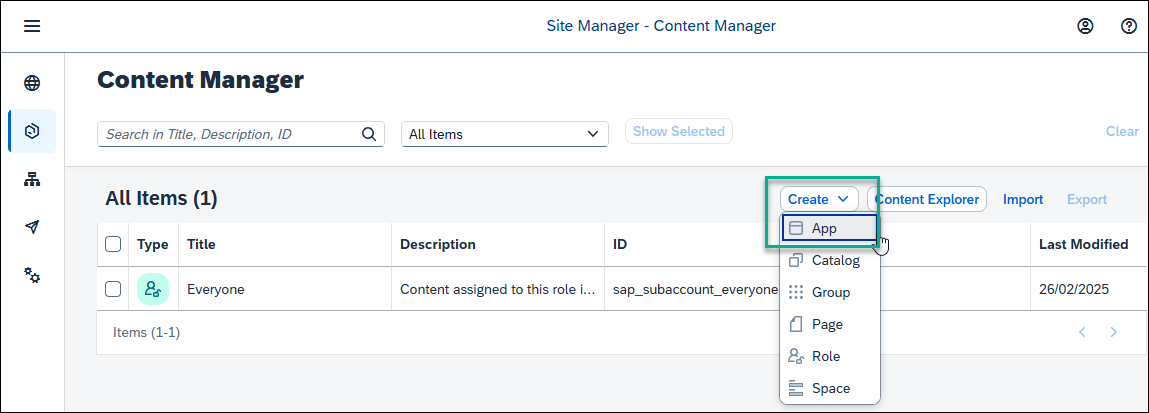
Add an app In the header area of the app editor, enter a title
New Orders.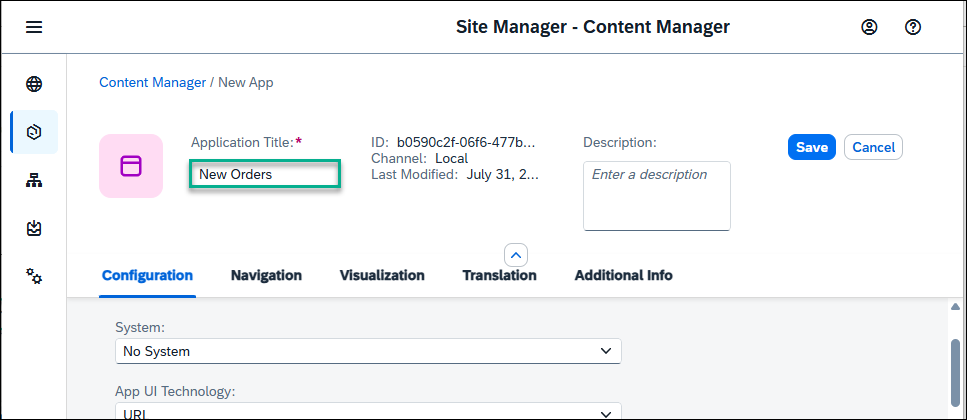
Add a title Under the Configuration tab, enter the following values (some will already be there by default):
Open App: In place
System: No System
App UI Technology: URL
URL:
https://sapui5.hana.ondemand.com/test-resources/sap/m/demokit/cart/webapp/index.html

Enter app properties When working in your own environment, it’s better to integrate SAPUI5 apps by configuring a destination to the relevant system and setting the app properties to use this destination. In this case, in the App UI Technology dropdown list, you would select
SAPUI5. This configuration allows you to better manage your content in the Dev-QA-Prod lifecycle.Click the Navigation tab to specify the intent of your app.
The unique combination of a semantic object and an action is called an intent. It’s used to define navigation to an application.
Enter the following values:
Semantic Object:
OrderAction:
Display
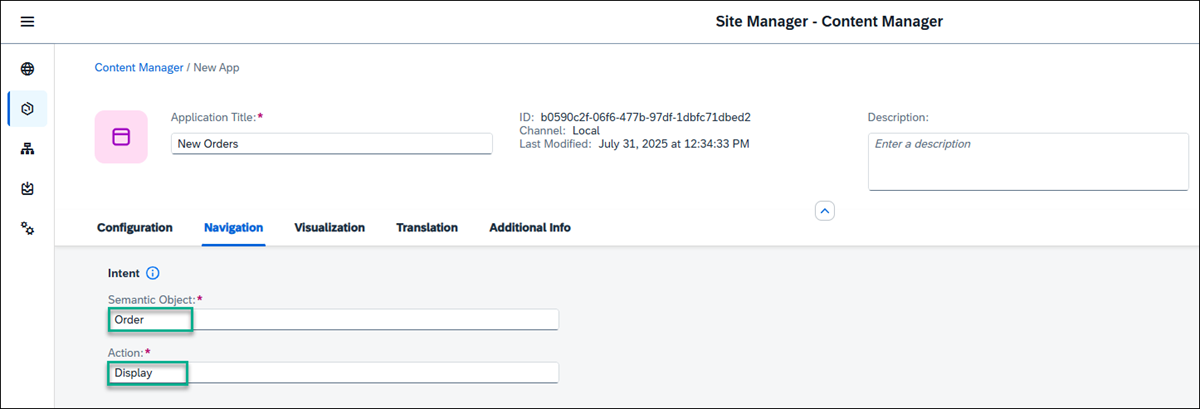
Add navigation properties Click the Visualization tab.
In this tab, you specify how the app will be displayed in the site.
Enter the following values:
Subtitle:
Shopping CartInformation:
Order Now!Icon: Click the browse icon, type
my-sales-order, and click on the displayed icon to add it to your tile.
On the right, you can see a preview of the tile with all the properties you entered. Click Save.

Add visualization properties
Go back to the Content Manager by clicking on the breadcrumbs.

You can see your app in the list of content items:
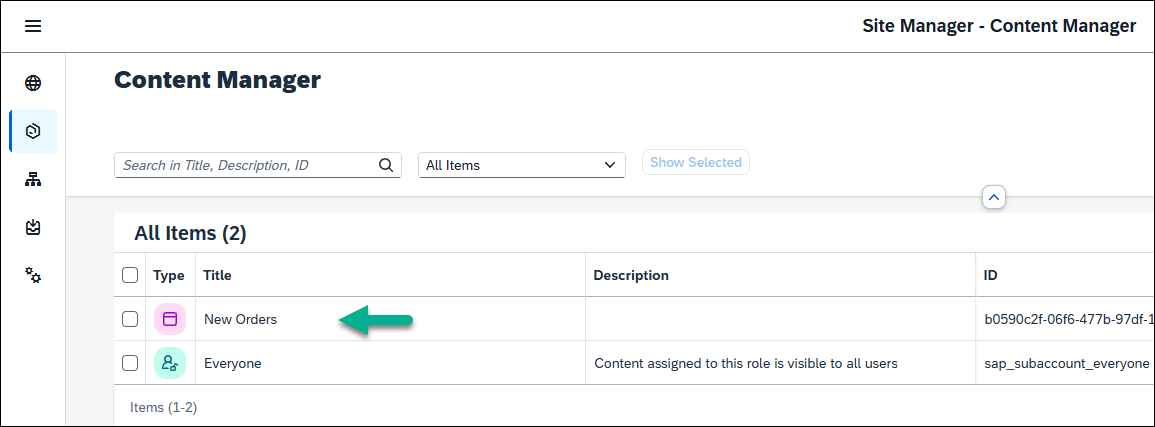
For end users to access the app in runtime, you must assign the app to a role.
Content assigned to the
Everyonerole is visible to all users.
Click the Everyone role.

Select everyone role Click Edit.

Click Edit Under the Apps tab, you’ll see that your
New Ordersapp has a red X in the Assignment Status column. Click the toggle to change the icon to green and then click Save. This action assigns the app to theEveryonerole.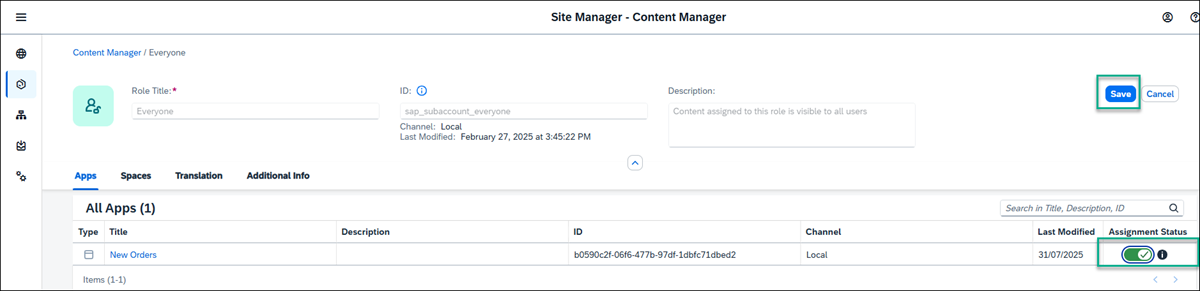
Assign app to role If you have many apps, you can type some letters of your app name in the search bar, (for example,
Or) to search for the app.
You’ve successfully created an SAPUI5 app. In the next tutorial, you’ll create another app (URL app) and then you’ll add both apps to a page.
Resources
Discussion
Share feedback on this tutorial or join the conversation in SAP Community.