
Overview
You will learn
- How to add multitenancy to a secure Node.js application
- How to provide the application to another subaccount with the SaaS Provisioning service
- How to access a multitenant application from another subaccount


Prerequisites
Prerequisites
- Secure a Basic Node.js App with the SAP Authorization and Trust Management Service (XSUAA)
- You must have a second subaccount within the same region and same trial account that you can use to subscribe to the application.
Steps
Intro
The use case for this tutorial is that you’ve created a Node.js application in your subaccount that is secured by the XSUAA. You now want to make that application available to other subaccounts (tenants). You’ll use the SaaS Provisioning service to make your application available to a consumer subaccount within your global trial account.
See the following diagram to get an overview of the SaaS architecture.

IMPORTANT: This tutorial is using specific values instead of placeholders. Please make sure to adapt those values to your own values, that you used in the previous tutorial.
The specific values that are used in this tutorial are:
- The application name of the product list application: product-list.
- Used in the
manifest.yml.
- Used in the
- The application name of the application router: approuter.
- Used in the
manifest.yml.
- Used in the
- The route: product-list-ap25.cfapps.eu10.hana.ondemand.com.
- Used in the
manifest.yml. - Partially used in the
config.json.
- Used in the
- The route: approuter-product-list-ap25.cfapps.eu10.hana.ondemand.com.
- Used in the
manifest.yml. - Partially used in the
index.js
- Used in the
- The XSUAA service instance name: xsuaa-service-tutorial
- Used in the
manifest.yml. - Used when creating the service instance.
- Used in the
- The SaaS Provisioning service instance name: saas-registry-tutorial.
- Used in the
manifest.yml. - Used when creating the service instance.
- Used in the
- The XSUAA application name: product-list
- Used in the
config.json. - Used in the
xs-security.json.
- Used in the
- The subdomain Id of the consumer subaccount: consumer-tenant-ap25.
- Used when creating the route for the consumer subaccount.
To enable multitenancy, you need to change the parameter tenant-mode in the xs-security.json file to make it available for multiple tenants.
Go to the
product-list/securityfolder.Open the
xs-security.jsonfile.Change the value of the parameter
tenant-modetoshared.Under
scopes, add access to the SaaS Provisioning service to call the product list callback API directly. You’ll implement the callbacks in Step 3.JSON"scopes": [ { "name": "$XSAPPNAME.read", "description": "With this scope, USER can read products." }, { "name": "$XSAPPNAME.Callback", "description": "With this scope set, the callbacks for tenant onboarding, offboarding and getDependencies can be called.", "grant-as-authority-to-apps": [ "$XSAPPNAME(application,sap-provisioning,tenant-onboarding)" ] } ],The
redirect-urisparameter needs to have an asterisk right after the protocol and beforeapprouter-product-list. This enables the application to redirect to the subscribed application instances in the other subaccounts.JSON"oauth2-configuration": { "redirect-uris": ["https://*approuter-product-list-ap25.cfapps.eu10.hana.ondemand.com/login/callback"] }Save the file.
In this step, you need to complete the following tasks:
- Add a new routing pattern
- Add the service binding for the SaaS Provisioning service
You can either do these steps one by one or copy the complete manifest.yml at the end. Remember to adapt the routes, URLs, and the TENANT_HOST_PATTERN according to your own example.
Add a parameter called TENANT_HOST_PATTERN to the approuter application. The parameter specifies a generic route for all tenants to call the application over the approuter.
Go to the
product-listfolder.Open the
manifest.ymlfile.For the approuter application, add the parameter
TENANT_HOST_PATTERNunder theenvparameter.YAMLenv: destinations: > [ {"name":"hw-dest", "url":"https://product-list-ap25.cfapps.eu10.hana.ondemand.com", "forwardAuthToken": true} ] TENANT_HOST_PATTERN: "^(.*)-approuter-product-list-ap25.cfapps.eu10.hana.ondemand.com"RESTRICTION: The value of the parameter
TENANT_HOST_PATTERNhas to be lowercase.
Adding the service binding of the SaaS Provisioning service in the manifest.yml will automatically bind the service instance to the product-list application when deploying it.
Add the service binding for the SaaS Provisioning service to the product-list application.
services:
  - xsuaa-service-tutorial
  - saas-registry-tutorial
At the end, your manifest.yml file should look like this:
applications:
# Application
- name: product-list
  instances: 1
  memory: 128M
  routes:
    - route: product-list-ap25.cfapps.eu10.hana.ondemand.com
  path: myapp
  buildpacks:
    - nodejs_buildpack
  timeout: 180
  services:
    - xsuaa-service-tutorial
    - saas-registry-tutorial

# Application Router
- name: approuter
  routes:
    - route: approuter-product-list-ap25.cfapps.eu10.hana.ondemand.com
  path: approuter
  buildpacks:
    - nodejs_buildpack
  memory: 128M
  services:
    - xsuaa-service-tutorial
  env:
    destinations: >
      [
        {
          "name":"products-destination",
          "url":"https://product-list-ap25.cfapps.eu10.hana.ondemand.com",
          "forwardAuthToken": true
        }
      ]
TENANT_HOST_PATTERN: "^(.*)-approuter-product-list-ap25.cfapps.eu10.hana.ondemand.com"To enable other subaccounts to subscribe to your application, you need to implement an endpoint for the SaaS registration manager to subscribe/unsubscribe.
Go to the
myappfolder.Open the
index.jsfile.Add the following lines of code after the
checkReadScopefunction (replace the string “ap25” with the string that you used when deploying the first tutorial. Adapt the region code if your trial isn’t in the eu10 region):JavaScriptapp.put('/callback/v1.0/tenants/*', function (req, res) { var consumerSubdomain = req.body.subscribedSubdomain; var tenantAppURL = "https:\/\/" + consumerSubdomain + "-approuter-product-list-ap25." + "cfapps.eu10.hana.ondemand.com/products"; res.status(200).send(tenantAppURL); }); app.delete('/callback/v1.0/tenants/*', function (req, res) { var consumerSubdomain = req.body.subscribedSubdomain; var tenantAppURL = "https:\/\/" + consumerSubdomain + "-approuter-product-list-ap25." + "cfapps.eu10.hana.ondemand.com/products"; res.status(200).send(tenantAppURL); });To be able to read the body of those calls, add the body parser module at line 9 of the
index.jsfile.JavaScriptconst bodyParser = require('body-parser') app.use(bodyParser.json())Add the body parser module as a dependency to the
product list/myapp/package.jsonfile.JSON"dependencies": { "express": "^4.17.1", "@sap/xsenv": "^3.1.0", "@sap/xssec": "^3.0.10", "passport": "^0.4.1", "body-parser": "^1.19.0" }
To make your multitenant application endpoints available for subscription to consumer subaccounts, you must register the application in the Cloud Foundry environment via the SaaS Provisioning service.
To register your application, you need a configuration file called config.json. In this file, you specify the subscription URL, the name and description of your application. The xsappname has to be the same as the xsappname in the xs-security.json file.
Go to the
product-listfolder.Create a
config.jsonfile.Insert the following lines:
JSON{ "xsappname":"product-list", "appUrls": { "onSubscription" : "https://product-list-ap25.cfapps.eu10.hana.ondemand.com/callback/v1.0/tenants/{tenantId}" }, "displayName" : "Product List MTA", "description" : "Product list MTA sample application", "category" : "Custom SaaS Applications" }
When you change the tenant mode from dedicated to shared like you did in step 1, it’s not enough to update the XSUAA service instance. You have to unbind and delete the old service instance first to recreate it later with the updated tenant mode settings.
- Unbind the existing XSUAA service instance from the product-list
cf unbind-service product-list xsuaa-service-tutorial- Unbind the existing XSUAA service instance from the approuter.
cf unbind-service approuter xsuaa-service-tutorial- Delete the existing XSUAA service instance.
cf delete-service xsuaa-service-tutorialCreate the new multitenant XSUAA service instance and the SaaS Provisioning service instance and redeploy your application.
Log in to your Cloud Foundry account with the Cloud Foundry CLI.
Go to the
product-listfolder.Create the XSUAA service instance with the
xs-security.jsonsecurity descriptor file.
cf create-service xsuaa application xsuaa-service-tutorial -c security/xs-security.json- Create the SaaS Provisioning service instance with the
config.jsonfile.
cf create-service saas-registry application saas-registry-tutorial -c config.json- Redeploy the application with the updated
manifest.ymlfile.
cf pushMake your application reachable for consumer subaccounts by adding a new route in the Cloud Foundry CLI. The route is composed of the subdomain of the subscribing subaccount (see screenshot) and the TENANT_HOST_PATTERN of the application router that we defined in the manifest.yml. You have to create a new route for every subaccount (tenant) that subscribes to the application.

Log in to the Cloud Foundry account where the application is deployed with the Cloud Foundry CLI.
Create a route for the consumer subaccount.
cf map-route approuter cfapps.eu10.hana.ondemand.com --hostname consumer-tenant-ap25-approuter-product-list-ap25To access the application, you need to subscribe to it. Follow these steps to subscribe to the SaaS application with the consumer subaccount and call the application URL.
Open the SAP BTP Trial.
Navigate to your consumer subaccount.
Choose Subscriptions.
Choose Product List MTA.
Choose Subscribe.
Choose Go to Application.
You’ll now see the application with the message no data because you have to assign the role collection to your user in the consumer subaccount.
Assign your user the role collection ProductListViewer that contains the necessary role to view the products in the product list.
Open the SAP BTP cockpit.
Navigate to your consumer subaccount.
Choose the Security tab and choose Trust Configuration.
Choose Default identity provider.
Enter your e-mail address and choose Show Assignments.
Choose Assign Role Collection.
Choose the
ProductListViewerrole collection.Clear your cache and reload the application URL.
https://consumer-tenant-ap25-approuter-product-list-ap25.cfapps.eu10.hana.ondemand.com/products
The application will now show you the products. If it’s not working also consider to check with another browser or in private mode.
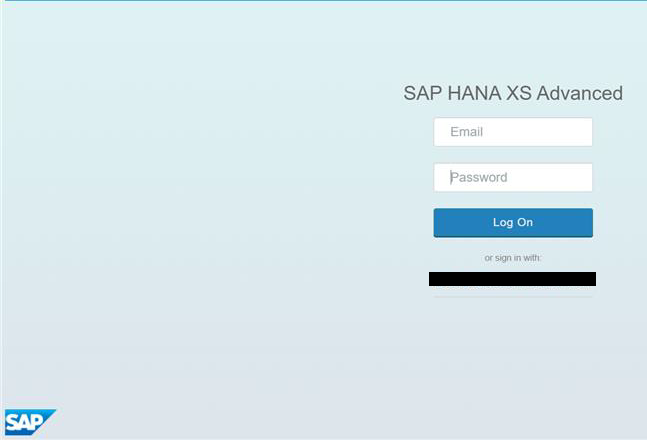
1. A login screen for SAP HANA XS Advanced is displayed.
2. Error message: 404 Not Found: Requested route (‘consumer-tenant-ap25-approuter-product-list-ap25.cfapps.eu10.hana.ondemand.com’) does not exist.
To resolve this error, check that you have mapped the routes correctly by verifying the subdomain in the subaccount overview.
Resources
Discussion
Share feedback on this tutorial or join the conversation in SAP Community.