
Overview
You will learn
- How to enhance your scenario by configuring phases, attributes, and performance indicators
- How to activate the scenario


Prerequisites
Prerequisites
- You have set up SAP Workflow Management service. For more information, see the Set Up Workflow Management in Cloud Cockpit tutorial.
- You have created a visibility scenario named Employee Onboarding Process with onboard workflow as a process participant. For more information, see Create a Visibility Scenario for a Deployed Workflow tutorial.
Steps
Intro
When you add a workflow to your visibility scenario as a process participant, a set of attributes and performance indicators are automatically configured to your visibility scenario. You can navigate to the respective tabs in the Configure Visibility Scenarios application to view them. You can either choose to activate the visibility scenario without enhancing or you can further enhance the visibility scenario by adding phases, status, calculated attributes, and performance indicators.
Add a phase to your visibility scenario by choosing + icon in the Phases tab.

Add phase Provide a the following details for the phase and choose OK.
Field Name Value Name Confirm EquipmentID ConfirmEquipment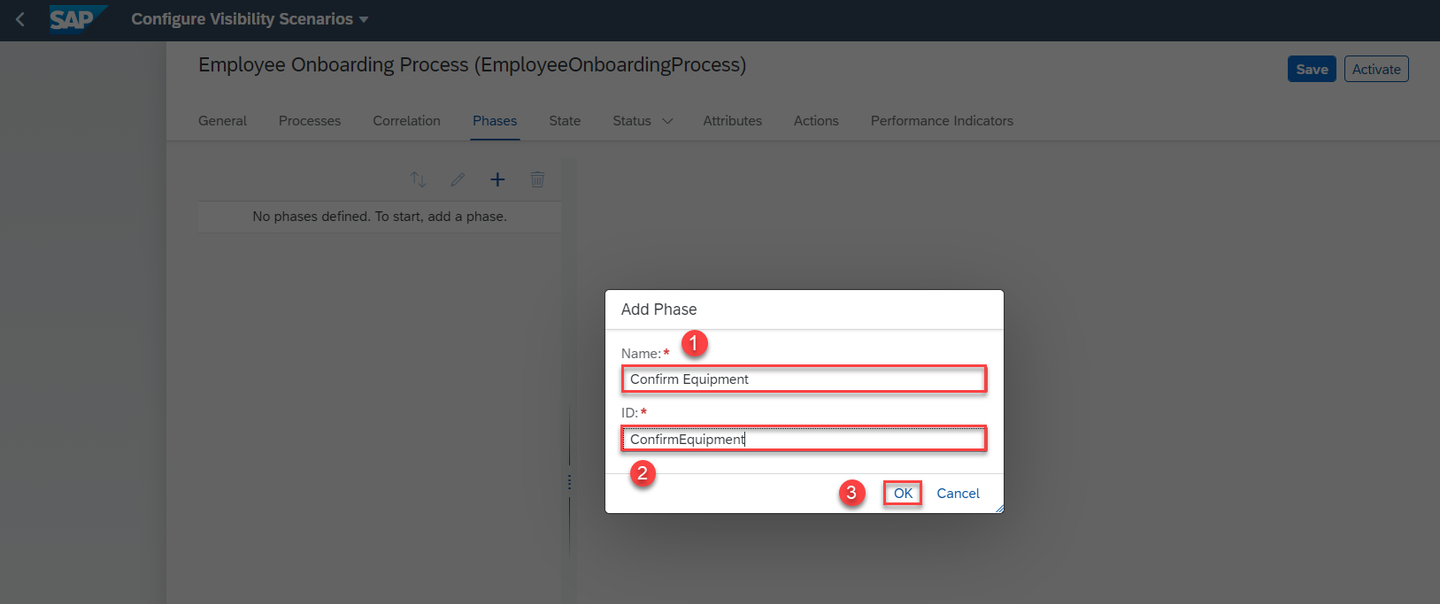
Phase name In the Start Events drop down, select StartEvent1 Started and Change or Confirm equipment Created options.
Field Name Value Start Events StartEvent1 Started,Change or Confirm equipment Created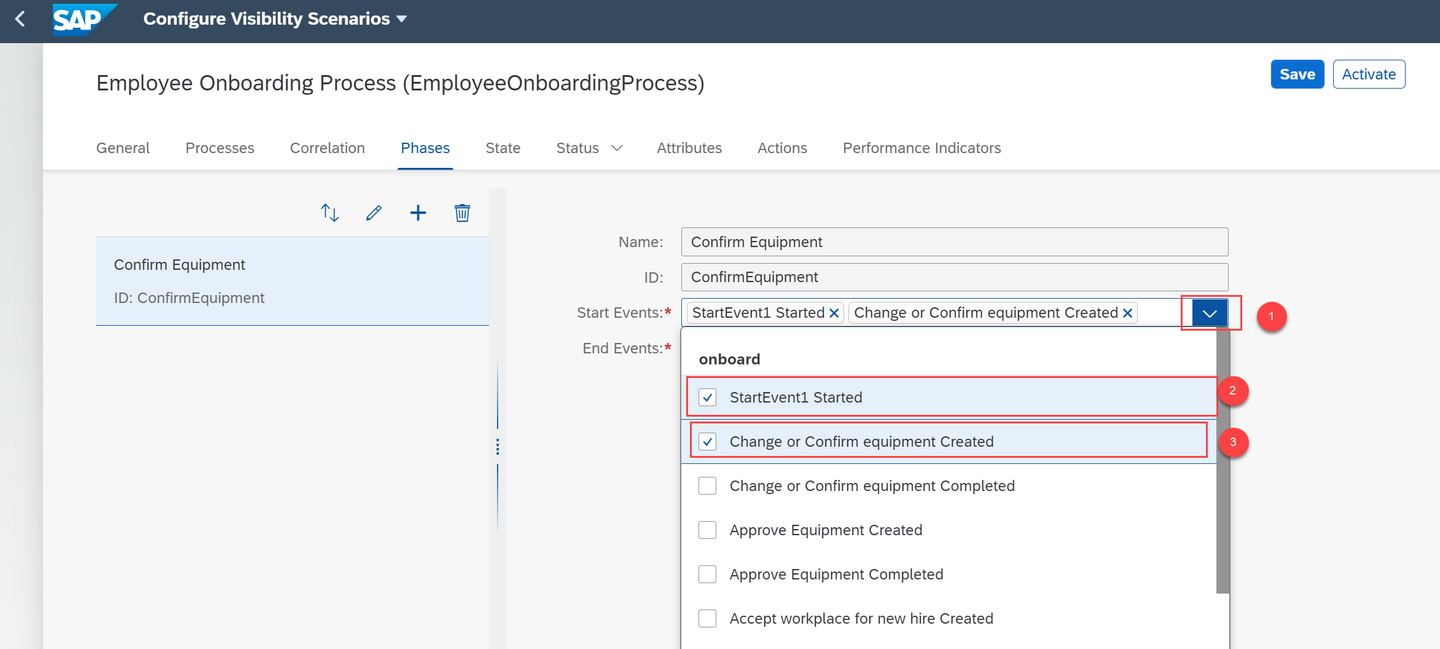
Phase start In the End Events drop down, select Change or Confirm equipment Completed option.
Field Name Value End Events Change or Confirm equipment Completed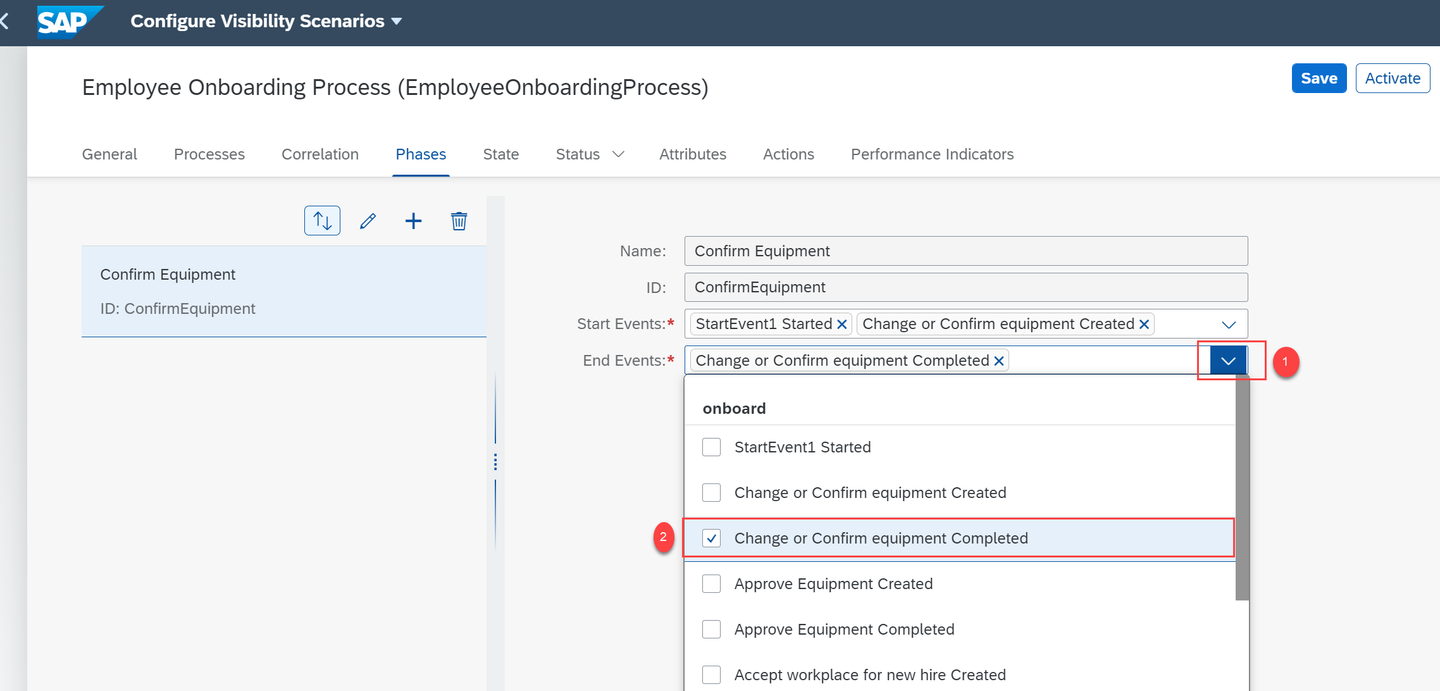
Phase end Similarly, create another phase named Approve Equipment. Then, select the Approve Equipment Created option from the Start Events dropdown and Approve Equipment Completed option from the End Events dropdown and Save the changes.
Field Name Value Name Approve EquipmentID ApproveEquipmentStart Events Approve Equipment CreatedEnd Events Approve Equipment Completed
Add another phase
Navigate to the Status tab.
Under the Target section, provide the following details and Save the changes:
Field Name Value Target Type ConstantTarget Value 30 Days,0 Hrs,0 MinThreshold 70 %
Configure Target
Choose the Attributes tab, you can view a set of default attributes in the left pane.

Attribute Add a calculated attribute by choosing the + icon.

Plus attribute Add the following properties in the Add Calculated Attribute dialog.
Field Name Value Name Time Taken To Approve EquipmentID TimeTakenToApproveEquipmentExpression Type Duration between eventsStart Event Approve Equipment CreatedEnd Event Approve Equipment Completed
Add attribute Save the changes.
Navigate to the Performance Indicators tab and add a performance indicator by choosing the + icon.
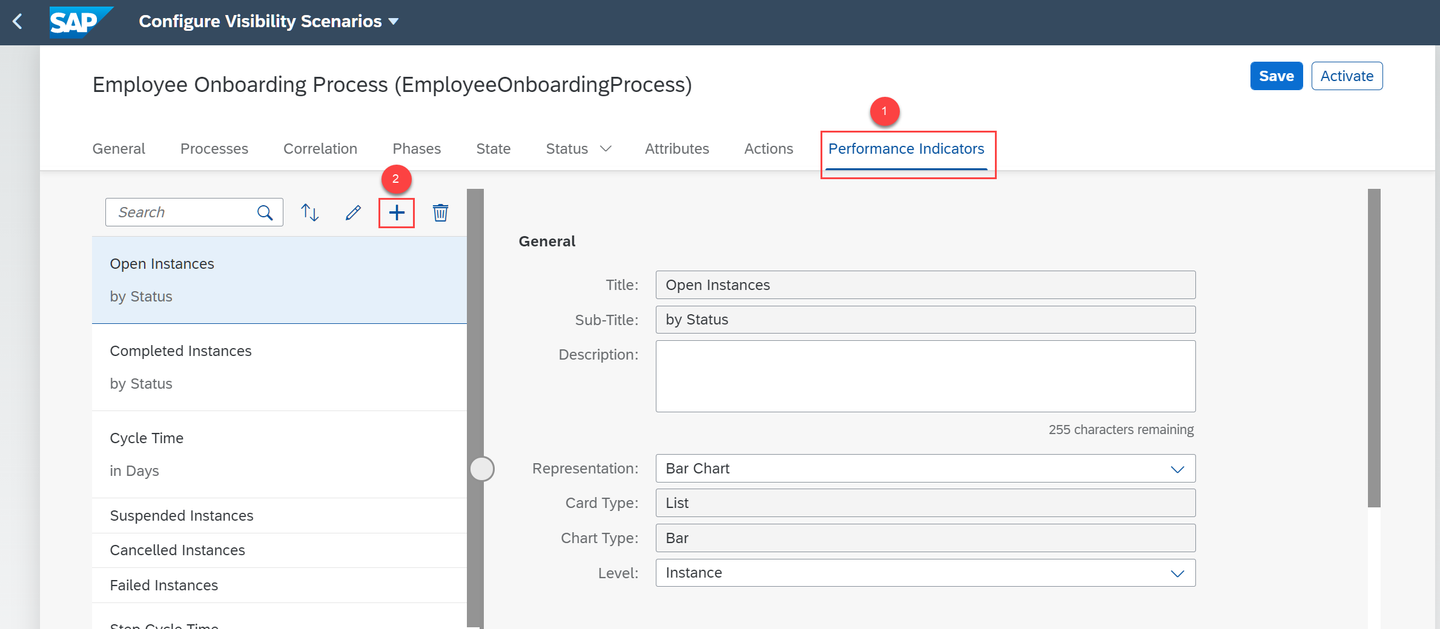
Performance indicators In the Add Performance Indicator dialog, provide the following details and choose OK.
Field Name Value Title Open Onboarding RequestsSub-Title By PhaseID Open_Onboarding_Requests
Add performance indicators Choose the following options as shown in the General and Data section of the Performance Indicators tab:
For General section:
Field Name Value Title Open Onboarding RequestsSub-Title By PhaseDescription This performance indicator is for open onboarding requests.Representation Bar ChartCard Type ListChart Type BarLevel InstanceFor Data section:
Field Name Value Measure Number of InstancesDimension Active Phases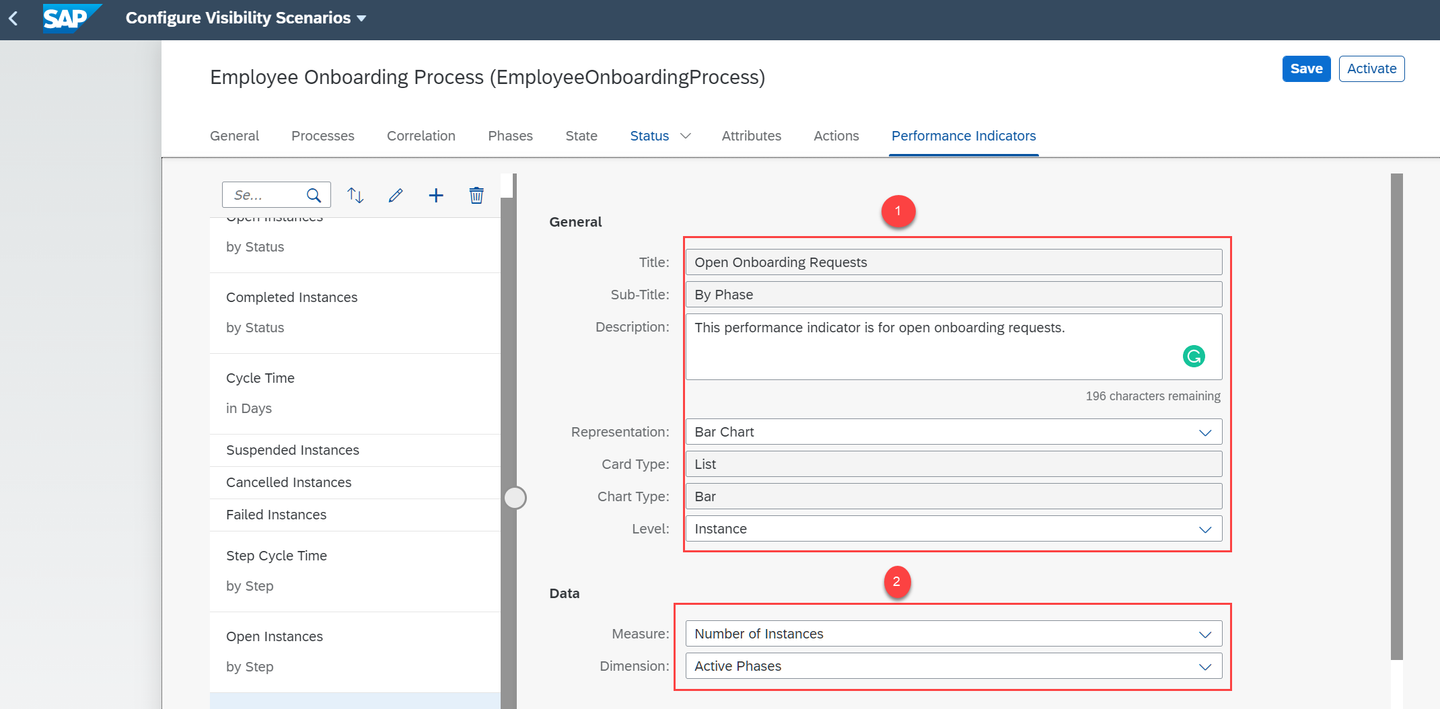
Add performance indicators details Choose the + icon under the Filters section of Performance Indicators to add a filter.
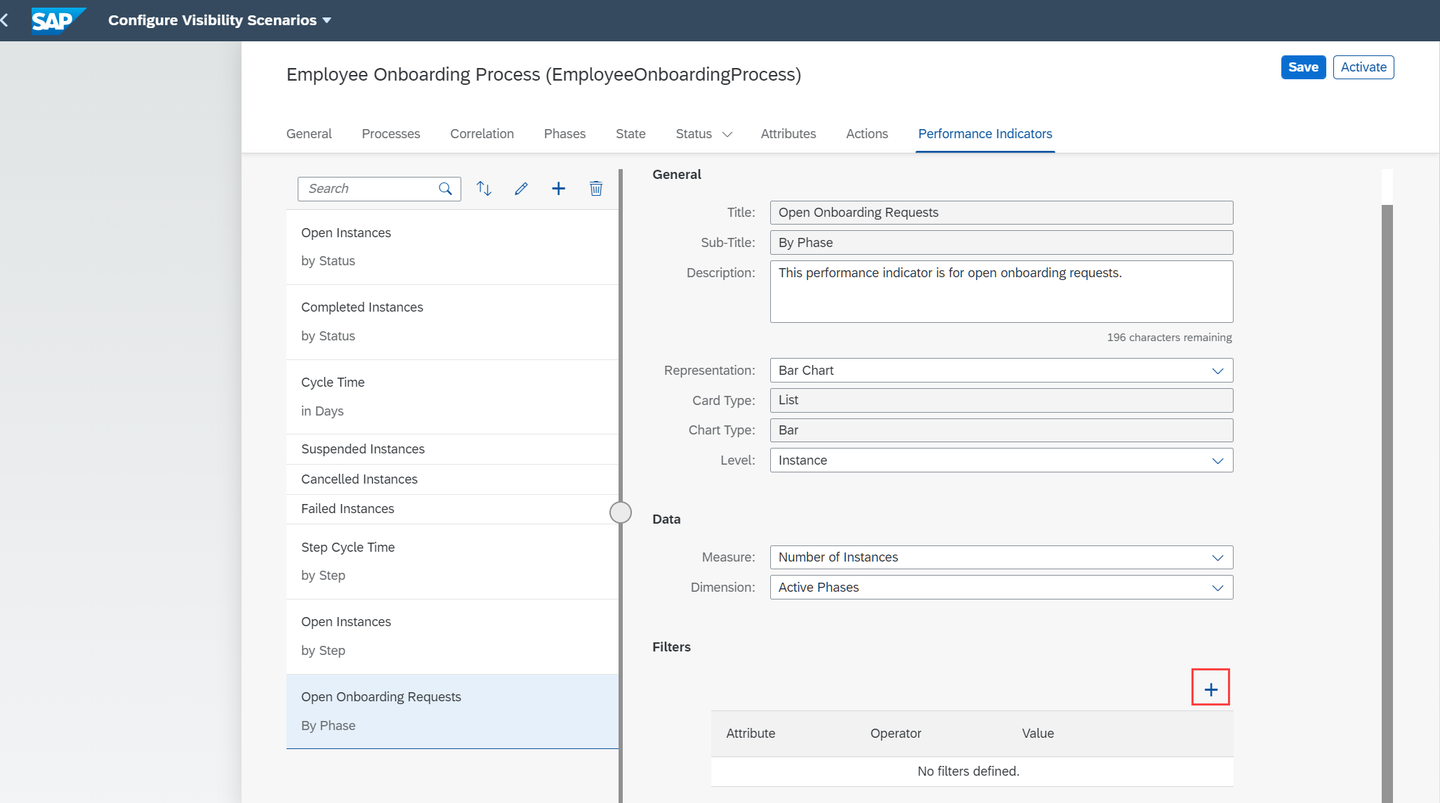
Add filter In the Add Filter dialog, provide the following details:
Field Name Value Attribute StateOperator equal toValue Open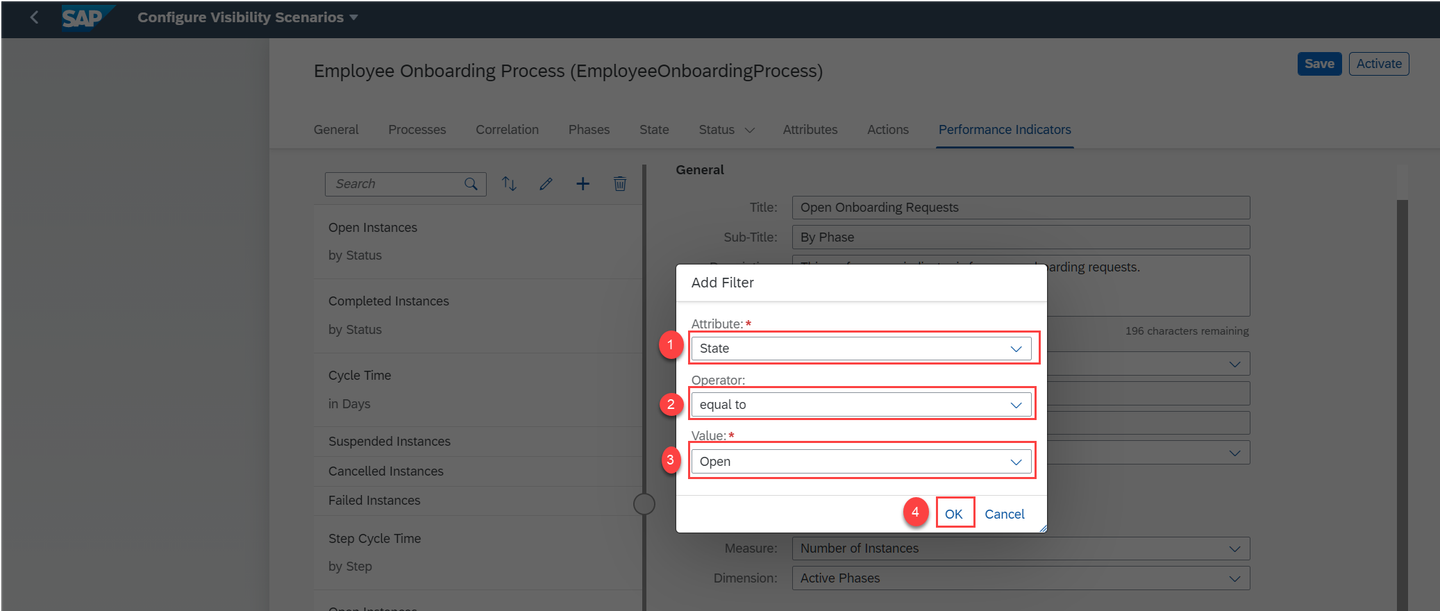
Filter details Save the changes.
Save the scenario and then choose Activate.
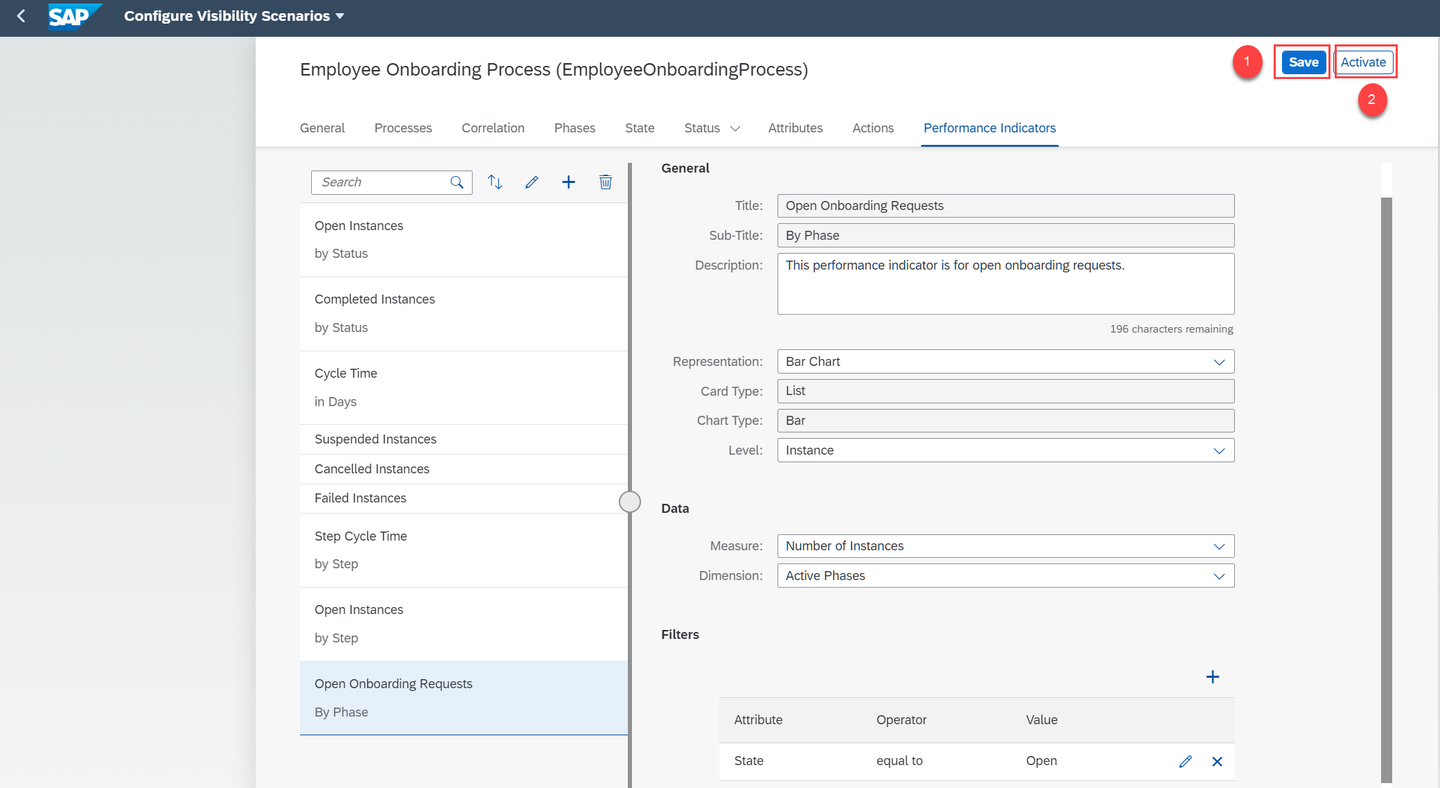
Activate Once the scenario is successfully activated, you can see the status of the Employee Onboarding Process scenario as Active.

After activate
Resources
Discussion
Share feedback on this tutorial or join the conversation in SAP Community.