
Overview
You will learn
- The value of versions and environments in the chatbot building process
- How to create a version
- How to create an environments, and manage the version of an environment
- How to push your chatbot into production


Prerequisites
Prerequisites
- You have already built the bot described in Create Chatbot for Customers of Shipping Company.
Steps
Intro
In this tutorial, you’ll create a second version of the shipping bot you created in Create Chatbot for Customers of Shipping Company.
You will then create 2 environments – development and production – and take the new version of the bot and deploy it to production, without needing to deploy anything on your landscape (like updating the web page).
A version is a copy of your bot’s training dataset and skills. Each version is independent of the others and can be managed individually. For example, you might want to create a new version prior to major updates to your training dataset or skills. Or you might want to create two or more variants of the same core bot for different audiences.
When you create a new bot, by default, your bot has only one main version, called v1.
A new version lets you create a copy of all your intents, entities and skills in the same bot as another development version or for a different purpose. The versions share some settings.
Forking a bot lets you copy a bot into a separate bot project, and the 2 copies are afterward completely separate and independent.
Note that when you make additional versions, copies of the Train and Build tabs are created. The Connect and Monitor tabs, and settings are shared among the versions.
Your bot’s environments represent a way to manage the development of the bot. Typically, you create environments for Development, Testing and Production, and then decide which version of the bot you want in each of the environments.
Since bots are deployed via channels, each channel is assigned an environment (i.e., each channel for your bot could be for development, testing or production). The version of the bot assigned to that environment is the one users will see on that channel.

For example, you can have a development web site and a production web site, and create 2 Webchat channels, assigning one channel the Development environment and the other the Production environment. You then take the JavaScript code for the development channel and put on your development website, and the code for the production channel on the production website.
When you develop a new version that you now want to push to production, you just assign that version to the Production environment, and automatically users on production website will see the new version of the bot.
When you first create a bot, you automatically have the Development environment (which is the default environment), with version v1 assigned to it.
System Aliases
When you create a chatbot, you often want to bring backend data into the bot in response to something the user said. You do this through API calls in a skill, each requiring a URL.
Instead of providing the entire URL in each API call, you can define a base URL for all API calls, one for each version of your bot.
And instead of providing a single base URL per version, you can use system aliases, and define multiple base URLs and then assign different values for each of these base URLs in each environment. The benefits are:
You can define more than one base URL for different backend systems.

System aliases You can assign different values for a base URL in different environments, for example a development backend for the bot in the development environment, and a production backend for the production bot.

Aliases per environment
Now you will create a second version of the shipping bot.
Open your shipping bot.
At the top of the page, open the version dropdown list and click Create Version.

Create version In the popup, enter or select the following values:
Your version name:
v2From which version?:
v1

Create version popup Refresh the page and again open the version dropdown list. You will see the new version, which is identical to the original version.

New version
Now, you will make a change in version 2, which represents for this tutorial a development version where you are working on new features now yet ready to be deployed.
In the version dropdown, select
v2.Go to Build > greetings.
In the Actions tab, find the message group where the greetings intent must be present.
Click Send Message.

Send Message Select Image, and add the following URL for the image:
URLhttps://images.unsplash.com/photo-1596443686812-2f45229eebc3Click Save.

Add image
Since you are still in version 2, test that first. Go to the Chat Preview and enter Hi.
You get the image.

At the top, change the version to v1. Now enter Hi again, and you get just the text greeting.

You now have 2 versions, the original and a new one with our experimental feature. In the next steps, you’ll use environments to manage your development so you can push your development features into production.
You now will create a new environment called Production, so that when you have a new version that is tested you can easily move it to production – without having to mess with your channel configuration.
Go to Settings.

Settings Click Environments, and then click Create Environment.

Create environment In the popup, enter or select the following values:
Your environment name:
ProductionWhich version should be deployed?:
v1
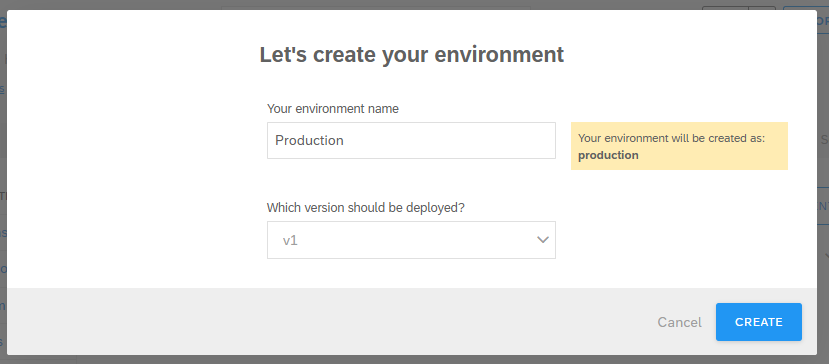
Environment configuration You make v1 the production version, and you will change v2 – with the new feature – as the development version.
On the environment screen (you should be there after creating a new environment), select the version dropdown for the Development environment and set it to v2.
In the popup, click Deploy v2.
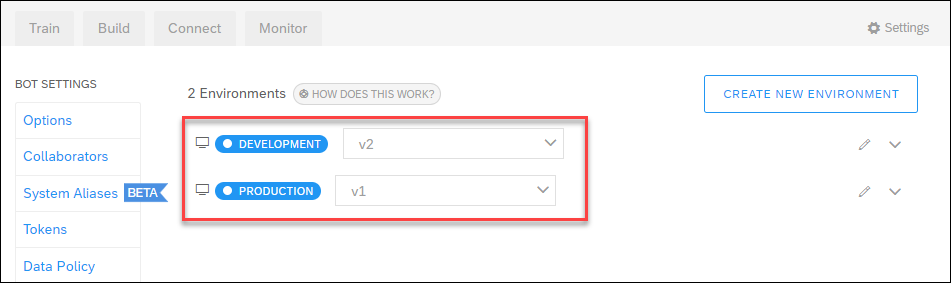
Environments
As an example of how to use the environment, you will deploy the production environment (version v1, without the image) via a Webchat channel.
Later, you will see how to quickly elevate v2 to production from development.
In the Connect tab, go to the Webchat channel and click the plus sign ( + ) to start to create a new channel.

Webchat Keep all the settings and click Create.

Webchat create Copy the JavaScript.

JavaScript Click Close.
Expand the Webchat channel.

Expand Next to the channel you just created, set the environment dropdown to
Production.Set environment
If you do not set an environment for the channel, the default environment is used.
The default environment is set within the bot’s settings:
- When a bot is created, there is one environment called Development and it is set as the default.
- You can see which is the default because it is the first environment listed, in the example, Testing.
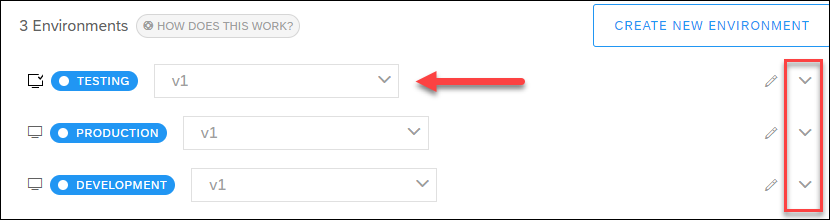
- If you want to set a different environment as the default, expand it (arrow to the right) and check the Defaults checkbox.
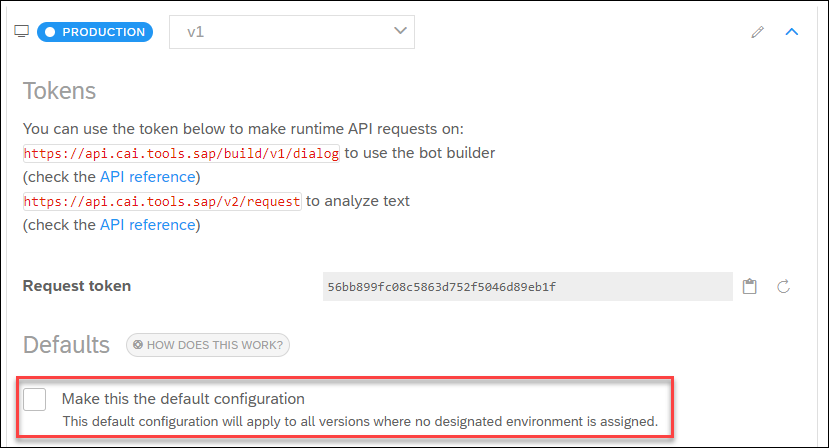
You cannot uncheck the **Defaults** checkbox, nor can you delete the default environment.
Create a web page.
You can simply create a file called
index.htmland copy in the following text.
<html>
  <head>
    <title>Bot Tester</title>
  </head>
  <body>
    <div>
      <h1> Bot Tester</h1>
    </div>
  </body>
</html>
In the <body> section after the <div> tag, copy in the `

Open the page, and then open in the bottom right the bot, and enter hi. The bot is v1, the one without the image.

Now you will simulate that development is complete and you want to push the new version to production.
Go to Settings for the bot, and click Environments.
Next to the Production environment, select
v2.
Move to production In the popup, click Deploy v2.
Go back to your web page and enter hi again. Now you get version v2, with the picture.

New production
Resources
Discussion
Share feedback on this tutorial or join the conversation in SAP Community.