
Overview
You will learn
- How to retrieve an OAuth token for use with SAP Conversational AI API
- How to call SAP Conversational AI API via OAuth


Prerequisites
Prerequisites
- You understand the basics of creating a chatbot, as described in the tutorial Build Your First Chatbot with SAP Conversational AI.
- Python
- VS Code with the Python extension by Microsoft, though you can use any Python development environment. See Getting Started with Python in VS Code.
- Flask package for Python
- Requests package for Python
- Flask-Caching package for Python
- You have created a chatbot that you would like to call. If not, create a new chatbot with the Greetings skill.
Steps
Intro
This tutorial is a companion to the tutorial Call SAP Conversational AI API Using OAuth (Postman), which lets you just test the APIs via a simple Postman collection. Here, you will make a more sophisticated simulation, including building a web server and using caching to store the OAuth token.
What you will build
This tutorial demonstrates the basics for calling the SAP Conversational AI API using an OAuth token, which is the required way for all new chatbots. The request endpoint of the Runtime API is called, which sends an utterance only to the NLP for understanding, but the principles are the same if you used the dialog endpoint.
To make things more interesting, you will create a simple web server that:
- Takes an utterance via a URL parameter.
- Retrieves an OAuth token, using the chatbot’s client ID and secret.
- Calls the NLP via the
requestendpoint, sending the OAuth token as authentication.
Best practices call for only retrieving the OAuth once, and then caching it for all subsequent calls. We will use the
flash_cachingpackage to store the token.
In the file explorer, create a new folder for the project and call it
chatbot-api.Open VS Code.
Make sure you have installed the Microsoft extension for Python, as well as all the prerequisite packages.
Go to File > Add Folder to Workspace, and select the project folder.
Inside the folder, create a folder called
static. Download the SAP Conversational AI icon and place it in the folder.

Your project should look like this:

In your project, create a file called
configproperties.py.Add properties for the credentials you will need:
Pythonclientid = "<your client ID>" secret = "<your secret>" requesttoken = "<your request token>" oauthURL = "<URL for getting OAuth token>" requestURL = "<URL for calling request API>"Retrieve your credentials from your chatbot and place as values in the
configproperties.pyfile.For the client ID, secret and OAuth URL, go to Settings > Tokens, and click Generate under Runtime APIs.

Client credentials Select Client Credentials, and click Next. After a few seconds, the credentials are created and you can click Close to close the dialog.

Client credentials Copy the client ID and secret.

Client credentials For the request token and request API URL, go to Settings > Versions and open the version of your chatbot that you want to call.

Request token
Now your configproperties.py file should have your credentials.

In your project, create a file called
chatbot-api.py.In the file add the following skeleton code:
Pythonfrom flask import Flask, request, jsonify import os import json import requests from flask_caching import Cache from datetime import datetime import configproperties app = Flask(__name__) cf_port = os.getenv("PORT") #Other code will go here if __name__ == '__main__': if cf_port is None: app.run(host='0.0.0.0', port=5000, debug=True) else: app.run(host='0.0.0.0', port=int(cf_port), debug=True)
The above is standard code, and will create the localhost server on port 5000. Also, debug=True will allow you make changes to the web server without having to manually restart the server.
You will have to have installed the
Flask,flask_caching, andrequestspackages.
All subsequent code goes where it is marked:
#Other code will go here
Add the following to enable the caching of the OAuth token:
config = {
    "DEBUG": True,          # some Flask specific configs
    "CACHE_TYPE": "SimpleCache",  # Flask-Caching related configs
    "CACHE_DEFAULT_TIMEOUT": 300
}
app.config.from_mapping(config)
cache = Cache(app)
For more information on configuring and using caching, see Flask-Caching.
Add the following function to retrieve the OAuth token:
@cache.cached(timeout=43200, key_prefix='token')
def get_token():
    print("GETTING TOKEN")
    result = requests.post(configproperties.oauthURL, data={ 'grant_type':'client_credentials' }, auth=(configproperties.clientid, configproperties.secret))
    token = json.loads(result.content)
    return token["access_token"]
Notice the following:
You set a
printstatement so you will be able to see whether this function is executed based on the cache (more on this later).In addition to sending the credentials as headers, you also send a the
grant_typekey-value pair as form-encoded data.In the
@cachedecorator for this function, you set the caching to be valid for 12 hours, which is the validity for the token. You also set the cache field name totoken.
Ideally, the caching timeout would not be hard-coded, but would be retrieved from within the JSON when you get the OAuth token, in the
expires_infield.
Add the following function to create an endpoint, and when called, to call the SAP Conversational AI API and return the intent that was detected.
# Route for calling SAP Conversational AI API
@app.route('/api')
def api():
    # Get text to send to NLP (from URL parameter)
    text = request.args.get("text")

    # Make Post request, with text and credentials
    result = requests.post(configproperties.requestURL, json={"text" : text}, headers={ "Authorization" : "Bearer " + get_token(), "X-Token" : "Token " + configproperties.requesttoken })
    resultsjson = json.loads(result.content)

    # Return web page, including the intent
    if resultsjson["results"]["intents"]:
        return f'<h1>SAP Conversational AI - API</h1><body>The intent was <b>{resultsjson["results"]["intents"][0]["slug"]}</b><br><img src="static/283370-pictogram-purple.svg" width=260px></body>'
    else:
        return f'<h1>SAP Conversational AI - API</h1><body>No intents.<br><img src="static/283370-pictogram-purple.svg" width=260px></body>'
Notice that you must send the OAuth token as bearer authorization token, and the X-Token header with your request token.
The format of the response for the Runtime request and dialog APIs are described under Runtime API.
Start the server by clicking the Run in Terminal icon.

Start server Call the server with the URL:
URLhttp://localhost:5000/api?text=hiThe web page shows the intent that was detected,
greetings.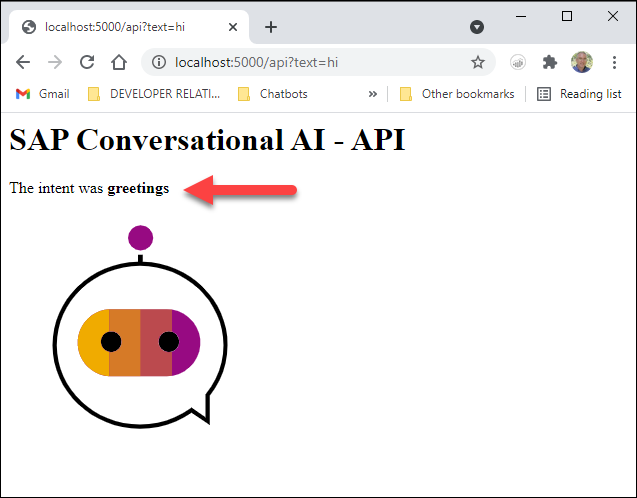
Response Call the server with the URL:
URLhttp://localhost:5000/api?text=byeThe web page shows the intent that was detected, now
goodbye.
Response Call the server with the URL:
URLhttp://localhost:5000/api?text=abcdefThe web page now says that no intent was detected.
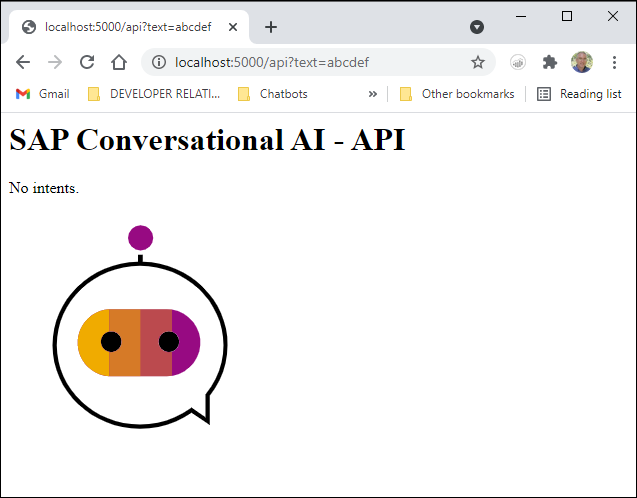
Response
If you look at the terminal, you will see that we retrieved the token in the first call but then used the cached token in the next 2 calls.

Resources
Discussion
Share feedback on this tutorial or join the conversation in SAP Community.