
Overview
You will learn
- How to retrieve an OAuth token for use with SAP Conversational AI API
- How to call SAP Conversational AI API with an OAuth token
- How to set up a Postman collection to call the APIs


Prerequisites
Prerequisites
- You have installed the Postman app.
- You have created a SAP Conversational AI chatbot, for example, as described in the tutorial Build Your First Chatbot with SAP Conversational AI.
Steps
Intro
This tutorial is a companion to the tutorial Call SAP Conversational AI API Using OAuth, which was a more sophisticated setup for calling SAP Conversational AI APIs using a Python server. Here, you will use Postman to more simply show how to retrieve an OAuth token and then call the API.
In Postman, you will set up 3 requests, and put them in a collection so they can be run together and pass arguments to each other:
start: This request is a dummy request, but let’s us at the start test whether we already have an OAuth token. If yes, we skip the request for getting a token.get-oauth-credentials: This request takes our chatbot credentials and calls the OAuth service to retrieve a new OAuth token.request: This request is the basic SAP Conversational AI Runtime API for sending an utterance to the NLP. (We could have also used thedialogRuntime API.)
This tutorial also shows off some of the functionality of Postman, from pre-request scripts, to tests, to setting and get environment data in order to pass between requests. It would have been simpler to use the built-in Postman OAuth authentication feature.
We will need to create a Postman environment to store the various credentials for the OAuth and Runtime API credentials.
Open Postman.
In the top-left, click New+.

New Select Environment.

New Call the environment OAuth, and create 3 variables:
clientidsecretrequesttoken

New Click Update.
Keep the Manage Environments window open. In the next step we will get your credentials and store them in the environment.
The URLs in this tutorial are for the community edition. We could have added the URLs in the environment so the entire setup would have also worked for the enterprise edition.
Go to your SAP Conversational AI account and open your chatbot.
This tutorial assumes your chatbot has the
greetingskill.Get the OAuth client ID and secret by going to your SAP Conversational AI chatbot to Settings > Tokens, and click Generate under Runtime APIs.

Client credentials Select Client Credentials, and click Next. After a few seconds, the credentials are created and you can click Close to close the dialog.

Client credentials Copy the client ID and secret, and put it in the corresponding fields in the Postman environment.
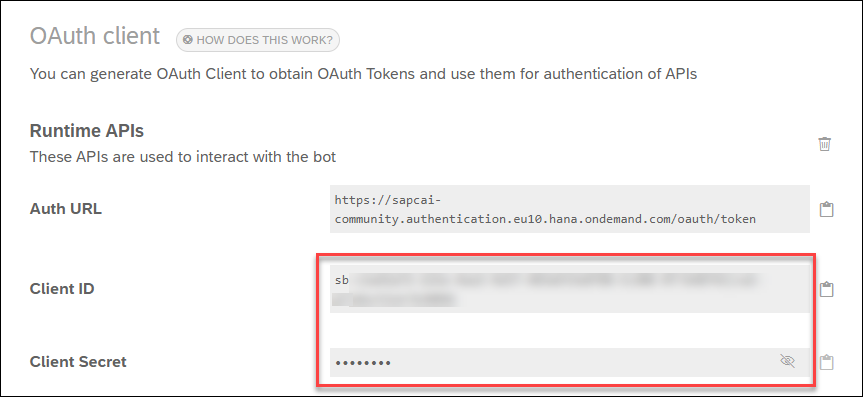
Client credentials Get the request token by going to Settings > Versions and open the version of your chatbot that you want to call.

Request token Copy the request token, and put it in the corresponding field in the Postman environment.
Your environment should look something like this:

New Click Update, and then click the X to close the Manage Environments window.
Create a new collection by again clicking New+, and this time selecting Environment.

New collection Call the collection
OAuthCAIAPI, and click Create.Click New+ > Request.
Enter
startas the name, select theOAuthCAIAPIcollection, and then clickSave to OAuthCAIAPI.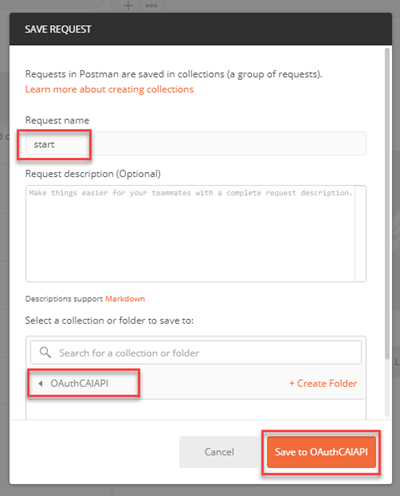
Request start To the request, add the URL:
URLhttps://postman-echo.com/getThis is a dummy URL and let’s us perform a script before calling any other APIs.
To the request, add the following to the Pre-request Script:
JavaScriptif (pm.environment.get("oauthtoken") != null) { postman.setNextRequest("request") pm.environment.set("retry", "true"); console.log("HAVE TOKEN") }This script checks if there already exists an OAuth token. If a token exists, we skip the call to get a token and we create a flag that indicate that if the API call fails we want to try again (after we retrieve a new token, for example, because it has expired).
Click Save.
Click New+ > Request.
Enter
get-oauth-credentialsas the name, select theOAuthCAIAPIcollection, and then clickSave to OAuthCAIAPI.To the request, add the URL:
URLhttps://sapcai-community.authentication.eu10.hana.ondemand.com/oauth/tokenTo the request, under Authorization, set the type Basic Auth.
Set the Username to
{{clientid}}.Set the Password to
{{secret}}.This will take the credentials from the environment variables.

Authorization To the request, add a body.
Set the type to
x-www-form-urlencoded.Set the key to
grant_typeand the value toclient_credentials.
Body To the request, add the following to the Pre-request Script:
JavaScriptpm.environment.set("retry", "false");This indicates that we have retrieved a new OAuth token, and once we try the API call, we do not want to retry (with a newer OAuth token).

Pre-request script To the request, add the following to the Tests:
JavaScriptbodyData = JSON.parse(responseBody); token = bodyData.access_token; pm.environment.set("oauthtoken",token); console.log("GOT TOKEN");This retrieves the token and stores in the environment, for use with the API call.

Test script Click Save.
Click New+ > Request.
Enter
requestas the name, select theOAuthCAIAPIcollection, and then clickSave to OAuthCAIAPI.To the request, add the URL:
URLhttps://api.cai.tools.sap/train/v2/requestTo the request, under Authorization, set the type Bearer Token.
Set the Token to
{{oauthtoken}}.This will take the token from the environment, where we stored it in the previous step.
To the request, add the following header:
Header Value X-Token {{requesttoken}}This will indicate to the API which chatbot to query.
To the request, add a body.
Set the type to
raw, and add the following body:JSON{ "text" : "Hi" }This is the utterance to send to the NLP, and should return the
greetingintent.To the request, add the following to the Tests:
JavaScriptif (pm.environment.get("retry")=="true" && pm.response.code ==401) { postman.setNextRequest("get-oath-credentials") } // Check if the request was successful (OAuth token was OK) pm.test("Request succeeded", function () { pm.response.to.have.status(200); }); // Test if the correct intent was returned pm.test("Is intent correct", function () { var jsonData = pm.response.json(); pm.expect(jsonData.results.intents[0].slug).to.eql("greetings"); });This code starts by checking if we had an authentication error and whether we want to retry in such a case – if so, we tell Postman to retrieve the OAuth token.
After that, we add some standard tests, first that the call worked, and then whether the correct intent was returned. These are optional.
Click Save.
In the top-left of Postman, click Runner.

Open runner In the Collection Runner, set the following:
- Select the
OAuthCAIAPIcollection. - Select the
OAuthenvironment. - Check Save Responses.

Runner settings - Select the
Click
Run OAuthCAIAPI.The 3 requests should run, one after the other, and return 200 code. The OAuth request is run because you did not have an environment variable storing the token.

Runner running Click on the word
request, then on Response Body to see the response, which shows that the NLP recognized thegreetingintent.
Runner response Run the collection again by clicking Collection Runner in the breadcrumb at top-left, then clicking
Run OAuthCAIAPIagain.This time the
oauth-get-tokenrequest is not run because we already had a valid token stored in the environment.
Runner no oauth request Finally, let’s simulate when the token expires by opening the
OAuthenvironment and changing the stored token toabc.Go back to the main Postman screen, and open the environment by selecting
OAuthand clicking the eye icon, on the top-right.Click Edit.

Change environment Change the
oauthtokenvariable toabc, and click Update. Close the window.Now go back to the Collection Runner and run the collection again. This time you will make 4 requests. Running
request, will fail, so the request to get an OAuth token will run, and thenrequestwill be retried, this time successfully.
Runner retrying
Resources
Discussion
Share feedback on this tutorial or join the conversation in SAP Community.