
Overview
You will learn
- How to create a simple UI
- How to create a form
- How to stylize your UI
- How to trigger from your app a workflow in SAP Build Process Automation


Prerequisites
Prerequisites
- You set up SAP Build App and entered the lobby, as described in Set Up SAP Build Apps on an SAP BTP Trial Account.
- You set up SAP Build Process Automation, and created the process described in the tutorial group Create a Sales Order Process and Enable Triggering Via API.
- You have set up a service key for the SAP Build Process Automation service, and a destination to the service, as described in Step 1 of 6 - Trigger Process from Your App.
Steps
Intro
This tutorial shows you how to use SAP Build Apps to create and stylize a simple, one-page app that triggers an SAP Build Process Automation workflow.
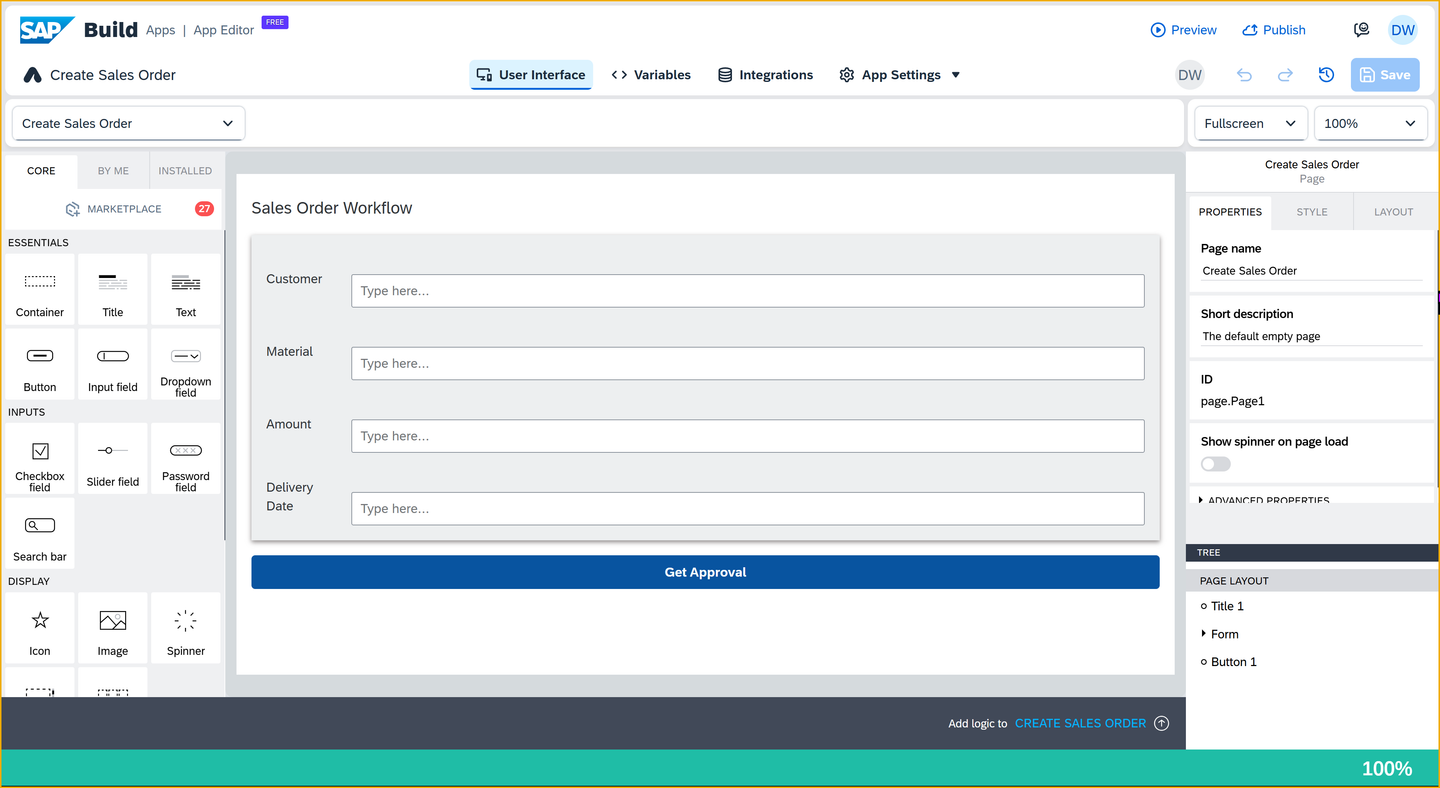
Specifically, the app lets the user enter sales order details and then send these to a process for approval. (In a real-world scenario, the sales order would then be created in SAP S/4HANA Cloud, but that is not part of our flow.)
Your app will look something like this:

Before you begin, we want to help you understand how apps are developed with SAP Build Apps.
Every app is built on a UI canvas – the canvas is the background of the app. On the canvas, you drag and drop components: text fields, input boxes, toggle bars, images and many other components you want the user to interact with.

Every component has properties, for example: the text to display, the value of the input box and so forth. You select the component and then its properties appear in the Properties pane to the right.
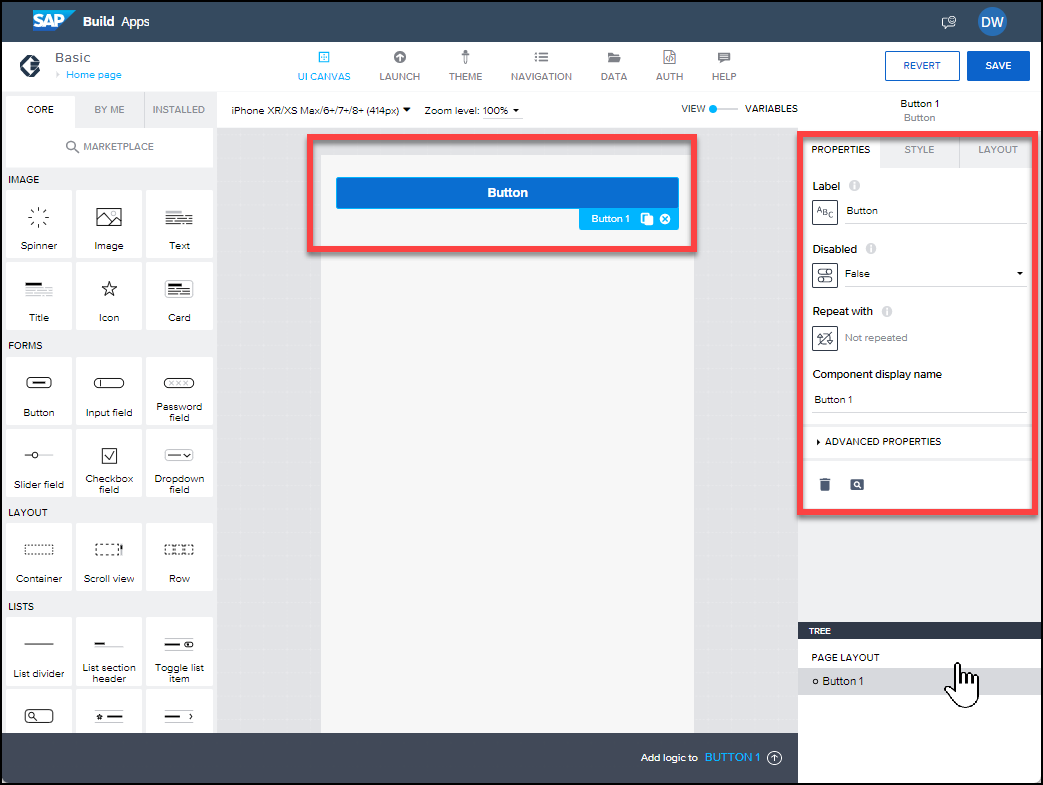
Each property is bound to something, for example:
Static text – in the screenshot, the button component’s Label property is bound to the static text Button
Variable – whose value can be updated elsewhere, for example in response to user action
Data from an SAP backend
Formula
Output of flow function in logic
For the property, you click the binding button …

… and then select from a menu of binding types.

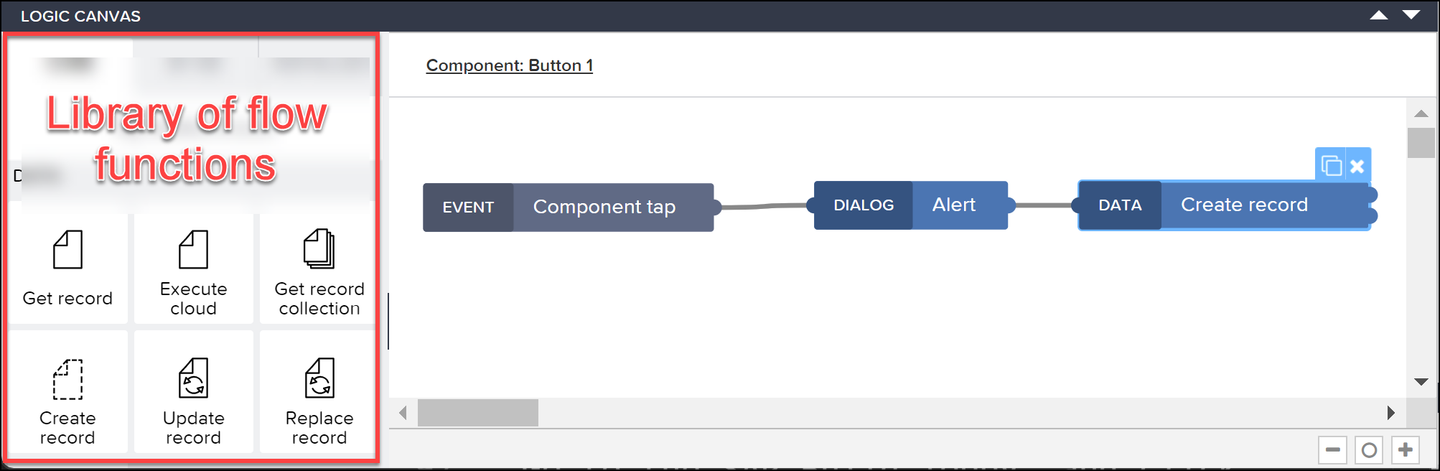
Finally, for every component there are events, for example, when a user taps a button or enters data in an input box. You can capture these events and then perform an action – like display a dialog, create data in a backend, change the value of variables and much more.
This is done on the logic canvas. Select a component (or no component if you want to capture app events), and then open the logic canvas.

You then drag and drop flow functions and connect them to events. The flow functions are executed whenever that event occurs. And, of course, each flow function has its own properties to bind 😺.
First, you need to create a SAP Build Apps project and the main page with the form for specifying the sales order. IN this step, you will only create the UI, not the logic or bindings.
Note that there are 2 tabs for this tutorial step (above).
- With Quick Import of UI, you can skip most of the work and simply import our skeleton project. You will bypass the nitty gritty of adding and stylizing components, but you will still learn how to import an SAP Build Apps project. This way is much faster.
- With Create from Scratch, you can create the UI yourself. This will take longer but you will learn about UI components, stylizing them, and organizing them on the page.
We really want you to see some of things related to stylizing you can do with SAP Build Apps. But we understand that stylizing a UI may be tedious for some people.
If you really want, you can skip doing the stylizing and instead import the project already stylized. If you want to take this route, do the following:
Download the file
Create-Sales-Order.mtar.In the SAP Build Lobby, click the import icon.

Skip UI Click Browse and select the MTAR file you just downloaded.

Browse Select the uploaded file, and click Import.

Import When the file disappears, click Close.
The project is now created.

Close Go back to the SAP Build Lobby, and click on the new project to open it.
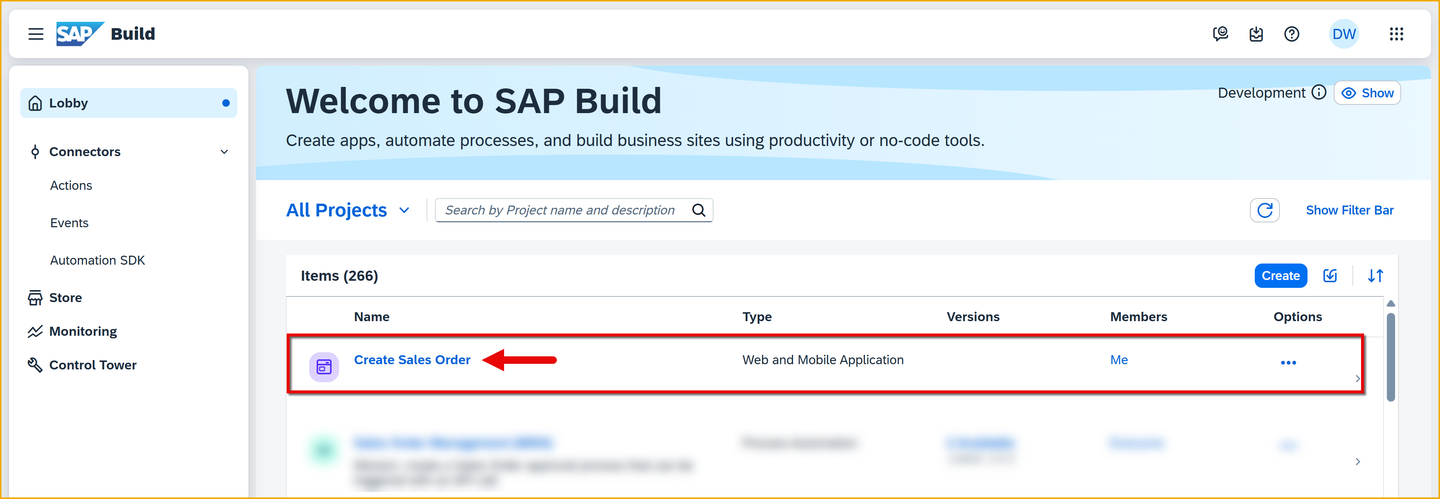
Open project in lobby
You will now see the opened project, with the sales order form already created.
Go to the SAP Build lobby, and click Create.

Create project Select Application, and then click Next.

Build an application Select Frontend, and click Next.

SAP Build Apps Select Web & Mobile Application.

Select project type For the project name, enter
Create Sales Order.For the description, enter
Application to enable business users to request creation of a sales order.Click Review.
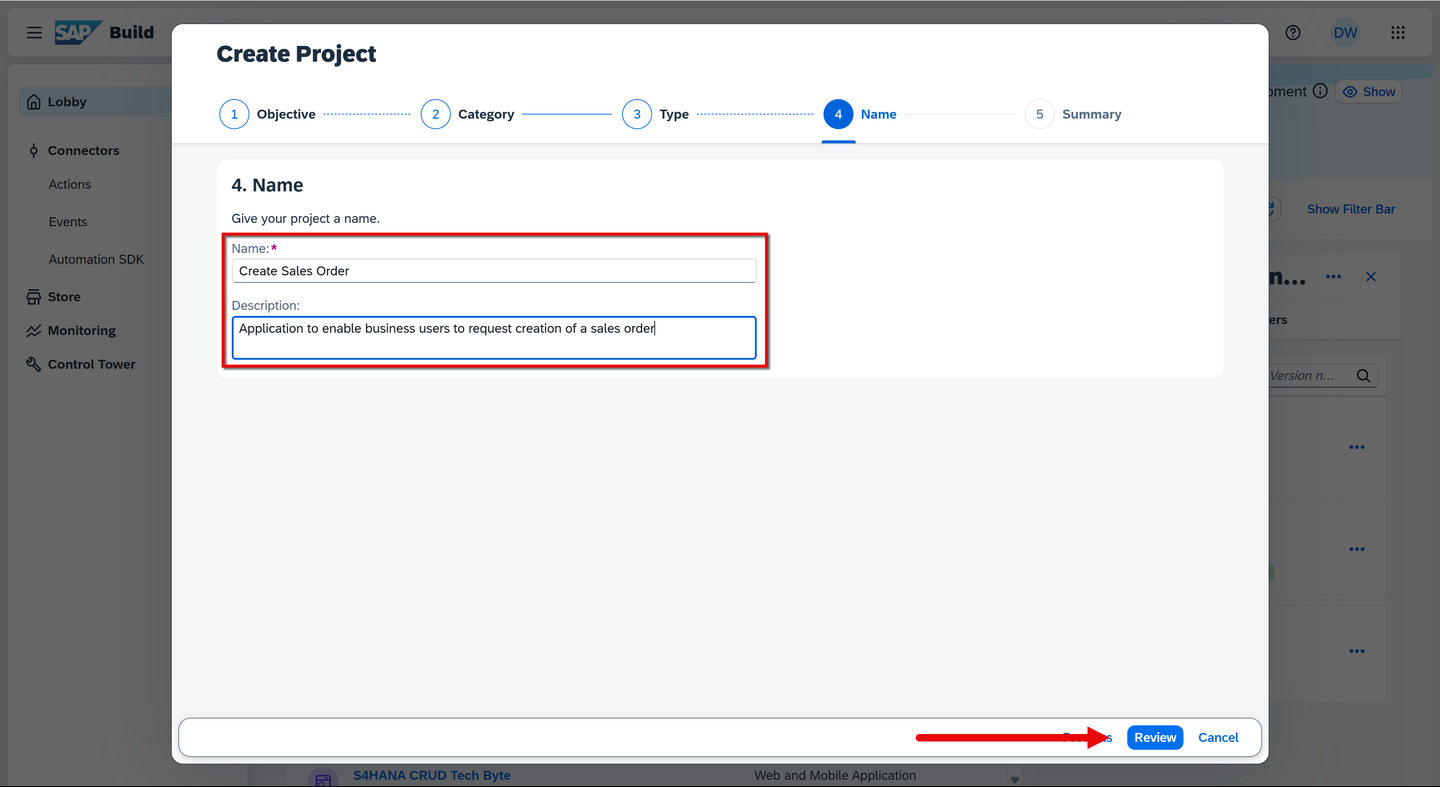
Name project Click Create.
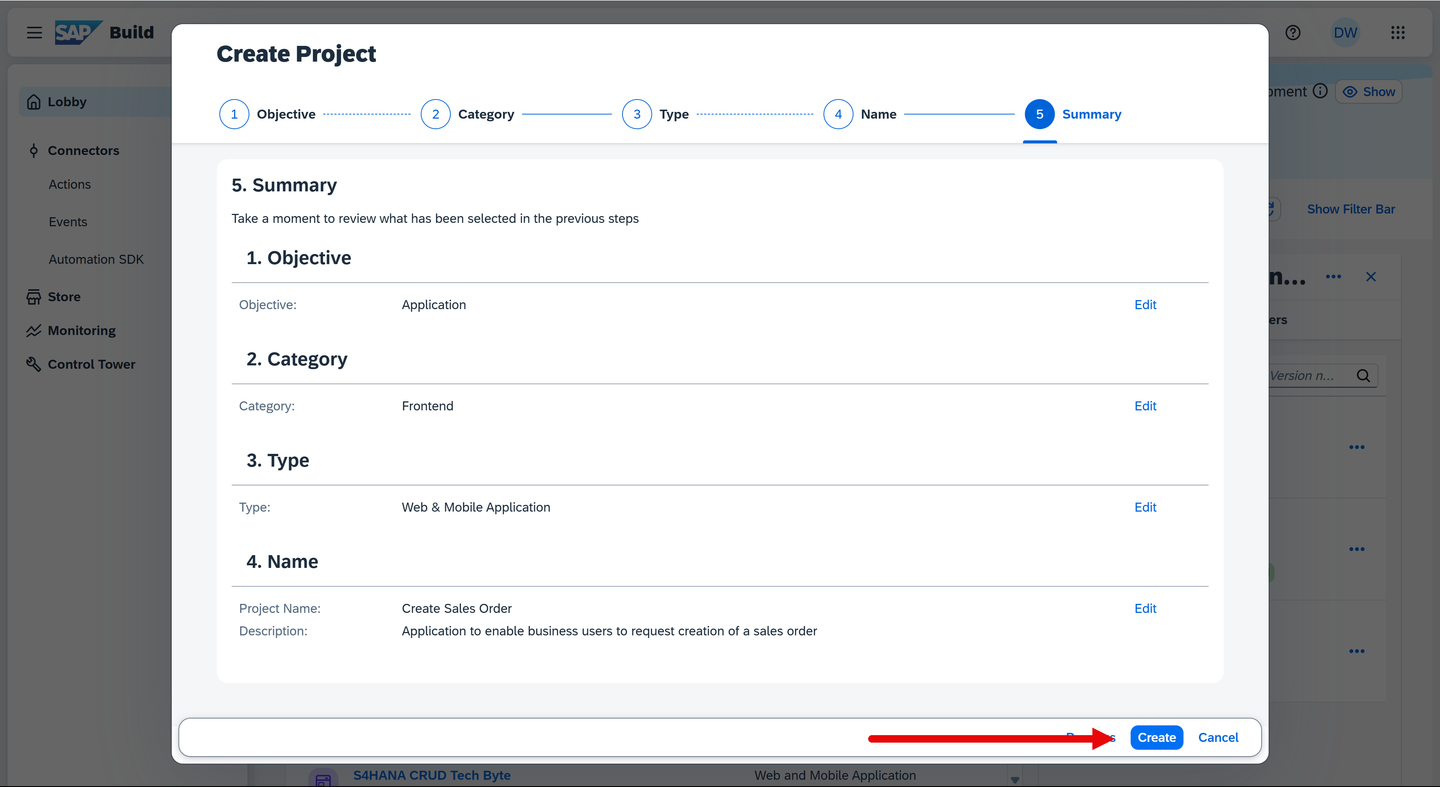
Name project Your new project should open in a new browser tab.

Open project Select the text field, and delete it.

Delete text Click on an open area (this brings up the Properties tab for the app instead of for a specific component), and in the Properties tab, change the Page name to
Create Sales Order.
Page name Double-click the title field, and change the text to
Sales Order Workflow.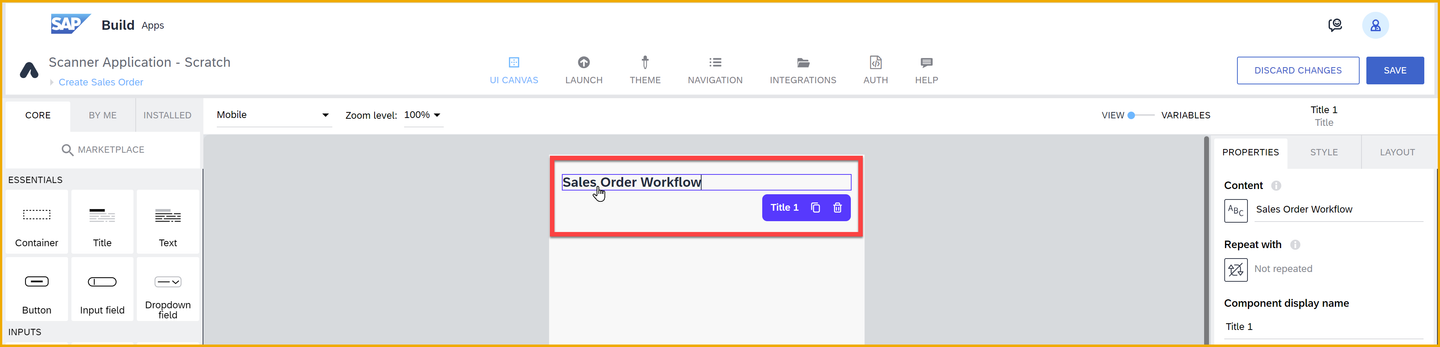
Title To the canvas, drag a container component.
Container components let you group components and configure the collection of the components as a single unit.
With the container selected, change its name to
Form.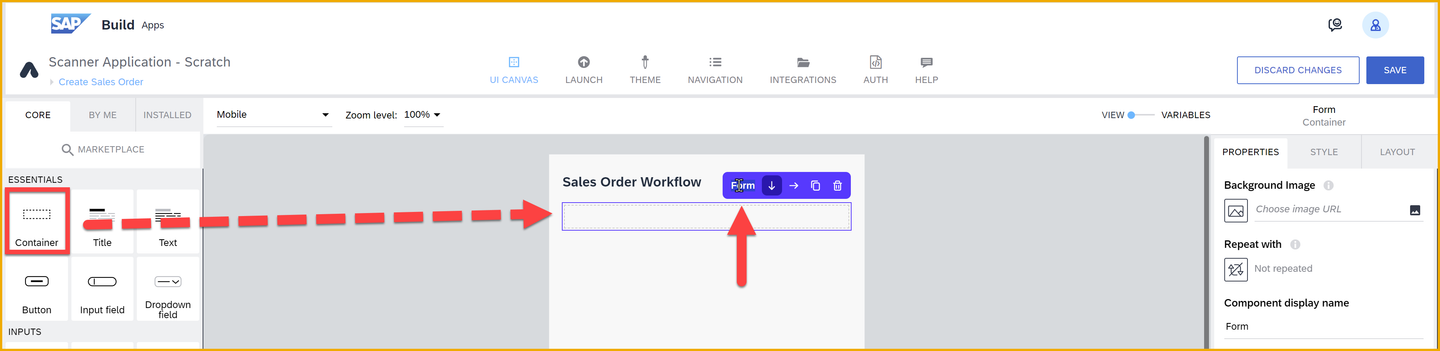
Container Still with the container selected, open the Style tab, click the dropdown icon for the Layout Container, and click Edit.

Container style For the background color, under Universal Background Colors, select Level 4 background.
For padding, set the padding on all 4 sides to 16px by clicking each rectangle, going to Theme, and selecting the L size.

Padding For Effects, create a shadow by setting these properties:
Field Value Enable Shadow True Shadow size Content Shadow 0 Shadow color #8e8989Click the X, and then select Static color. You can then copy and paste in the color code, or use the color picker to choose a color.
Color picker Let’s save the style by scrolling up in the Style tab, clicking New Style, entering
Layout Form Container, and clicking OK.
New style
This saves the new style in the Style tab.
Into this container ( Form ), drag in another container.
It may be easier to drag it into the Tree view on the lower right, so you can put it precisely where you want. The Tree makes it easier to select specific components and to create a hierarchy of components on the page.
Inside the new container add a text and input field. The result should look like this:
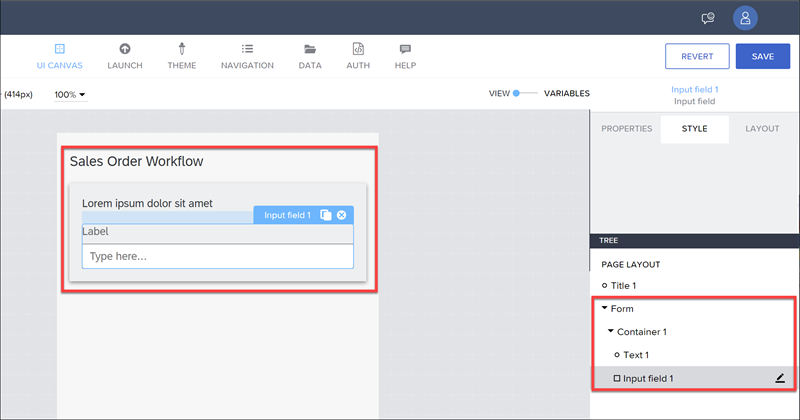
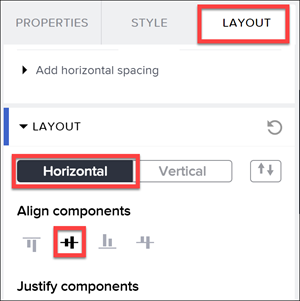
Inside container Select the new, inner container ( Container1 from the Tree view), go to Layout tab, and under Layout set the container to Horizontal. Then, set Align components to middle.
Container layout Select the text field, go to the Layout tab, then Width and Height, and set the width to exactly 75px.

Text width Select the input field, and in the Properties tab, delete
Labelfrom the Label property.
Input box properties From the Tree view, select the inside container ( Container1 ).

Copy Duplicate the container by clicking on the Duplicate icon.

Duplicate Repeat this 2 more times, until you have 4 fields.

Multiple fields Click on each field label and change it to the following field names, in this order:
Fields Customer Material Amount Delivery Date 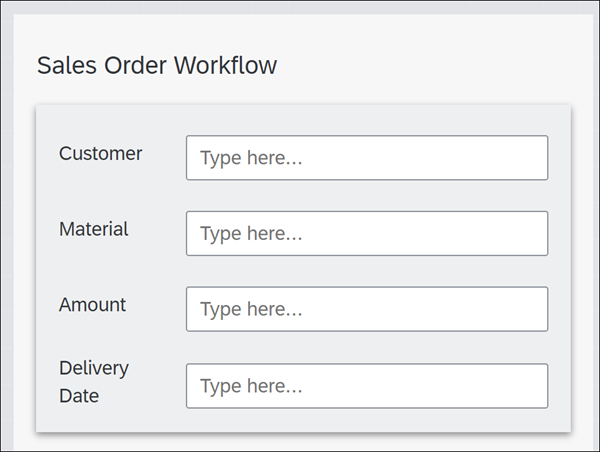
Name fields At the bottom of the page (outside the outside container), add a button.
In the Properties tab, set the Label to
Get Approval.
Add button Click Save (upper right).
You need to enable SAP BTP authentication because you want to use SAP BTP destinations, and users need to be authenticated to use them.
SAP BTP destinations are connections to backend services – each specifies the location of a backend and how the user will be authenticated. The destinations can be used by the various services within SAP BTP, including SAP Build Apps.
SAP BTP authentication also has the benefit of requiring authentication in your app and reusing the built-in SAP BTP authentication mechanism.
Go to the Settings > Authentication tab.

Authentication Click Enable Authentication.
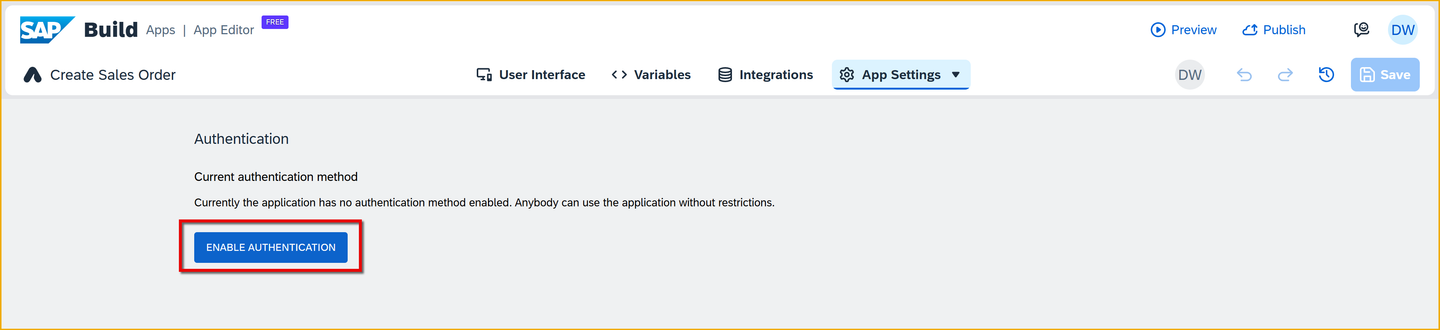
Enable authentication Select SAP BTP Authentication.
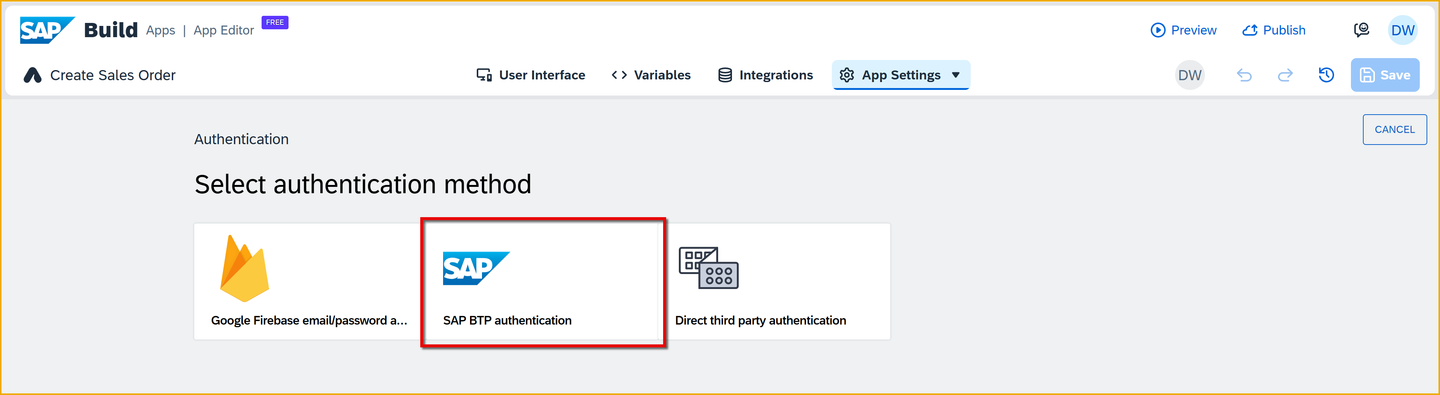
BTP authentication On the confirmation popup, click OK.
Click Save on the upper-right corner.
When you created your process and then deployed, you also published it so it can be discoverable by SAP Build Apps. You will now tell your project to use this process.
Open the Integrations tab, at the top of the page.
Click Add Integration.
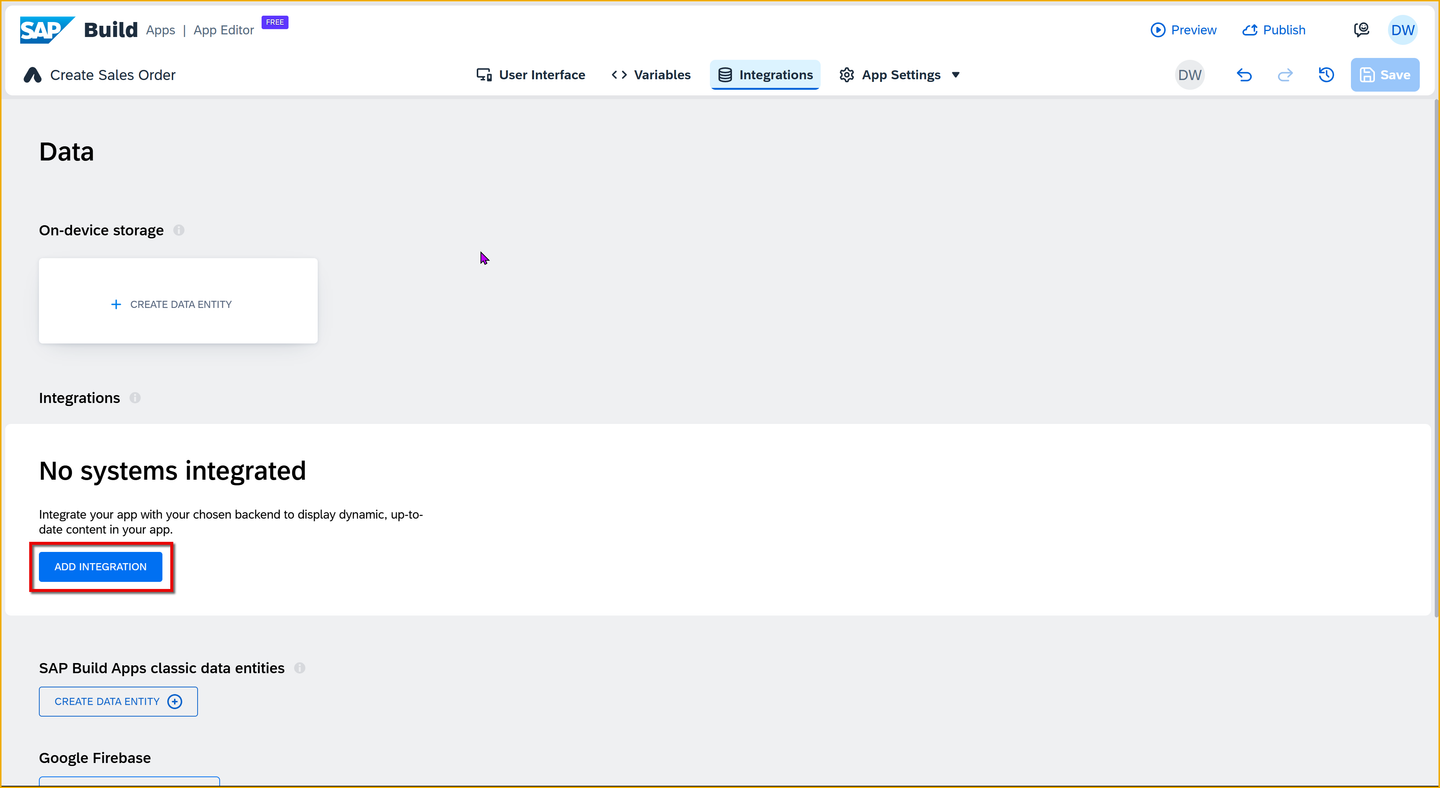
Add integration Click Library.

Open library You can see each process you (or a colleague) published, plus that process’s project name.
Click the process you published, Order Processing.
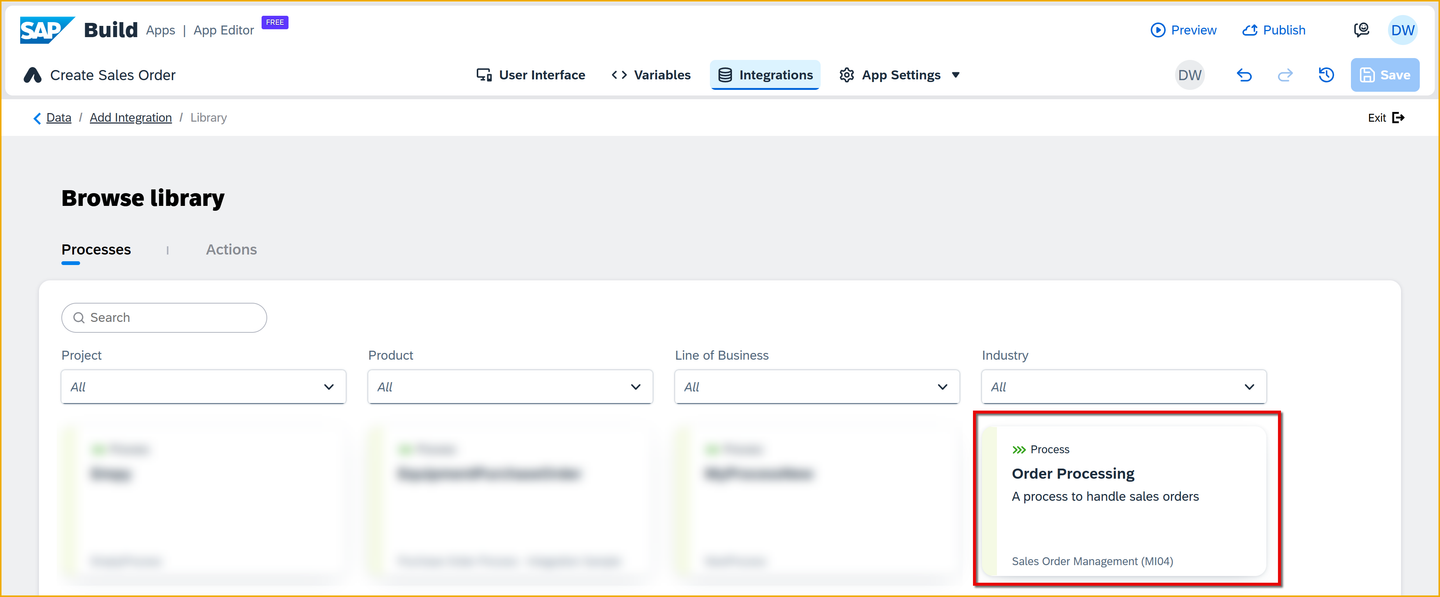
Select process If you are unable to see the process here, please ensure that Step 6 of Run the Sales Order Business Process is complete.
Click Enable process.
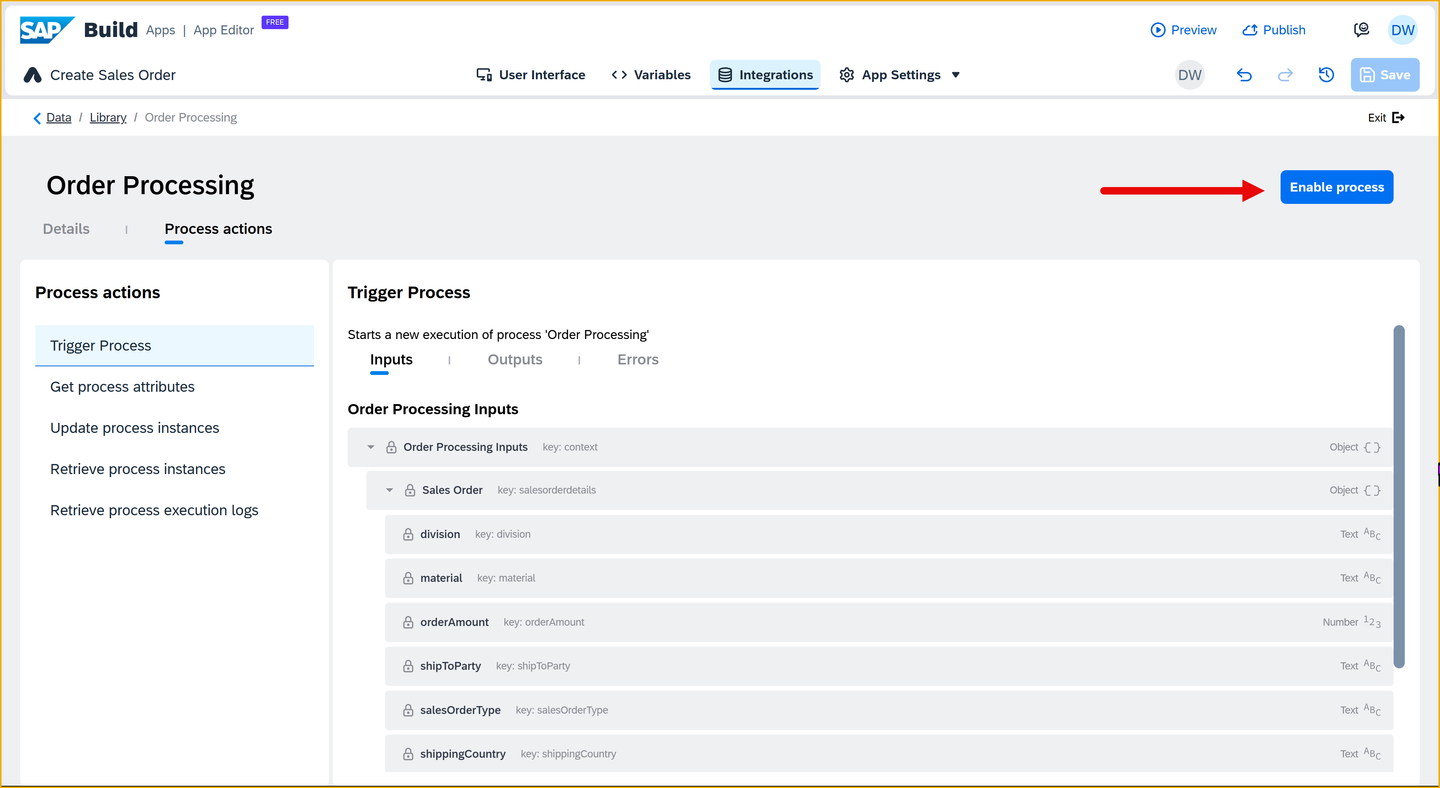
Enable process Click Save (upper right).
You need a place to put the values the user will enter, so that you can later pass them to the process. For this, you can create a page variable.
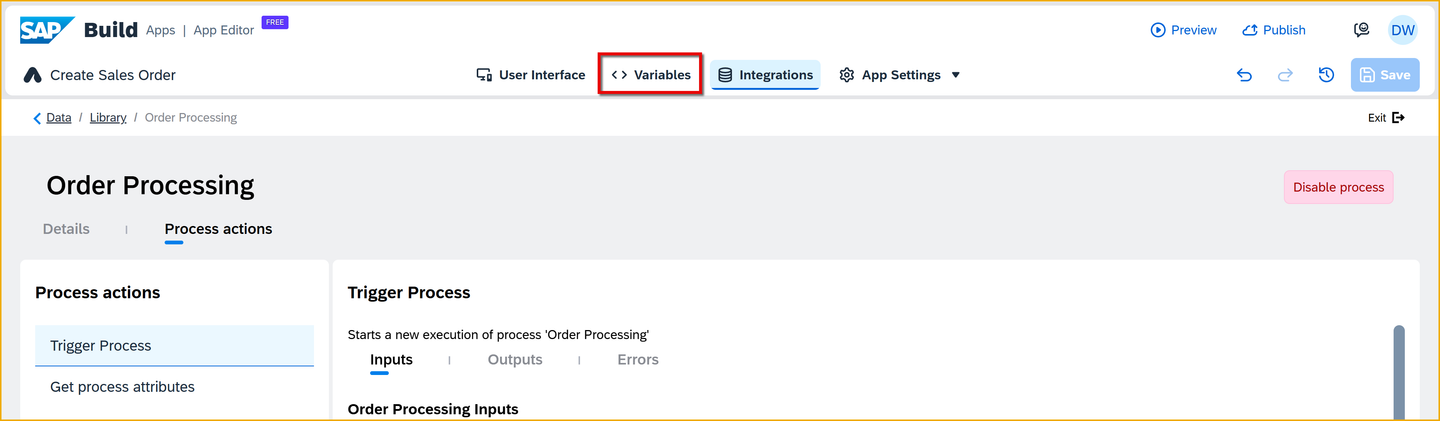
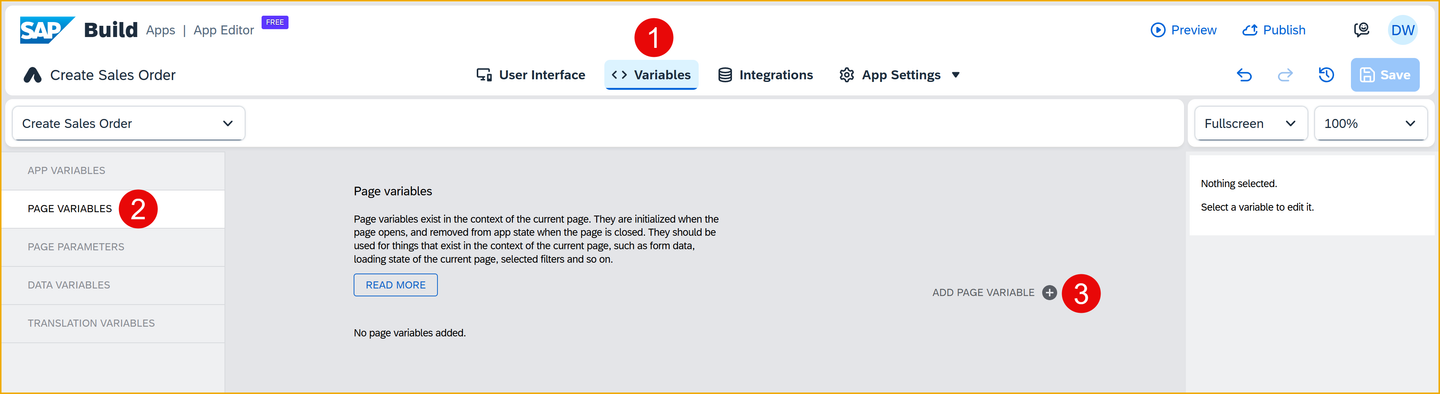
At the top of the page, click Variables.
Variables On the left, click Page Variables.
Click Add Page Variable.
Page variable Select From existing schema.

Existing schema Select Process.

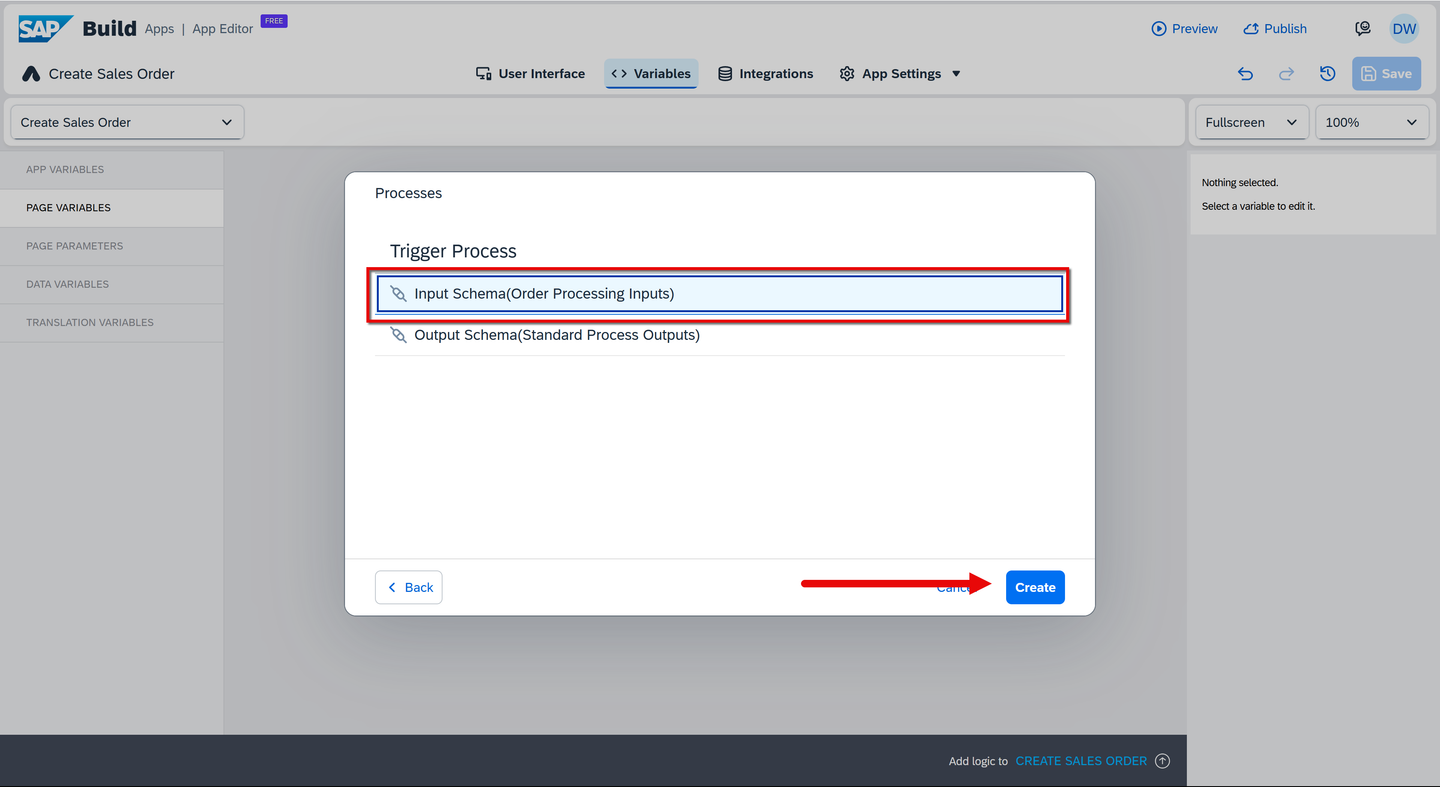
Existing schema Navigate to Order Processing > Trigger Process > Input Schema.
Click Create.
Page variable Change the name of the variable to SalesOrderDetails.
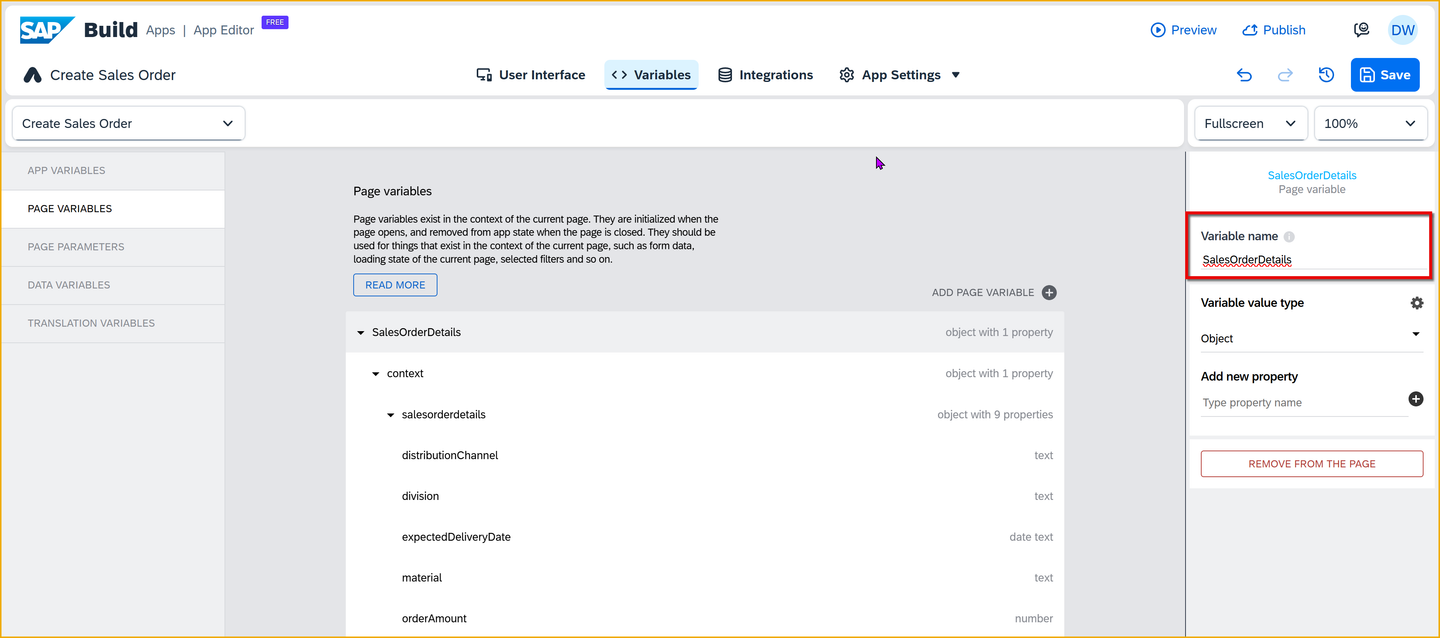
Page variable Click Save (upper right).
We created a variable for the sales order data, but now we need to get the data entered by the user into the variable. We do this by binding the variable to UI elements, specifically, to the input boxes.
Whenever someone types into the input box, the value is automatically copied into the variable.
Click the User Interface tab.
Click on the first input field (for Customer).
In the Properties tab, click the X next to the Value field, and select Data and Variables > Page Variables > SalesOrderDetails > context > SalesOrderDetails > shipToParty.
Click Save

Binding input field Click on the second input field (for Material).
In the Properties tab, click the X next to the Value field, and select Data and Variables > Page Variables > SalesOrderDetails > context > SalesOrderDetails > material.
Click Save
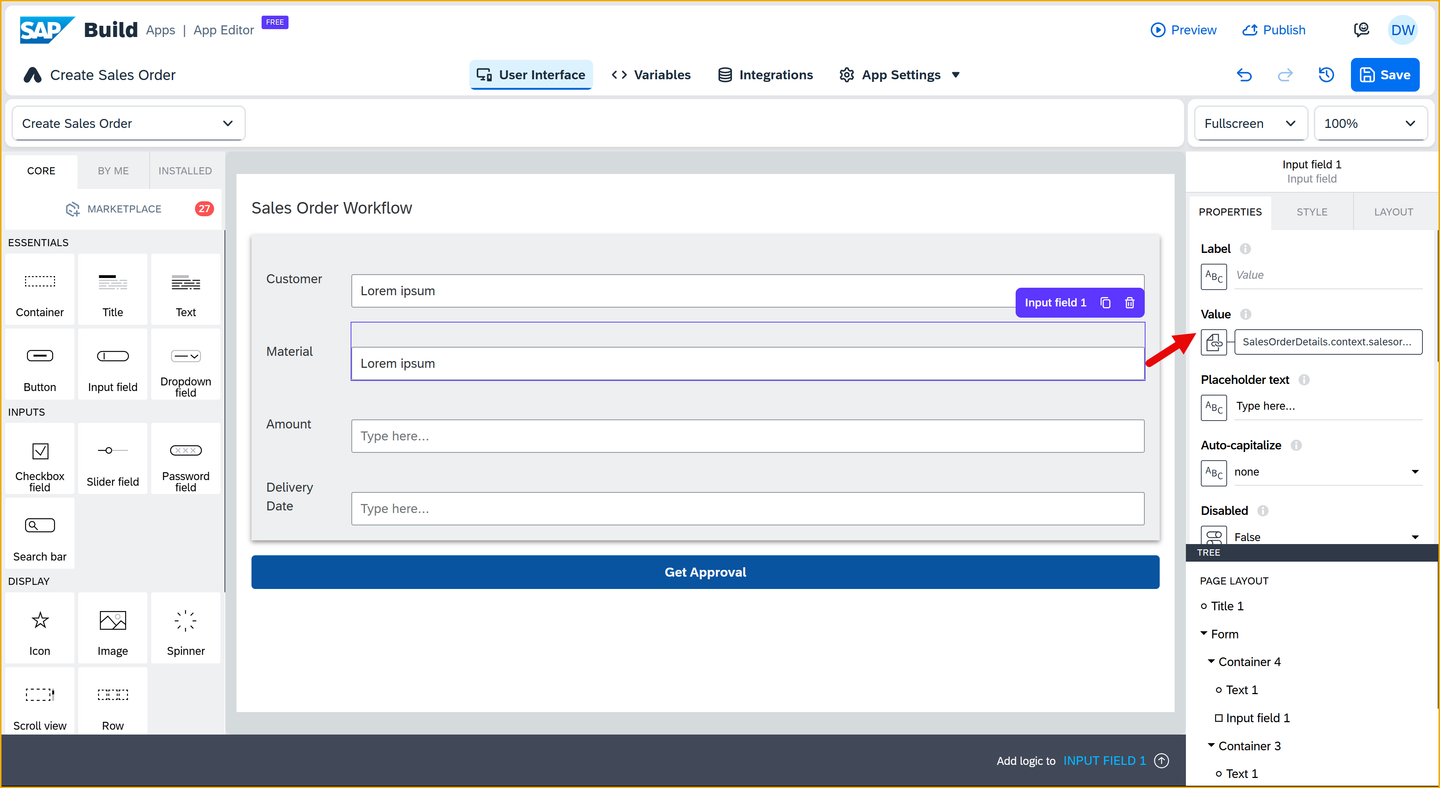
Binding input field Click on the third input field (for Amount).
In the Properties tab, click the X next to the Value field, and select Data and Variables > Page Variables > SalesOrderDetails > context > SalesOrderDetails > orderAmount.
Click Save
Click on the fourth input field (for Delivery Date).
In the Properties tab, click the X next to the Value field, and select Data and Variables > Page Variables > SalesOrderDetails > context > SalesOrderDetails > expectedDeliveryDate.
Click Save
Click Save (upper right).
We need to set up the logic so when someone clicks the Get Approval button (an event), we send the sales order data to our SAP Build Process Automation workflow using the data resource we previously created.
Click on the Get Approval button, and open the logic canvas by clicking Add logic to Button 1 at the bottom right.

Open logic canvas Drag a Trigger Process flow function onto the canvas, and connect the component tap event to it.

Create record Click on the Trigger Process flow function and configure it in the Properties pane on the right.
For Process, this should already be set to Order Processing, since you have only one process enabled.
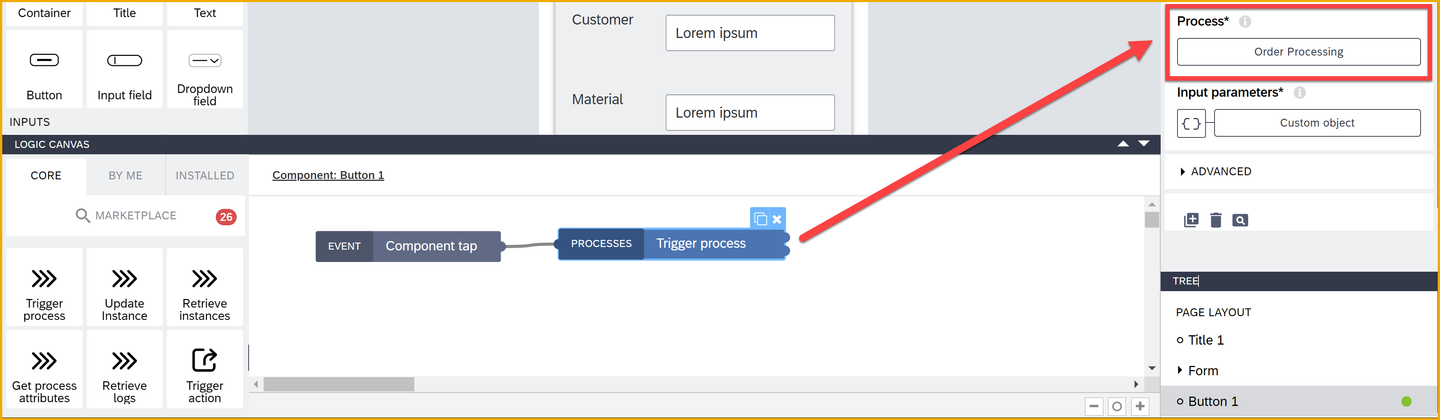
Create record binding For Input Parameters, click the binding type icon.
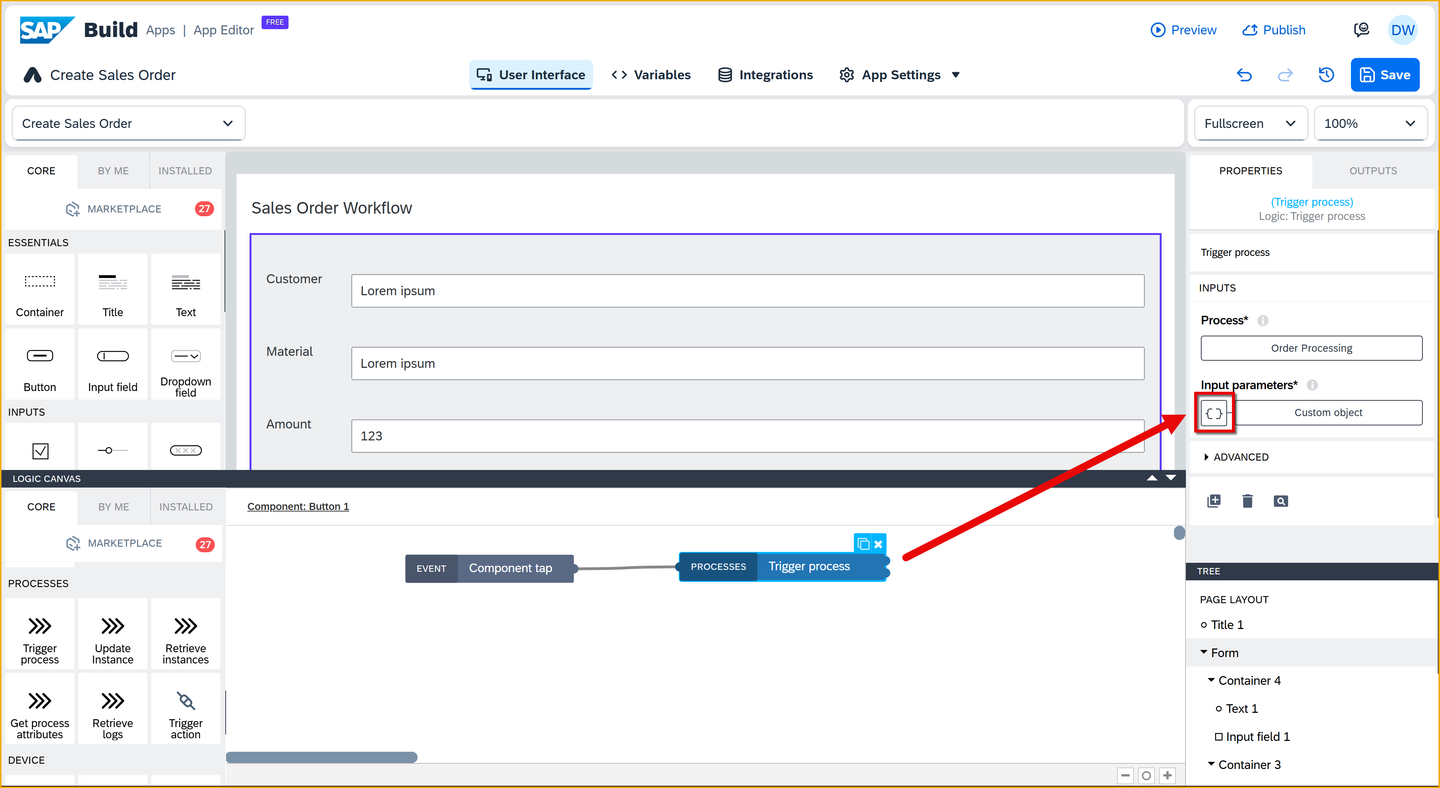
Close binding UI Select Data and Variables > Page variable, and then select SalesOrderDetails > context
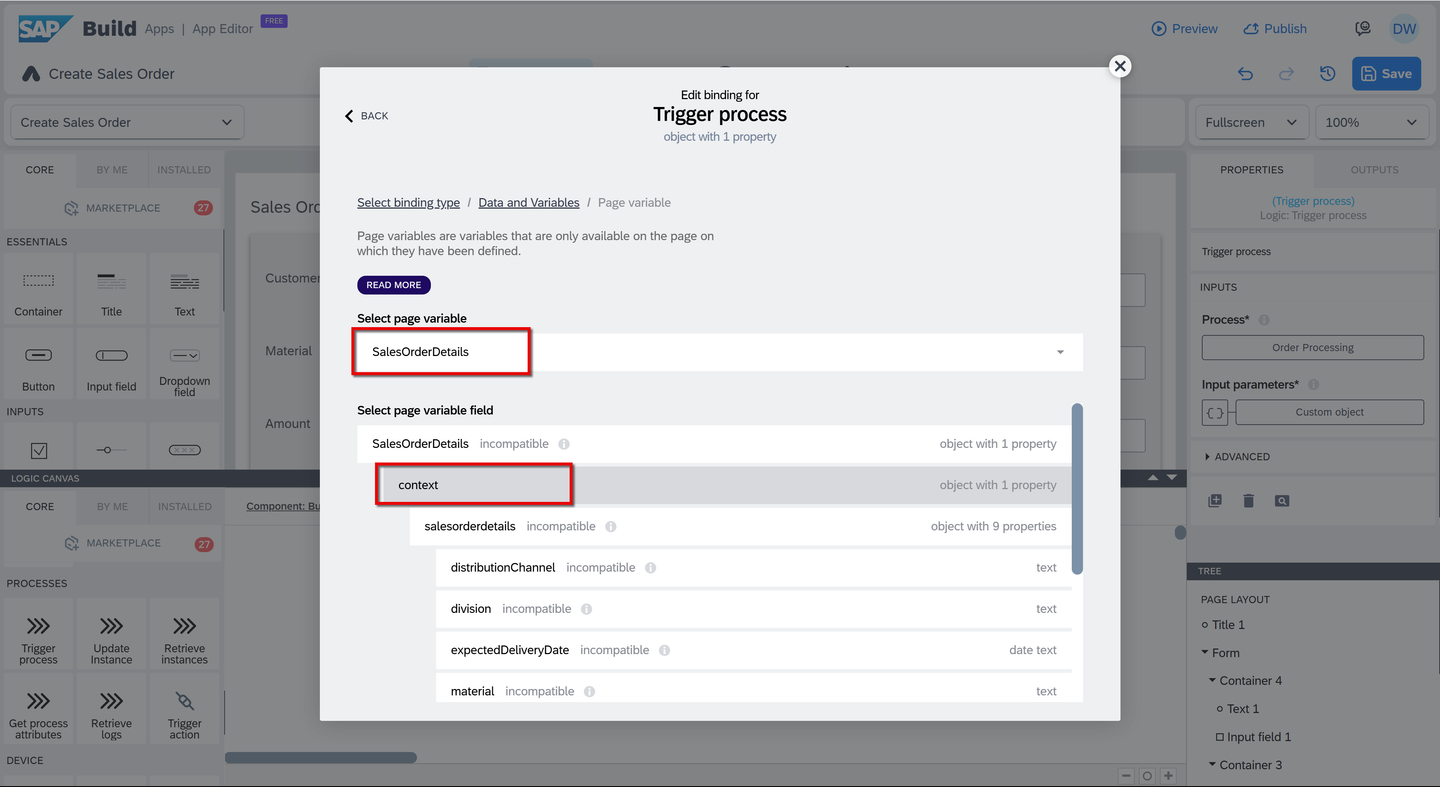
Select page variable Click Save.
Drag a Toast flow function onto the canvas, and connect the top output of the Trigger process flow function to it.

Add toast Click on the Toast flow function and configure it in the Properties pane on the right.
For Toast message, click on the ABC, and then select Formula > Formula.

Configure toast Erase the quotation marks, and enter the following formula:
JavaScript"Triggered process with ID: " + outputs["Trigger process"].newProcessInstance.idClick Save.
Click Save (upper right).
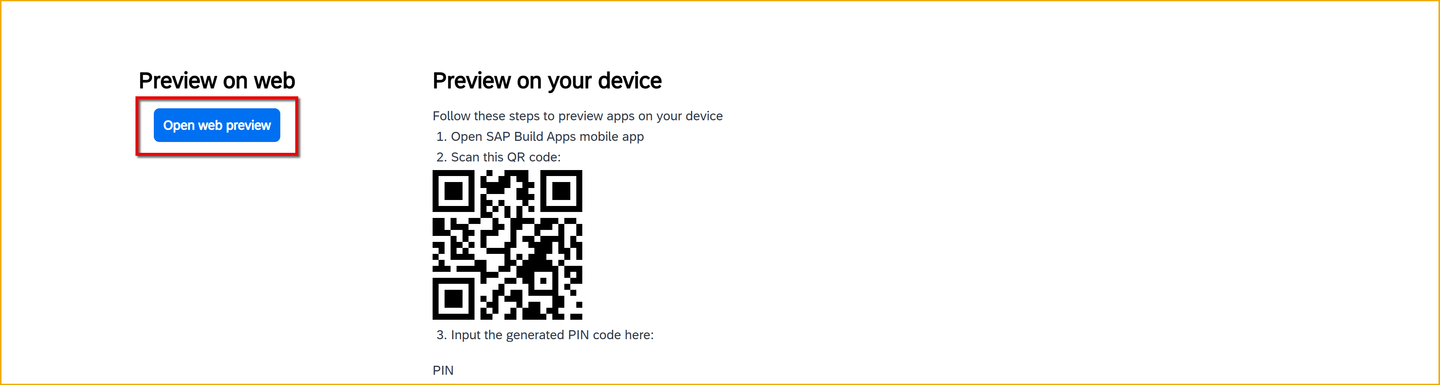
Click Preview at the top of the page.

Preview Click Open web preview.
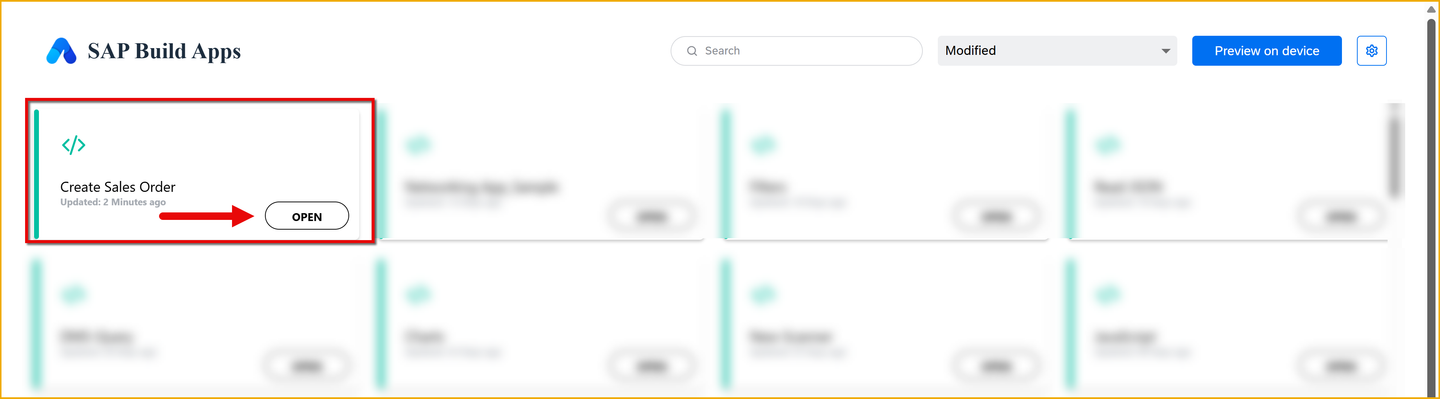
Launch preview In the Create Sales Order tile, click Open.
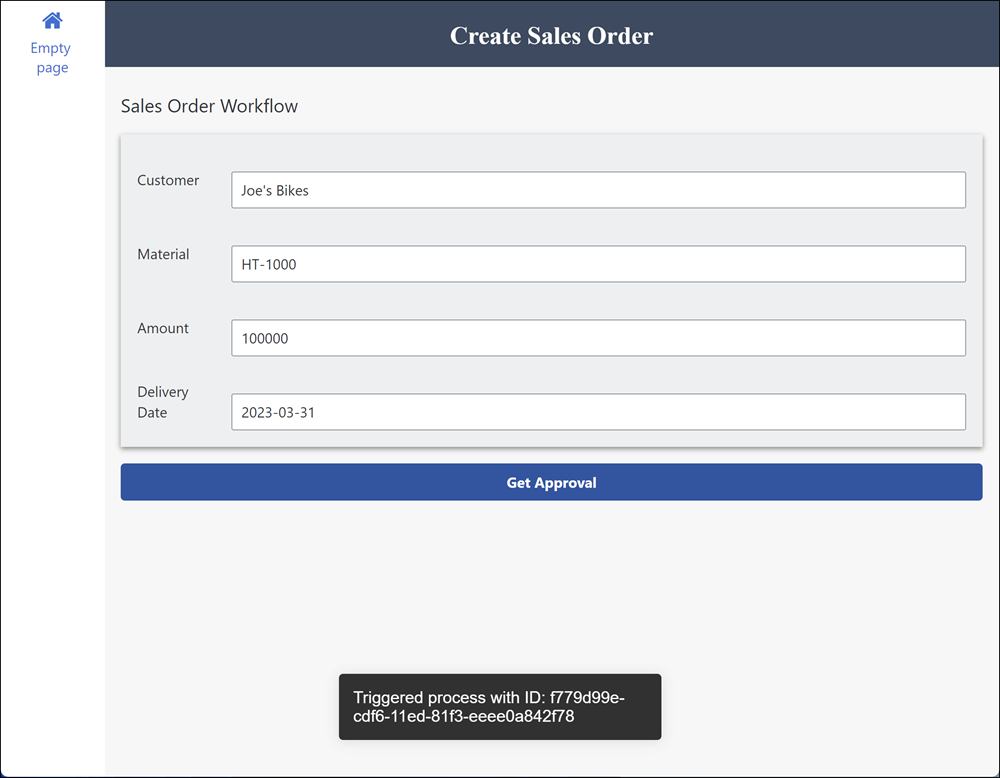
Launch preview Enter the following values in your form:
Field Value Customer Joe's BikesMaterial HT-1000Amount 100000Delivery Date 2023-03-31Click Get Approval.
Your process should be triggered and require approval (since the amount is 100,000 or above).
You should see the toast message indicating the workflow was triggered, and with the process instance ID.
You can also see the results of the call in SAP Build Process Automation.
Go to the Monitoring tab from the lobby, then under Monitor section, access the Process and Workflow Instances tile. The first one should be the one you just triggered.
You can see the new process instance.
You can see the process ID is the same as in the toast message in the app.
You can see the context, which is the values sent when triggering the process (4 of them, in yellow, you entered in the input fields and the others were hardcoded in the formula for the Trigger Process flow function).
You can also see the execution log, which shows that the process was automatically approved and stopped when it sent a notification, which needs to be acknowledged.If you expand the approval step you can see more information, including who the approval request was sent to.

Resources
Discussion
Share feedback on this tutorial or join the conversation in SAP Community.