
Preparing Your SAP Integration Suite Tenant
Prepare your existing SAP Integration Suite tenant or set up a trial account.
Overview
You will learn
- How to start your SAP Integration Suite trial
- How to subscribe to the service and assign user roles
- How to provision and activate the capabilities > IMPORTANT: Trial accounts are not intended for productive usage or team development. If you’re using Integration Suite from a production account for your proof of concepts or real-time business cases, refer to the product documentation on SAP Help Portal for step-by-step explanation of the initial set up and further information.


Prerequisites
Prerequisites
- If you don’t have an SAP Integration Suite tenant, create a trial account on SAP Business Technology Platform: Get a Free Trial Account on SAP BTP.
- If you have an SAP Integration Suite tenant, start from Step 3.
Steps
This step is relevant only if you’re setting up your trial account. If you already have an SAP Integration Suite Tenant, start with Step 3.
WHERE TO START:
- Are you new to SAP BTP Trial? - skip this note and continue with the tutorial.
- You already have a SAP BTP trial account but new to SAP Integration Suite:
- If you have already activated Cloud Integration (Process Integration) service in a subaccount:
      - **Option 1**:
      Create a **`New Subaccount`** and then proceed to **Step 2** of this tutorial.
      For a new subaccount, you must assign entitlements by adding service plans and the quotas. For more information, see [Configure Entitlements and Quotas for Subaccounts](https://help.sap.com/viewer/ea72206b834e4ace9cd834feed6c0e09/Cloud/en-US/c90f3d522ee04e65bd87cdec8808e5ce.html).
      - **Option 2**:
      To continue with an existing subaccount, unsubscribe from Cloud Integration and then proceed to **Step 2**.
- If you have already subscribed to Integration Suite in your existing trial account, proceed to Step 3. You can consume only one SAP Integration Suite tenant per trial account.
In your web browser, open SAP BTP trial cockpit.
Navigate to the trial global account by choosing Enter Your Trial Account.

From your global account page, choose the appropriate subaccount’s tile to navigate.
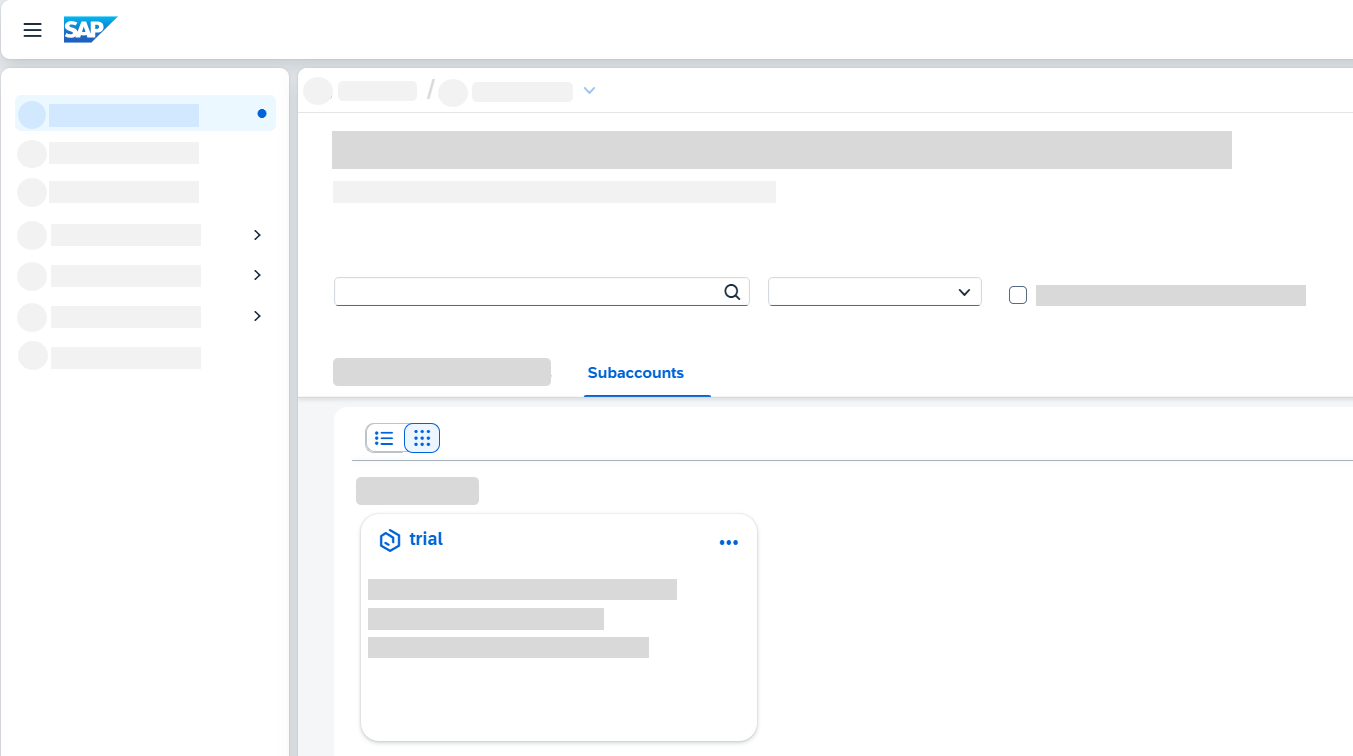
Access Trial account
This step is relevant only if you’re setting up your trial account. If you already have an SAP Integration Suite tenant, start with Step 3.
Select Services > Instances and Subscriptions.
Choose Create.
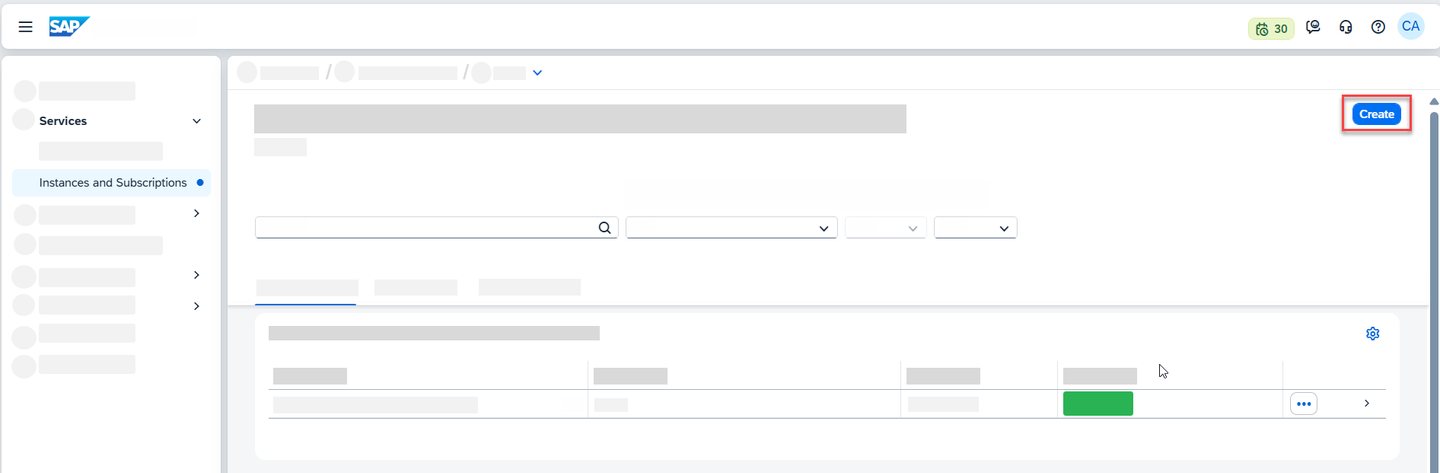
Instances & Subscriptions In the New Instance or Subscription dialog, choose Integration Suite from the list of services.
If SAP Integration Suite is not visible in the Services list, you must assign SAP Integration Suite trial entitlements. To assign entitlements, see Manage Entitlements on SAP BTP Trial.
- In the tutorial Manage Entitlements on SAP BTP Trial, after Step 3.5, there is a list of available services on the left pane.
- Filter for Integration Suite and select the service.
- Select the service plan, add it to your subaccount, and continue with this tutorial.
Choose the default plan which is trial and then choose Create. You are subscribed to the service now.
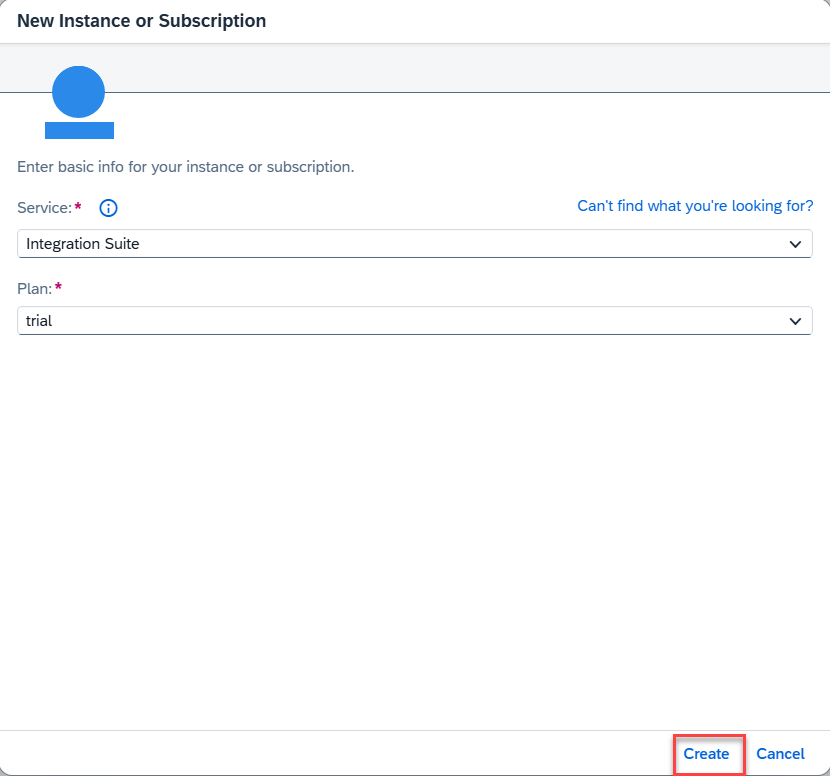
Create Subscription Select Security > Users. Choose the entry against your name. In the Role Collections section, choose Assign Role Collection.
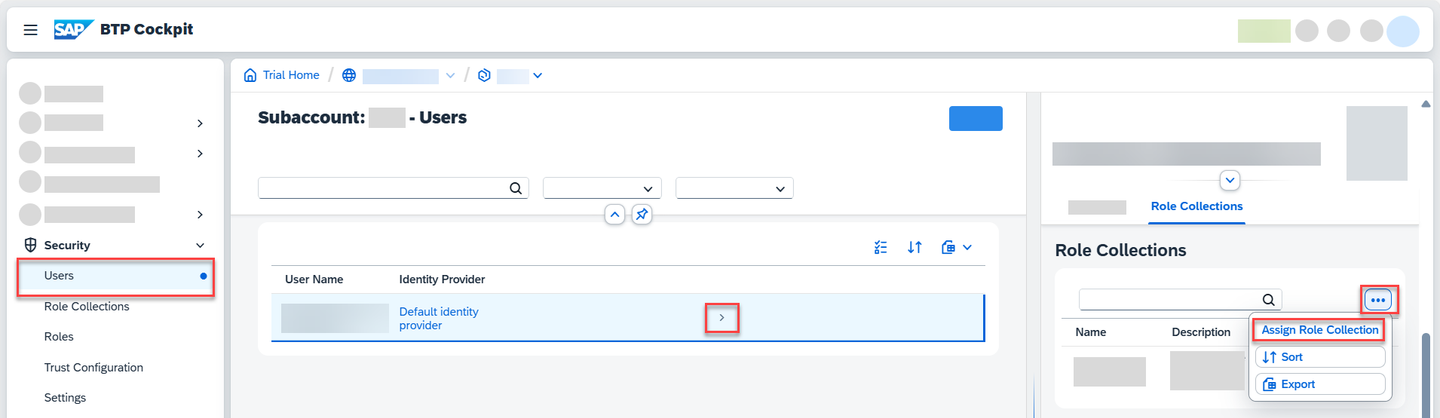
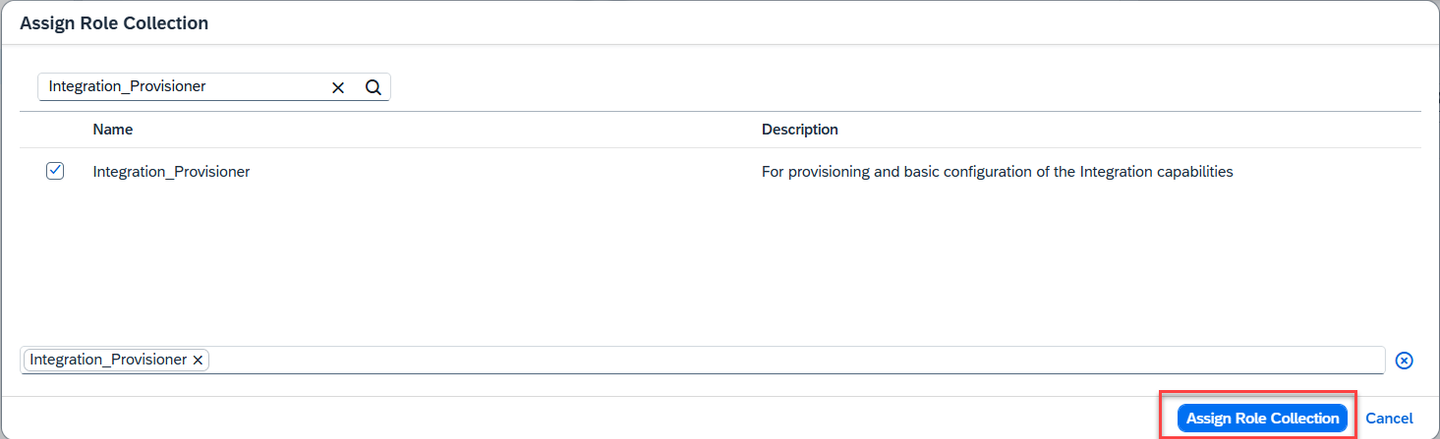
Assign Roles In the dialog that appears, select Integration_Provisioner. Choose Assign Role Collection.
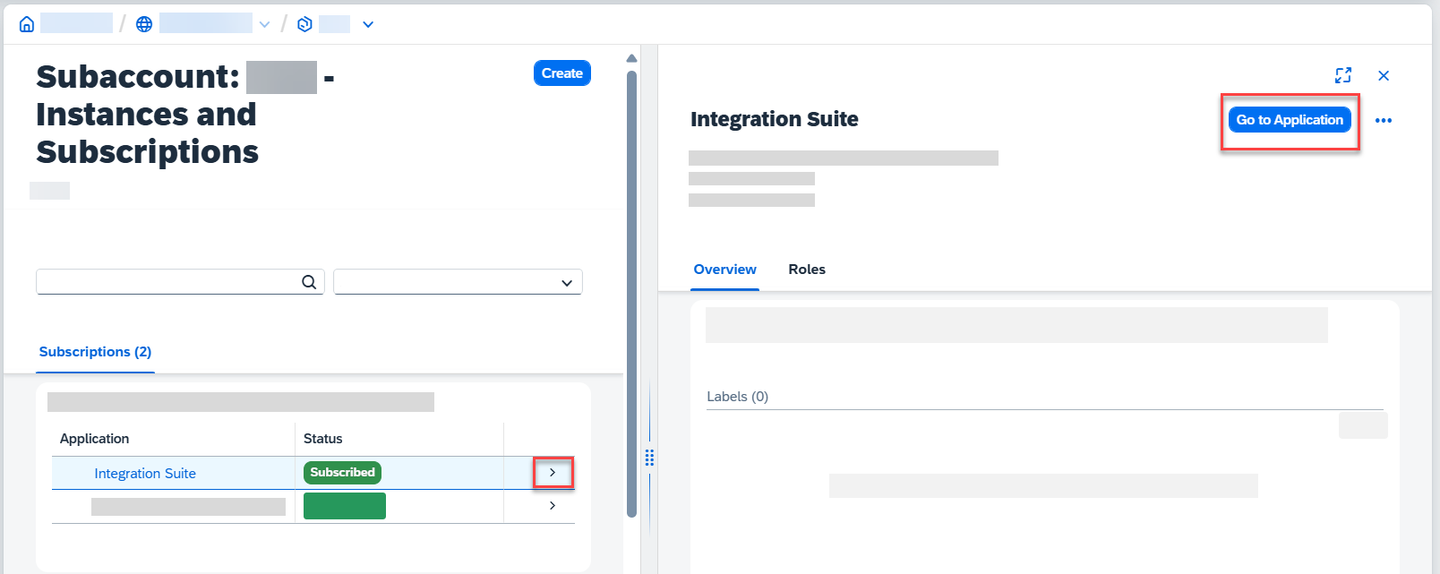
Assign Role Collection Click Go to Application in the Integration Suite overview page. Now you are directed to the Integration Suite home page.
Assign Role Collection
IMPORTANT: Ensure that you unsubscribe from the standalone services (like Cloud Integration) if you have already subscribed to them in the same subaccount. If the standalone subscription exists, you will be unable to activate respective capability via Integration Suite.
Navigational Steps: Go to Instances and Subscriptions and delete the subscriptions.
In the SAP Integration Suite home page, choose Add Capabilities to activate the capabilities offered by SAP Integration Suite.

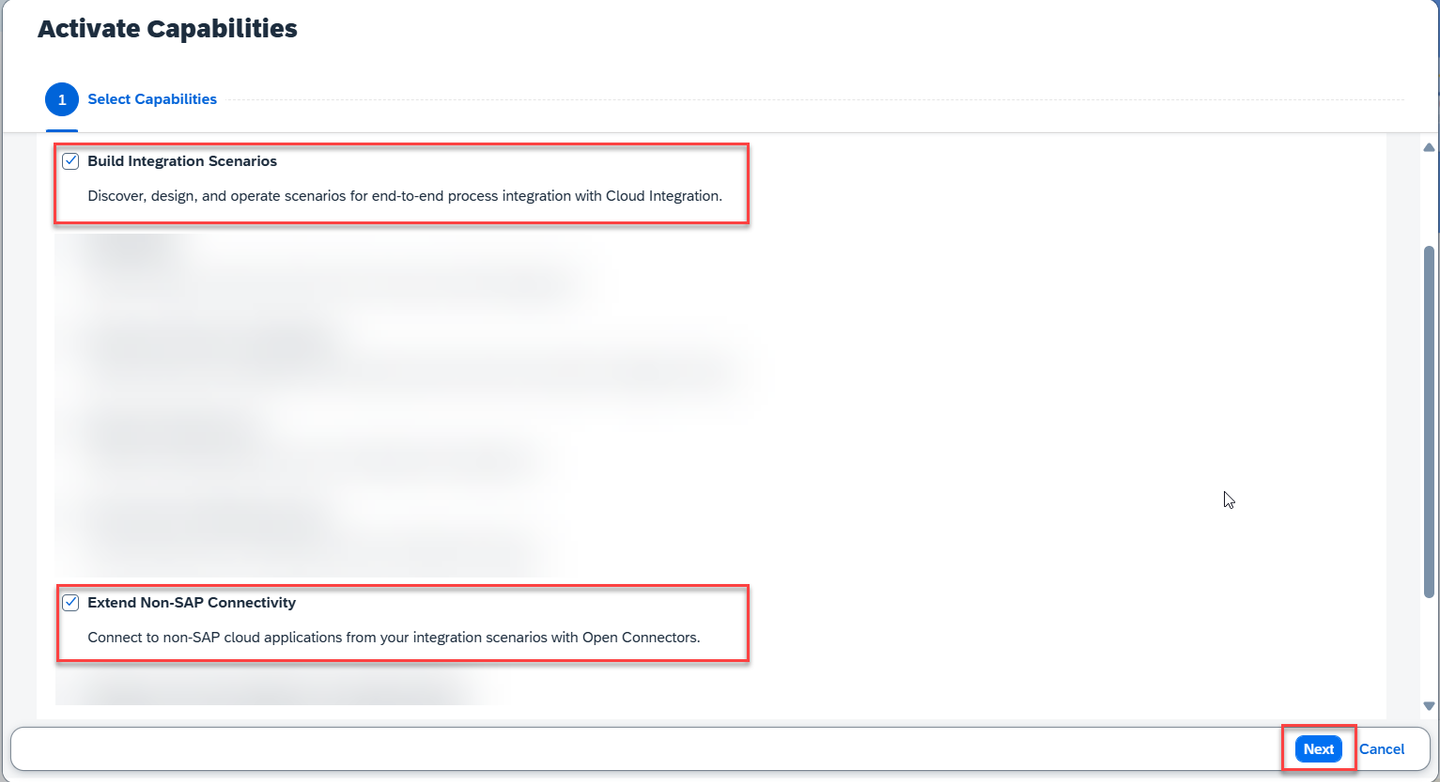
Integration suite launchpad For this tutorial, you must select the Build Integration Scenarios and Extend Non-SAP Connectivity capabilities. Choose Next.
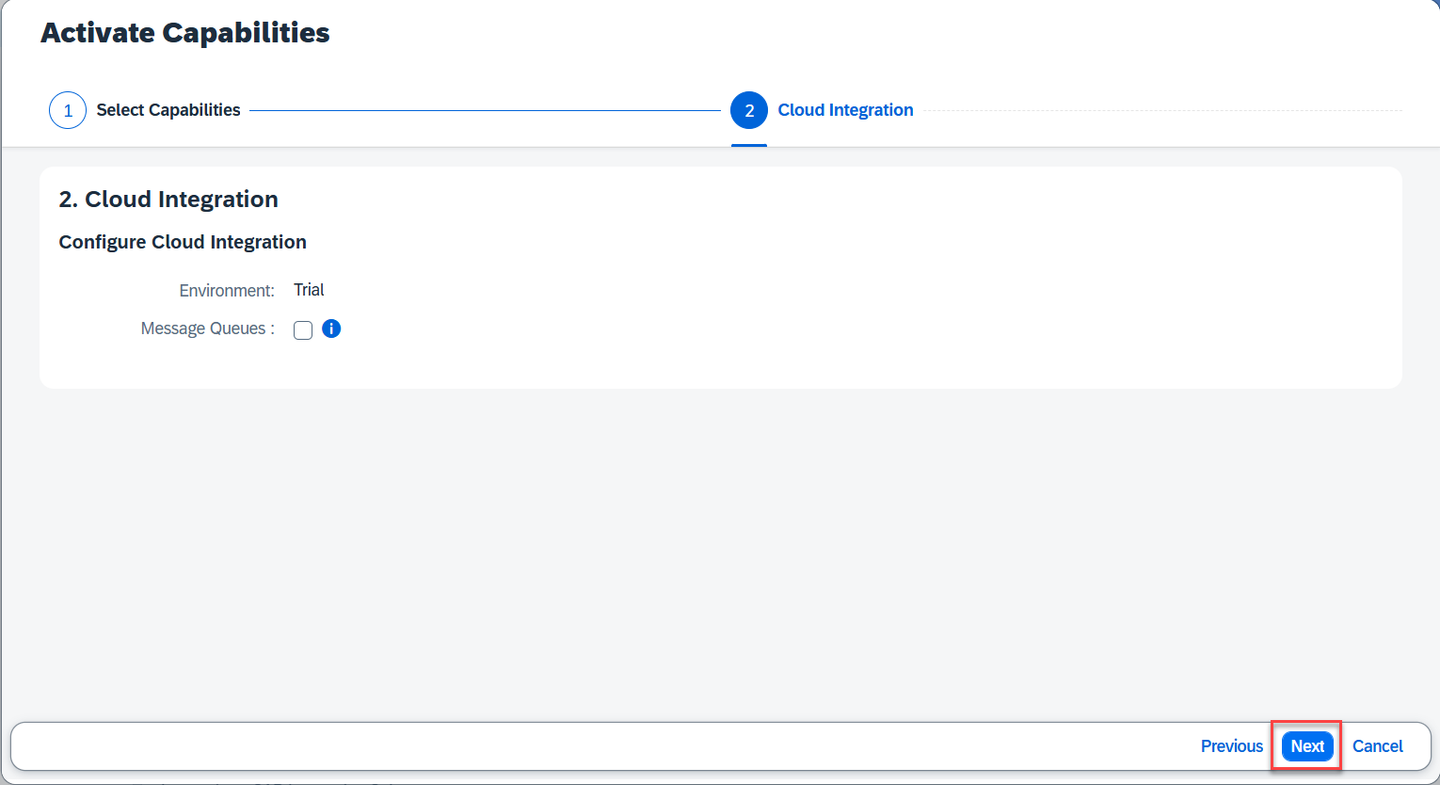
Add Capabilities You do not have to select anything specific for Cloud Integration capability for this scenario. Choose Next.
Intermediate Step Choose Activate to provision the selected capabilities.
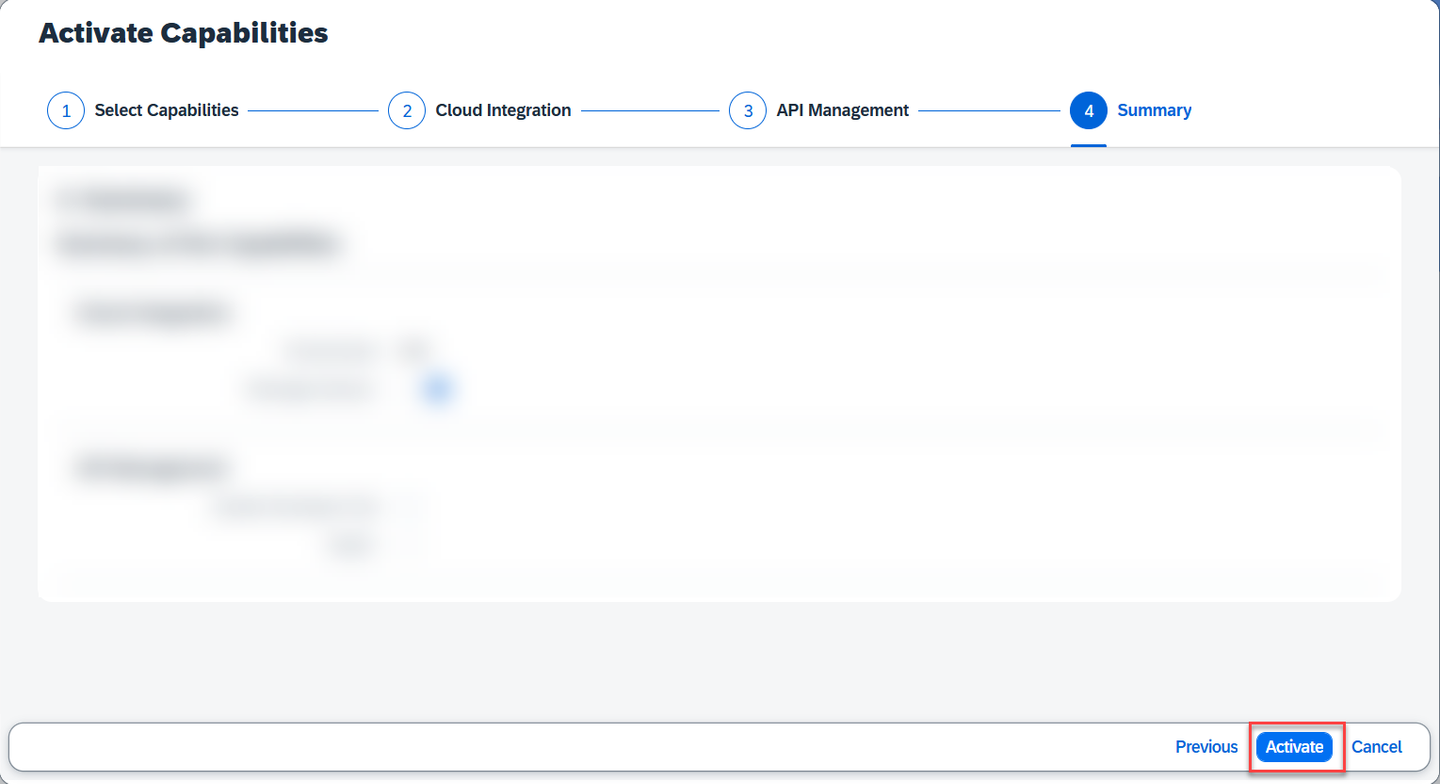
Activate capabilities Choose OK.
The activation takes a while to complete.
IMPORTANT: Before you proceed, please wait for the capabilities to be activated.
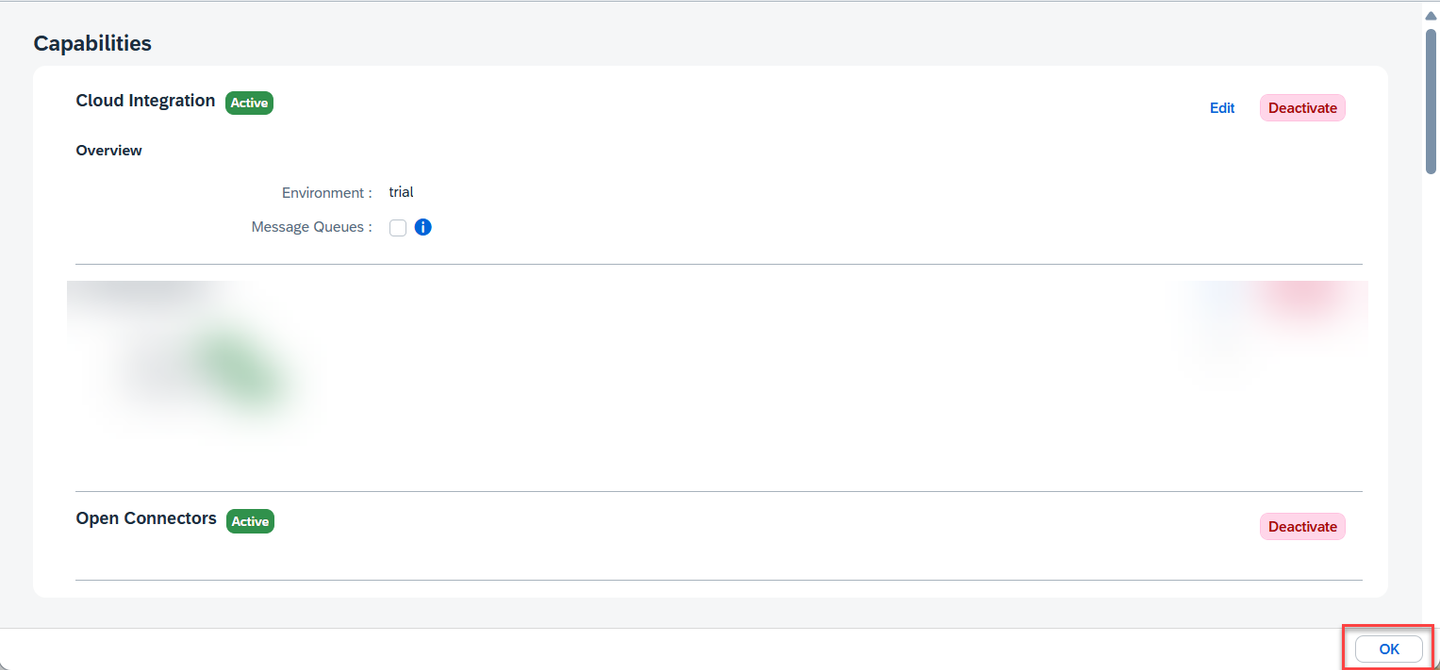
Wait for activation Verify that the activated capabilities are seen on the home page.
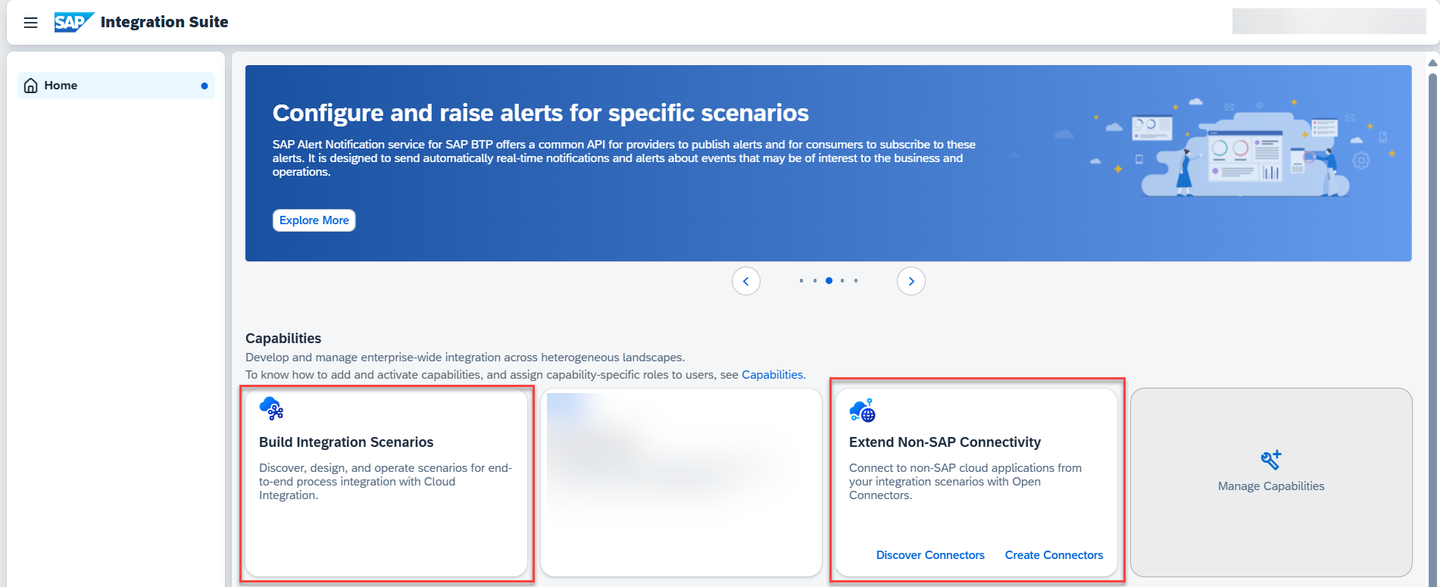
Activation-complete
Though activation is complete, you can’t yet access the activated capabilities. To access each capability, you must first assign capability-specific roles which is explained in the next step.
In this step, you assign yourself the necessary roles to access and use the activated capabilities.
Navigate to your SAP BTP subaccount. Choose Security > Users. Choose the entry against your name.
In the Role Collections section, select the Three-Dot-Icon and choose Assign Role Collection. Assign the following role collections:
Capability Role Collection Cloud Integration PI_AdministratorCloud Integration PI_Business_ExpertCloud Integration PI_Integration_DeveloperOpen Connectors OpenConnectors_User
A service instance defines how a service of SAP BTP (in our case, SAP Process Integration Runtime service) can be called from a remote component. In the context of SAP Integration Suite, a service instance is the definition of an OAuth client. The service key generated out of the service instance contains credentials and other information that is required for authentication to execute and monitor integration artifacts.
Create an instance of SAP Process Integration Runtime service to access the endpoints after deploying the integration artifacts.
Choose Services > Instances and Subscriptions.
Choose Create.
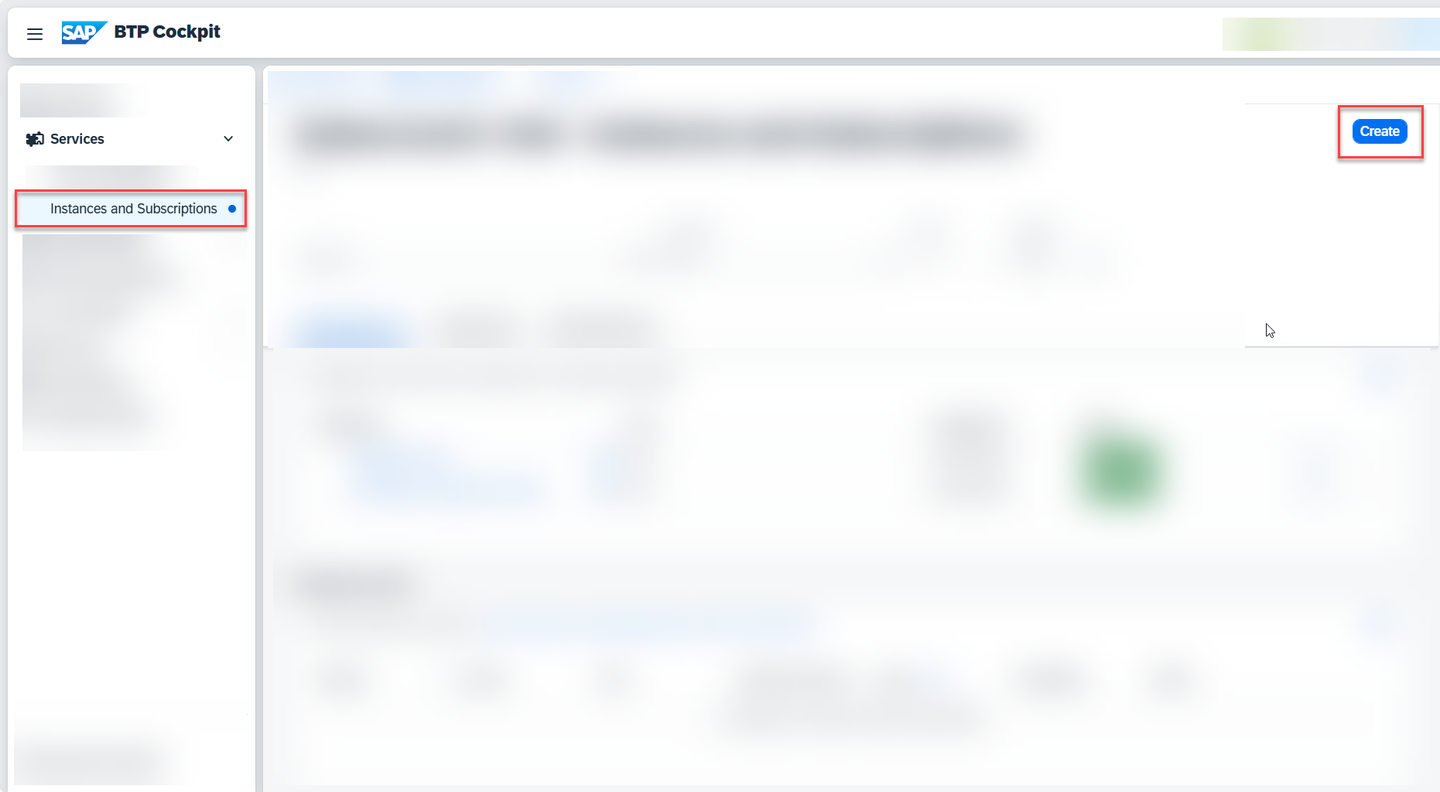
Create-Service-Instance In the New Instance or Subscription dialog, choose SAP Process Integration Runtime from the list of services.
Choose integration-flow from the list of plans.
Choose Cloud Foundry as the runtime environment.
Select a space in your Cloud Foundry org to create the instance.
Provide a name for your service instance, then choose Create.
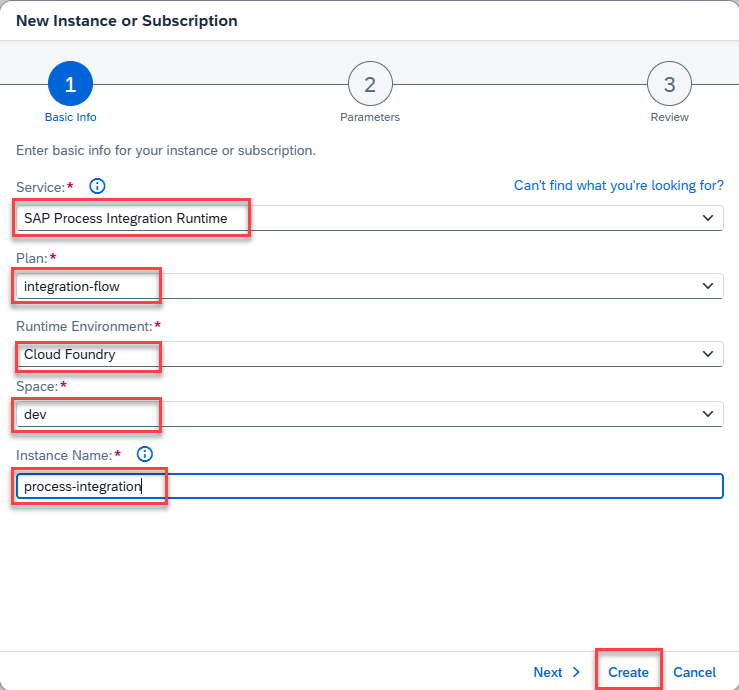
5-7-Create-Service-Instance A service instance is created.
Under Actions (Three-Dot-Icon), choose Create Service Key.
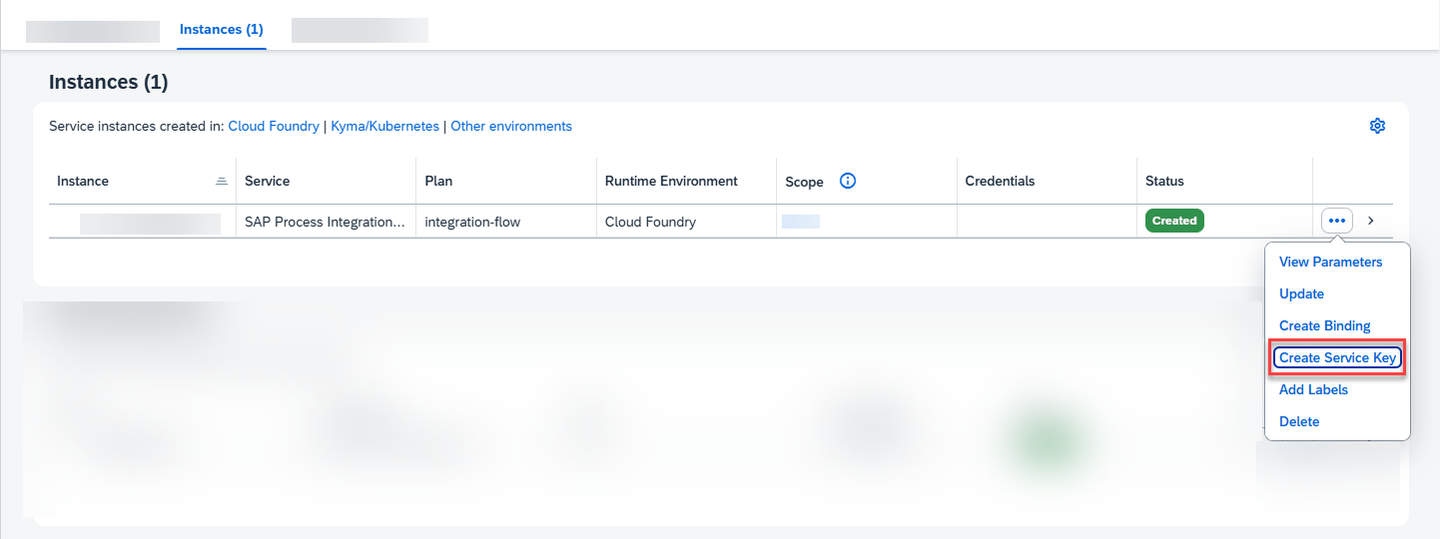
5-8-Create-Service-Key Provide a name for the service key and choose Create.
Open the service key. You will need the values clientid and clientsecret in the final step of this mission for authorizing yourself.
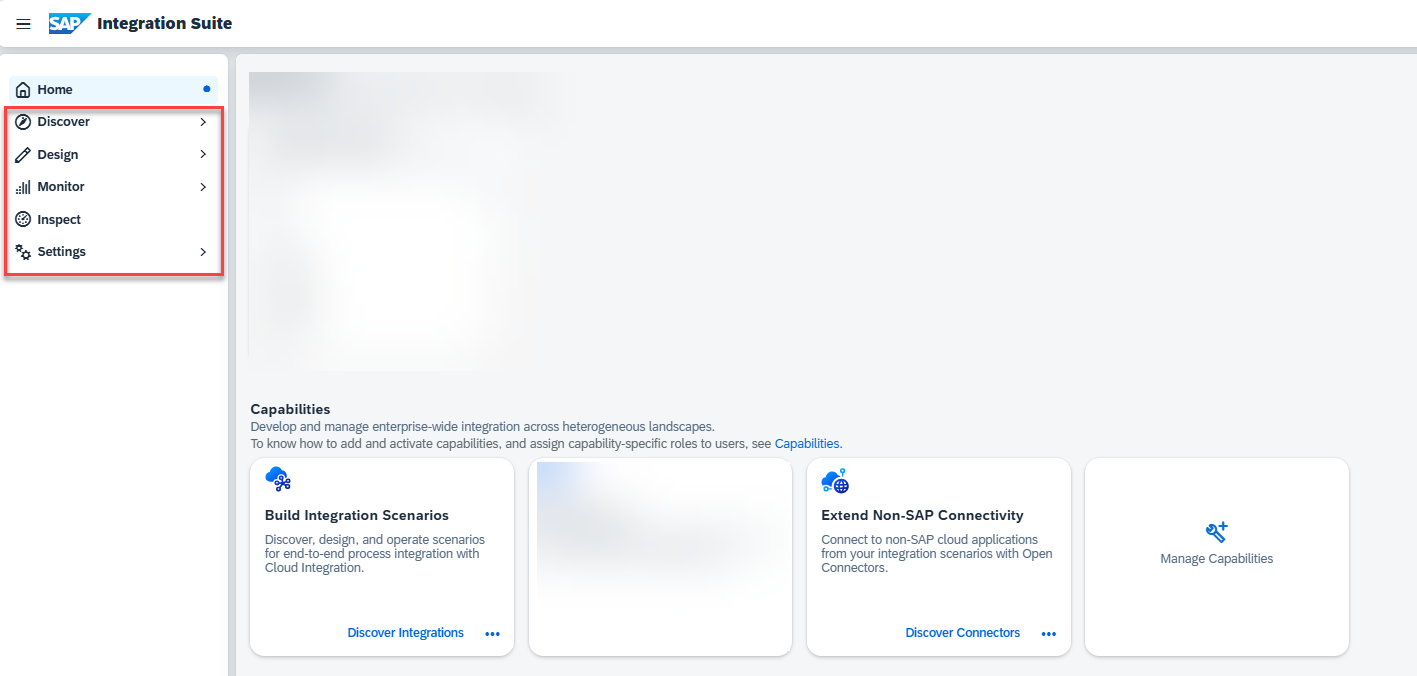
Refresh the Integration Suite home page to see capability-specific menu items being added to the left navigation.
Resources
Discussion
Share feedback on this tutorial or join the conversation in SAP Community.