
Overview
You will learn
- How to create an ABAP package
- How to create a database table
- How to create transactional UI services
- How to enhance the behavior definition of a data model
- How to publish a service binding
- How to run the SAP Fiori Elements Preview


Prerequisites
Prerequisites
- This tutorial can be used in the SAP S/4HANA Public Cloud. This tutorial can also be used in both SAP S/4HANA Cloud, private edition system and SAP S/4HANA on-premise system with release 2023 FPS03. We suggest using a [Fully-Activated Appliance] (https://blogs.sap.com/2018/12/12/sap-s4hana-fully-activated-appliance-create-your-sap-s4hana-1809-system-in-a-fraction-of-the-usual-setup-time/) in SAP Cloud Appliance Library for an easy start without the need for system setup.
- For SAP S/4HANA on-premise, create developer user with full development authorization
- You have installed the latest Eclipse with ADT.
- Use Starter Development Tenant in S/4HANA Cloud for the tutorial to have necessary sample data in place.
- Business role
SAP_BR_PURCHASERneeds to be assigned to your business user - In case the CAL instance is not used, please set up for developer extensibility to get
ZLOCALpackage. - Create software component for local cloud-ready development with
ZLOCAL - Create a structure package with
ZLOCAL - You are already logged into SAP S/4HANA Cloud, ABAP Environment or SAP S/4HANA on-Premise. If not, please complete the login tutorial.
Steps
Intro
In this tutorial, wherever ### appears, use a number (e.g. 000). This tutorial is done with the placeholder 000.
Hint: In case the CAL instance is not used, please set up for developer extensibility to get ZLOCAL package.
- Create software component for local cloud-ready development with
ZLOCAL - Create a structure package with
ZLOCAL
Select ZLOCAL > New > ABAP Package.

package Create new ABAP package:
- Name:
Z_PURCHASE_REQ_### - Description: Package ###
- Check Add to favorite packages

package Click Next >.
- Name:
Click Next >.

package Create a new request:
- Request Description: TR12345

package Click Finish.
Right-click your package
Z_PURCHASE_REQ_###and select New > Other ABAP Repository Object.
table Search for database table, select it and click Next >.

table Create new database table:
- Name:
ZASHOPCART_### - Description: Shopping cart table

table Click Next >.
- Name:
Click Finish.

table Replace your code with following:
@EndUserText.label : 'Shopping cart table'
@AbapCatalog.enhancement.category : #NOT_EXTENSIBLE
@AbapCatalog.tableCategory : #TRANSPARENT
@AbapCatalog.deliveryClass : #A
@AbapCatalog.dataMaintenance : #RESTRICTED
define table zashopcart_### {
key client            : abap.clnt not null;
key order_uuid        : sysuuid_x16 not null;
order_id              : abap.numc(8) not null;
ordered_item          : abap.char(40) not null;
@Semantics.amount.currencyCode : 'zashopcart_###.currency'
price                 : abap.curr(11,2);
@Semantics.amount.currencyCode : 'zashopcart_###.currency'
total_price           : abap.curr(11,2);
currency              : abap.cuky;
order_quantity        : abap.numc(4);
delivery_date         : abap.dats;
overall_status        : abap.char(30);
notes                 : abap.string(256);
created_by            : abp_creation_user;
created_at            : abp_creation_tstmpl;
last_changed_by       : abp_lastchange_user;
last_changed_at       : abp_lastchange_tstmpl;
local_last_changed_at : abp_locinst_lastchange_tstmpl;
purchase_requisition  : abap.char(10);
pr_creation_date      : abap.dats;
}- Save and activate.
Right-click your database table
ZASHOPCART_###and select Generate ABAP Repository Objects.
cds Create new ABAP repository object:
- Generator: ABAP RESTful Application Programming Model: UI Service

cds Click Next >.
Maintain the required information on the Configure Generator dialog to provide the name of your data model and generate them.
For that, navigate through the wizard tree (Business Objects, Data Model, etc…), maintain the artefact names provided in the table below, and press Next >.
Verify the maintained entries and press Next > to confirm. The needed artifacts will be generated.
Please note: Error Invalid XML format.
If you receive an error message Invalid XML format of the response, this may be due to a bug in version 1.26 of the ADT tools. An update of your ADT plugin to version 1.26.3 will fix this issue.
| RAP Layer | Artefacts | Artefact Names |
|---|---|---|
| Business Object | ||
| Data Model | Data Definition Name: ZR_SHOPCARTTP_### | |
Alias Name: ShoppingCart | ||
| Behavior | Implementation Class: ZBP_SHOPCARTTP_### | |
Draft Table Name: ZDSHOPCART_### | ||
| Service Projection (BO Projection) | Name: ZC_SHOPCARTTP_### | |
| Business Services | ||
| Service Definition | Name: ZUI_SHOPCART_### | |
| Service Binding | Name: ZUI_SHOPCART_O4_### | |
Binding Type: OData V4 - UI |

Click Next >.
Click Finish.

cds
In this tutorial example a SAP S/4HANA Cloud, ABAP environment system was used. The mode therefore is strict (2).
- Open your behavior definition
ZR_SHOPCARTTP_###to enhance it. Add the following read-only fields to your behavior definition:
,
PurchaseRequisition,
PrCreationDate,
DeliveryDate;
- Check your behavior definition:
managed implementation in class ZBP_SHOPCARTTP_### unique;
strict ( 2 );
with draft;

define behavior for ZR_SHOPCARTTP_### alias ShoppingCart
persistent table zashopcart_###
draft table ZDSHOPCART_###
etag master LocalLastChangedAt
lock master total etag LastChangedAt
authorization master( global )

{
field ( readonly )
   OrderUUID,
   CreatedAt,
   CreatedBy,
   LastChangedAt,
   LastChangedBy,
   LocalLastChangedAt,
   PurchaseRequisition,
   PrCreationDate,
   DeliveryDate;

field ( numbering : managed )
   OrderUUID;

create;
update;
delete;

draft action Edit;
draft action Activate;
draft action Discard;
draft action Resume;
draft determine action Prepare;

mapping for ZASHOPCART_###
{
   OrderUUID = ORDER_UUID;
   OrderID = ORDER_ID;
   OrderedItem = ORDERED_ITEM;
   Price = PRICE;
   TotalPrice = TOTAL_PRICE;
   Currency = CURRENCY;
   OrderQuantity = ORDER_QUANTITY;
   DeliveryDate = DELIVERY_DATE;
   OverallStatus = OVERALL_STATUS;
   Notes = NOTES;
   CreatedBy = CREATED_BY;
   CreatedAt = CREATED_AT;
   LastChangedBy = LAST_CHANGED_BY;
   LastChangedAt = LAST_CHANGED_AT;
   LocalLastChangedAt = LOCAL_LAST_CHANGED_AT;
   PurchaseRequisition = PURCHASE_REQUISITION;
   PrCreationDate = PR_CREATION_DATE;
}
} - Save and activate.
Choose between the tabs Cloud and On-premise and follow the publishing process.
Open your service binding
ZUI_SHOPCART_O4_###and click Publish.
binding Select
ShoppingCartin your service binding and click Preview to open SAP Fiori Elements preview.
preview
Login to SAP NetWeaver and execute
/n/IWFND/V4_ADMINt-code.
preview Click on Publish Service Groups.

preview Select System Alias and click Get Service Groups. Select the Service Group
ZUI_SHOPCART_O4_###and click Publish Service Groups.
preview Click Continue, you will get the message New service group(s) successfully published.

preview Click the back button to see the published group.
Expand the Service Groups and double click on the group.
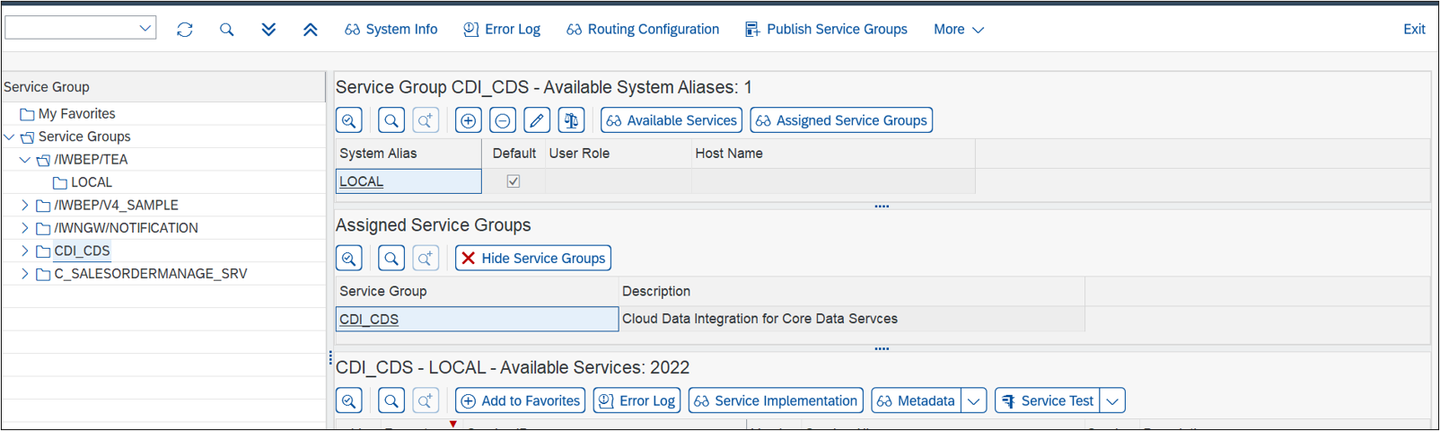
preview We can see the available services under this group.
To test the service, go back to your service binding, select
ShoppingCartto start the SAP Fiori Elements preview.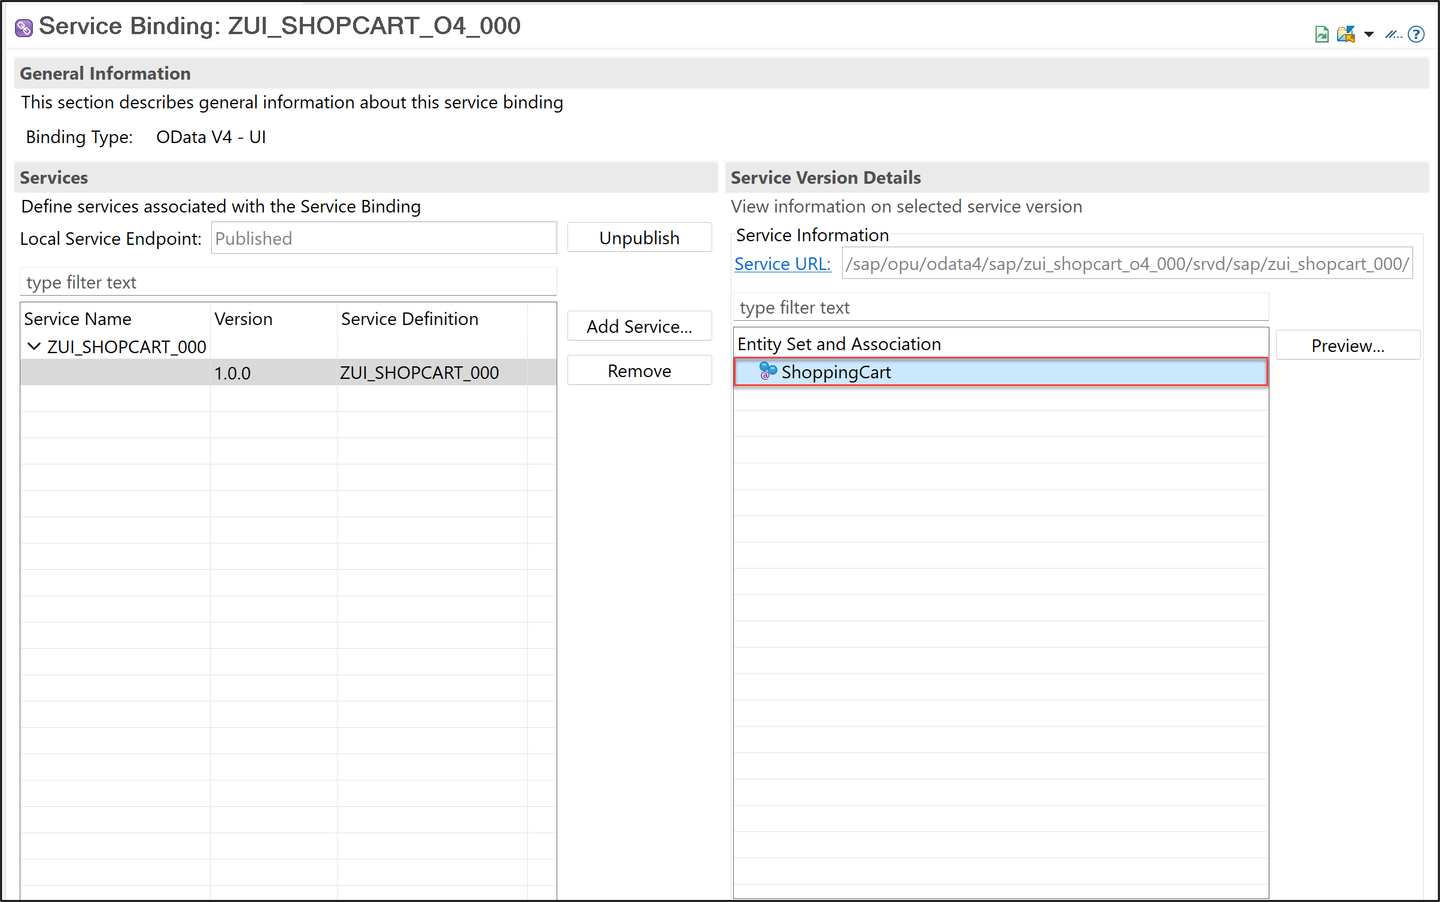
preview More information here.
Resources
Discussion
Share feedback on this tutorial or join the conversation in SAP Community.