
Overview


Prerequisites
Steps
You will Learn
- To create and configure action project based on the API specification
- To release and publish action project to be consumed in the business process modelling
- To add action to the business process
- To map input fields of the action to the actual process content
- To release and deploy business process with actions
Intro
Action is a feature in SAP Build Process Automation to connect processes with external systems, be it SAP or non-SAP systems. This is an important piece of the puzzle especially if you want to automate or extend your business processes for any available LoB processes like S/4HANA, SAP BTP ABAP Platform, SuccessFactors etc. These extensions can be easily built using SAP Build Process Automation, and using actions you can connect to your given S/4HANA, SAP BTP ABAP Platform, Ariba or other SAP LoB systems for any kind of GET, POST, PATCH, and other calls.
In this tutorial, you will create an action project based on Open API. The Workflow Notification API is an OData V4 service available to send the notification at the completion of a workflow step back to the calling system. You will use the POST call from SBPA to BTP ABAP environment to notify if the travel request has been Approved or Rejected on completion of workflow.
Open SAP Build Lobby with your username and password, then do the following:
- Under Connectors, select Actions.
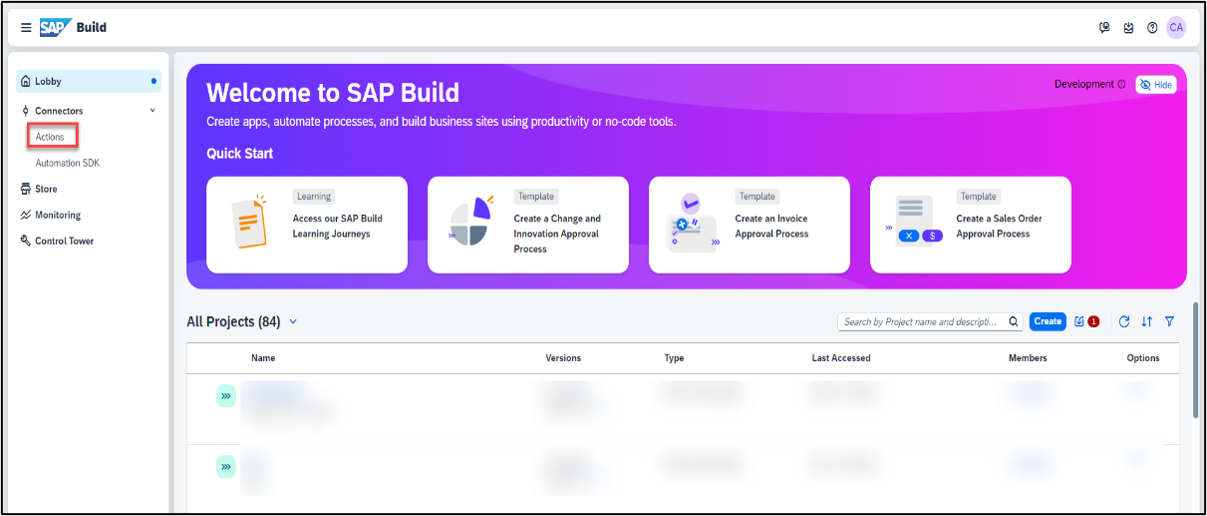
SAP Build Lobby
- Under Connectors, select Actions.
Save the below Open API Specification file as local
.edmx file.
{
   <?xml version="1.0" encoding="utf-8"?>
<edmx:Edmx Version="4.0" xmlns:edmx="http://docs.oasis-open.org/odata/ns/edmx" xmlns="http://docs.oasis-open.org/odata/ns/edm">
 <edmx:DataServices>
   <Schema Namespace="com.sap.gateway.default.api_workflow_notification.v0001" Alias="SAP__self">
     <ComplexType Name="CT_NOTIFICATION_RESULT">
     </Action>
     <EntityContainer Name="Container">
       <ActionImport Name="ProcessCompleted" Action="com.sap.gateway.default.api_workflow_notification.v0001.ProcessCompleted"/>
       </EntityContainer>
   </Schema>
 </edmx:DataServices>
</edmx:Edmx>
   <Property Name="notificationProcessed" Type="Edm.Boolean" Nullable="false"/>
     </ComplexType>
     <Action Name="ProcessCompleted">
   <Parameter Name="workflowInstanceId" Type="Edm.String" Nullable="false" MaxLength="36"/>
   <Parameter Name="outcome" Type="Edm.String" Nullable="false" MaxLength="255"/>
   <ReturnType Type="com.sap.gateway.default.api_workflow_notification.v0001.CT_NOTIFICATION_RESULT" Nullable="false"/>
}
Choose Create

CreateActionPlan In the Choose an API Source popup, under API Specification, select Upload API Specification.

ChooseAPISource Drag and drop or click Browse Files to upload open specification file saved in step above.
Choose Next.
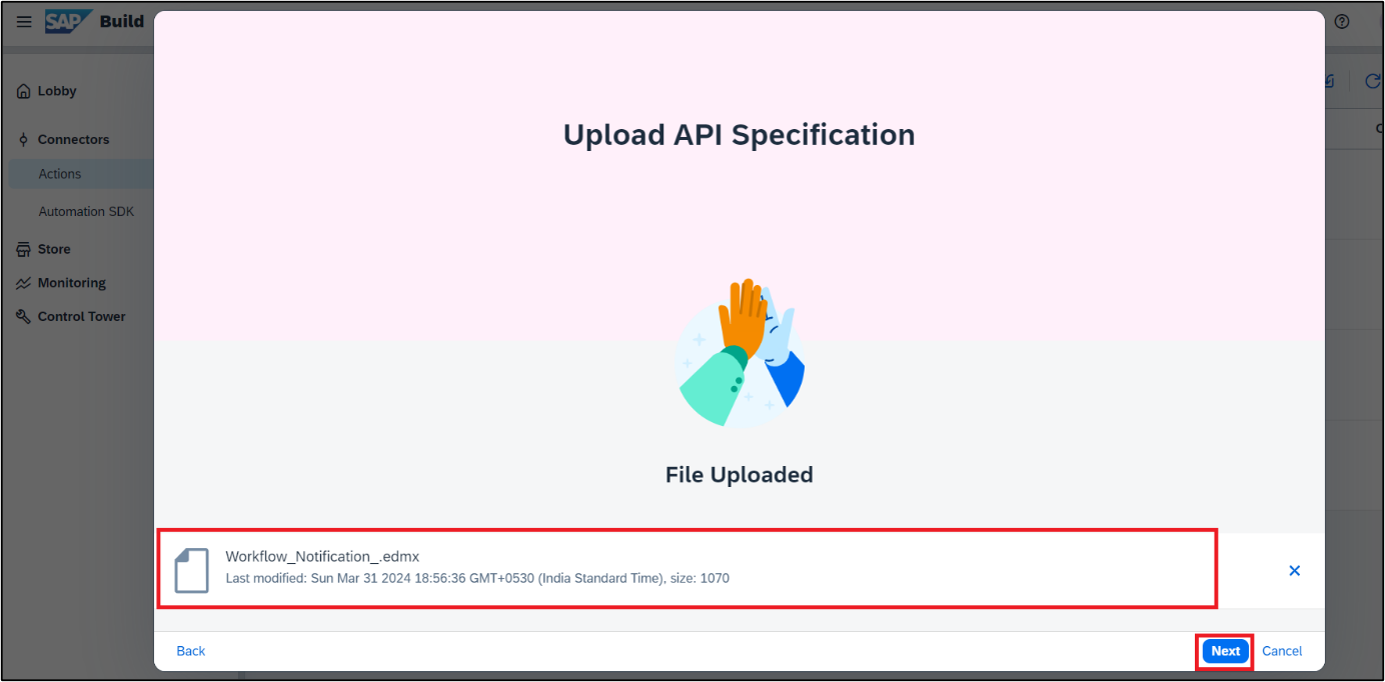
UploadAPI In the Create an Action Project Popup do the following:
Enter the Project Name as Workflow Notification.
Enter the Description as Workflow Completion Notification.
Click Create.

CreateActionProject As soon as the Workflow Notification Action gets created, SAP Build Actions will automatically open and the Add Actions to Workflow Notification pop up will appear.
Select Service Operation Post. Click on Add
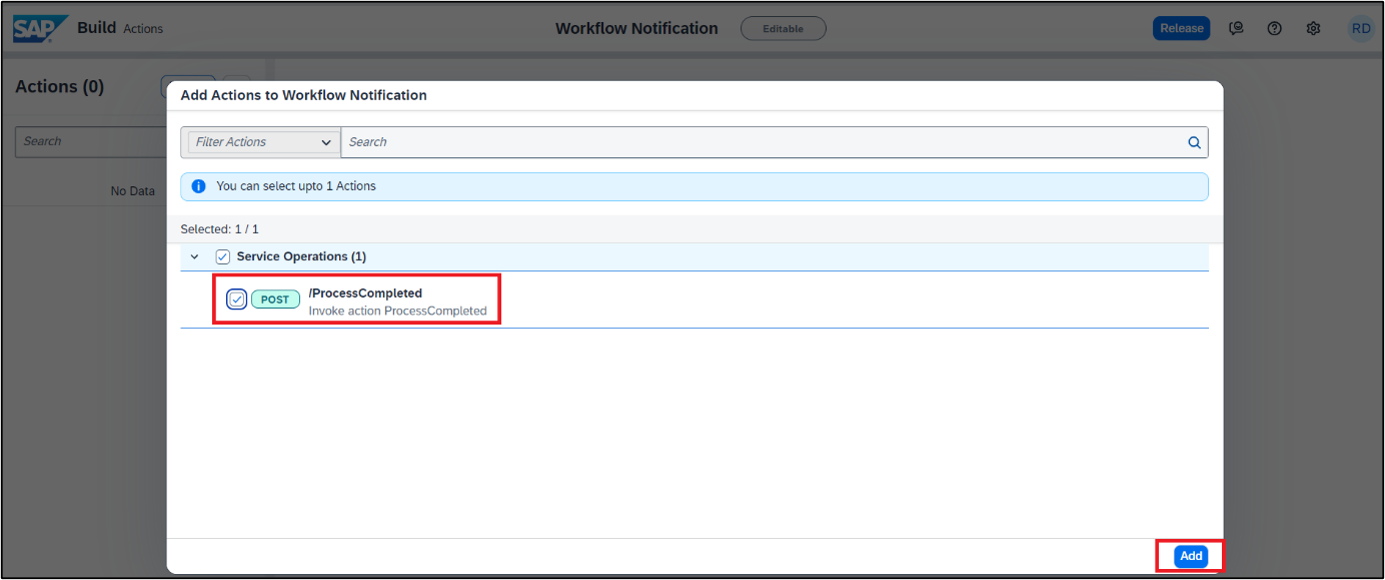
AddActions SAP Build Actions will open with the selected APIs which can be further configured based on the requirements.
- To update the project name, click on the pencil icon next to the project name.
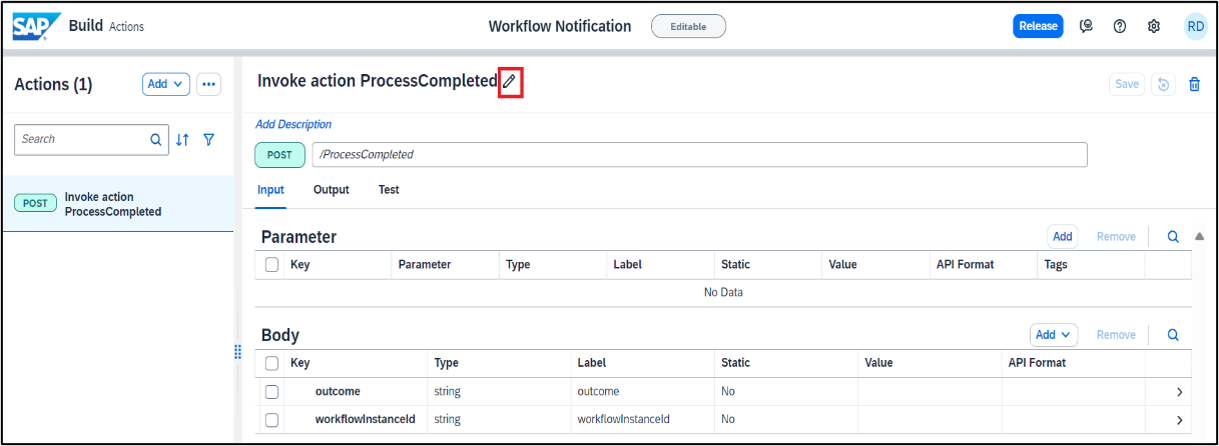
ProjectName This action project name will help you search your action project from your API list,once published in action repository.
- Change the name to Workflow Completion Notification.
- Once done, Select Update to submit the changes.

WorkflowComplete - Enter the default value for outcome Input field by clicking on it.
Set the value for outcome to Approved.

Outcome It is also possible to change the field labels and update the input/output fields of the action project to keep only the mandatory fields that are needed.
- As BTP ABAP environment APIs need CSRF token, you need to enable it. Select Settings icon.
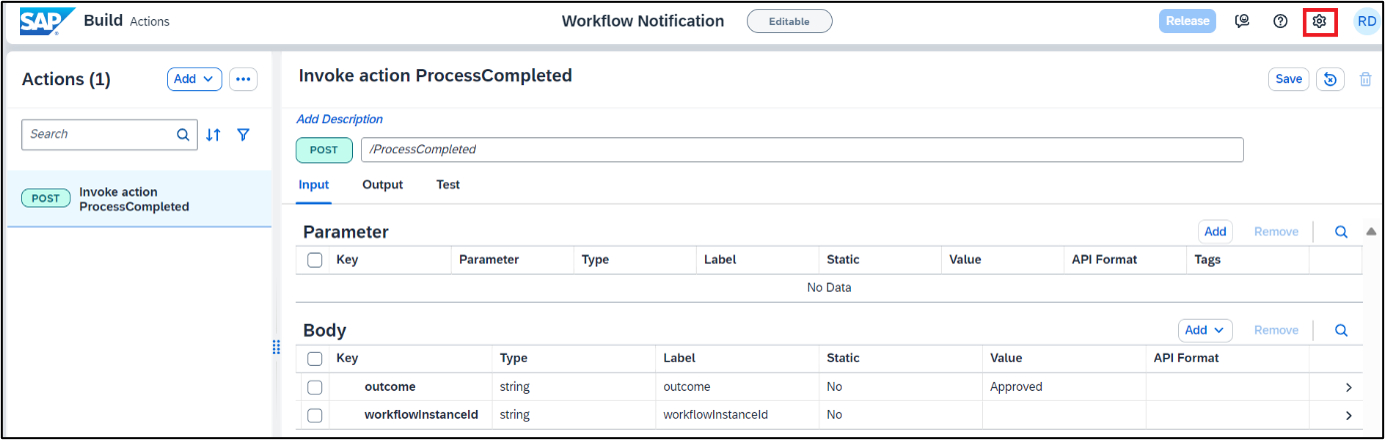
EnableCSRF In the Project Settings window select CSFR and do the following:
- Enable CSFR by selecting YES.
- Under the Token Fetch End Point enter:
/

TokenFetch In the Project Settings Window, Select URL prefix and do the following
- Enter Resource Path /sap/opu/odata4/sap/api_workflow_notification/default/sap/api_workflow_notification/0001.
- Choose Save.
Resource Path is required to create the Final Action URL by combining
{Destination URL} + {Resource Path} + {API Endpoint}.
If you’re exposing multiple services from the same system, you don’t have to create different destinations to access those services. By configuring the resource path, you can set only one destination. Resource paths must begin with/and can’t end with/.
URLPrefix If you get Gateway Timeout issue while saving, then close the error dialog and refresh the browser.
If you see that changes are not saved, then try saving again and refreshing the browser.Save the Action Project.

SaveProject Release the action project.
You will now release the action project to create version(s) and then publish a selected version in the action repository. It is then these published actions that can be used in different processes and applications to connect to external systems.
- To release a version of the action project click Release from top-right corner.
- Enter the Release Notes:
Workflow Completion Notification V1.
Notice the version of the project. It is in
majorVersionNumber.minorVersionNumber.patchNumberformat.

Publish Action Project
Once the action project is released, you can then publish any release version of the action by clicking Publish to Library from top-right corner.

PublishActionProject With this you have successfully completed creating, configuring, releasing, and publishing of action project. Now you will use this published action to connect workflow business process to external systems via API.
Add the action in the business process to connect and send the workflow completion notification back to the system that triggered the workflow. You can do this by choosing the relevant action from the actions library and then configuring the actions parameters.
Go to lobby and open project
RAP110_Travel_Workflow. Navigate to open the process builder canvas for Travel Approval Processing and click on expand>for the Approval form.
OpenProject To add the callback action once the form is Approved, click on the
+on the Approve branch.
ApproveBranch From the options select Action.

Action In the Browse Action library pop up, enter the action name that you just created like in this case ‘Workflow Notification’ in the Search field, to find the actions published by you in the library. Once you find your action project click on Add.
This will add the action to your business process.

BorwseLibrary Configure action for approval.
On clicking the add button your action will be added to the business flow and a pop-up window will open to configure the action settings for Destination, input and output parameter mapping.
In General tab of action parameters, expand Destination variable and choose
+Create Destination Variable.
CreateDestinationVariable In the pop-up window for Create Destination Variable, fill in the below values and choose create.
Input Field Value Identifier CallBack_DestinationDescription CallBack Destination
DestinationVariable A Destination variable is required to connect the action to a configured system. The actual destination value is selected on the deployment of the Business Process.
Click Inputs tab and map each input to the actual process content.
Please note that since the default value for Outcome is set to Approved in the Action project we will not be setting it here.
To set the value for WorkflowInstanceId click on the field and select Process Instance ID from the Process Metadata.

ProcessContent To call the action in case the Approval form is Rejected, click on the
+on the Reject branch and follow all the steps described above for the Approve branch to add the action.Once the Action is added to the Reject branch. In General tab of action parameters, expand Destination variable and choose the destination Callback_Destination you already created.

CallbackDestination Click Inputs tab and map each input to the actual process content for the Reject branch action trigger.
As the default Outcome is Approved, we will have to change the value in case of Approval form rejection.
| Input Field | Value |
|---|---|
| Outcome | Map it to the Approval Form output field comment |
| Workflowinstanceid | Map it to the field process instance id under process Metadata |

Save the business process.
The final process should be same as shown below.

SaveBusinessProcess
Resources
Discussion
Share feedback on this tutorial or join the conversation in SAP Community.