
Overview
You will learn
- How to add scopes for filtering apps
- How to create roles and role collections
- How to create role collection mappings
- How to assign users to role collections


Prerequisites
Prerequisites
- Create a developer user in a SAP Cloud Platform ABAP Environment system.
- Download Eclipse Photon or Oxygen and install ABAP Development Tools (ADT). See https://tools.hana.ondemand.com/#abap.
Steps
Open SAP Web IDE and your project
ROOM_MTA_XXXand add scope toxs-security.json.JSON{ "name": "$XSAPPNAME.Room-maintain", "description": "View data" }Add role template to xs-security.json
      {
            "name": "RoomTemplate",
            "description": "Role for viewing data",
            "scope-references": ["$XSAPPNAME.Room-maintain"]
} - Add required scope to
webapp/manifest.json.
      {
          "sap.platform.cf":
                            {
                              "oAuthScopes": ["$XSAPPNAME.Room-maintain"]
                            }
} Right click on
ROOM_MTA_XXXfile and choose Deploy > Deploy to SAP Cloud Platform.
Deploy UI to Cloud Foundry Choose again the API Endpoint, Organization and Space. Now click on Deploy.

Deploy UI to Cloud Foundry
Switch to your SAP Cloud Platform Cockpit, select your
appRouter, click Roles and New Role
Create role & role collection Create a new role.
- Name:
MyRoomTemplate_XXX - Template:
RoomTemplate
Click Save.

Create role & role collection - Name:
Select your subaccount, click Role Collections in the security area and click New Role Collection.

Create role & role collection Create a new role collection.
- Name:
MyCollection_XXX
Click Save.

Create role & role collection - Name:
Select your created role collection.

Create role & role collection Add a role to your role collection in Cloud Foundry subaccount.

Create role & role collection
In your SAP Cloud Platform Cockpit, select your Role Collection Mappings and click New Role Collection Mapping

Create role collection mapping Hint: Groups attribute and assignment to business user needs to be provided in identity provider!
Create a new role collection mapping.
- Role collection:
MyCollection_XXX - Value:
BR_ROOM_XXX
Click Save.
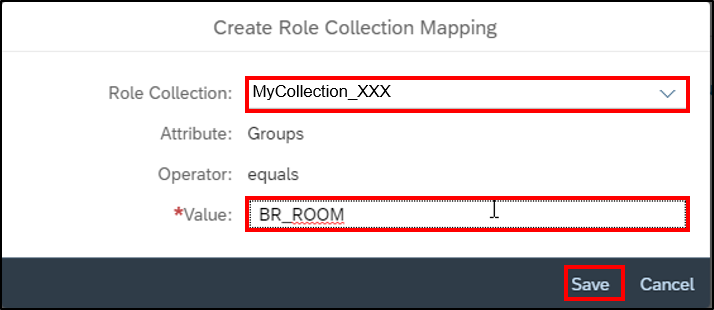
Create role collection mapping - Role collection:
Select your trust configuration in your SAP Cloud Platform Cockpit. Select Role Collection Assignment, enter your e-mail address, click Show Assignments and Assign Role Collection.

Create role & role collection Select
RoomsRoleand click Assign Role Collection.
Create role & role collection Select your subaccount and your application route will be shown.

Create role & role collection Hint:
<route-on-cf> = <your_url>.sap.hana.ondemand.com
Resources
Discussion
Share feedback on this tutorial or join the conversation in SAP Community.