
Overview
You will learn
- How to create software component
- How to pull software component
- How to release transport request
- How to create main branch
- How to create other branches


Prerequisites
Prerequisites
- SAP BTP, ABAP environment user
- ADT version 2.96 or higher
- Administrator role assigned to user
Steps
Intro
In this tutorial, wherever XXX appears, use a number (e.g. 000).
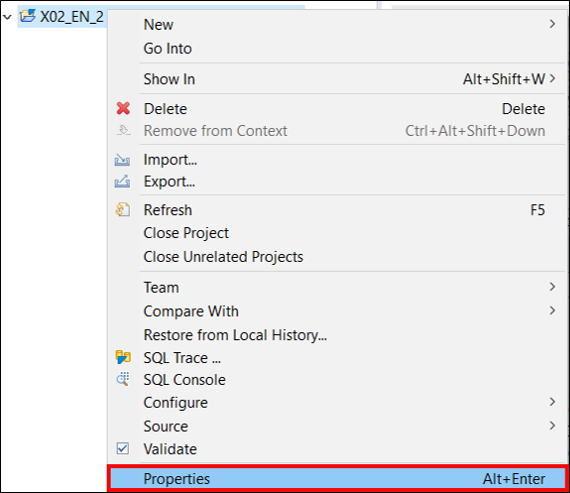
Logon to ADT, right-click on your ABAP cloud project and select Properties.
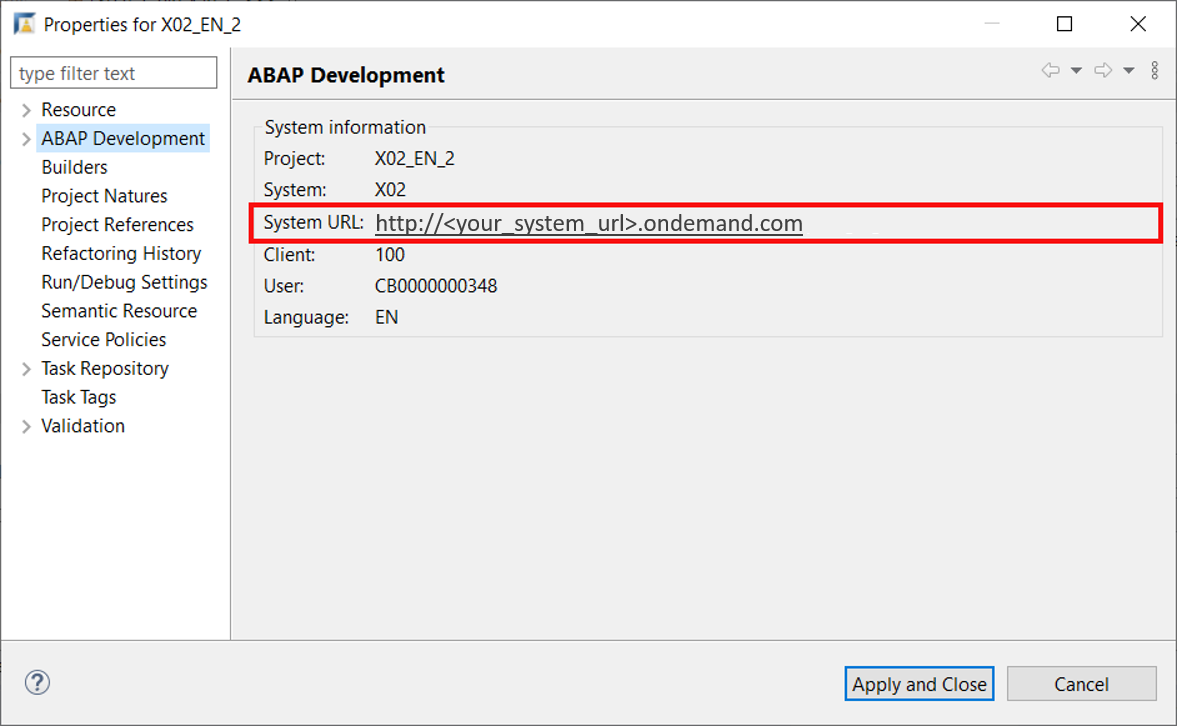
Create software component Click on your system URL.
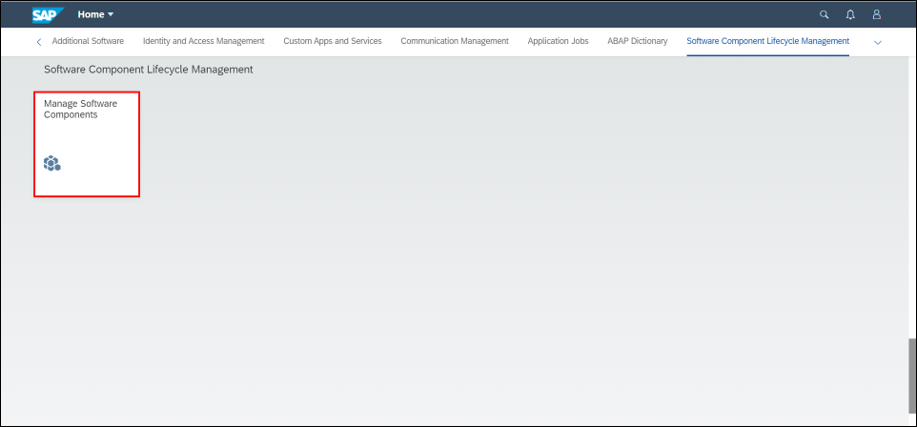
Create software component Logon to your ABAP system in your SAP Fiori launchpad and select Manage Software Component.
Create software component Select
+to add a new software component.
Create software component Create a new software component:
- Name:
Z_SWCT_XXX - Type: Development
Click Save.

Create software component - Name:
In your available software component
Z_SWCT_XXXclick Pull.
Pull software component Note: In the initial system, the ‘main’ branch will not be visible until you’ve released a transport request. If you are pulling in the production system, all branches will be available before you’ve released an ABAP transport request.
Click OK.

Pull software component Check your result. Your pull is successful.

Pull software component
Switch to your ADT, right-click on Favorite Packages and select Add Package.

Create ABAP class Search for
Z_SWCT_XXX, select it and click OK.
Create ABAP class Right-click on your
superpackageZ_SWCT_XXXand select Add Package.
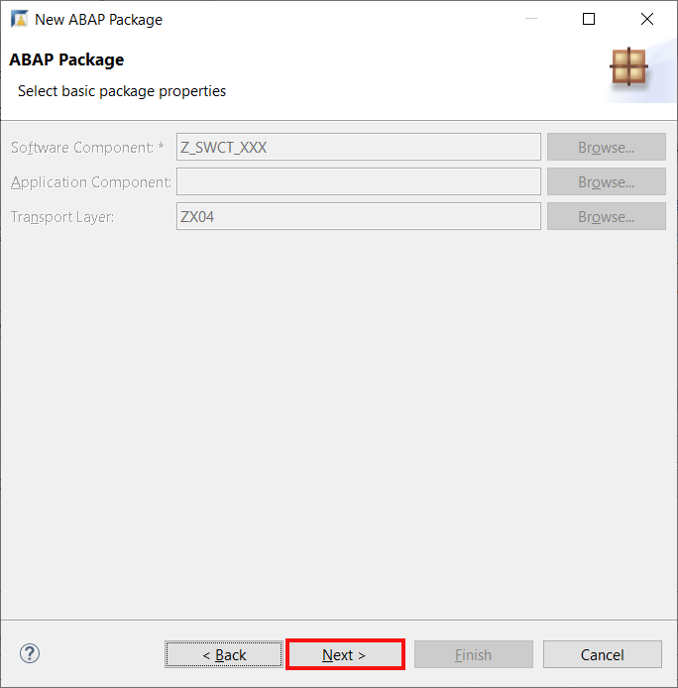
Create ABAP class Create your package: - Name:
Z_PCK_XXX- Description:Package XXXClick Next>.

Create ABAP class Click Next >.
Create ABAP class Select Create a new request:
- Request Description:
TR123456
Click Finish.
- Request Description:

Right-click on your package
Z_PCK_XXXand select ABAP Class.
Create ABAP class Create your ABAP class: - Name:
Z_CL_XXX- Description:Class XXX
Click Next>.

Click Finish.
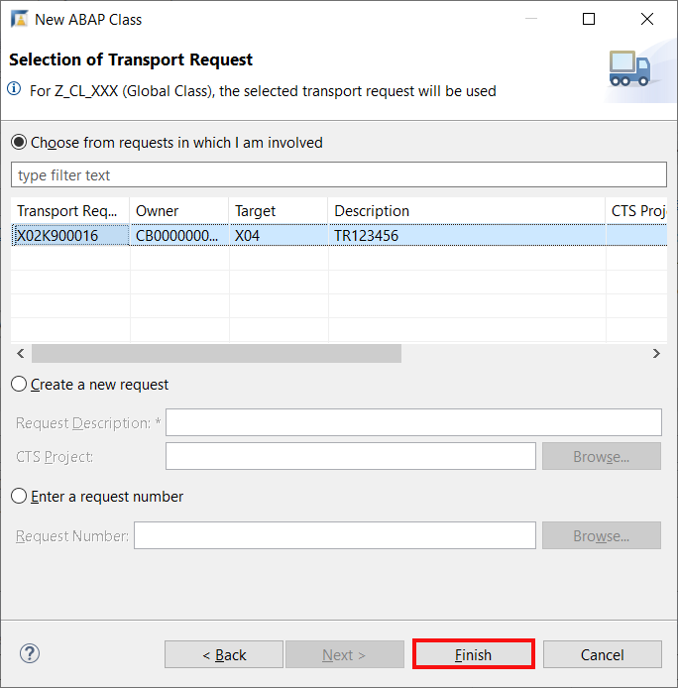
Create ABAP class Replace your code with following:
class z_cl_xxx definition
public
final
create public .

public section.
interfaces if_oo_adt_classrun.
protected section.
private section.
ENDCLASS.

CLASS z_cl_xxx IMPLEMENTATION.
METHOD IF_OO_ADT_CLASSRUN~MAIN.
out->write('Hello world!').
ENDMETHOD.
ENDCLASS.
Save and activate.
Select your class
Z_CL_XXXand select Transport Organizer in your menu. Right-click on your transport task and select Release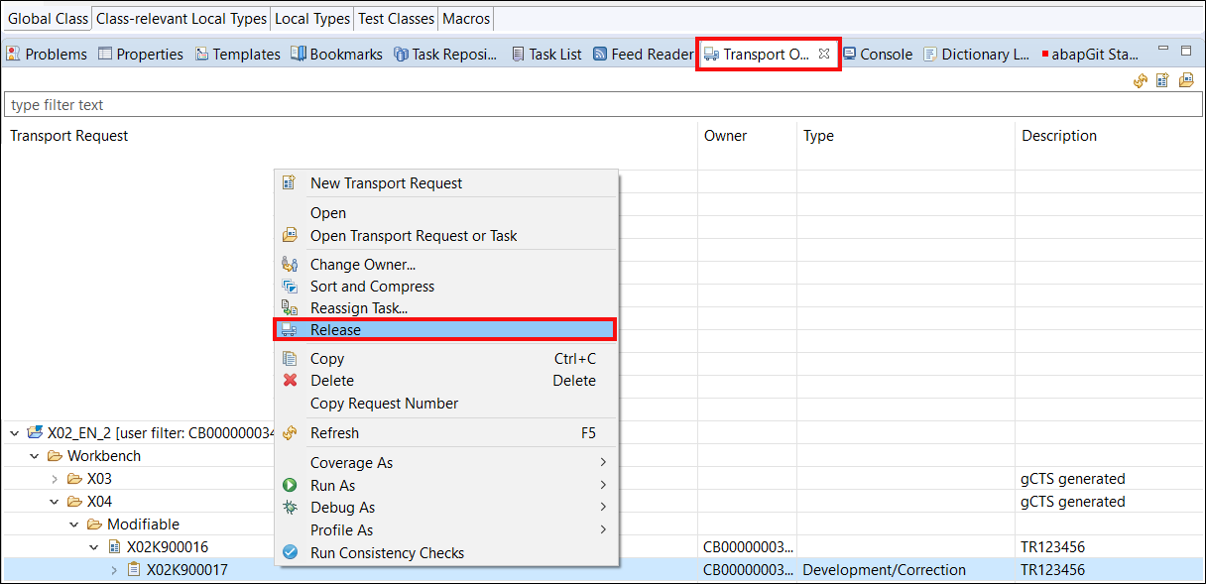
Release transport request Check your result and click OK.

Release transport request Right-click on your transport request and select Release.

Release transport request Check your result and click OK.

Release transport request
Switch to your ABAP system in your SAP Fiori launchpad, open your software component
Z_SWCT_XXXin Manage Software Component.
Create new branch Refresh your page by pressing
F5.
Create new branch Select your main branch and click
+to create a new branch.
Create new branch Create new branch:
- Branch Name:
branch_xxx
Click Create.
- Branch Name:

Check your result. Now your new branch
branch_xxxis created.
Create new branch
Resources
Discussion
Share feedback on this tutorial or join the conversation in SAP Community.